Practice
Sau khi xem Plan, người chơi chuẩn bị cho Practice
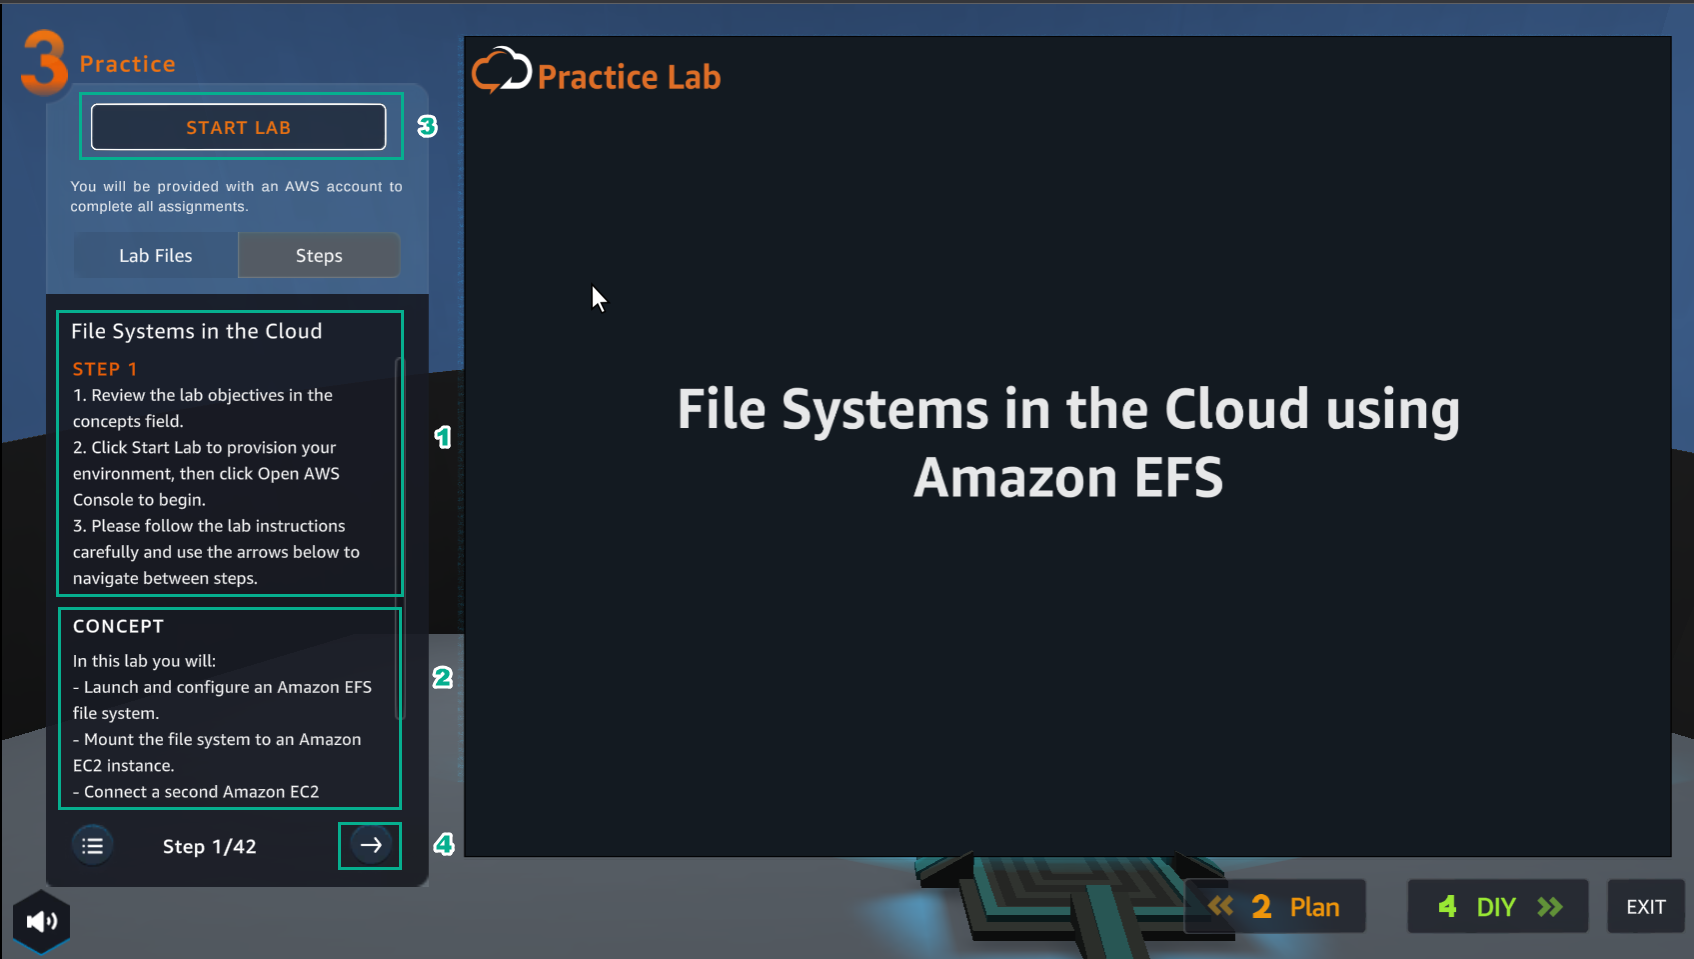
- Trong giao diện Practice
- Đọc bước 1 của File Systems in the Cloud
- Đọc CONCEPT
- Chọn START LAB
- Chọn mũi tên sang phải để xem các bước tiếp theo
- Trong giao diện Practice
- Đọc bước 2 của File Systems in the Cloud
- Đọc CONCEPT
- Chọn Open AWS Console
- Chọn mũi tên sang phải xem các bước tiếp theo
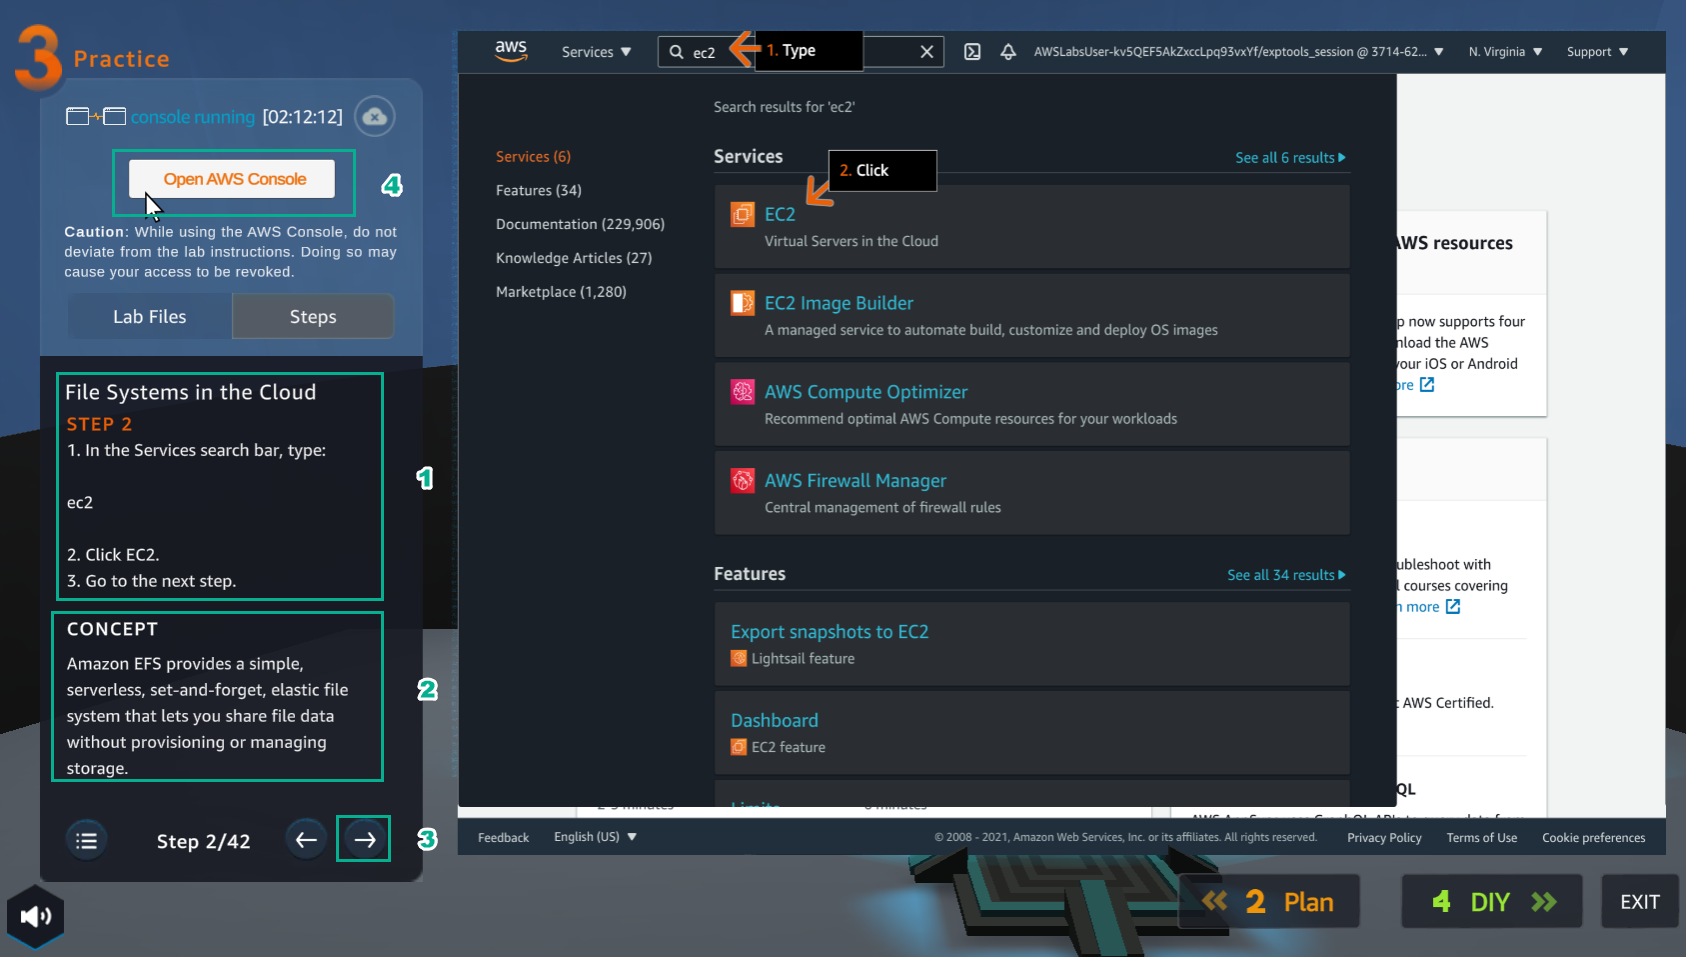
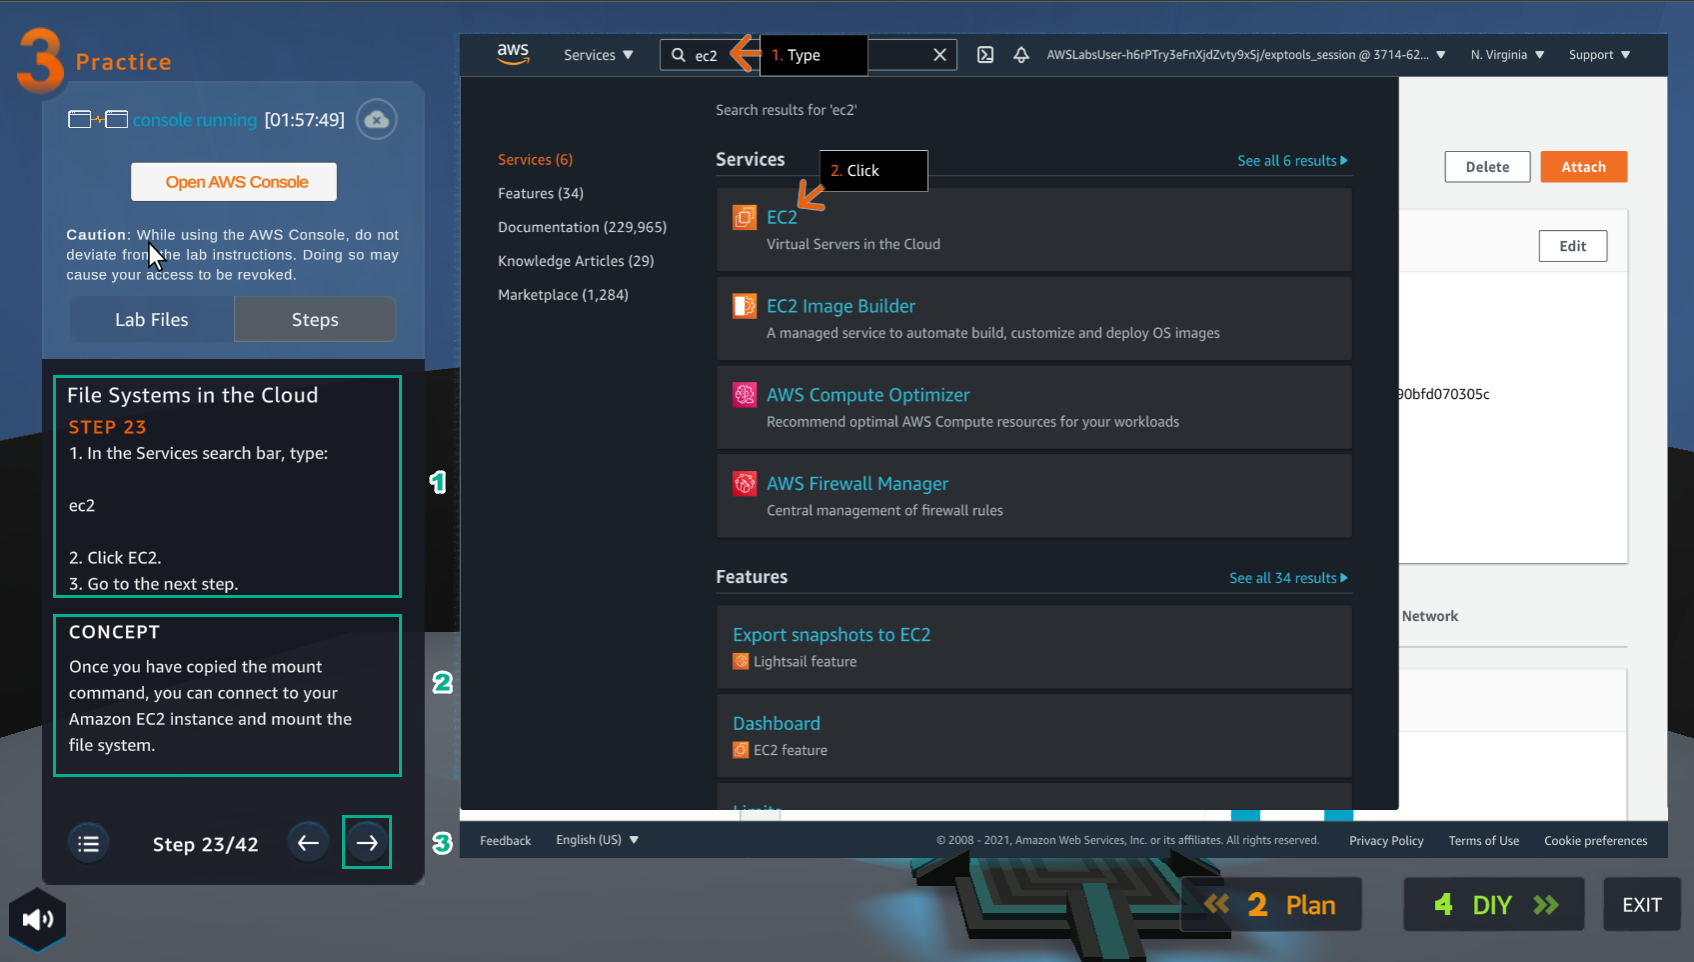
- Trong giao diện AWS Console
- Tìm EC2
- Chọn EC2
- Trong giao diện Practice
- Đọc bước 3 của File Systems in the Cloud
- Đọc CONCEPT
- Chọn mũi tên sang phải để xem các bước tiếp theo
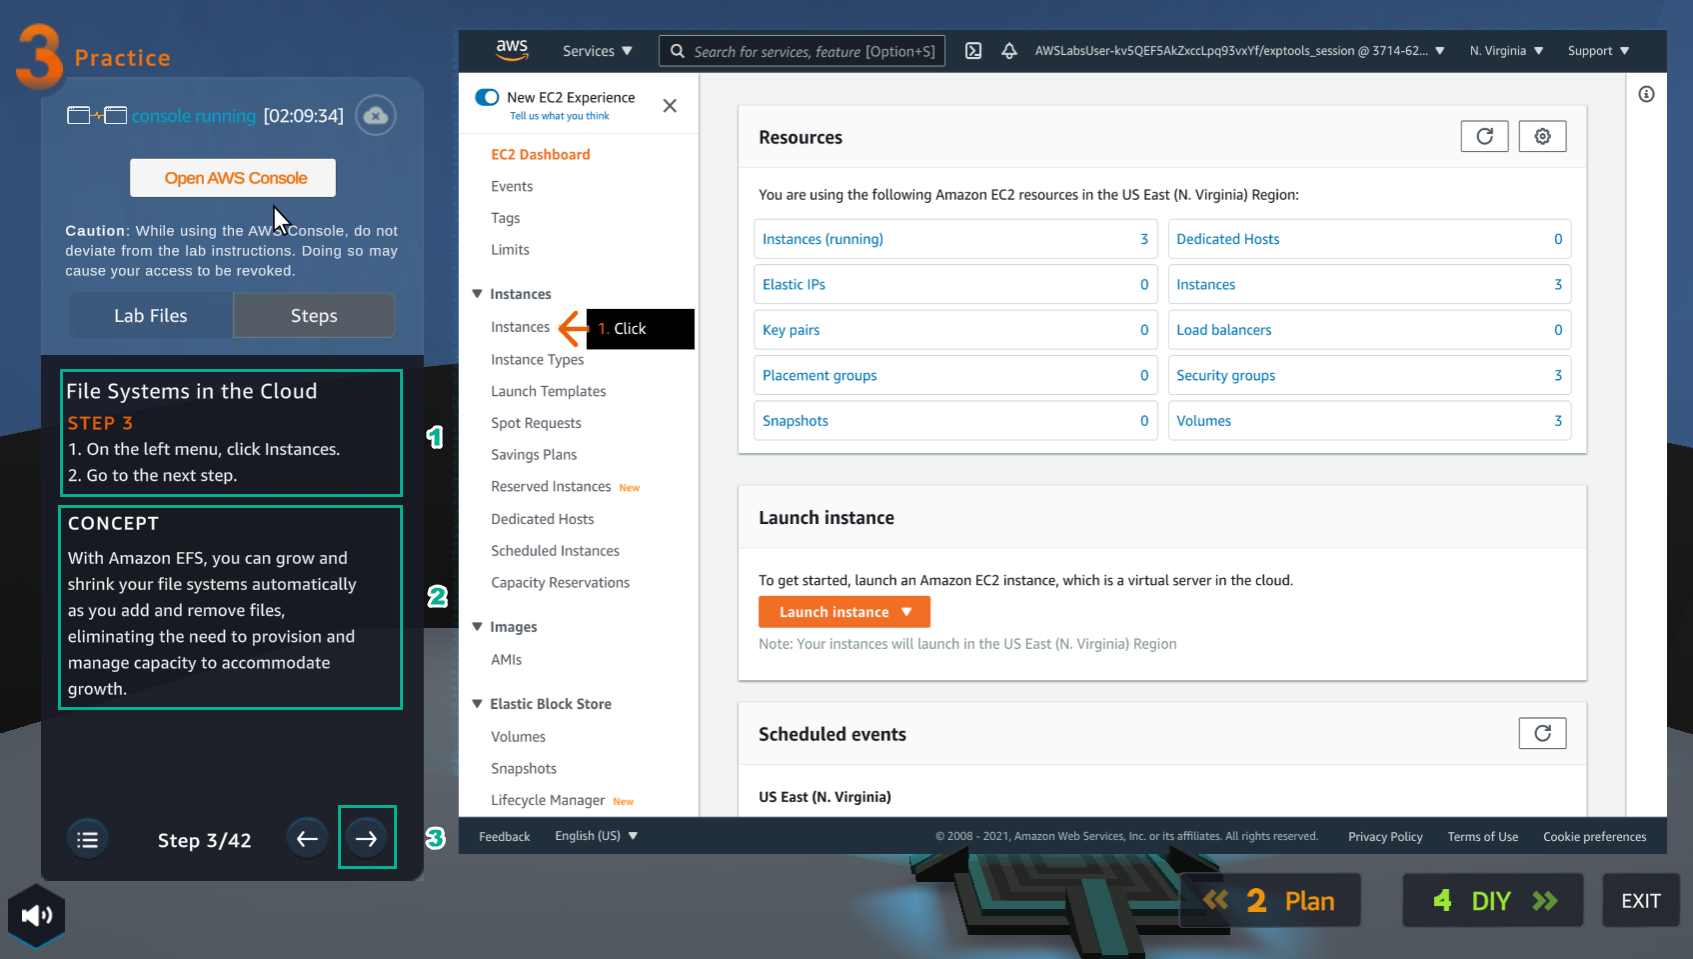
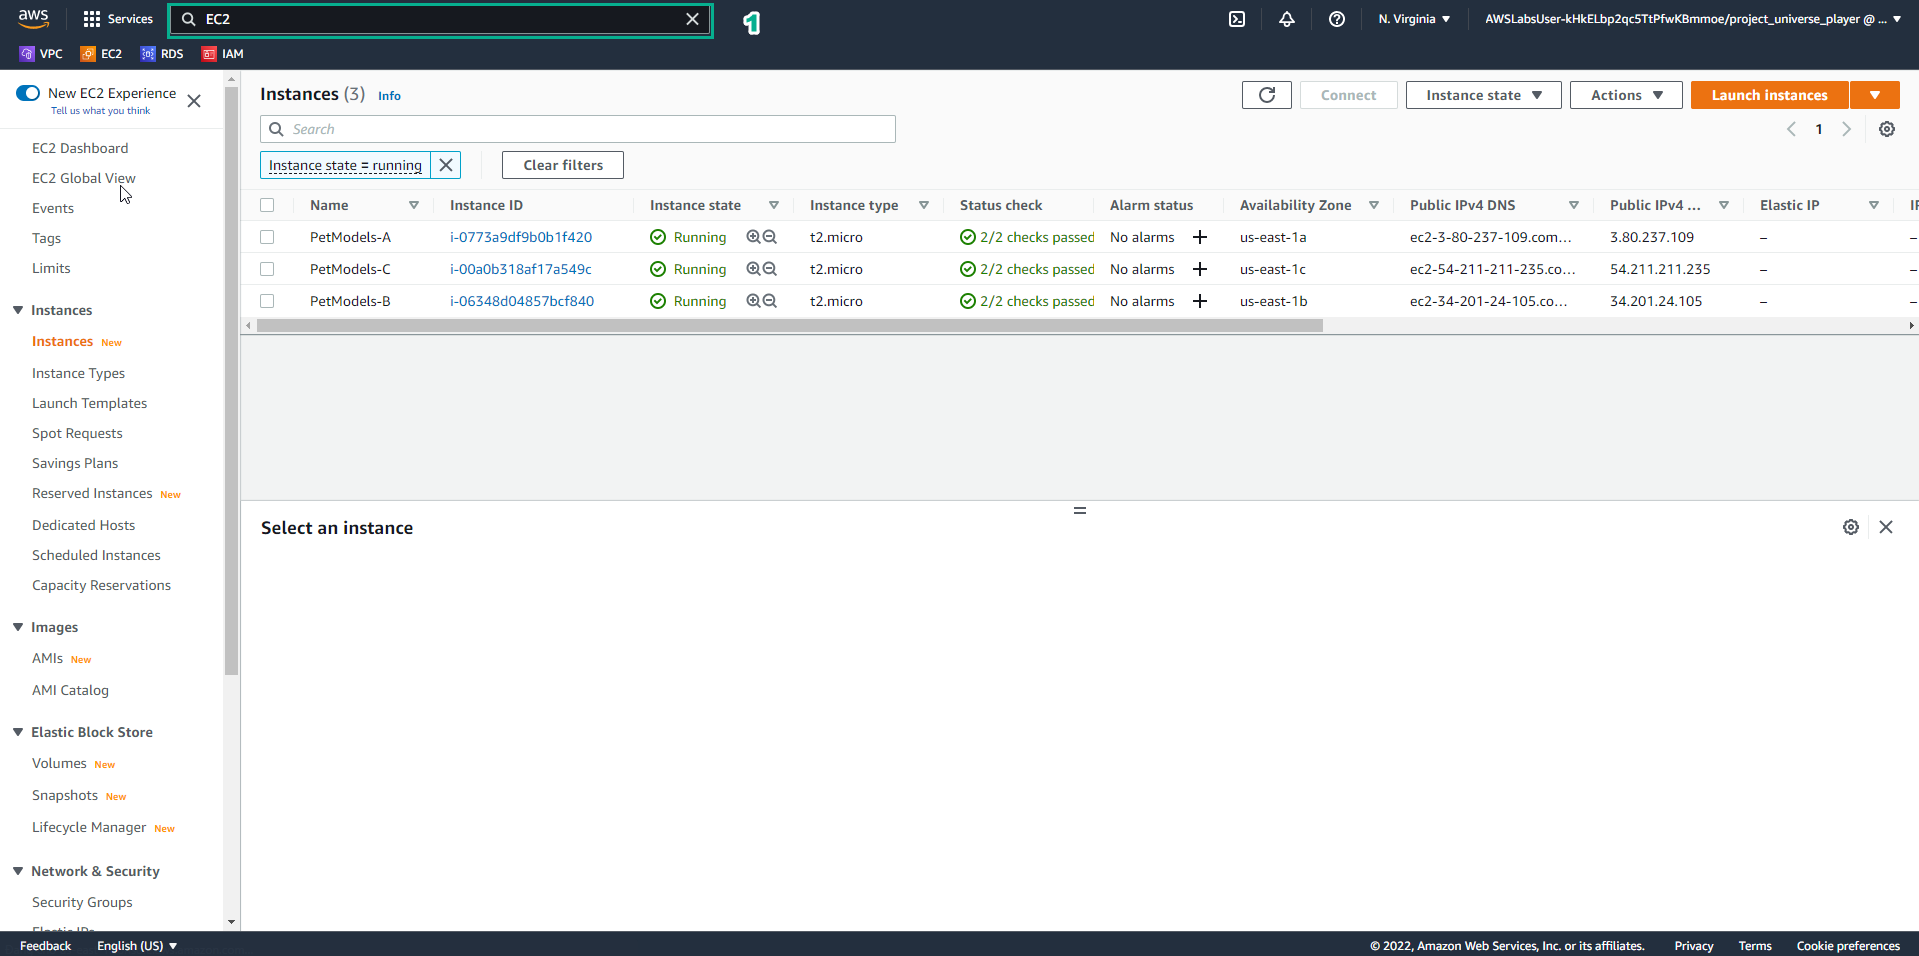
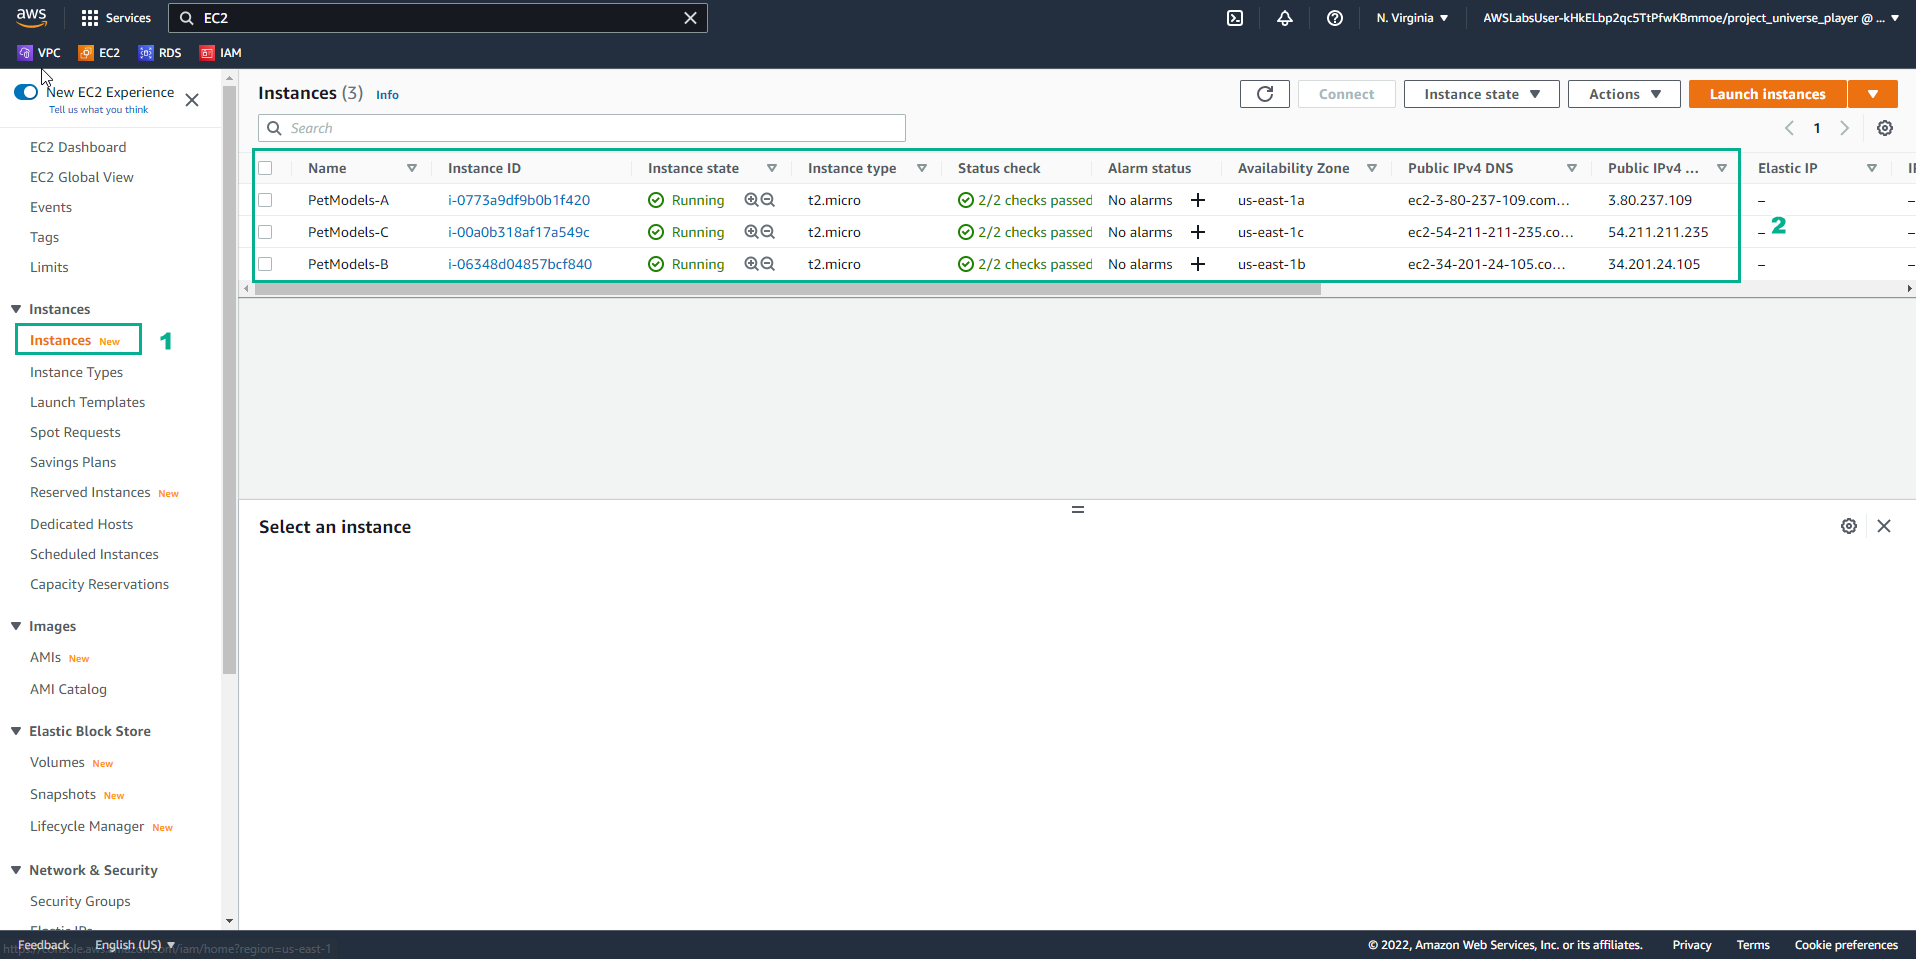
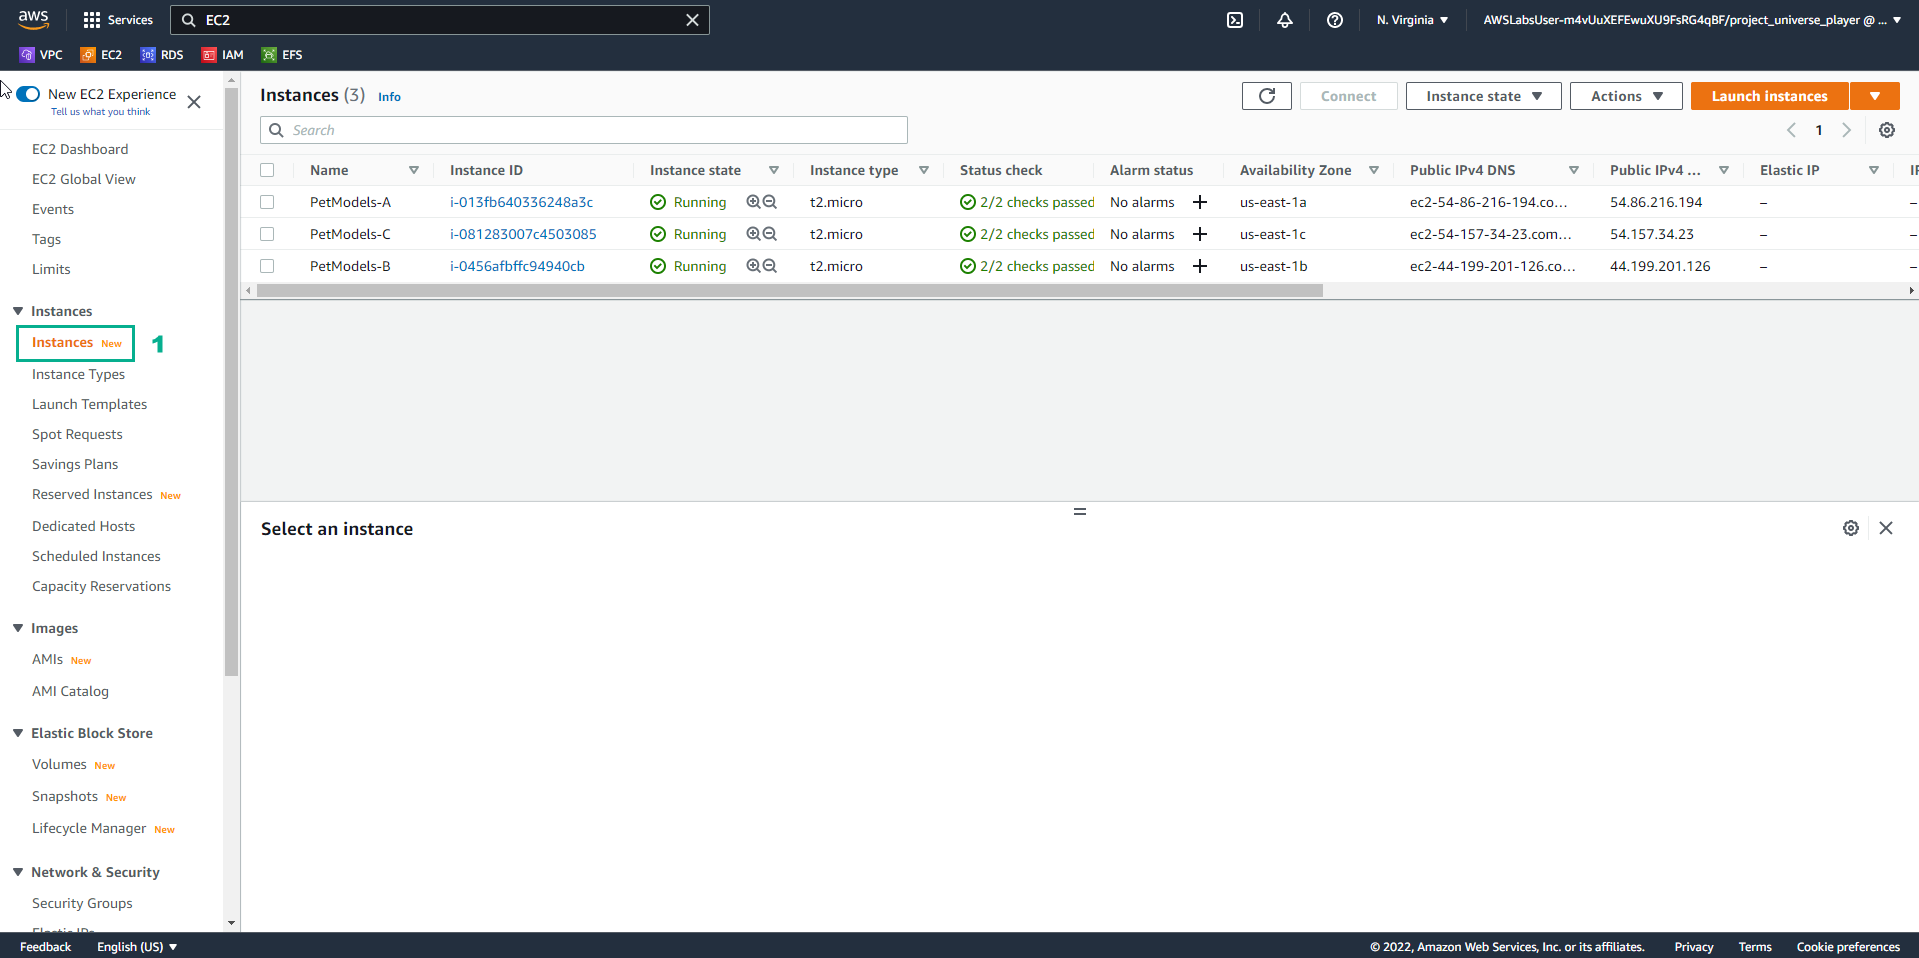
- Trong giao diện EC2
- Chọn Instances
- Xem các instance
- Trong giao diện Practice
- Đọc bước 5 của File Systems in the Cloud
- Đọc CONCEPT
- Chọn mũi tên sang phải để xem các bước tiếp theo
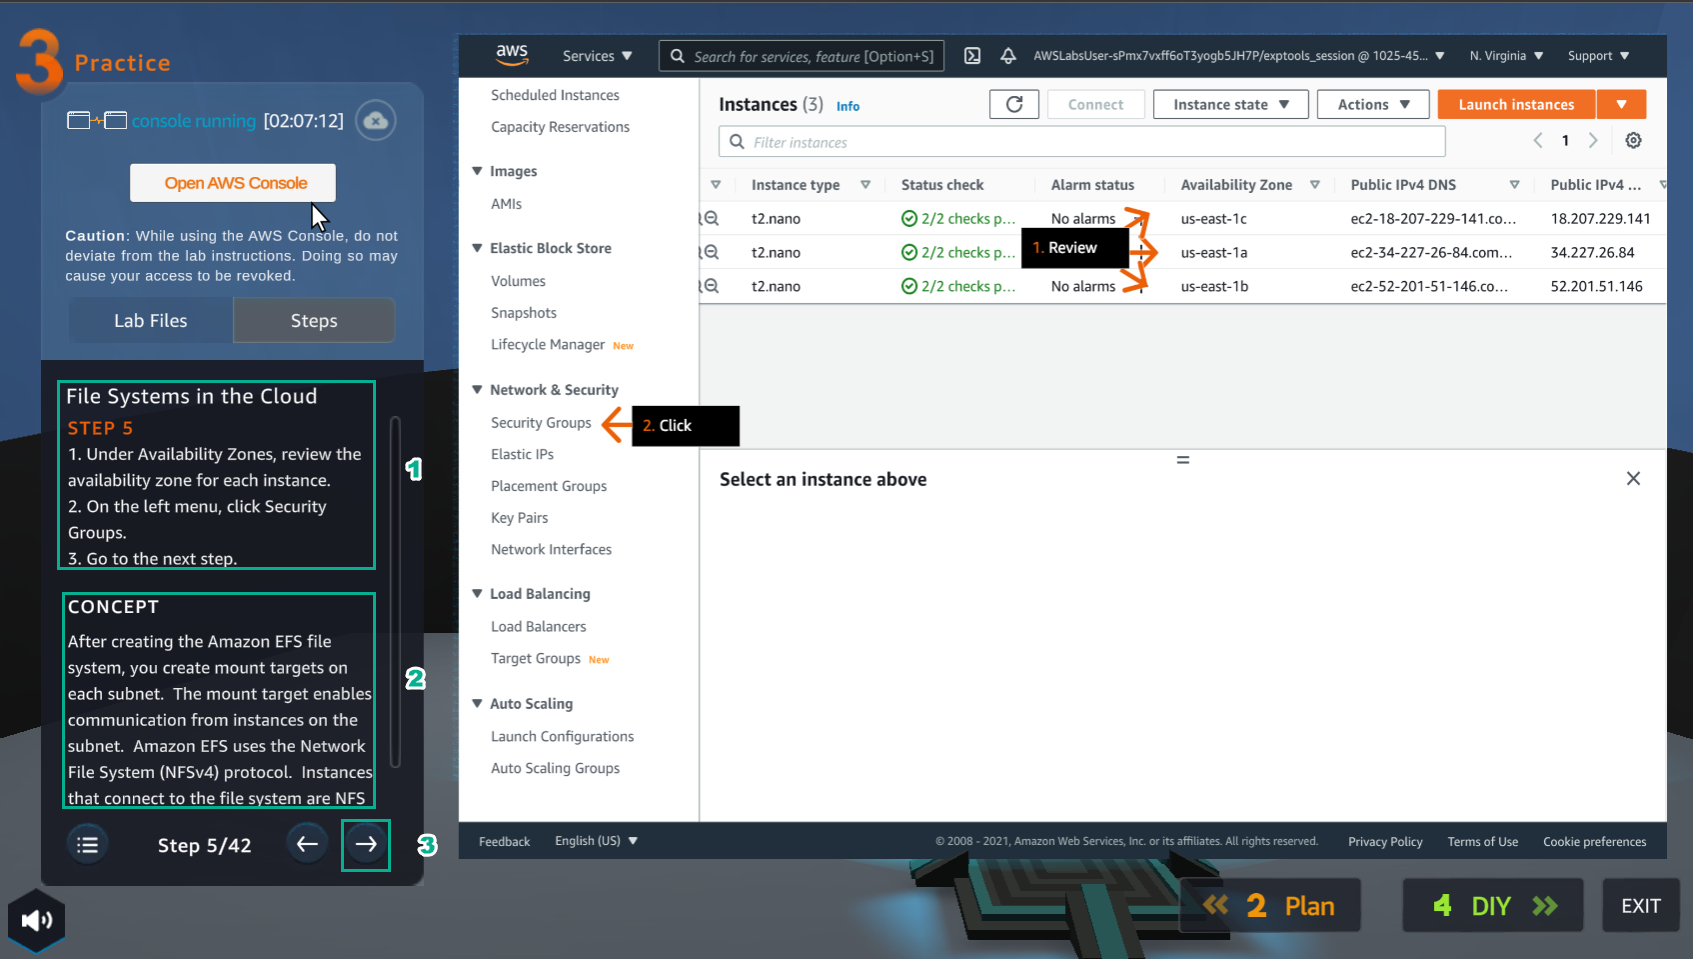
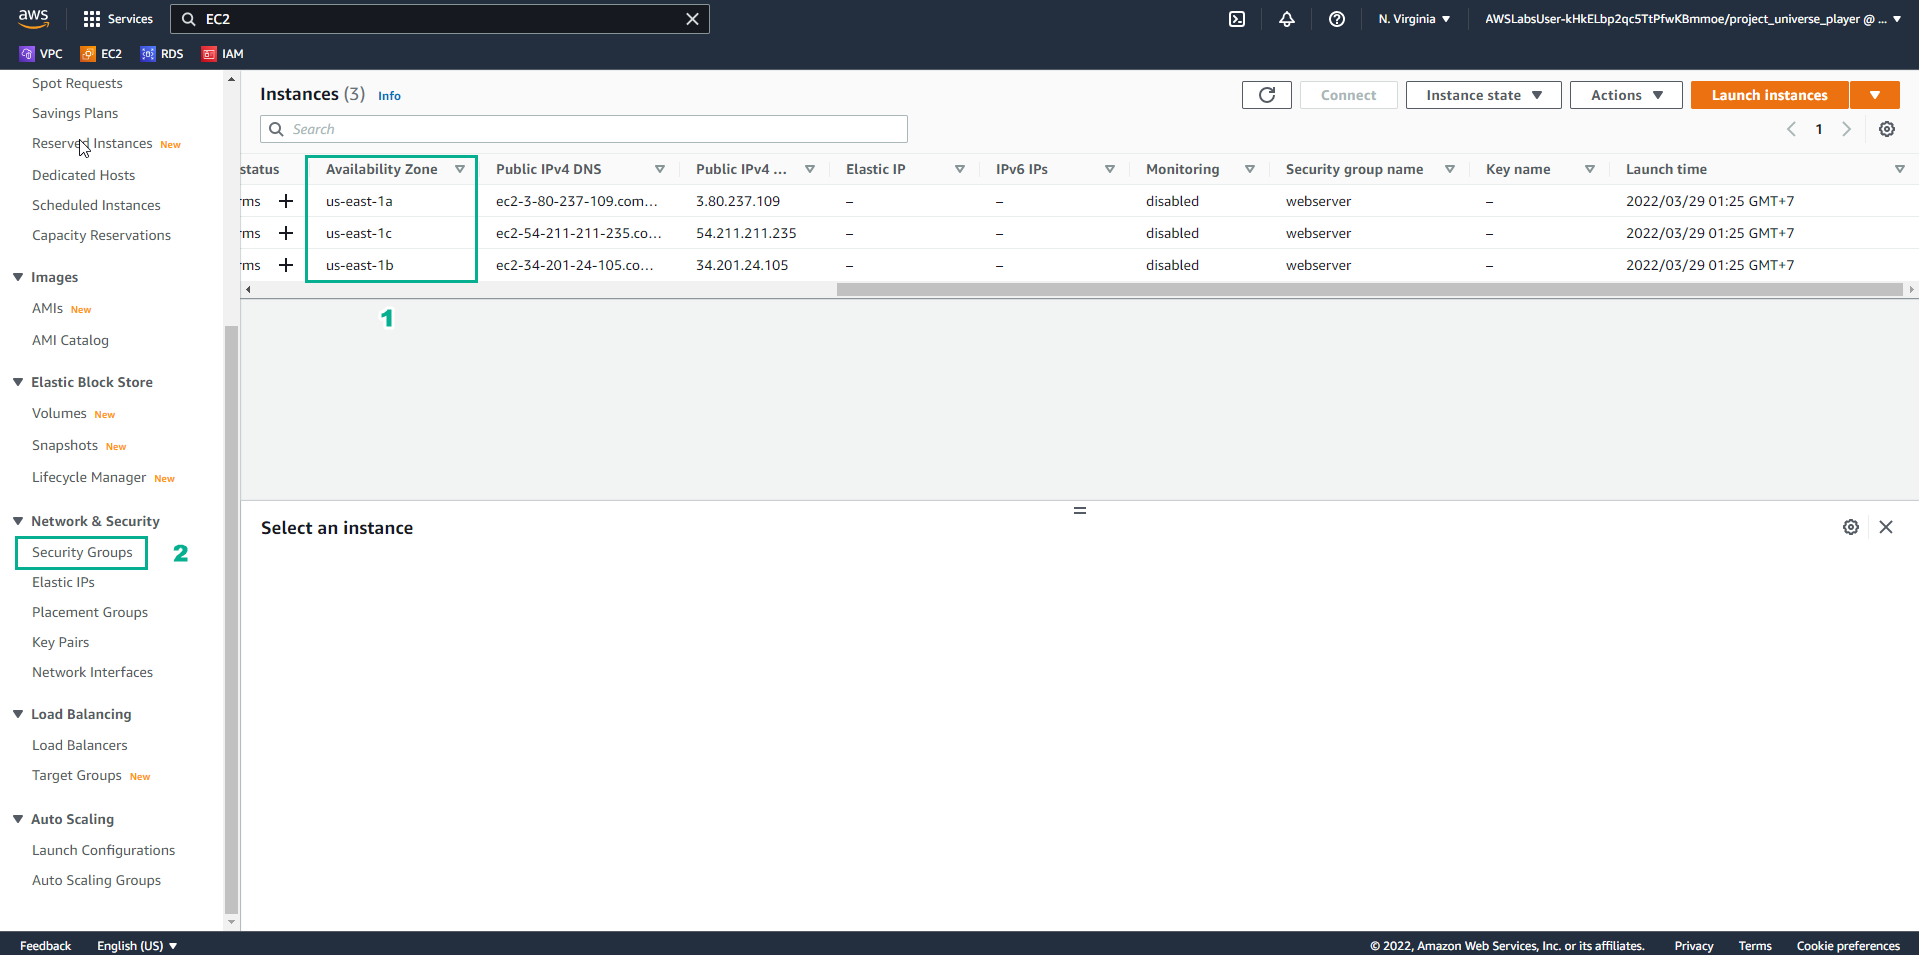
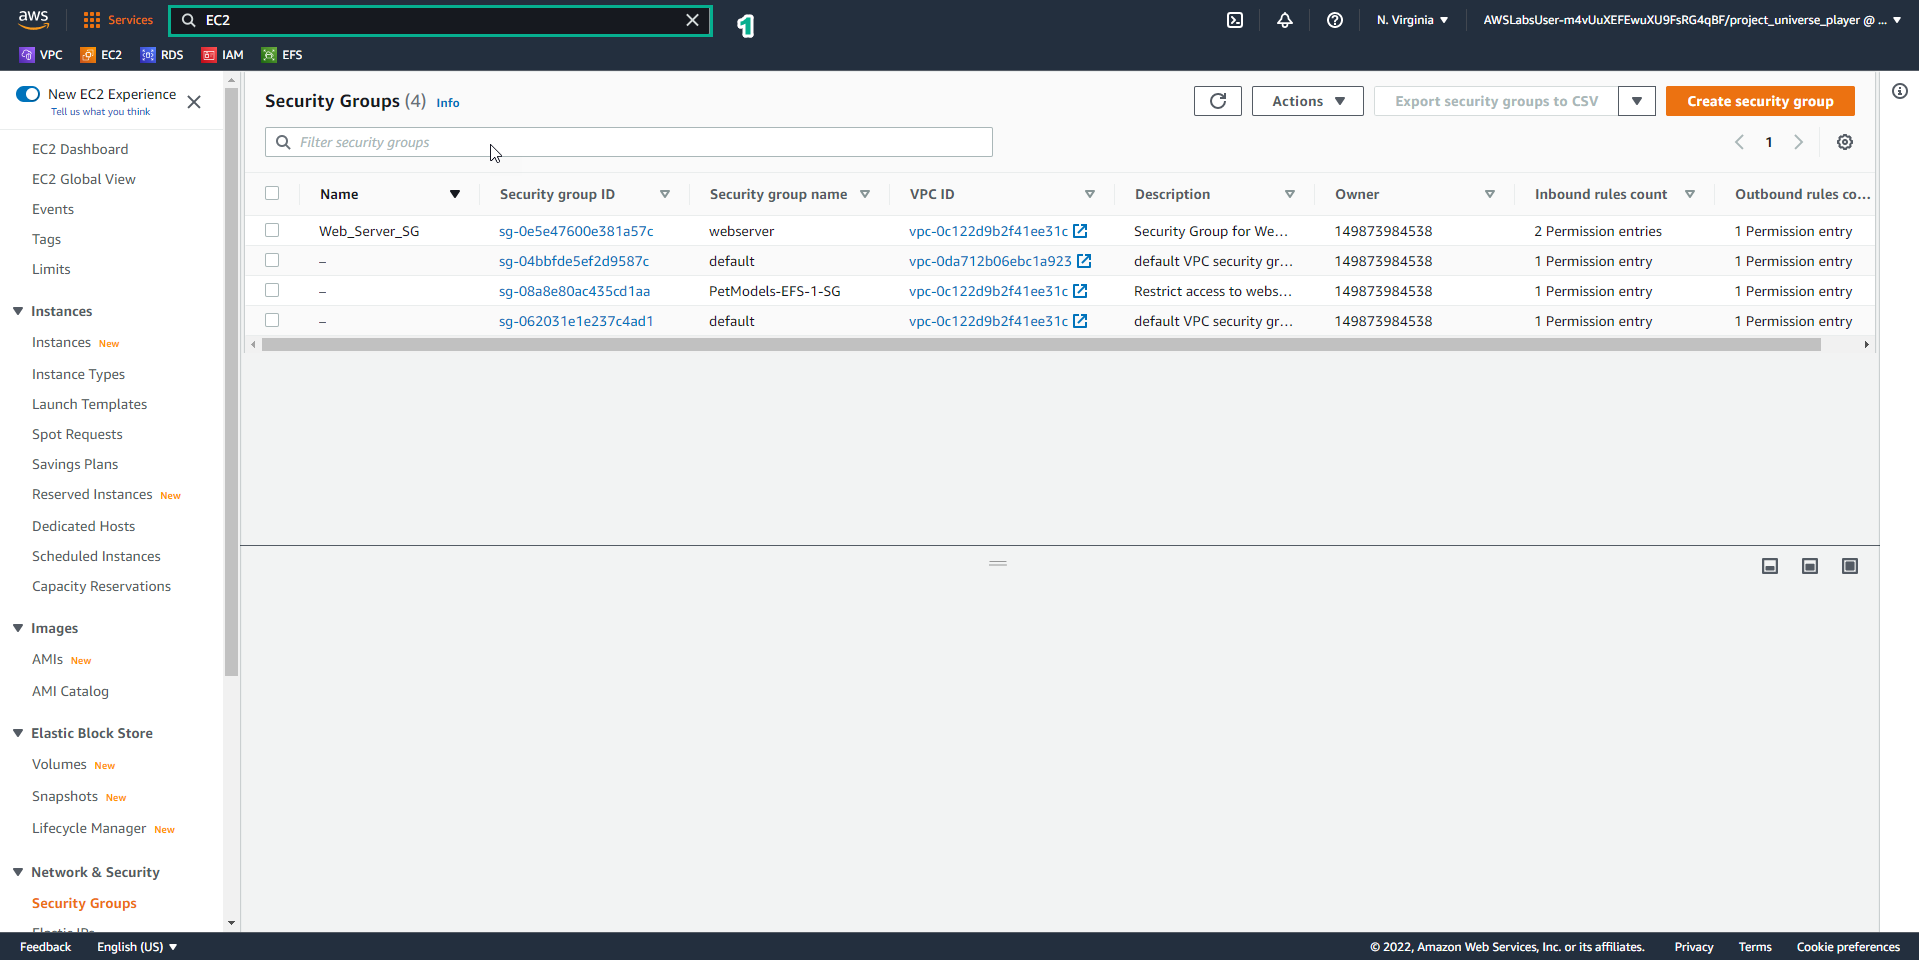
- Trong giao diện EC2
- Xem các Availability Zone
- Chọn Security Groups
- Trong giao diện Practice
- Đọc bước 6 của File Systems in the Cloud
- Đọc CONCEPT
- Chọn mũi tên sang phải để xem các bước tiếp theo
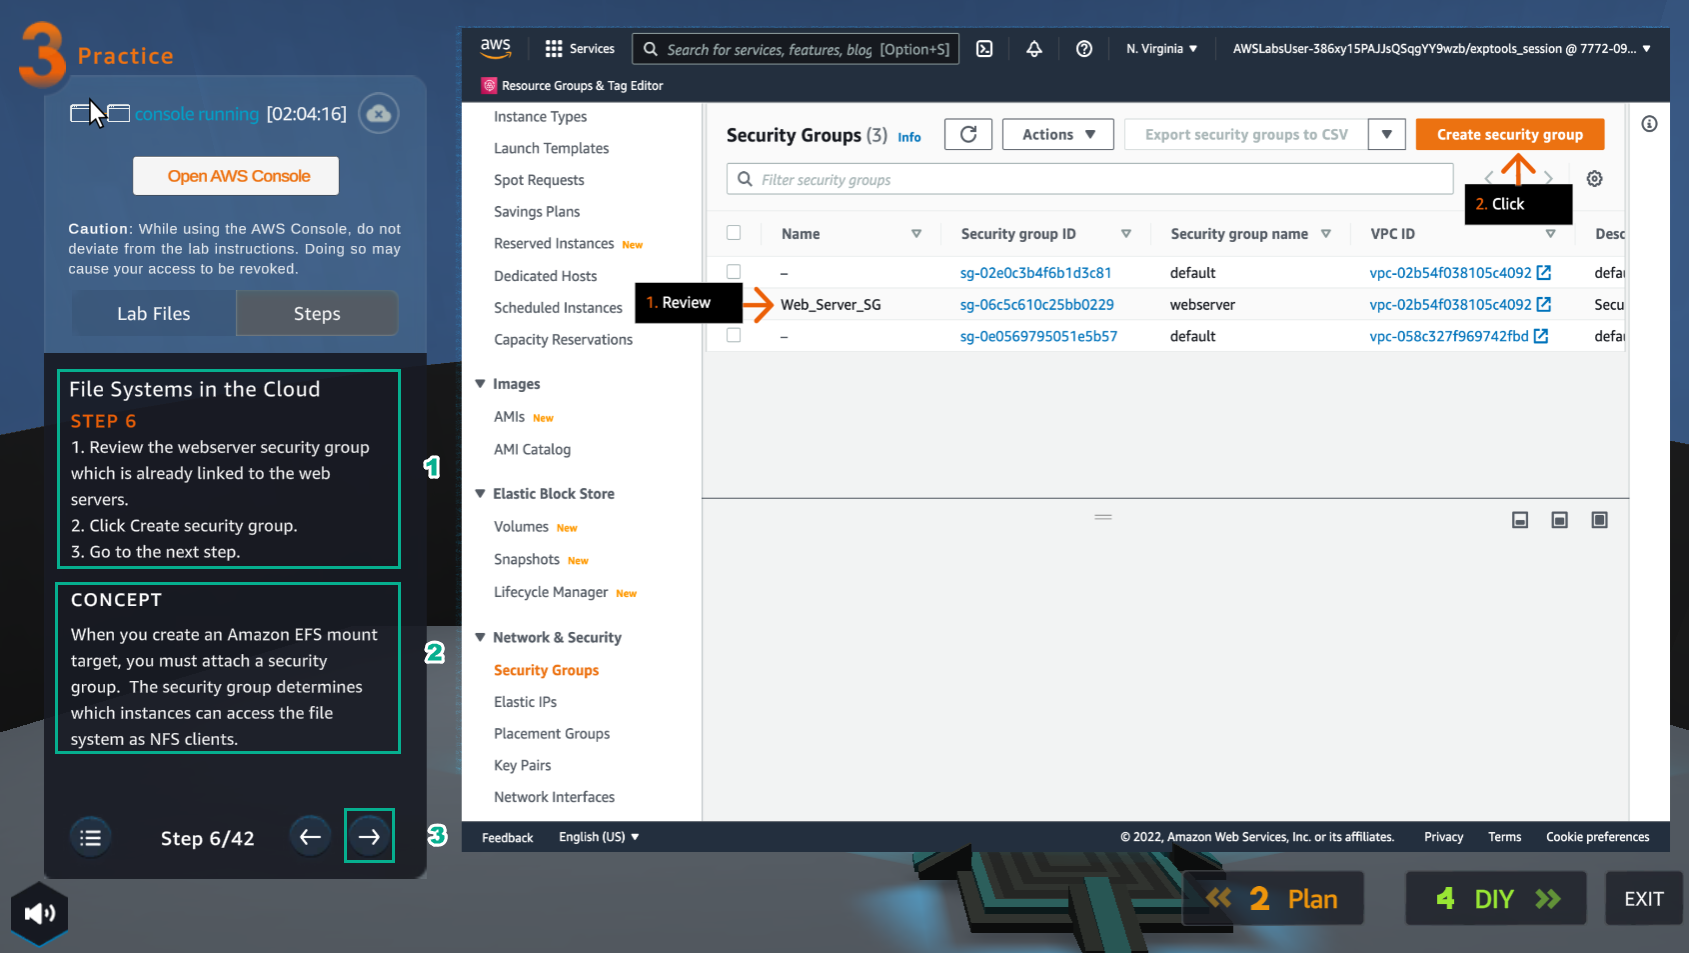
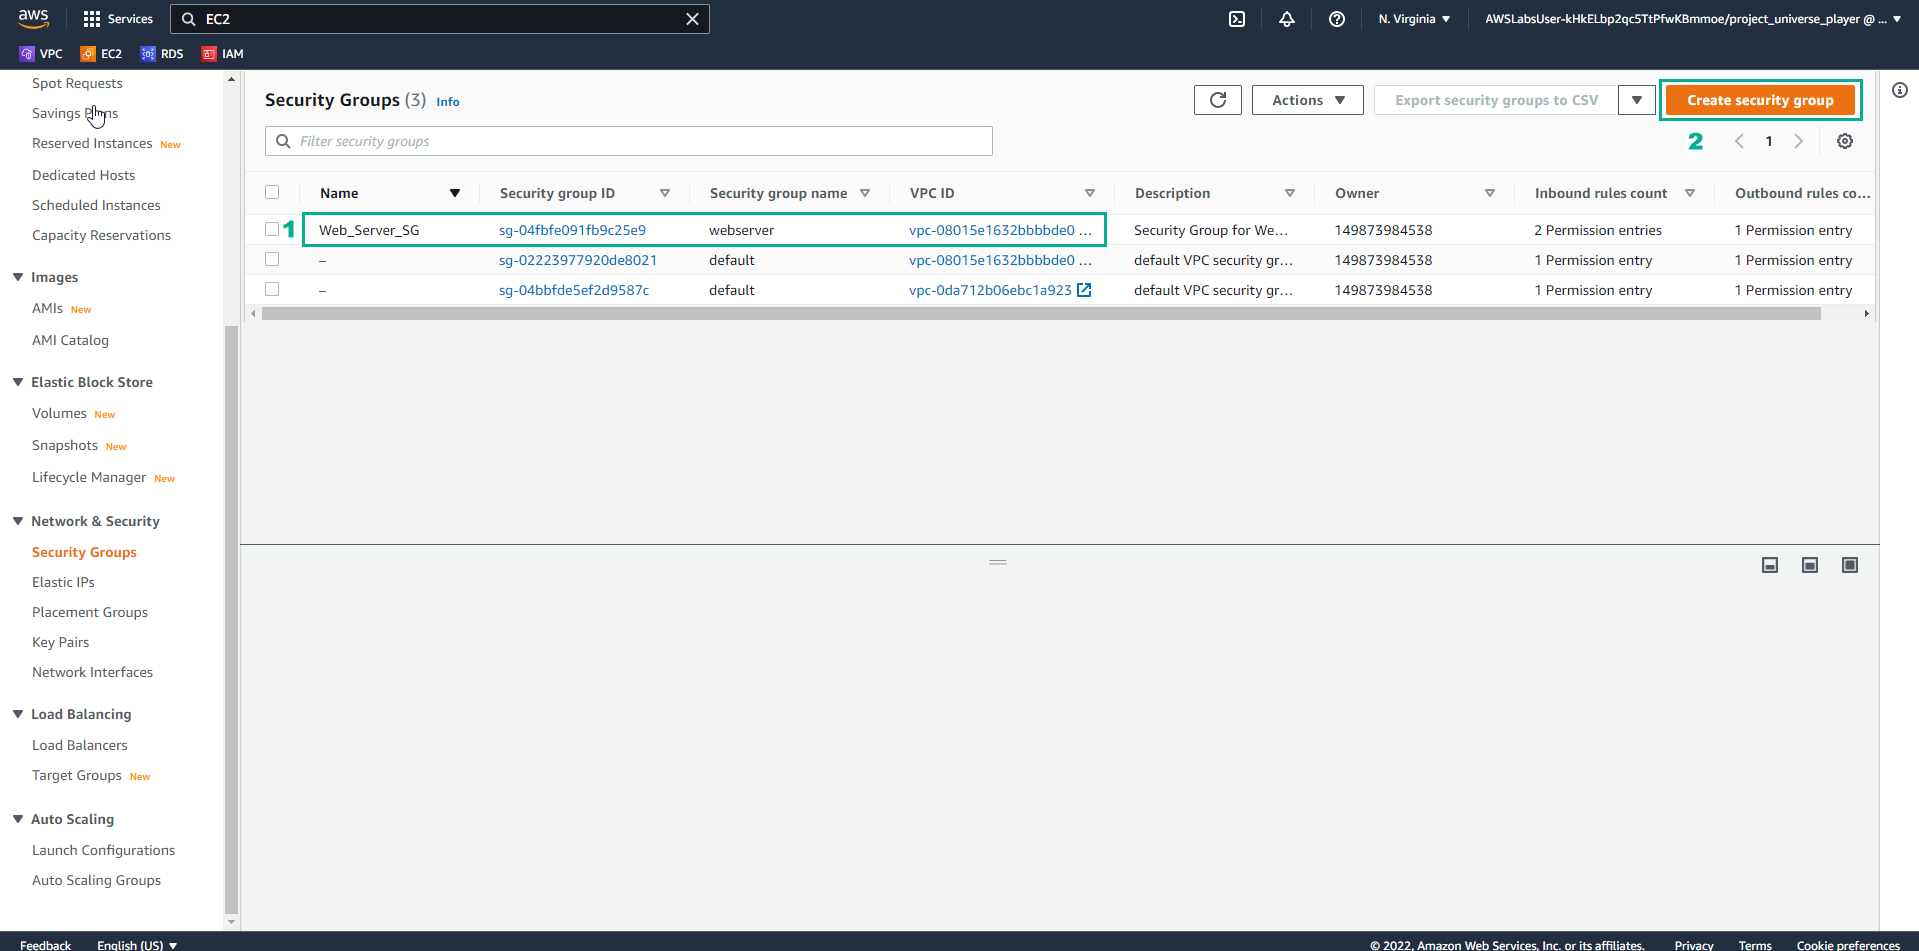
- Trong giao diện Security Groups
- Xem Web Server Security Group
- Chọn Create security group
- Trong giao diện Practicce
- Đọc bước 7 của File Systems in the Cloud
- Đọc CONCEPT
- Chọn mũi tên sang phải để xem các bước tiếp theo
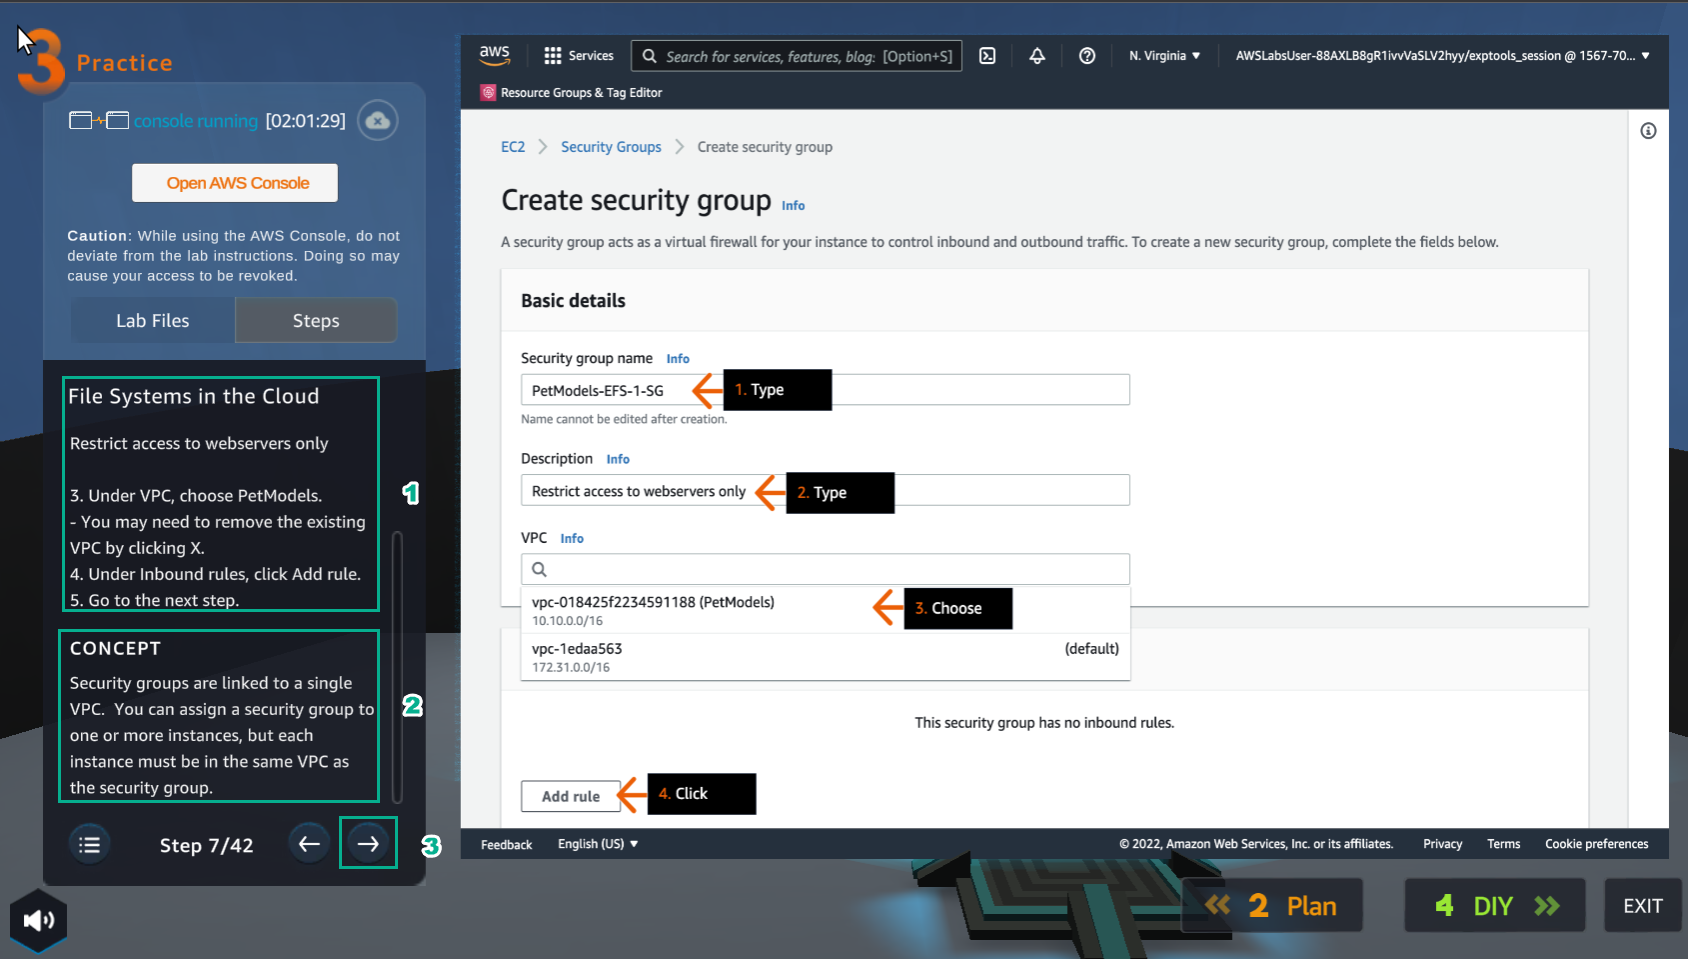
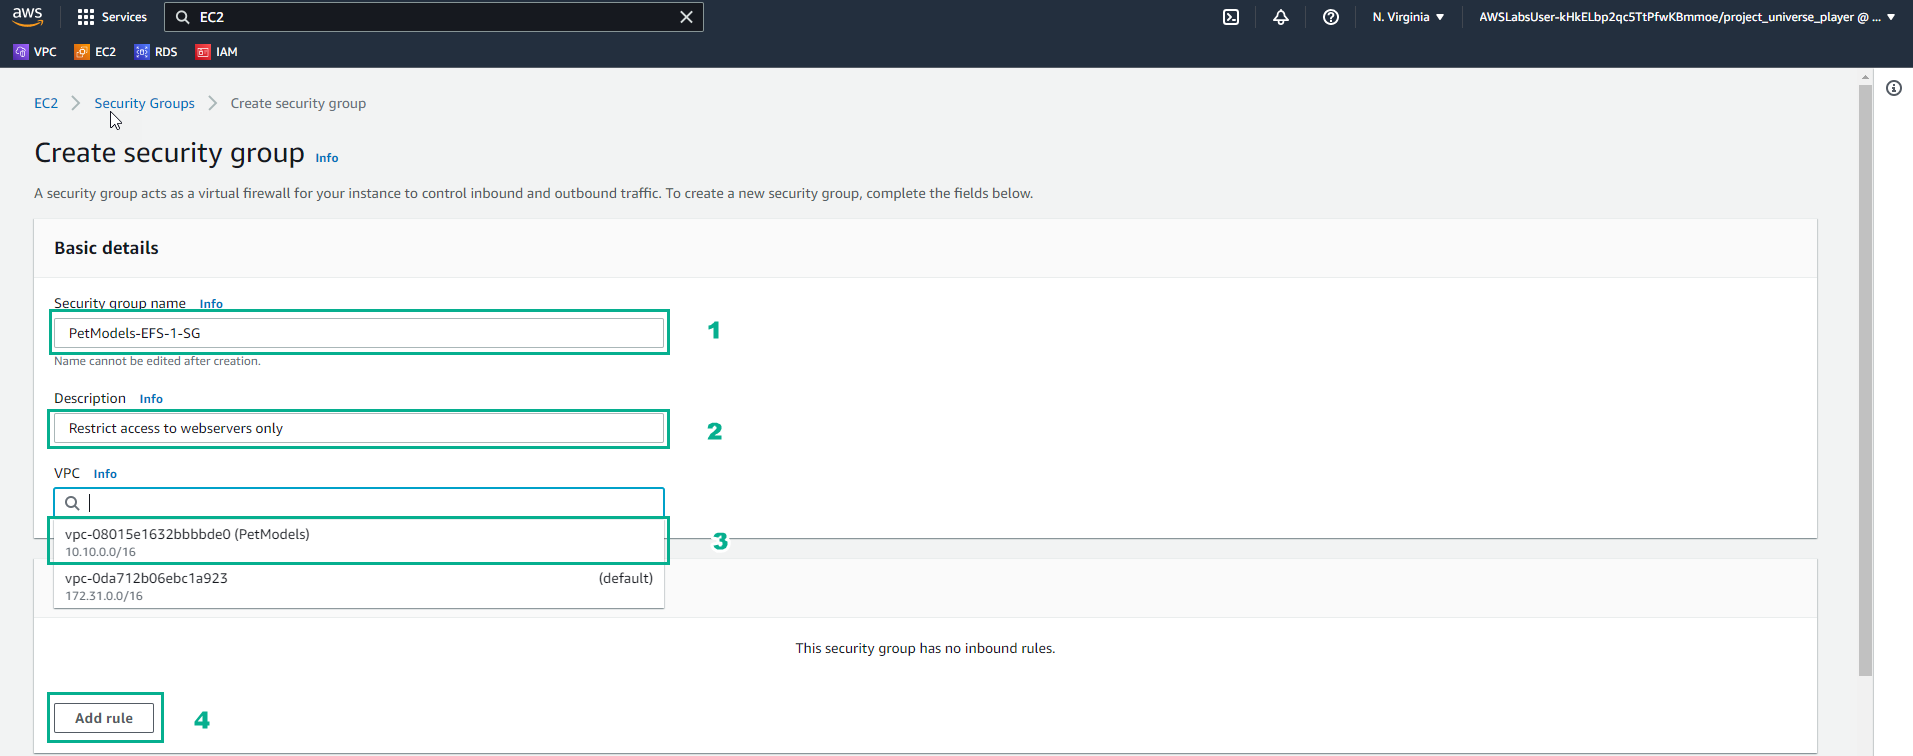
- Trong giao diện Create security group
- Security group name, nhập
PetModels-EFS-1-SG - Description, nhập
Restrict access to webservers only - Chọn VPC PetModels
- Chọn Add rule
- Trong giao diện Practice
- Đọc bước 8 của File Systems in the Cloud
- Đọc CONCEPT
- Chọn mũi tên sang phải để xem các bước tiếp theo

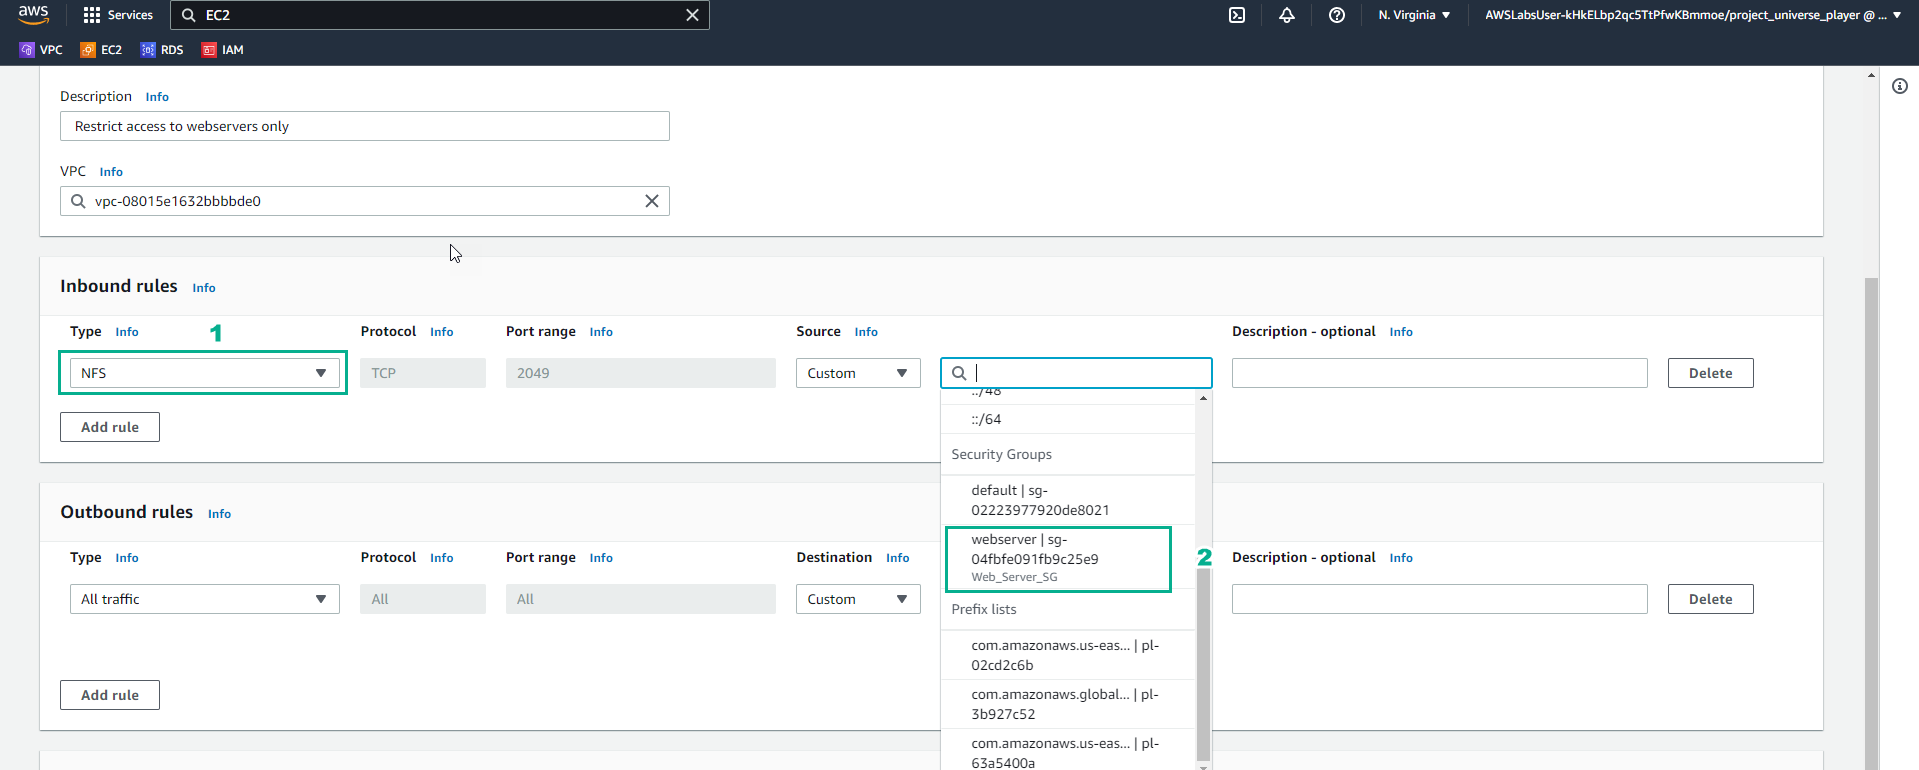
- Trong giao diện Create security group
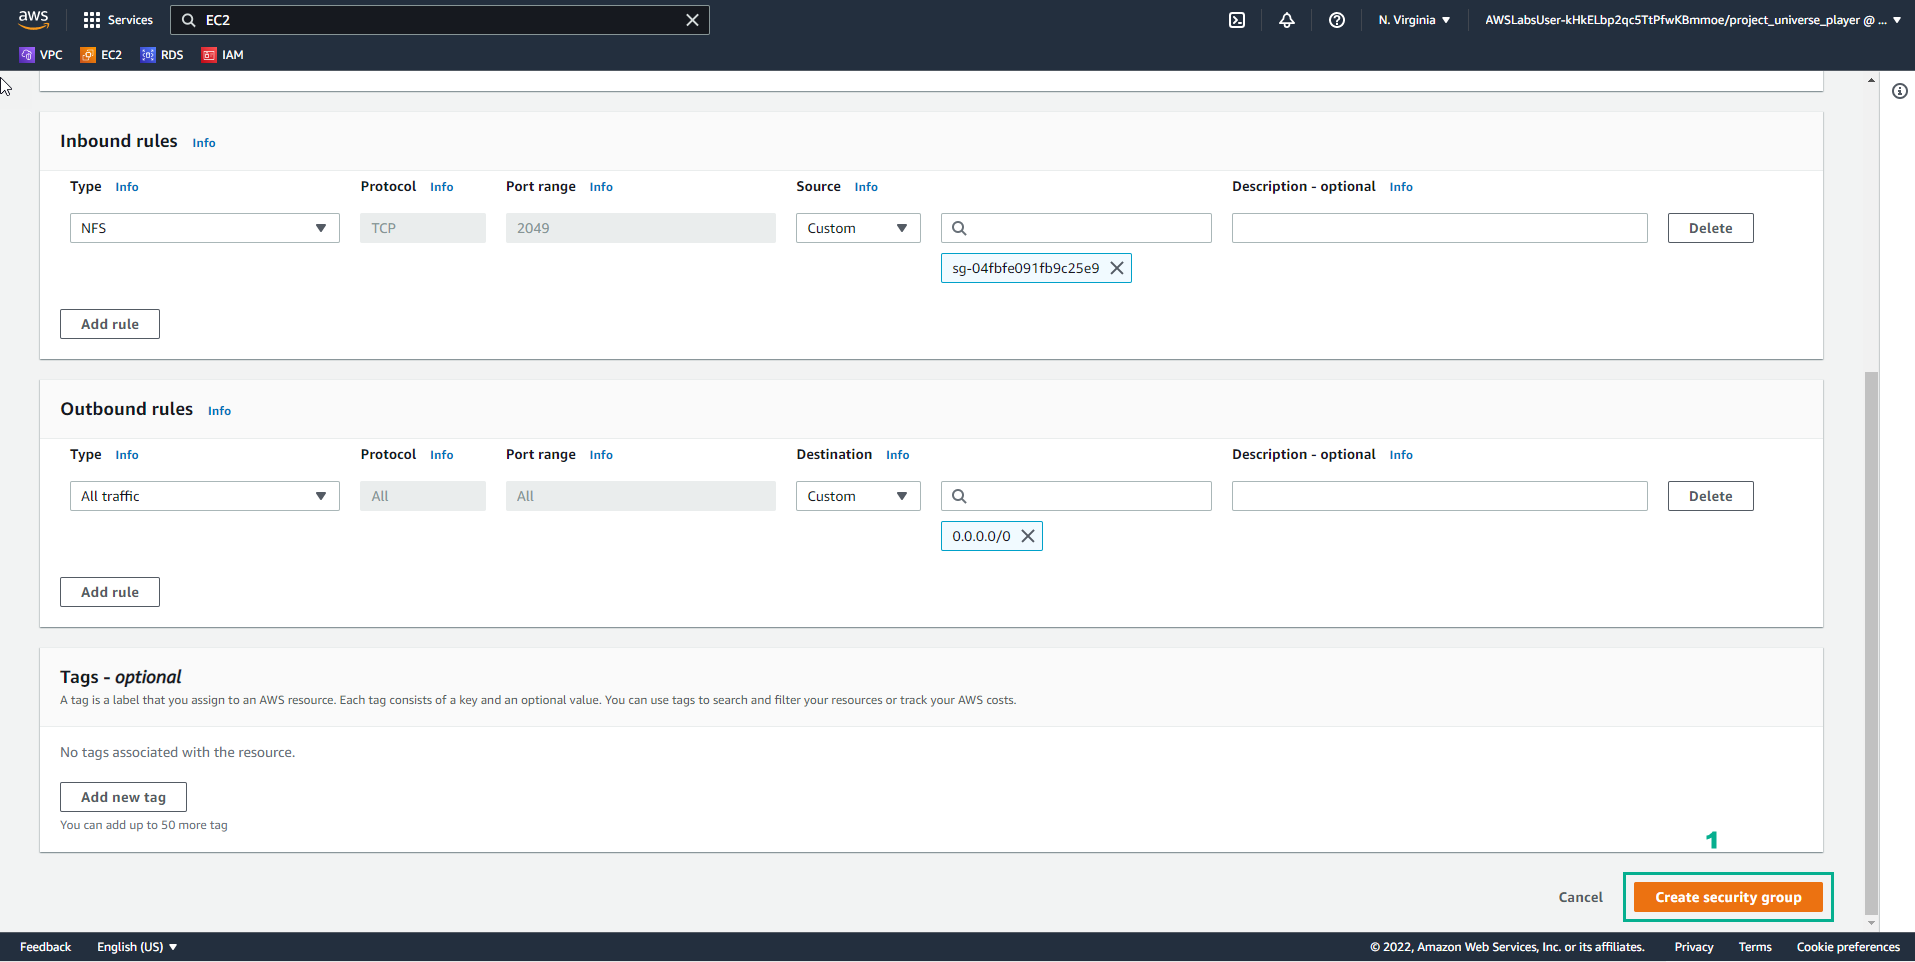
- Trong Inbound rules, chọn NFS
- Chọn Security group, chọn webserver
- Trong giao diện Practice
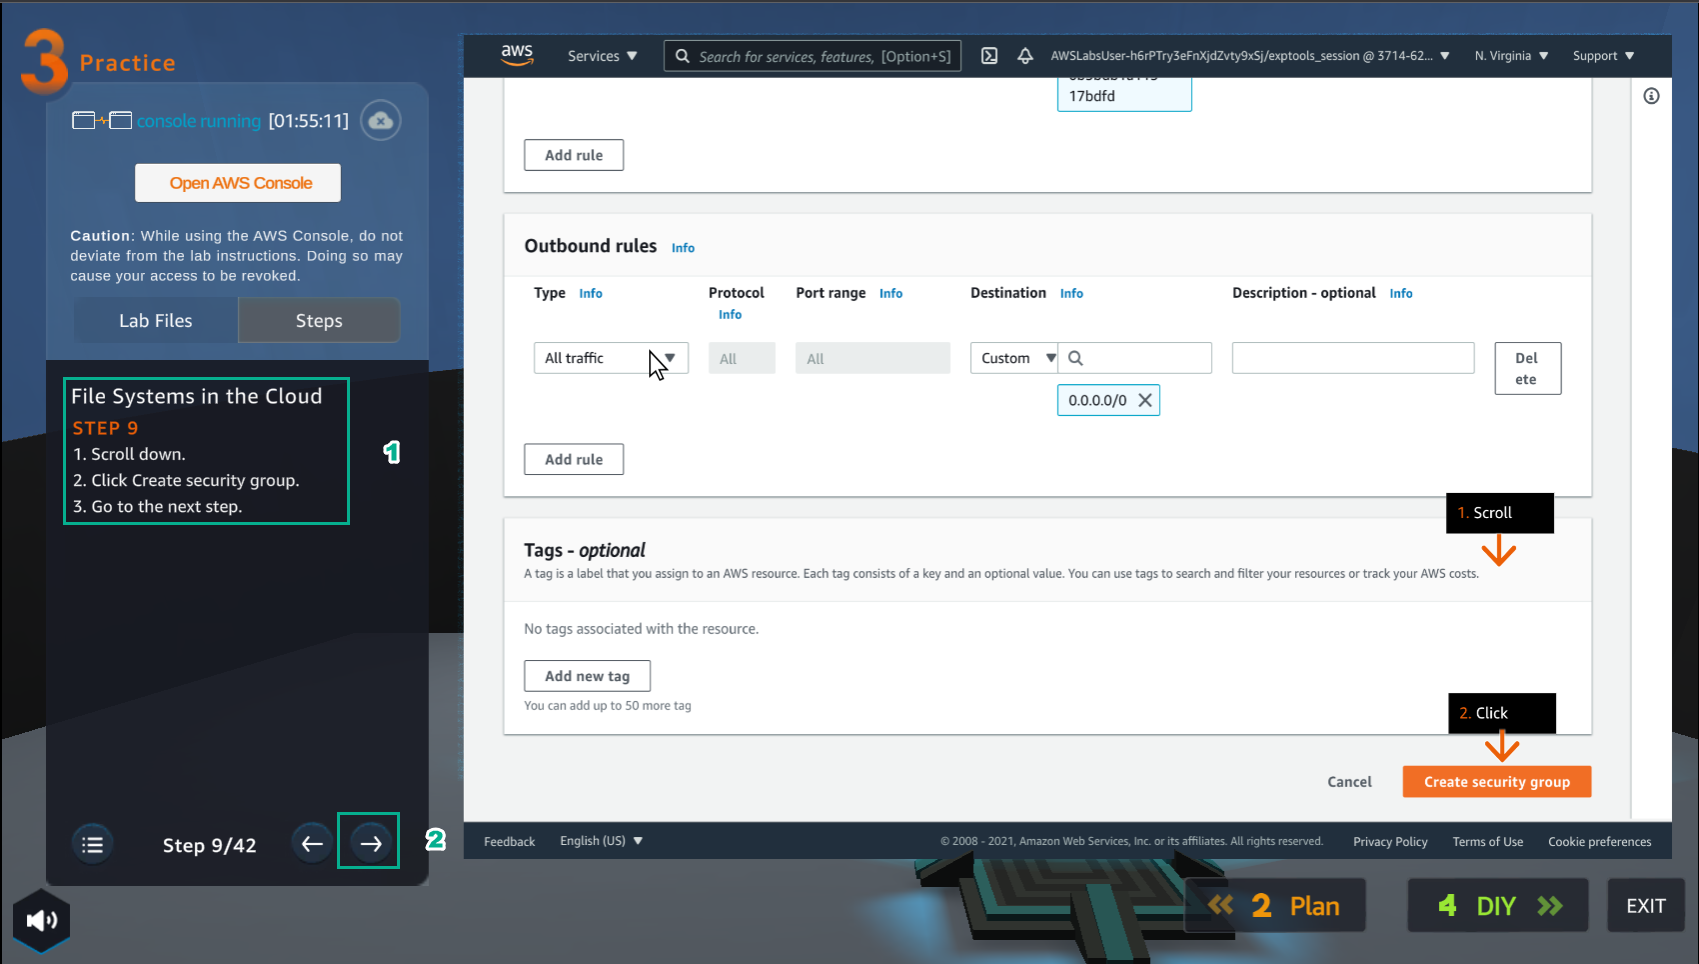
- Đọc bước 9 của File Systems in the Cloud
- Chọn mũi tên sang phải để xem các bước tiếp theo
- Trong giao diện Create security group
- Chọn Create security group
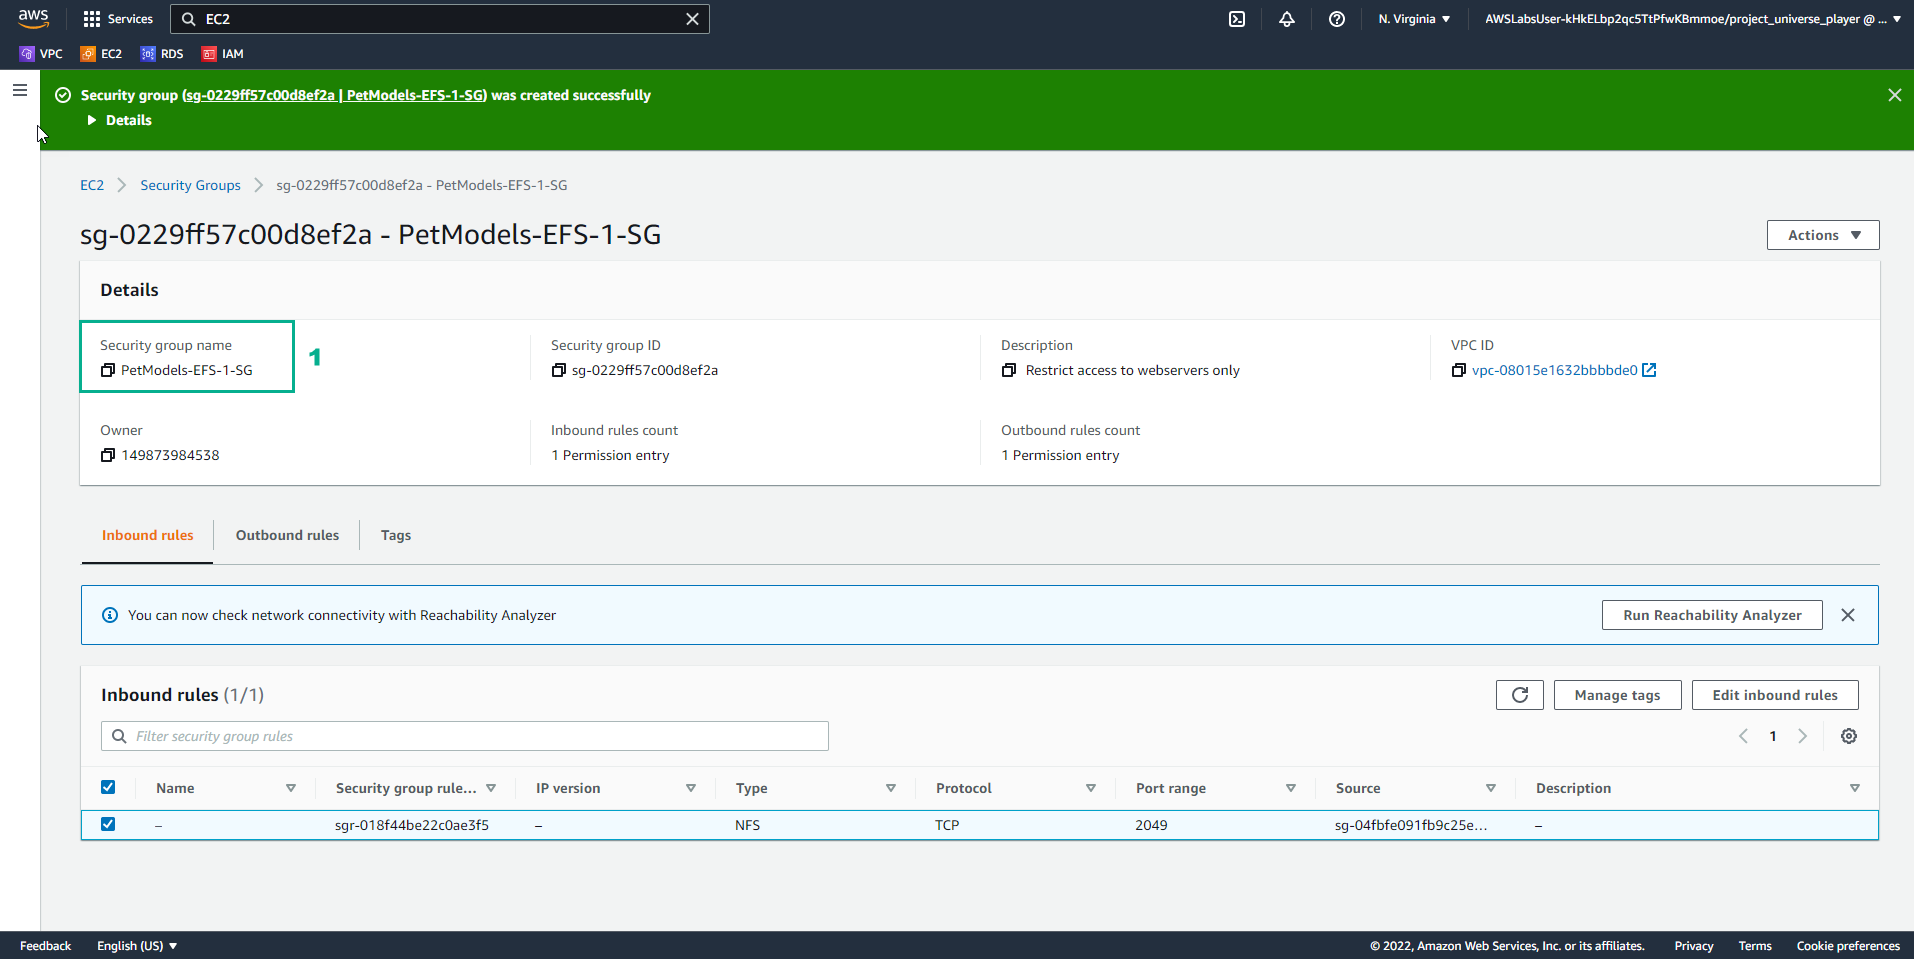
- Trong giao diện Practice
- Đọc bước 10 của File Systems in the Cloud
- Đọc CONCEPT
- Chọn mũi tên sang phải để xem các bước tiếp theo
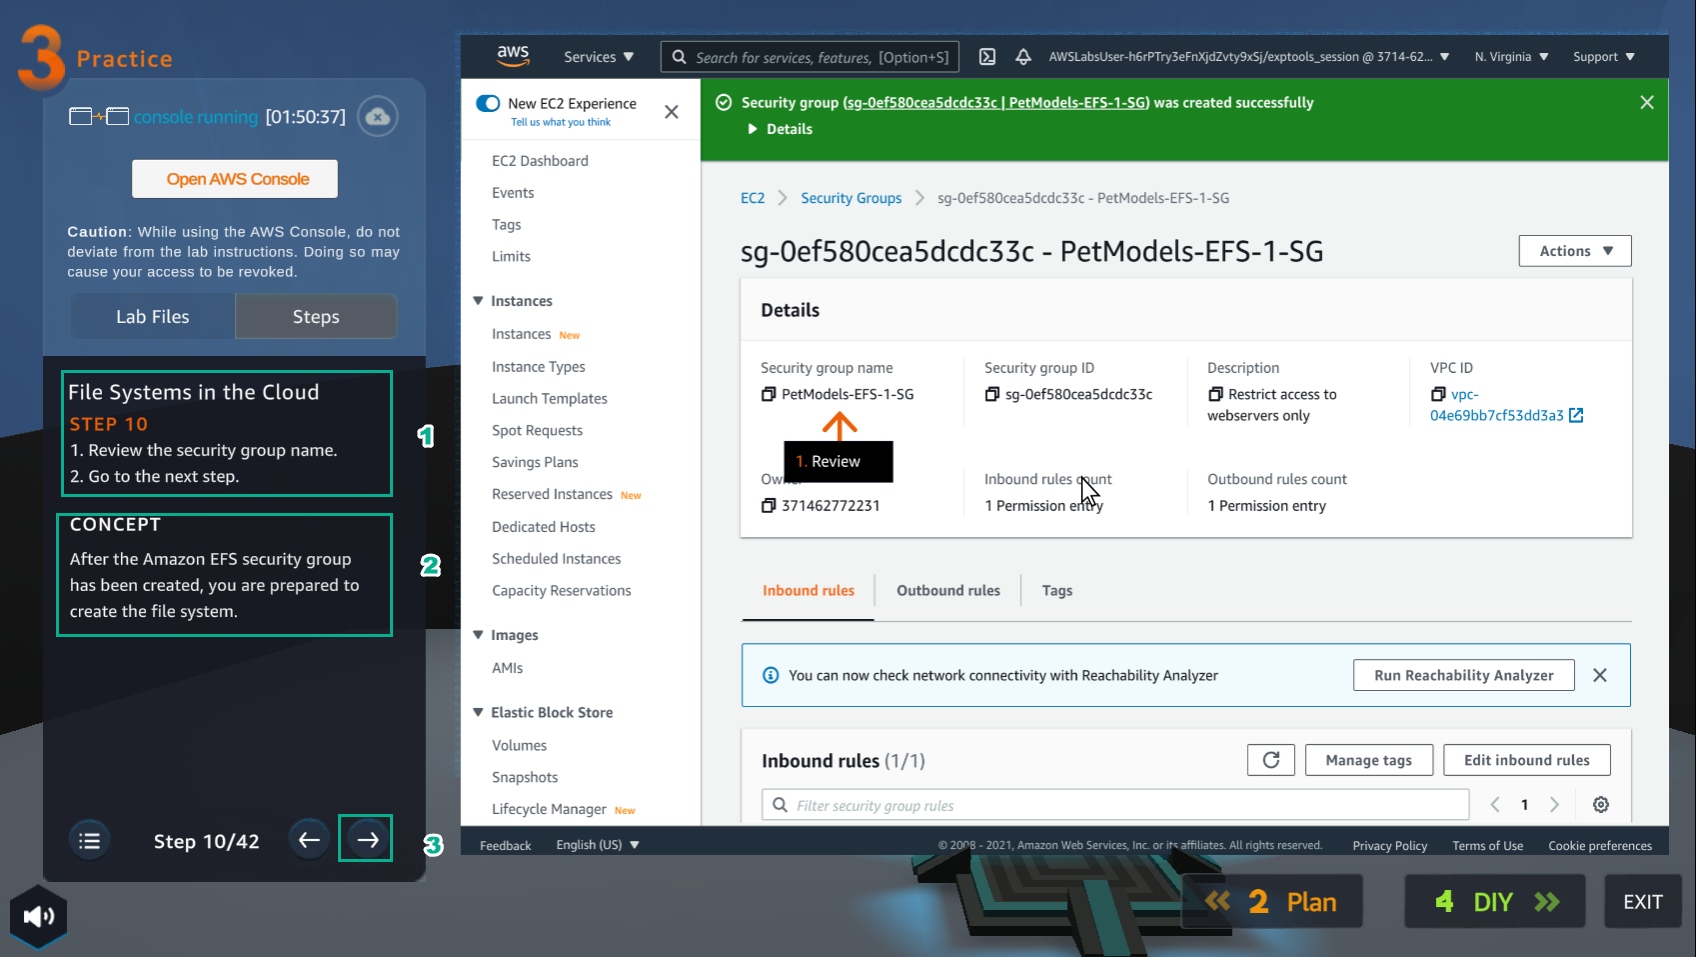
- Trong giao diện Security group
- Xem Security group name vừa tạo
- Trong giao diện Practice
- Đọc bước 11 của File Systems in the Cloud
- Đọc CONCEPT
- Chọn mũi tên sang phải để xem các bước tiếp theo
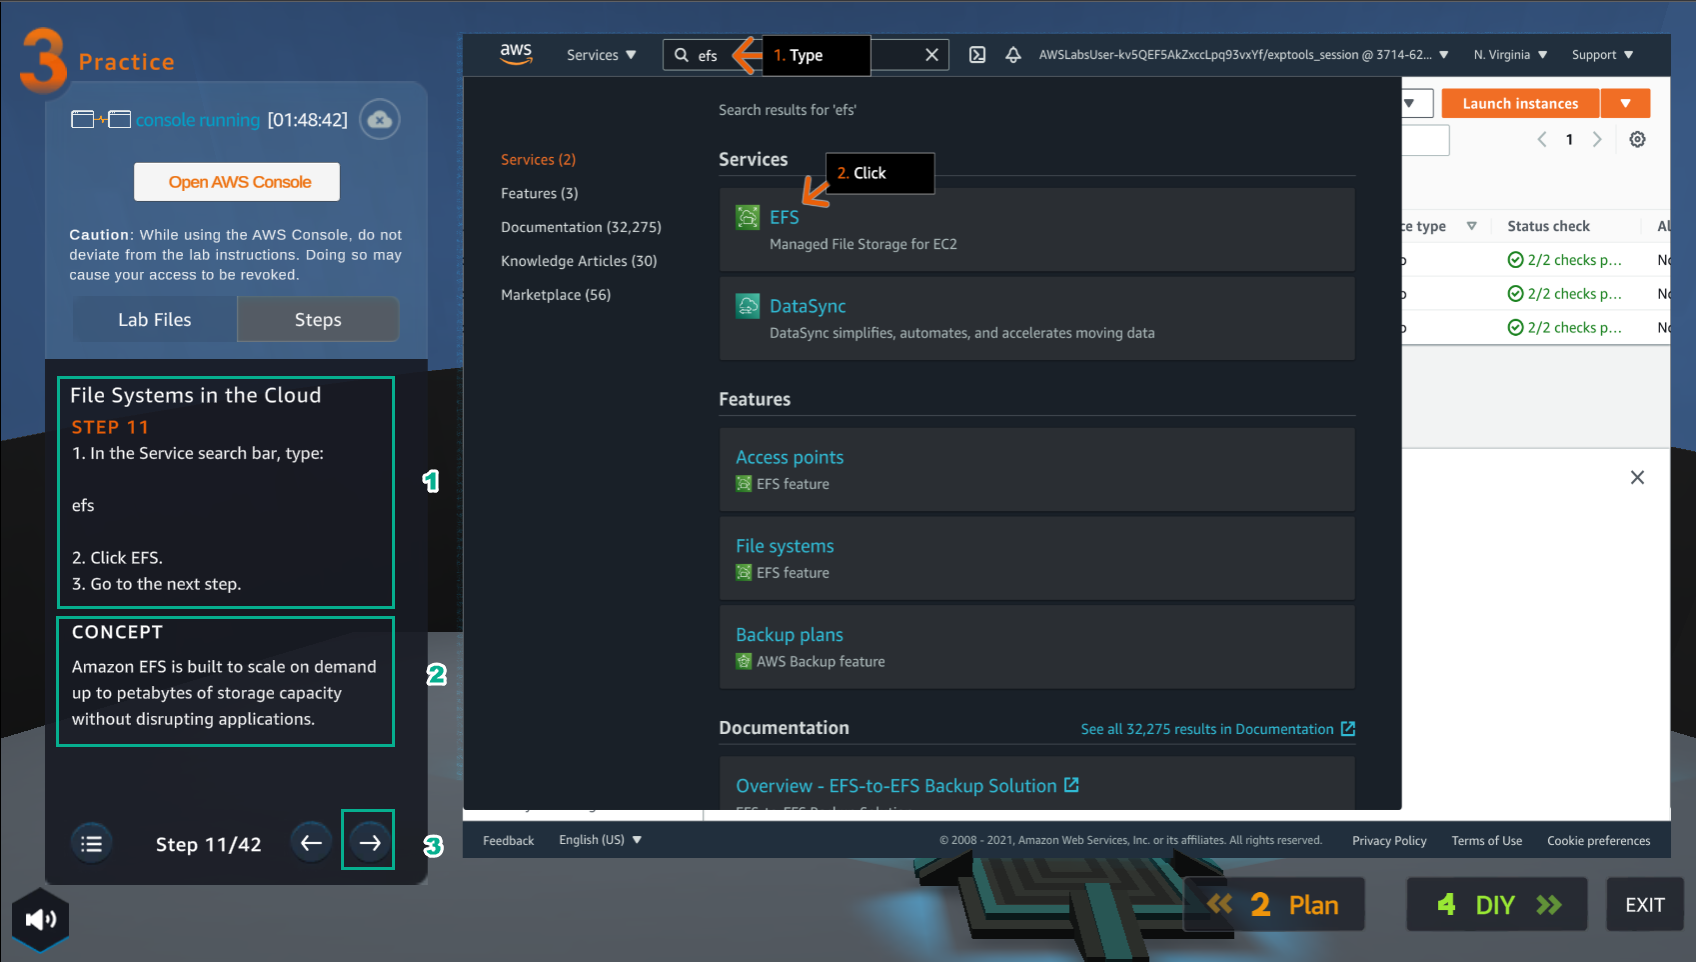
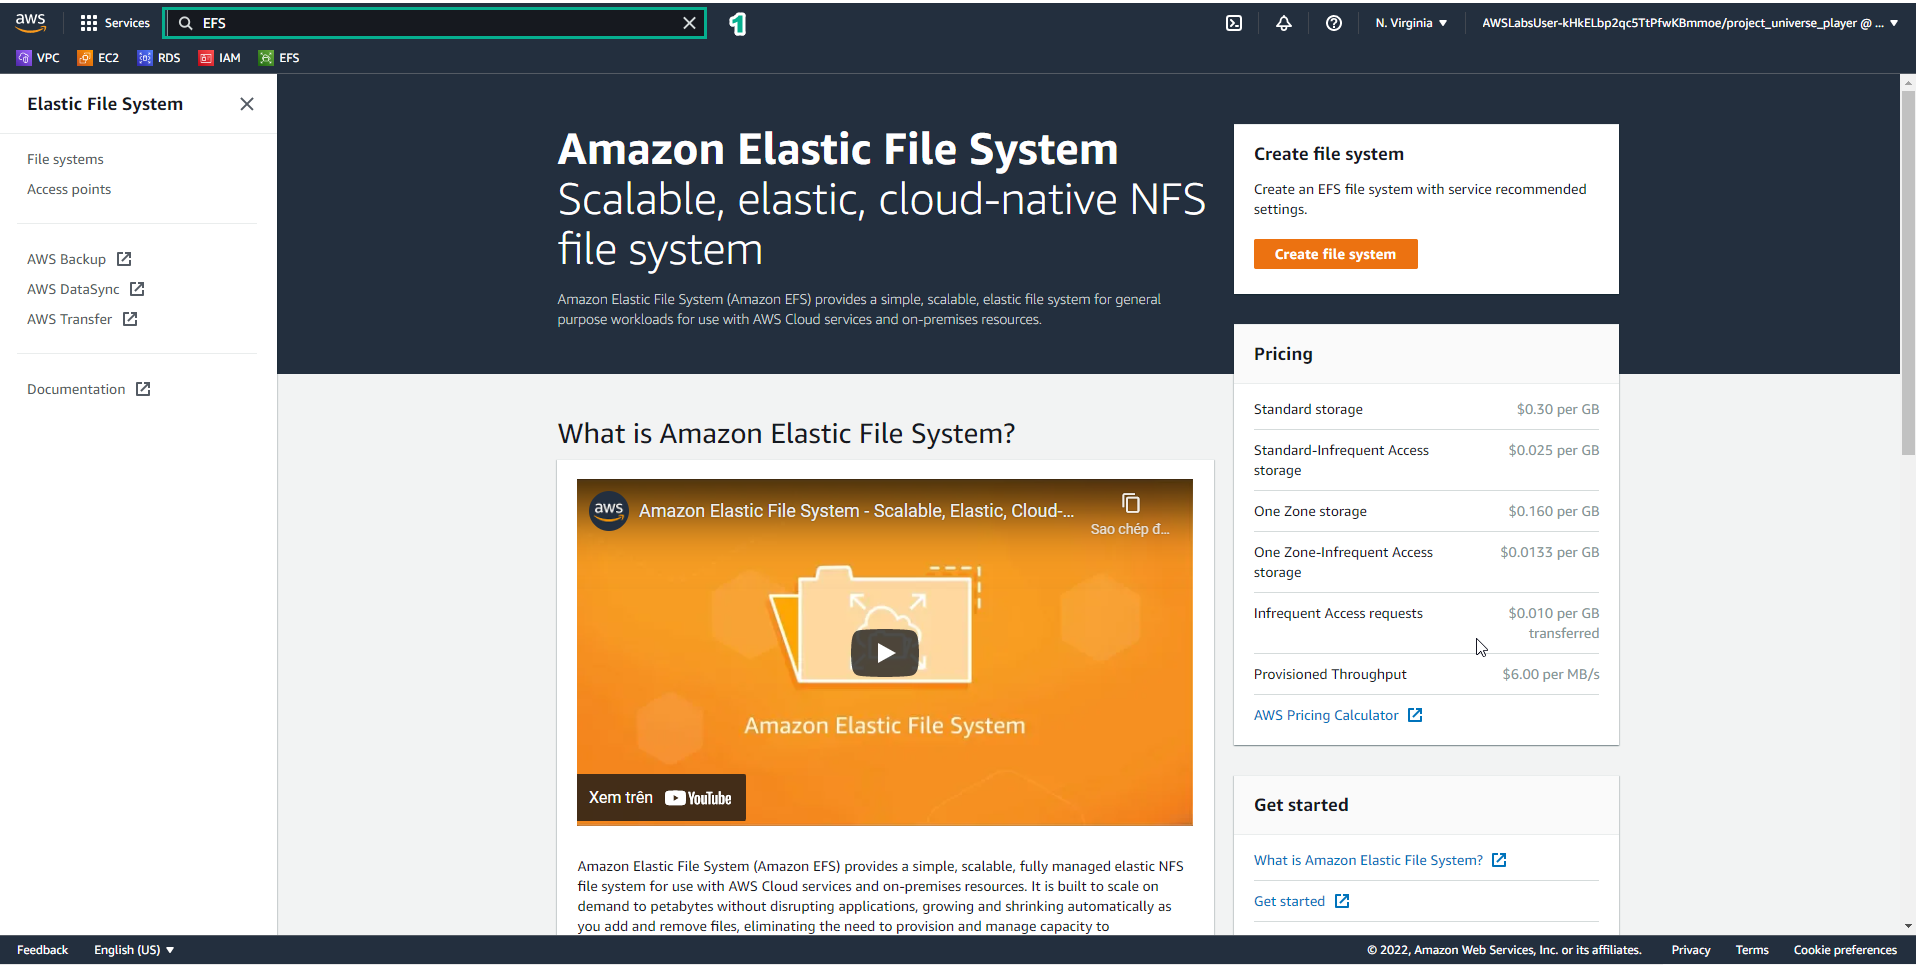
- Trong giao diện AWS Console
- Tìm EFS
- Chọn EFS
- Trong giao diện Practice
- Đọc bước 12 của File Systems in the Cloud
- Đọc CONCEPT
- Chọn mũi tên sang phải để xem các bước tiếp theo
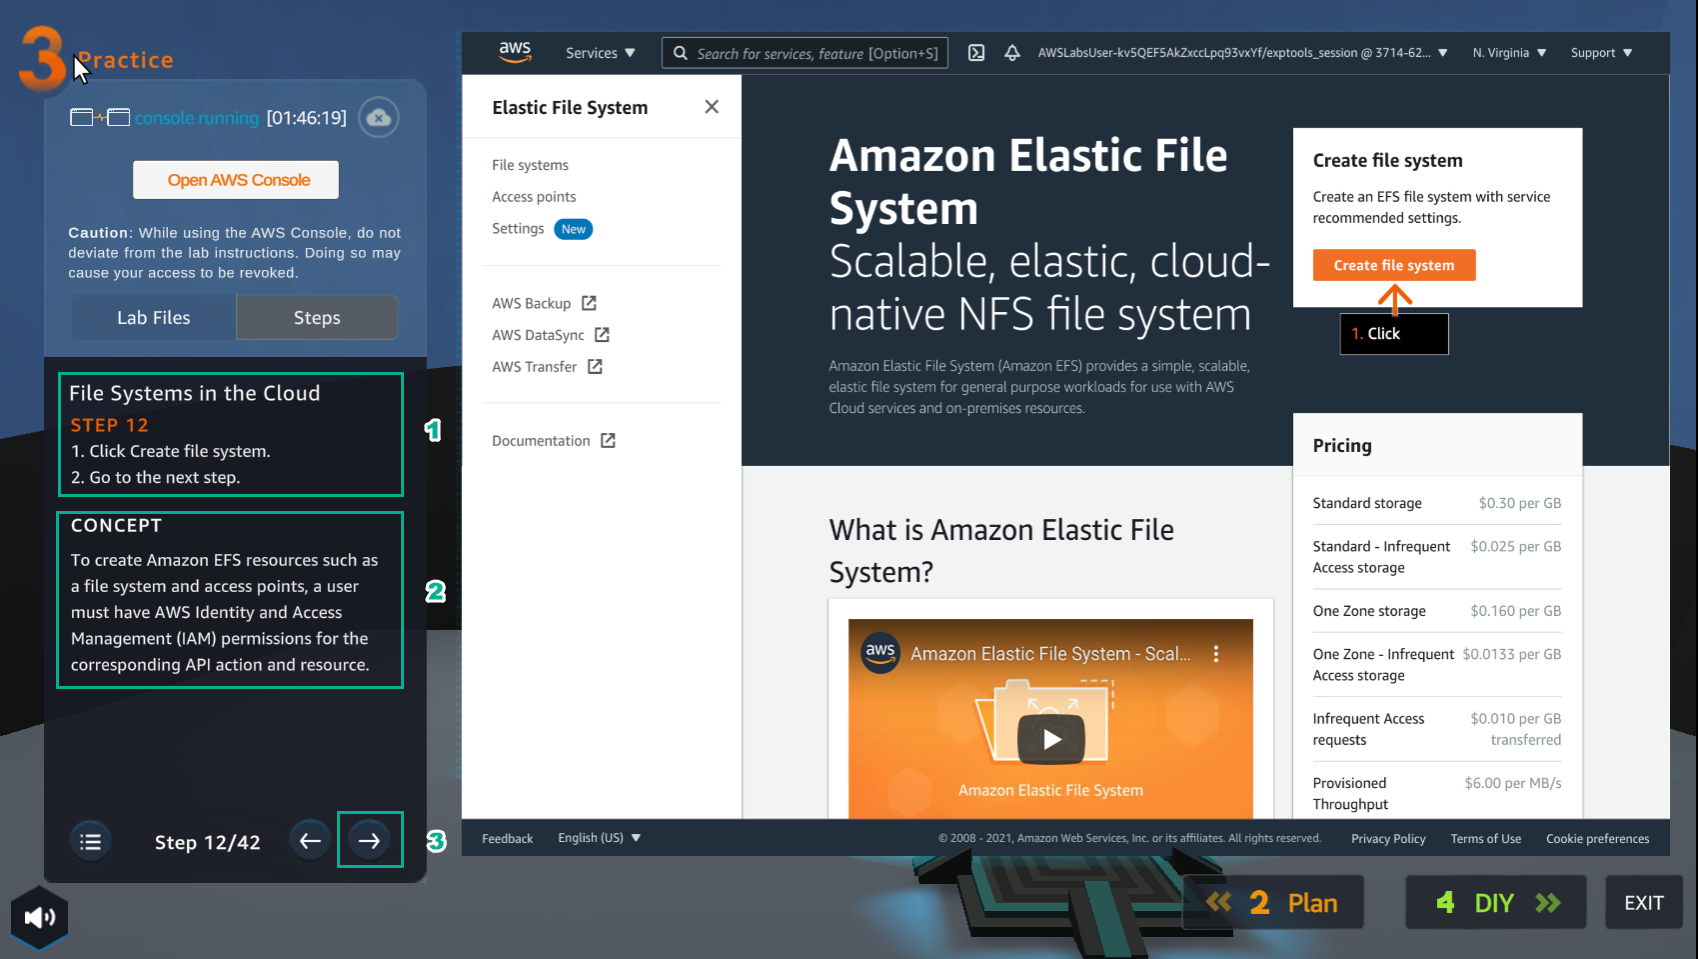
- Trong giao diện EFS
- Chọn Create file system

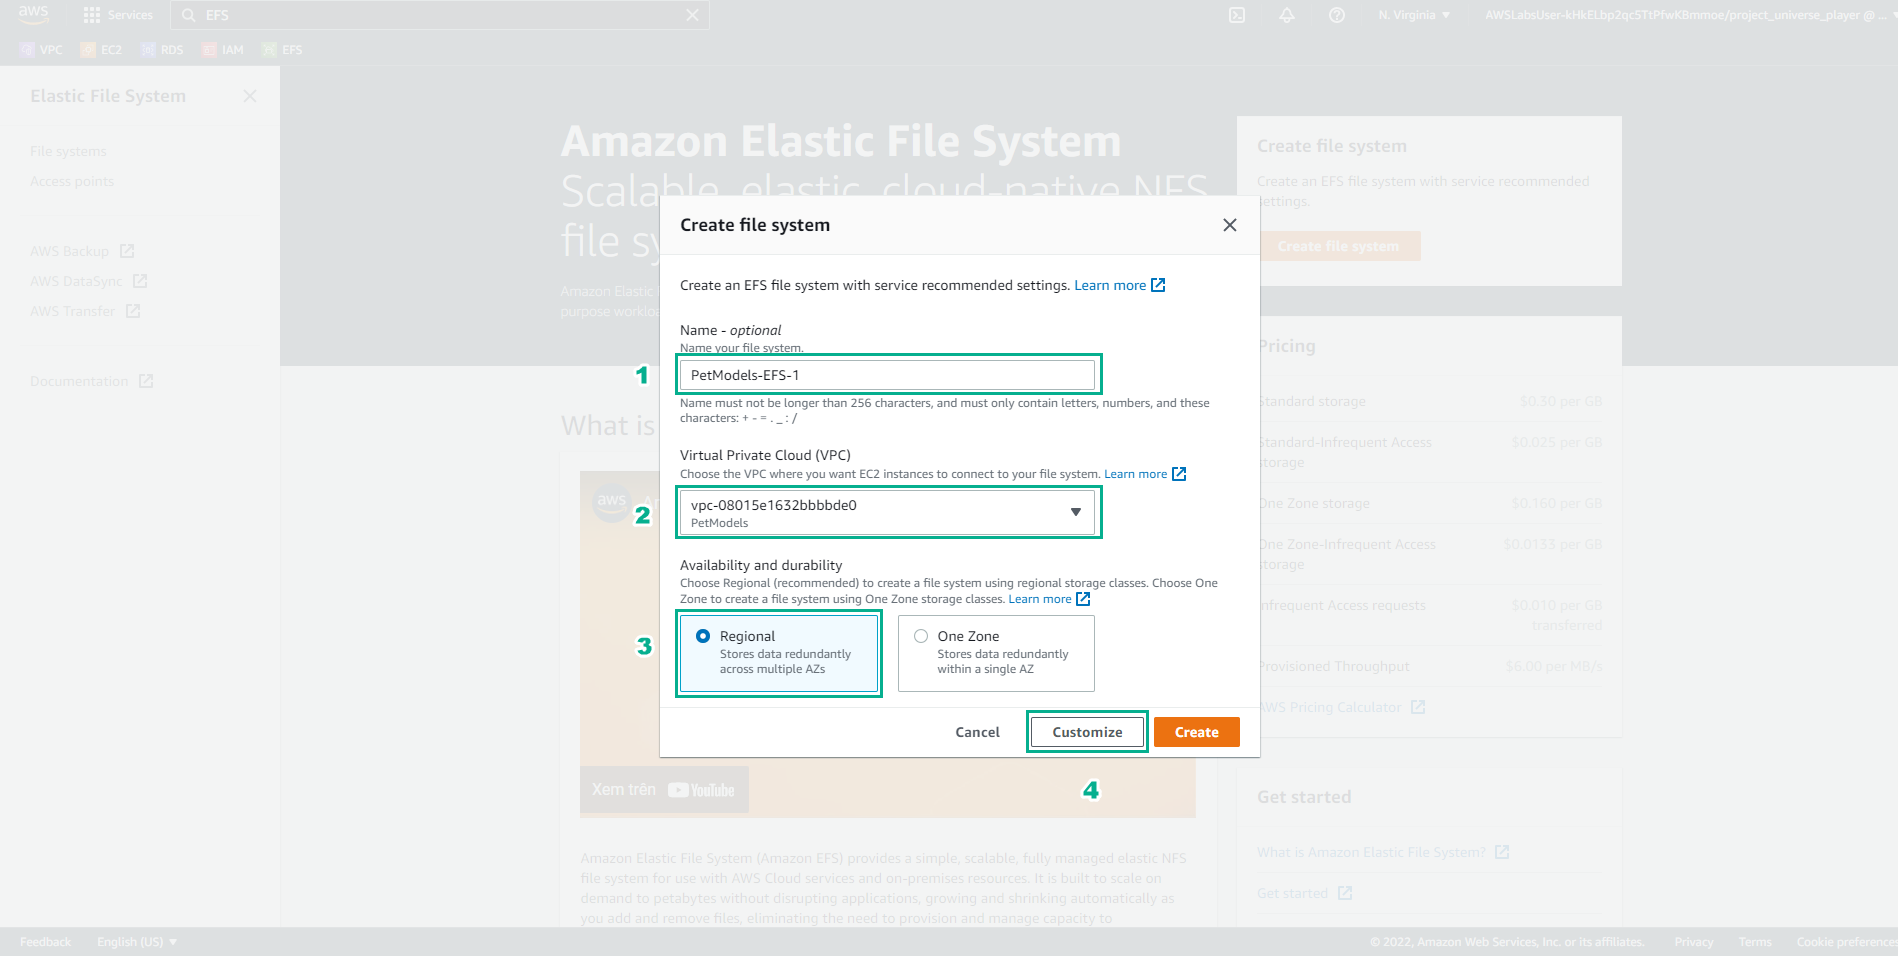
- Trong giao diện Practice
- Đọc bước 13 của File Systems in the Cloud
- Đọc CONCEPT
- Chọn mũi tên sang phải để xem các bước tiếp theo
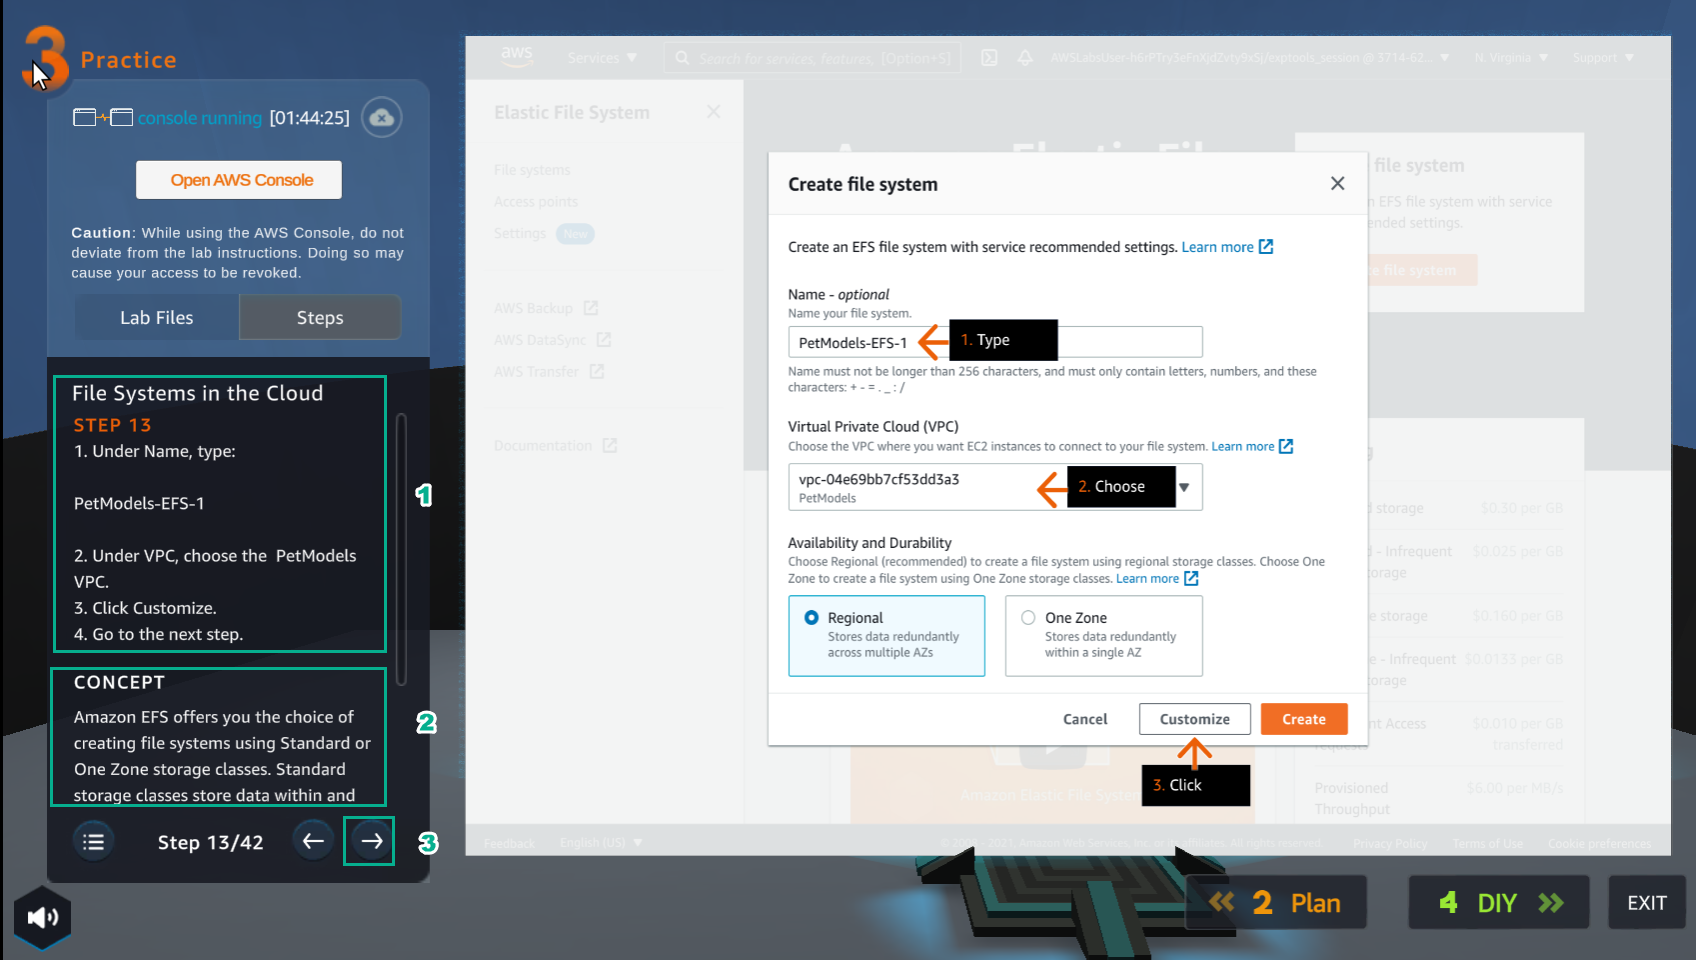
- Trong giao diện Create file system
- Trong Name your file system, nhập
PetModels-EFS-1 - Trong VPC, chọn VPC PetModels
- Trong Availability and durability, chọn Regional
- Chọn Customize
- Trong giao diện Practice
- Đọc bước 14 của File Systems in the Cloud
- Đọc CONCEPT
- Chọn mũi tên sang phải để xem các bước tiếp theo
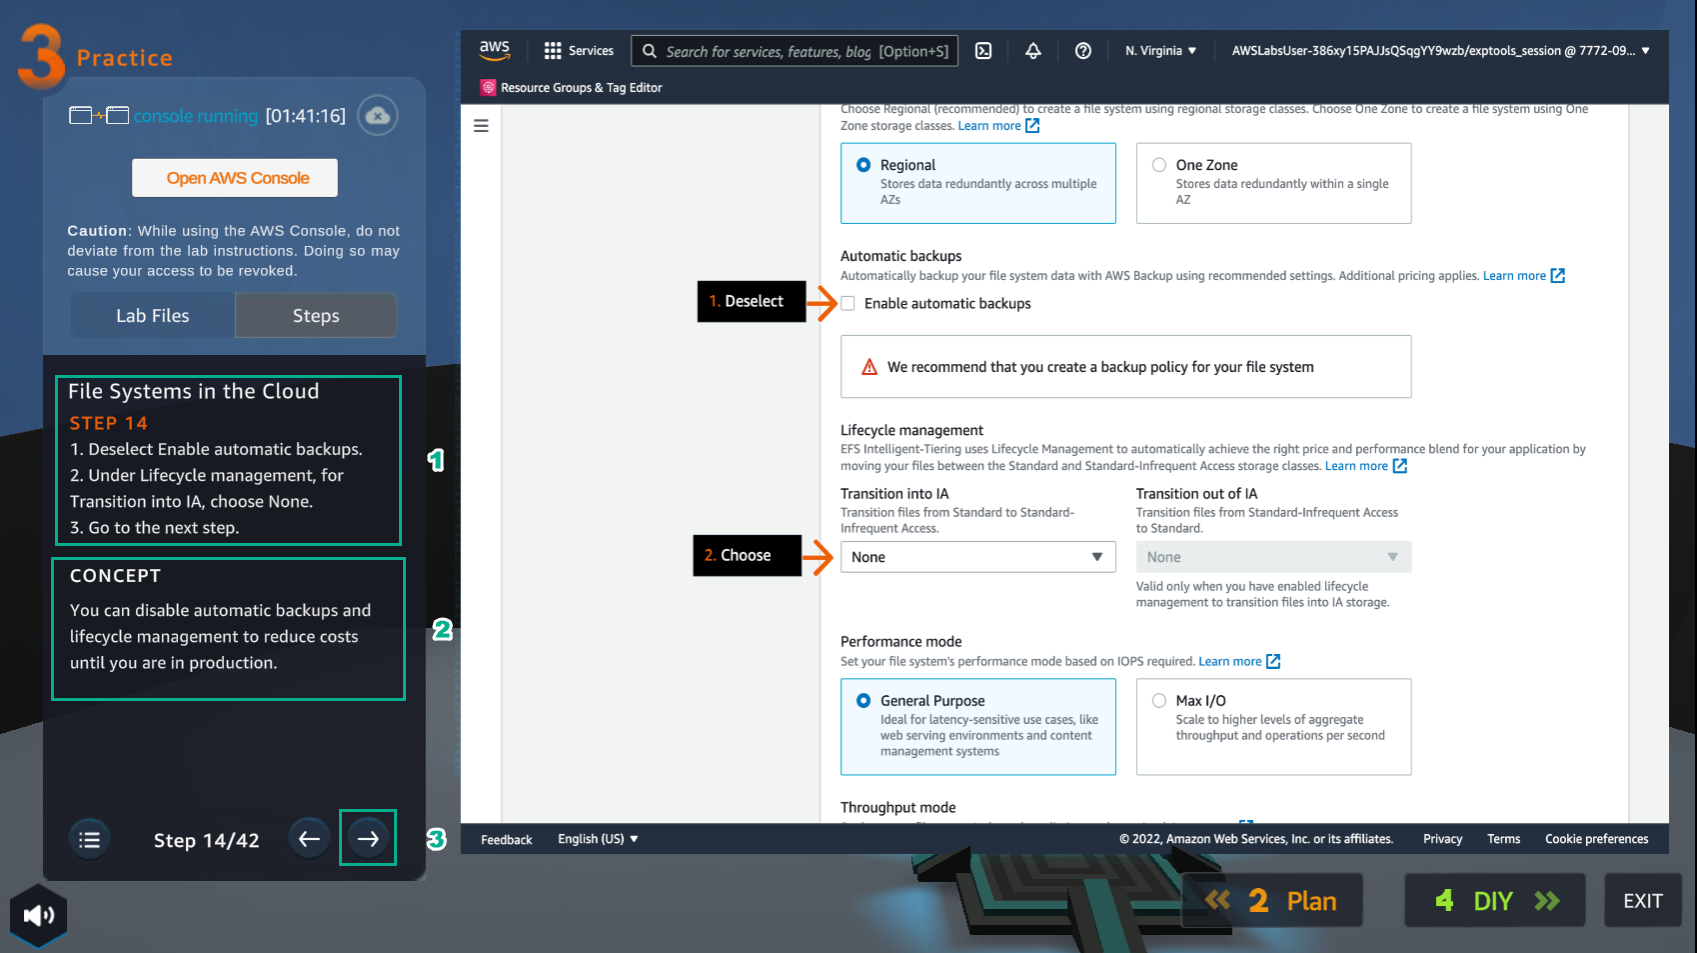
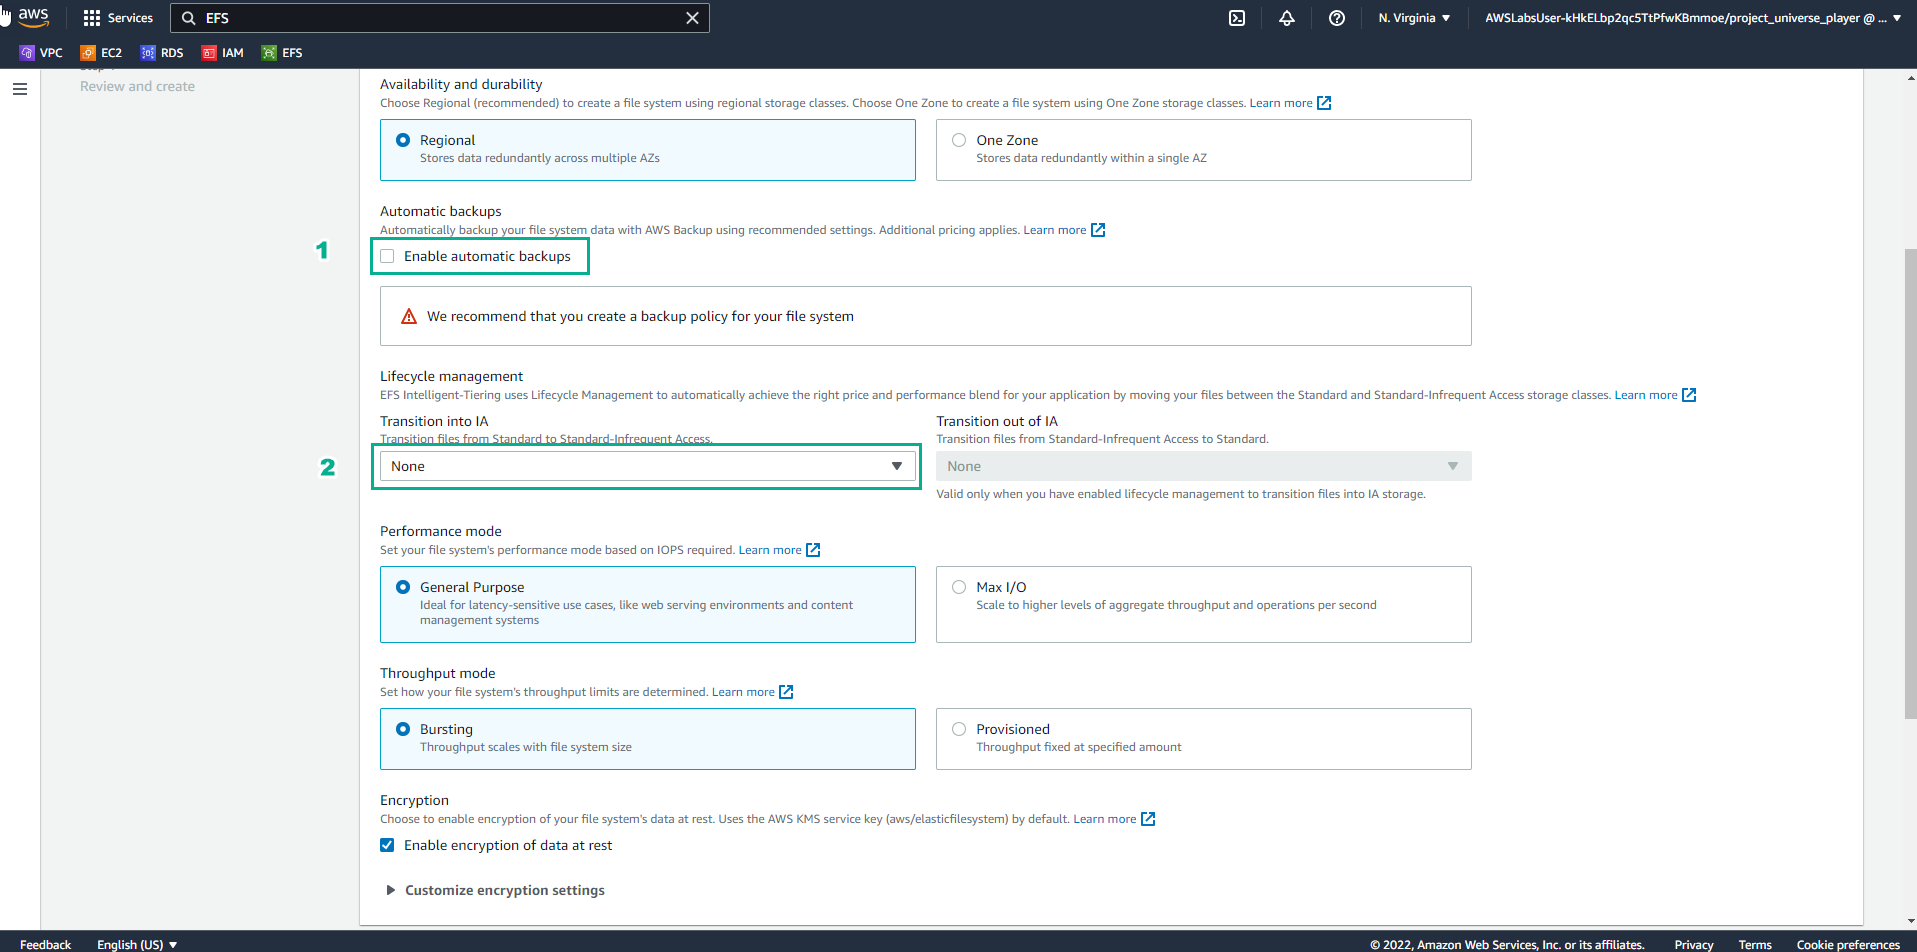
- Trong giao diện EFS
- Trong Automatic backups, bỏ chọn Enable automatic backups
- Trong Transition into IA, chọn None
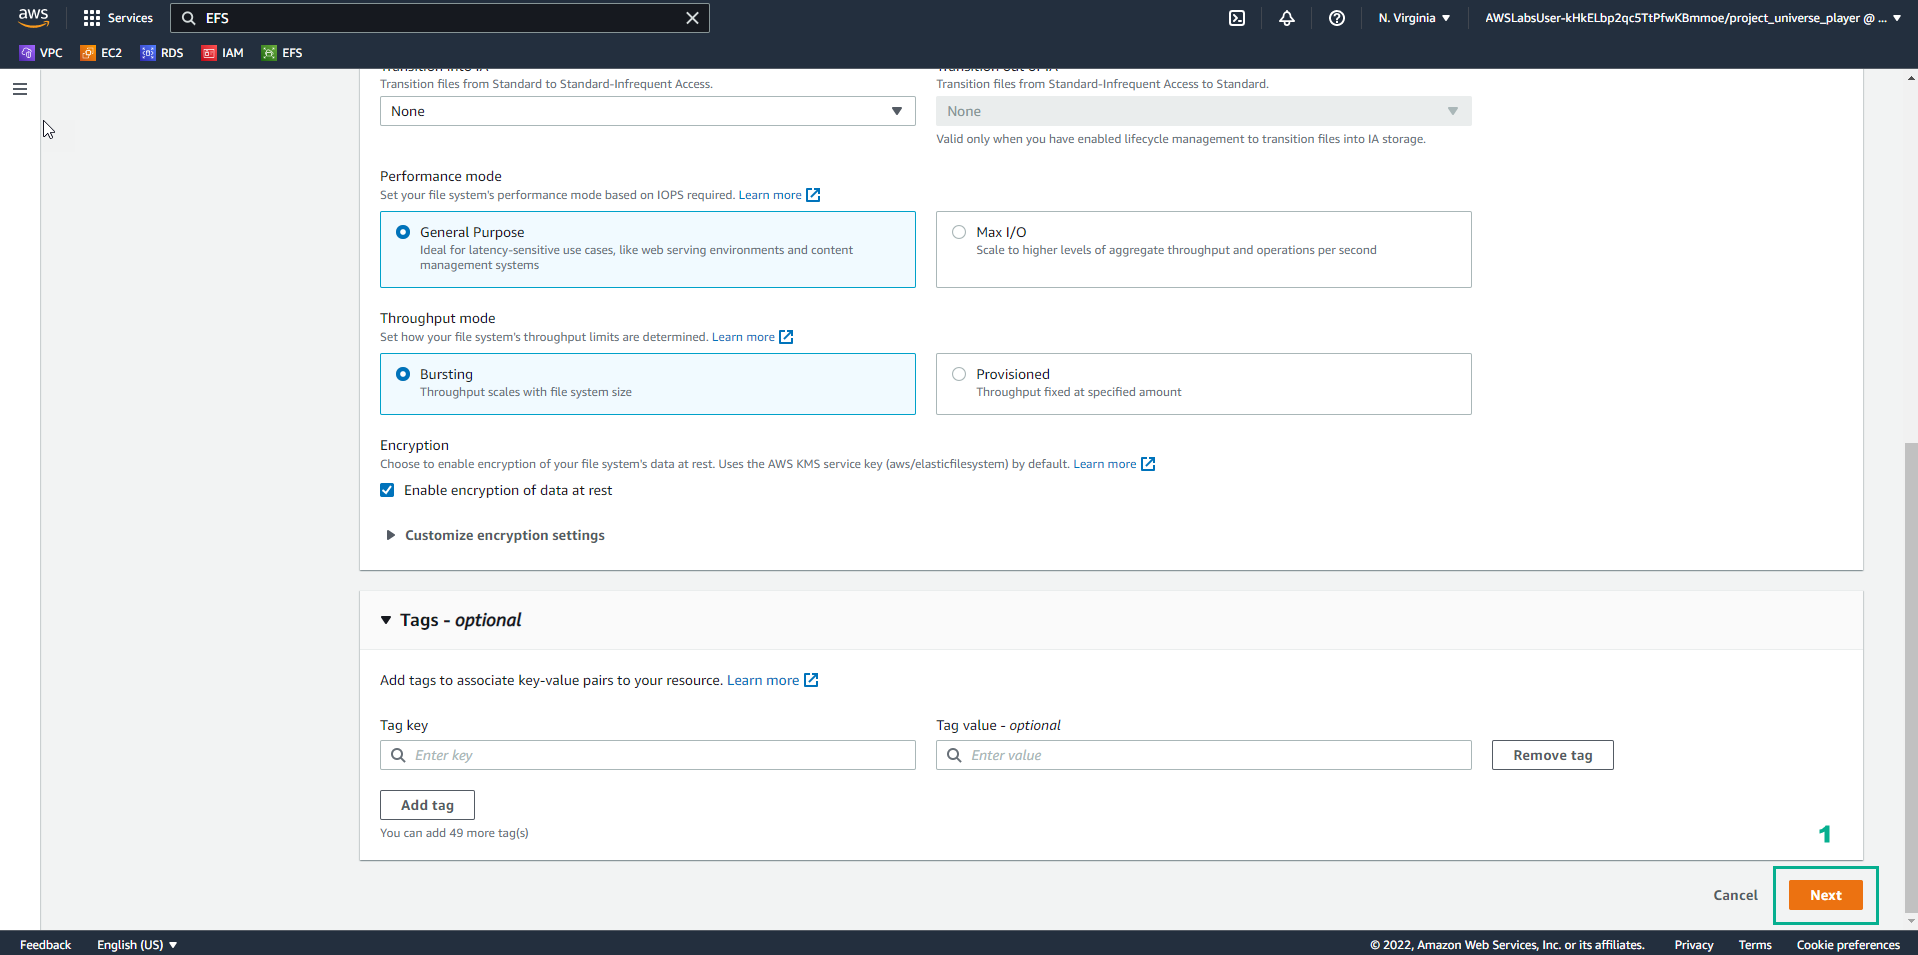
- Trong giao diện Practice
- Đọc bước 15 của File Systems in the Cloud
- Chọn mũi tên sang phải để xem các bước tiếp theo
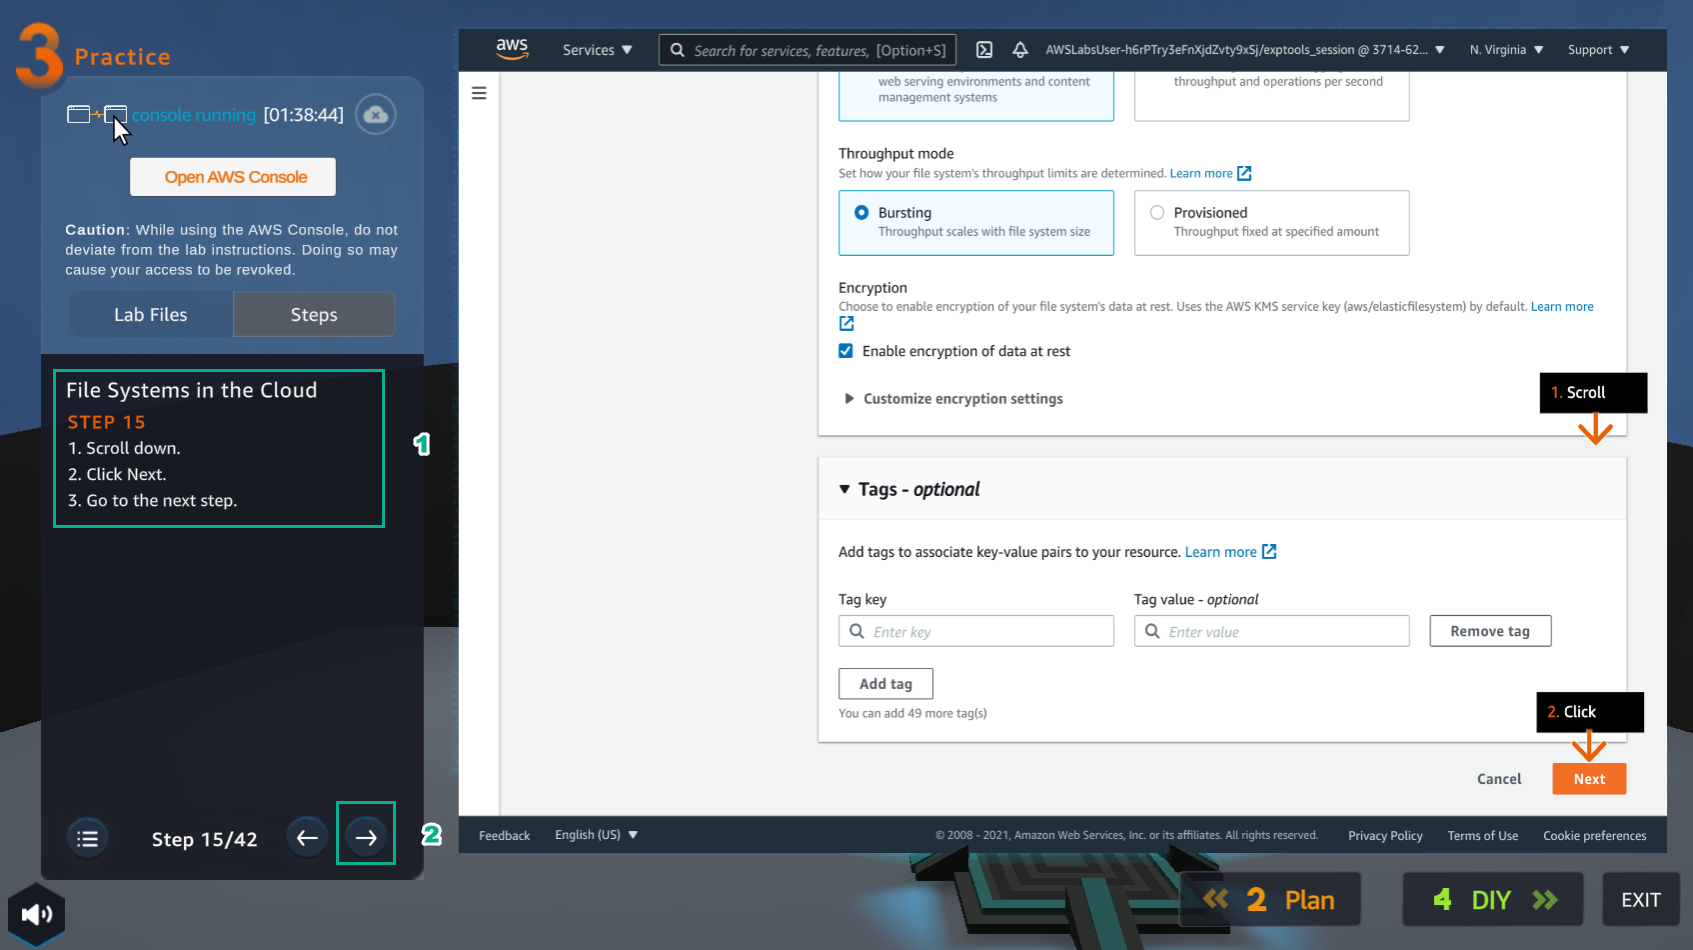
- Trong giao diện EFS
- Chọn Next
- Trong giao diện Practice
- Đọc bước 16 của File Systems in the Cloud
- Đọc CONCEPT
- Chọn mũi tên sang phải để xem các bước tiếp theo
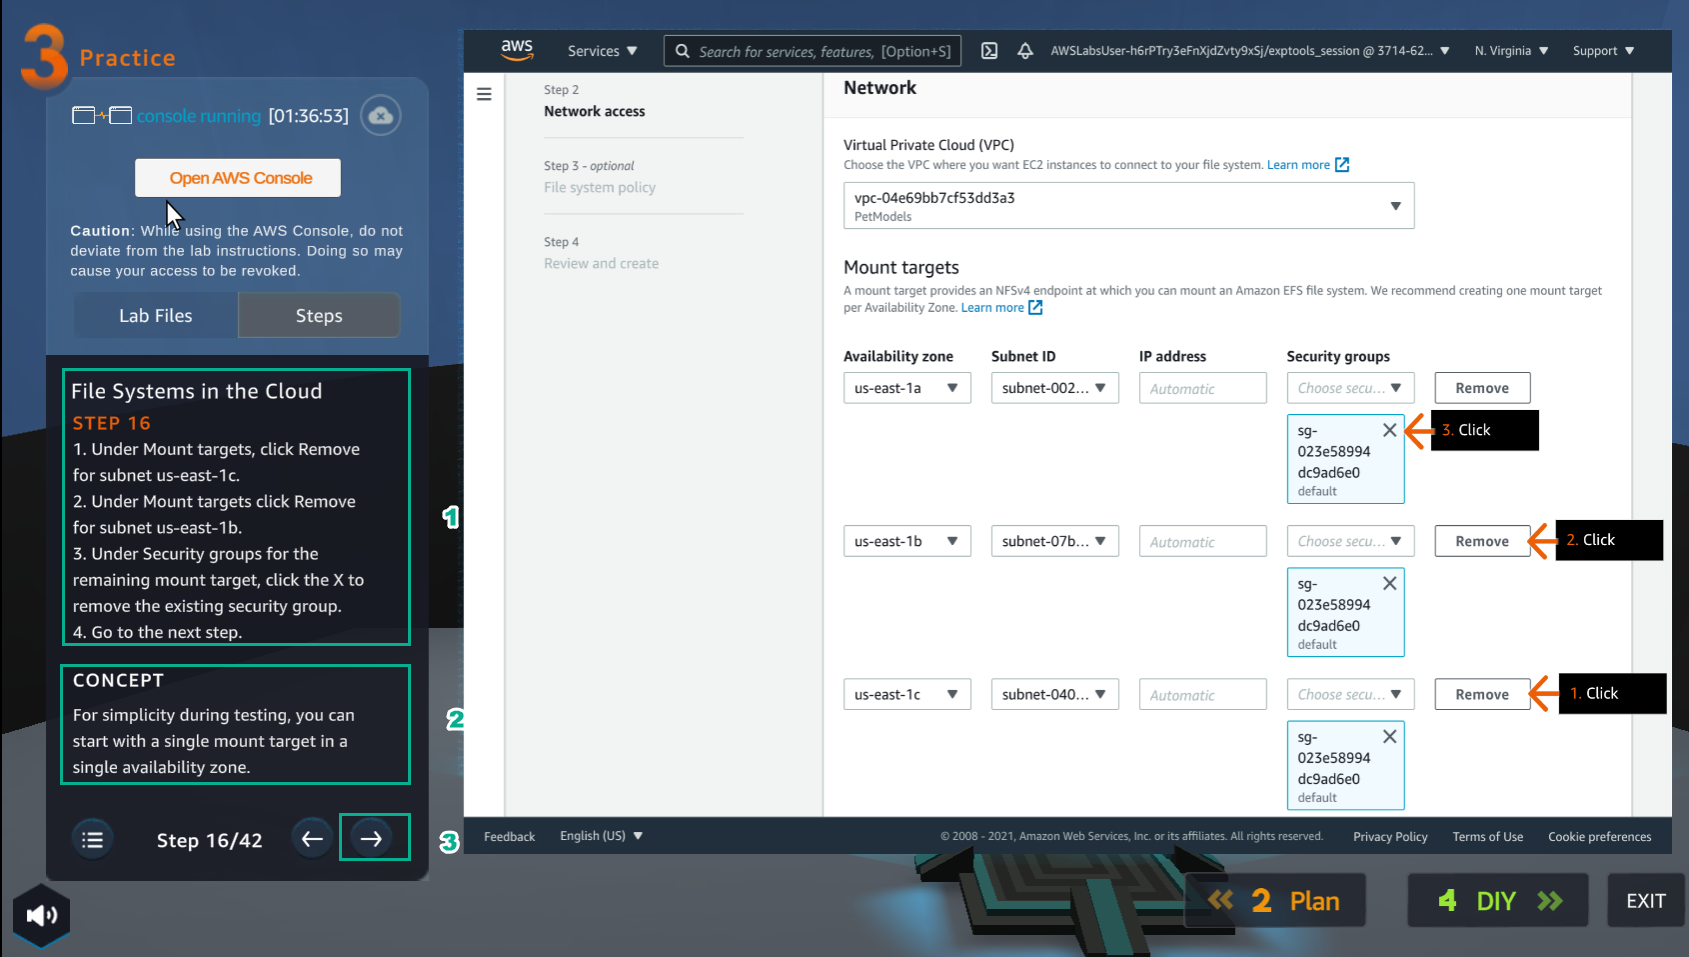
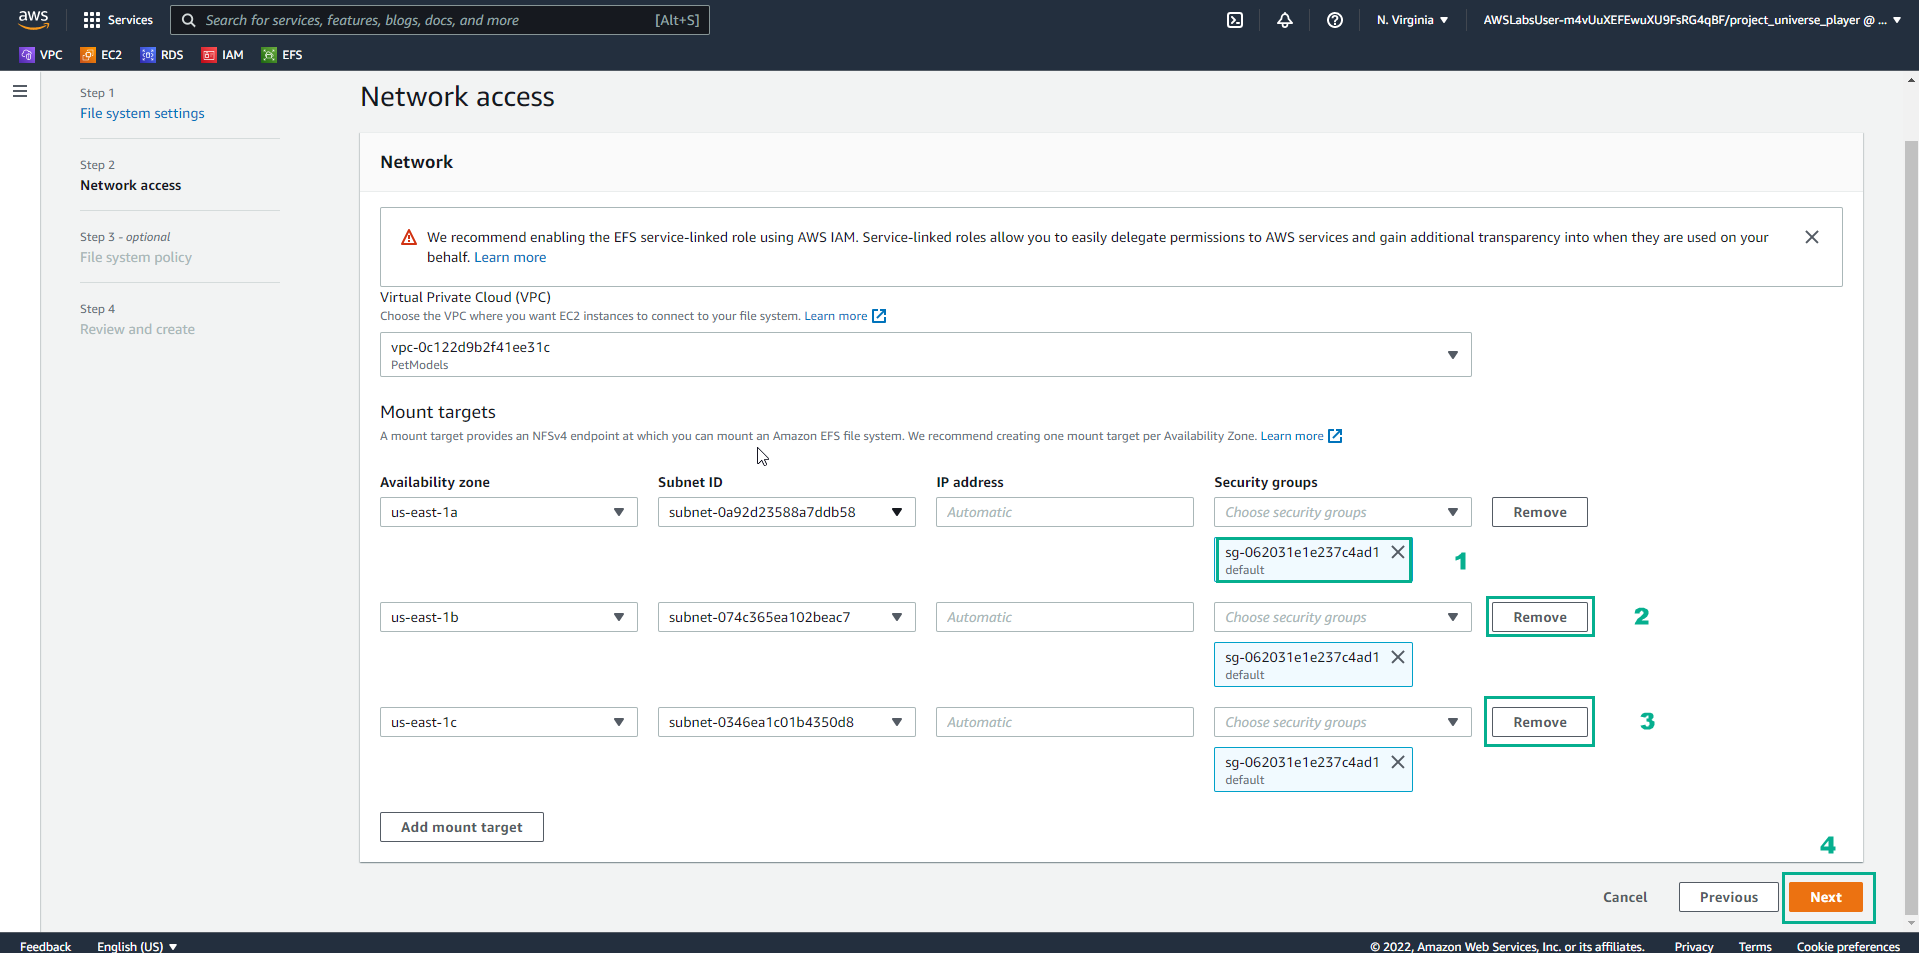
- Trong giao diện Network Access
- Thực hiện bỏ security của AZ us-east-1a
- Chọn Remove 2 AZ còn lại
- Chọn Next
- Trong giao diện Practice
- Đọc bước 17 của File Systems in the Cloud
- Đọc CONCEPT
- Chọn mũi tên sang phải để xem các bước tiếp theo
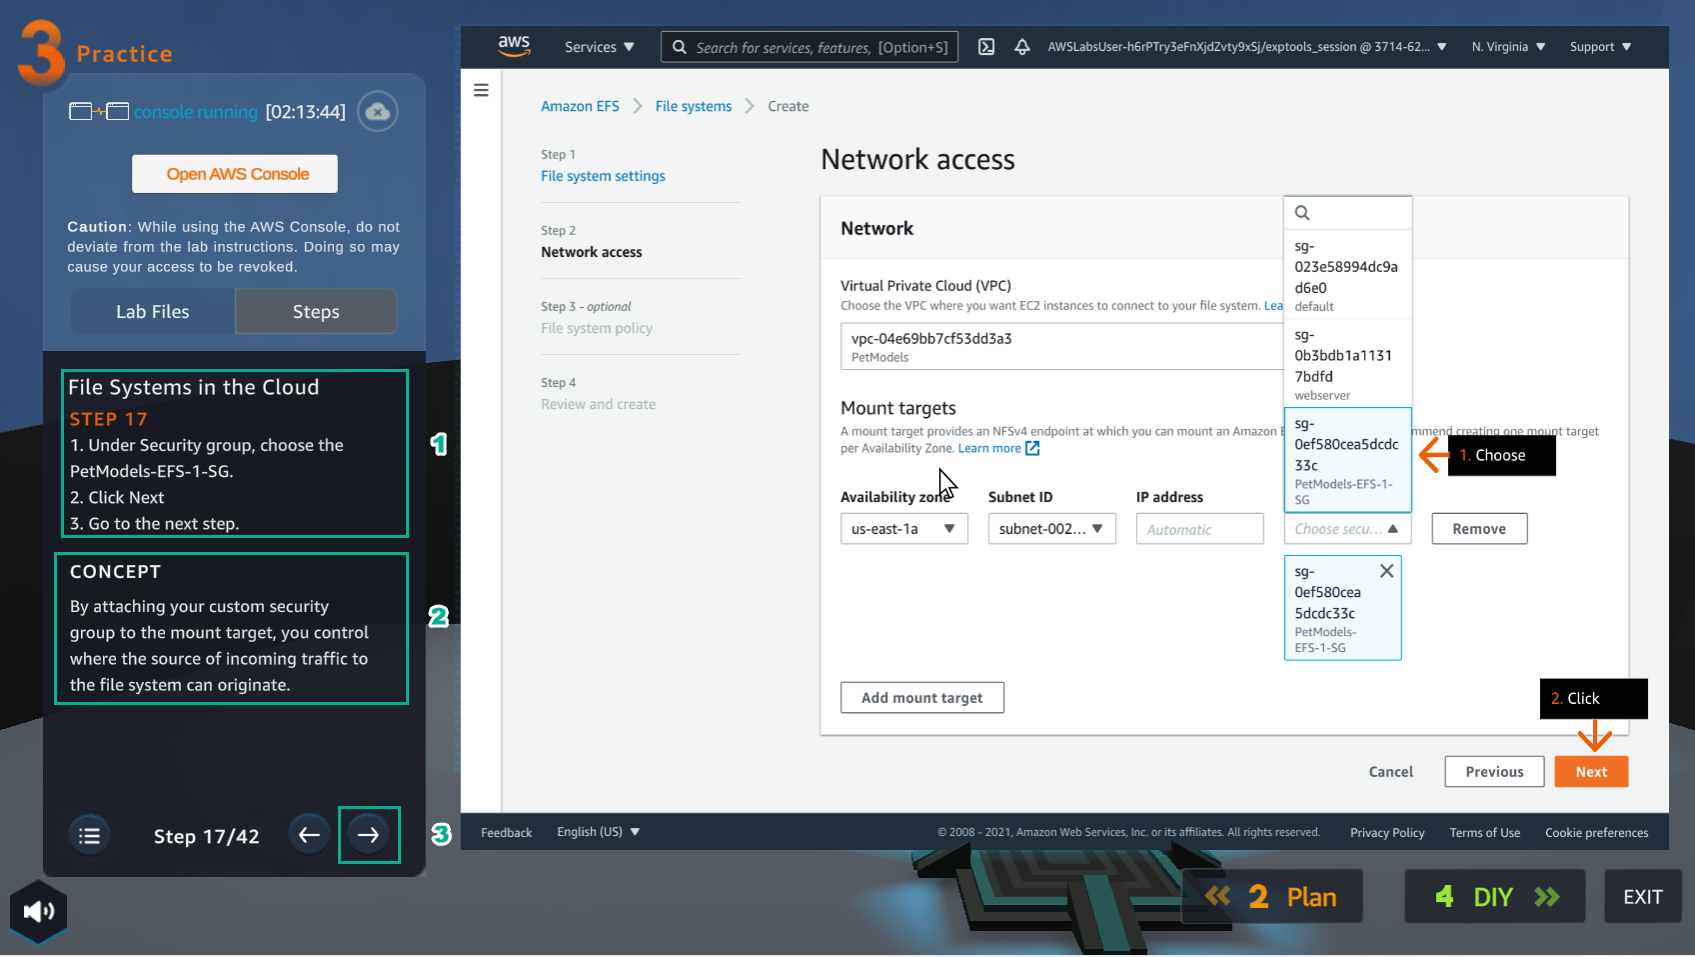
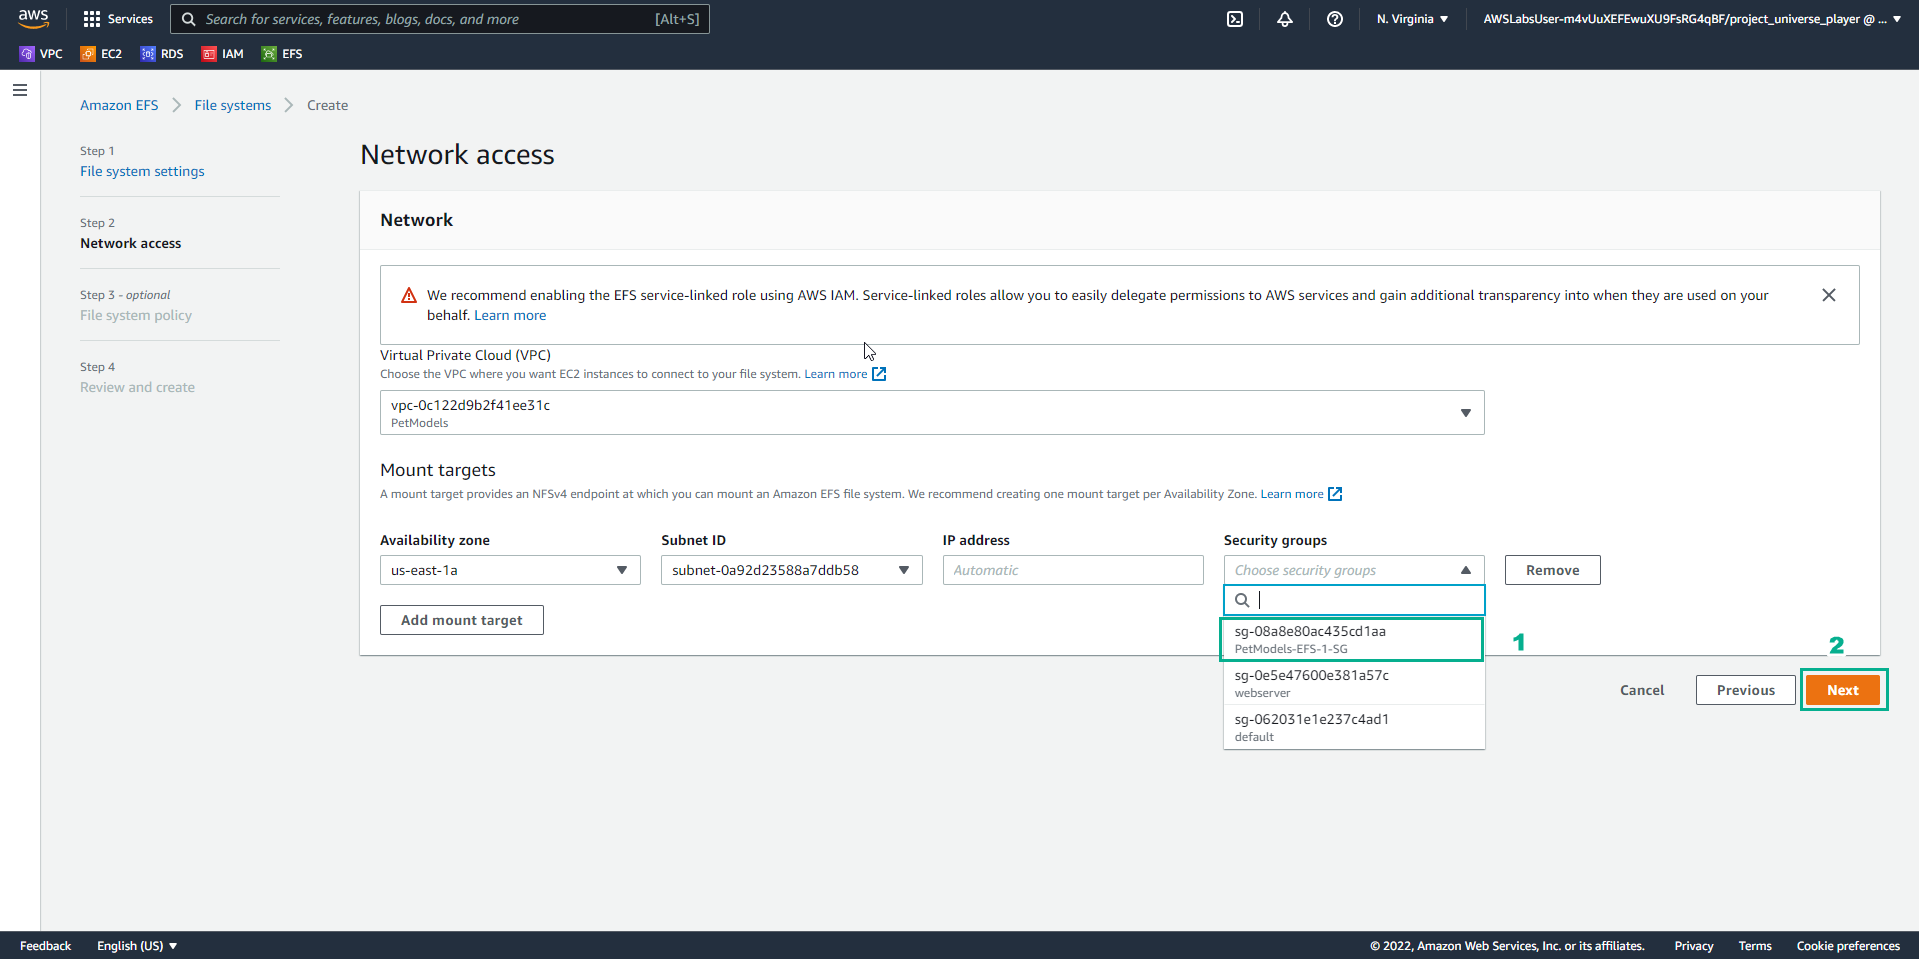
- Trong giao diện Network access
- Trong Security group, chọn PetModels-EFS-1-SG
- Chọn Next*
- Trong giao diện Practice
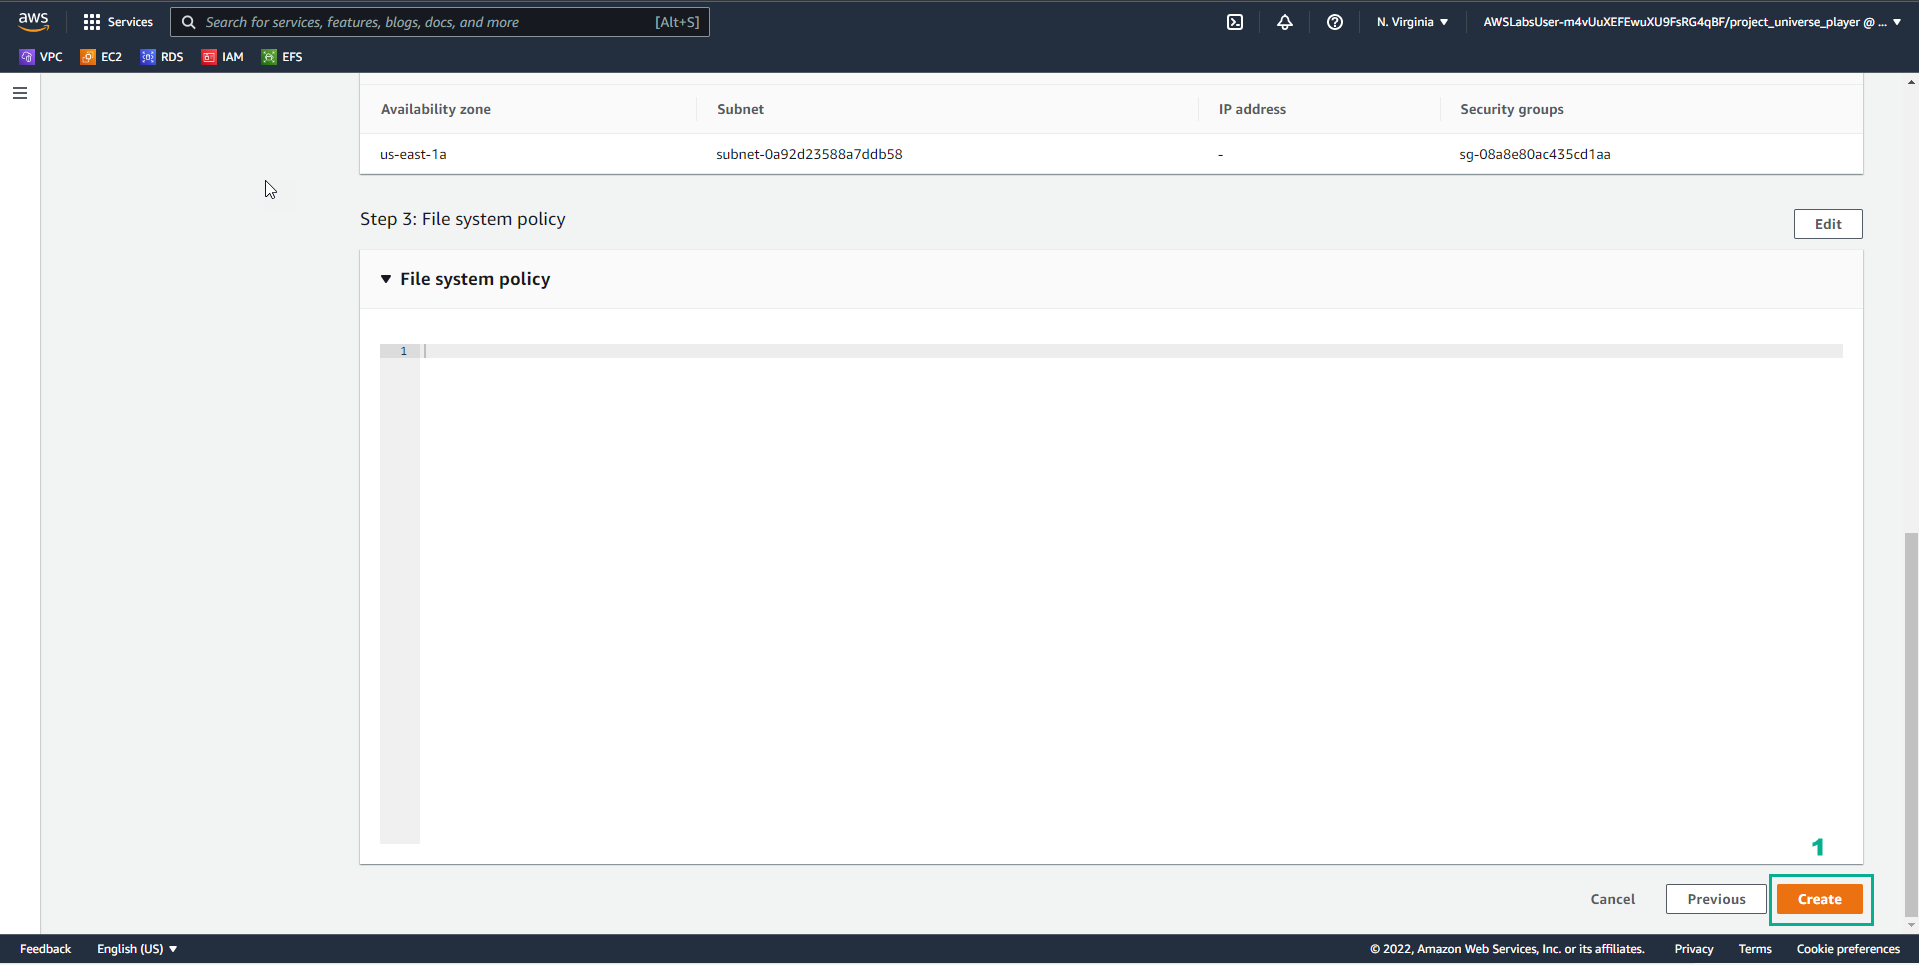
- Đọc bước 18 của File Systems in the Cloud
- Chọn mũi tên sang phải để xem các bước tiếp theo
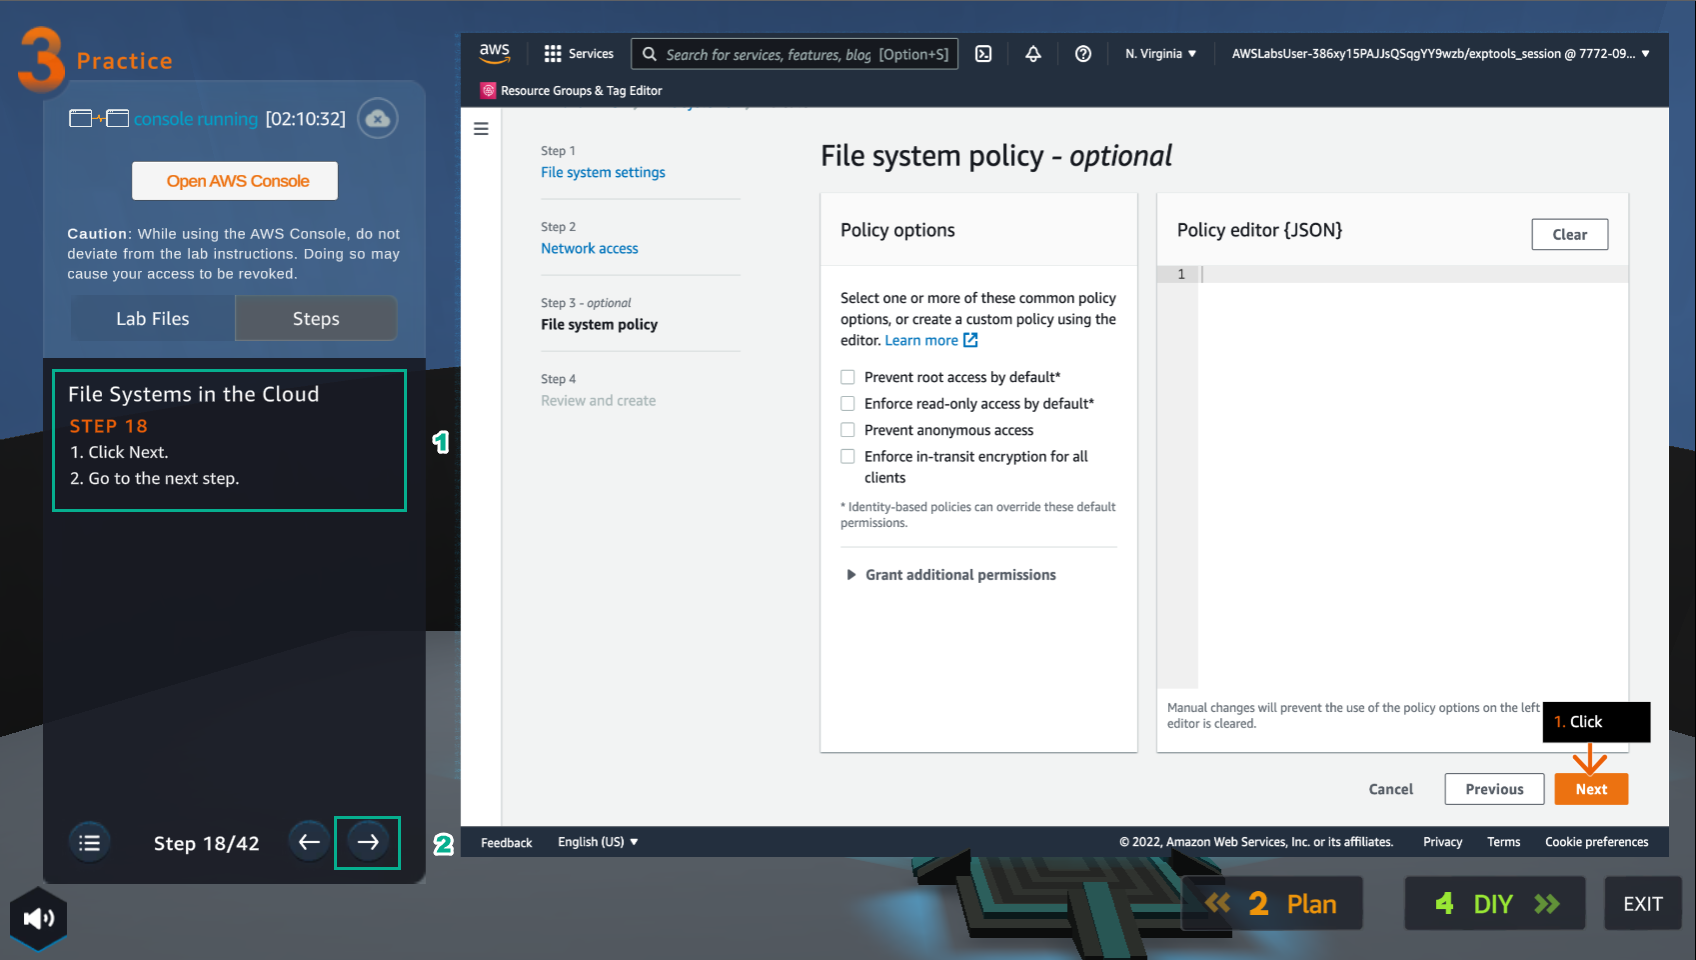
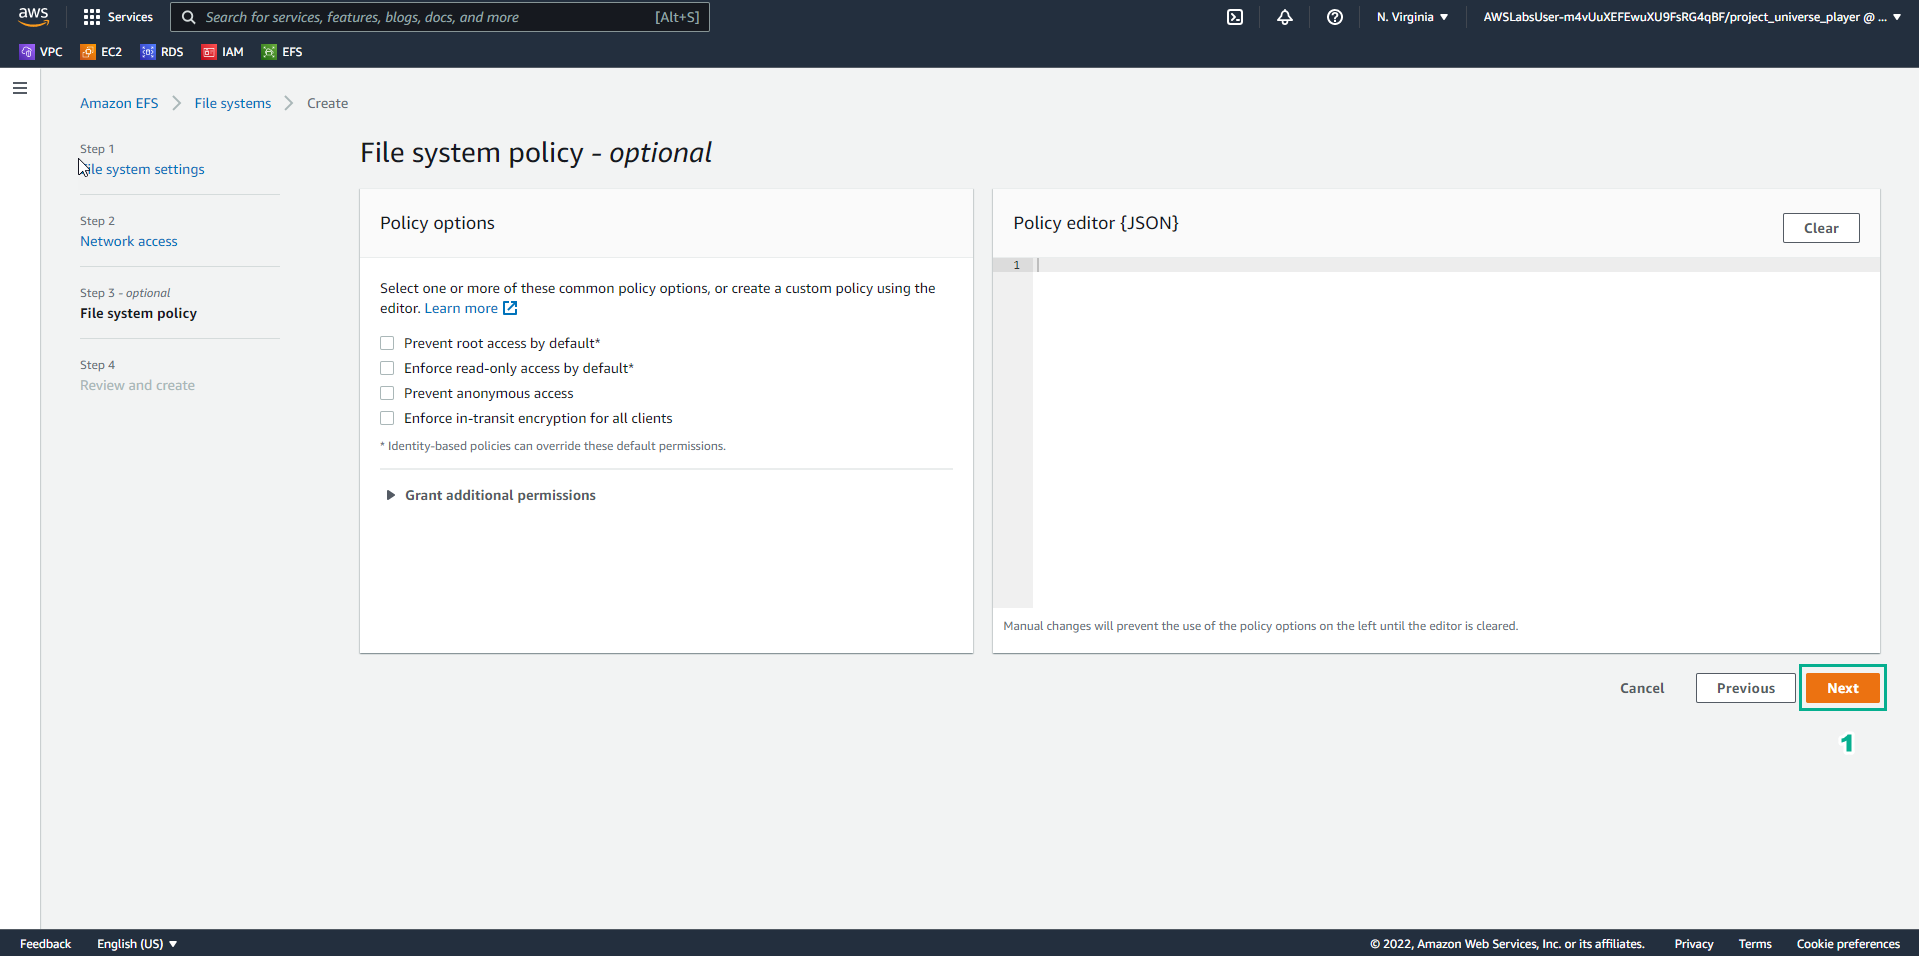
- Trong giao diện File system policy
- Chọn Next
- Trong giao diện Practice
- Đọc bước 19 của File Systems in the Cloud
- Chọn mũi tên sang phải để xem các bước tiếp theo
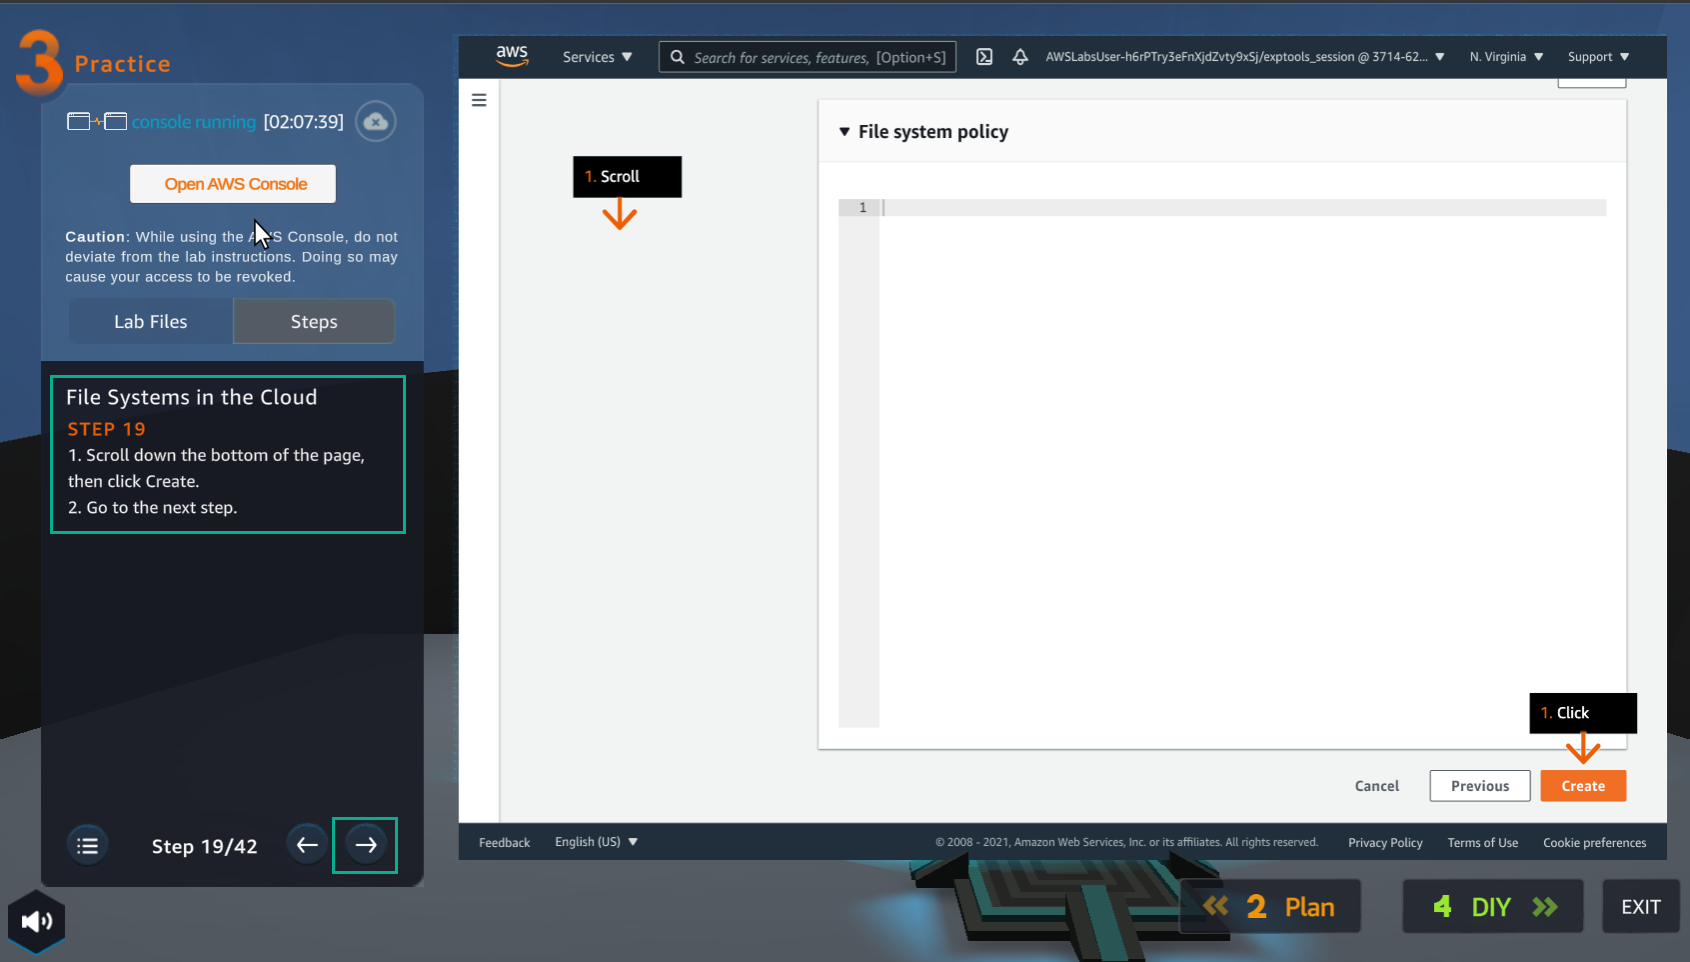
- Trong giao diện Create file system
- Chọn Create
- Trong giao diện Practice
- Đọc bước 20 của File Systems in the Cloud
- Đọc CONCEPT
- Chọn mũi tên sang phải để xem các bước tiếp theo
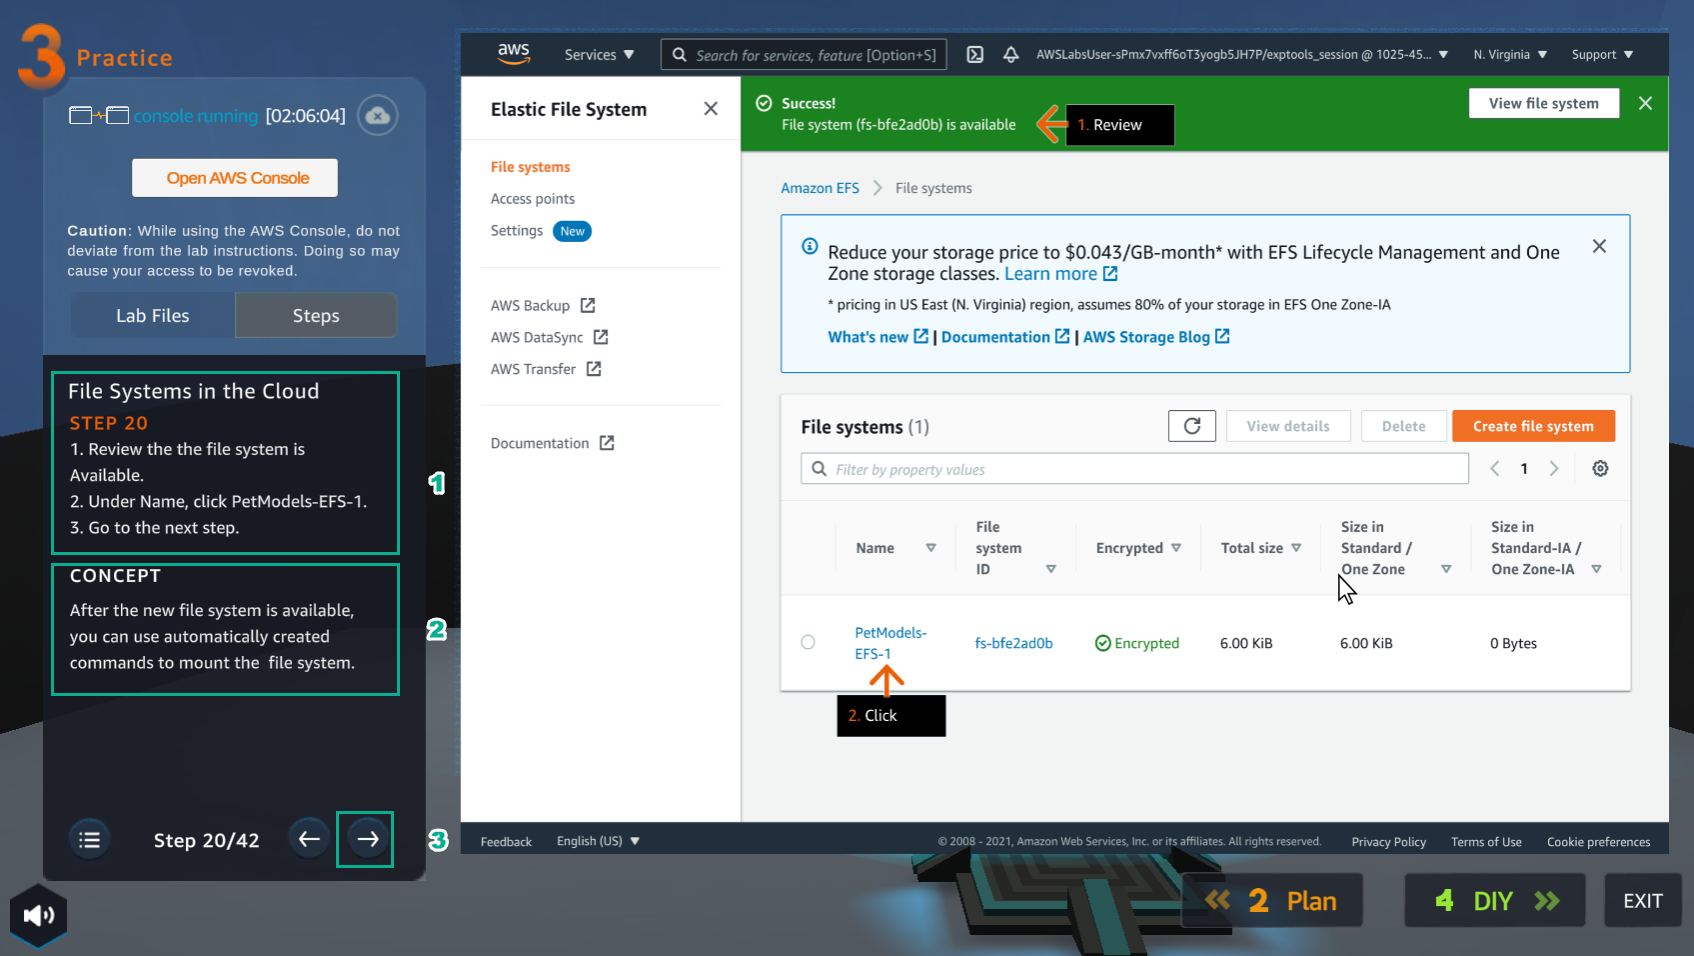
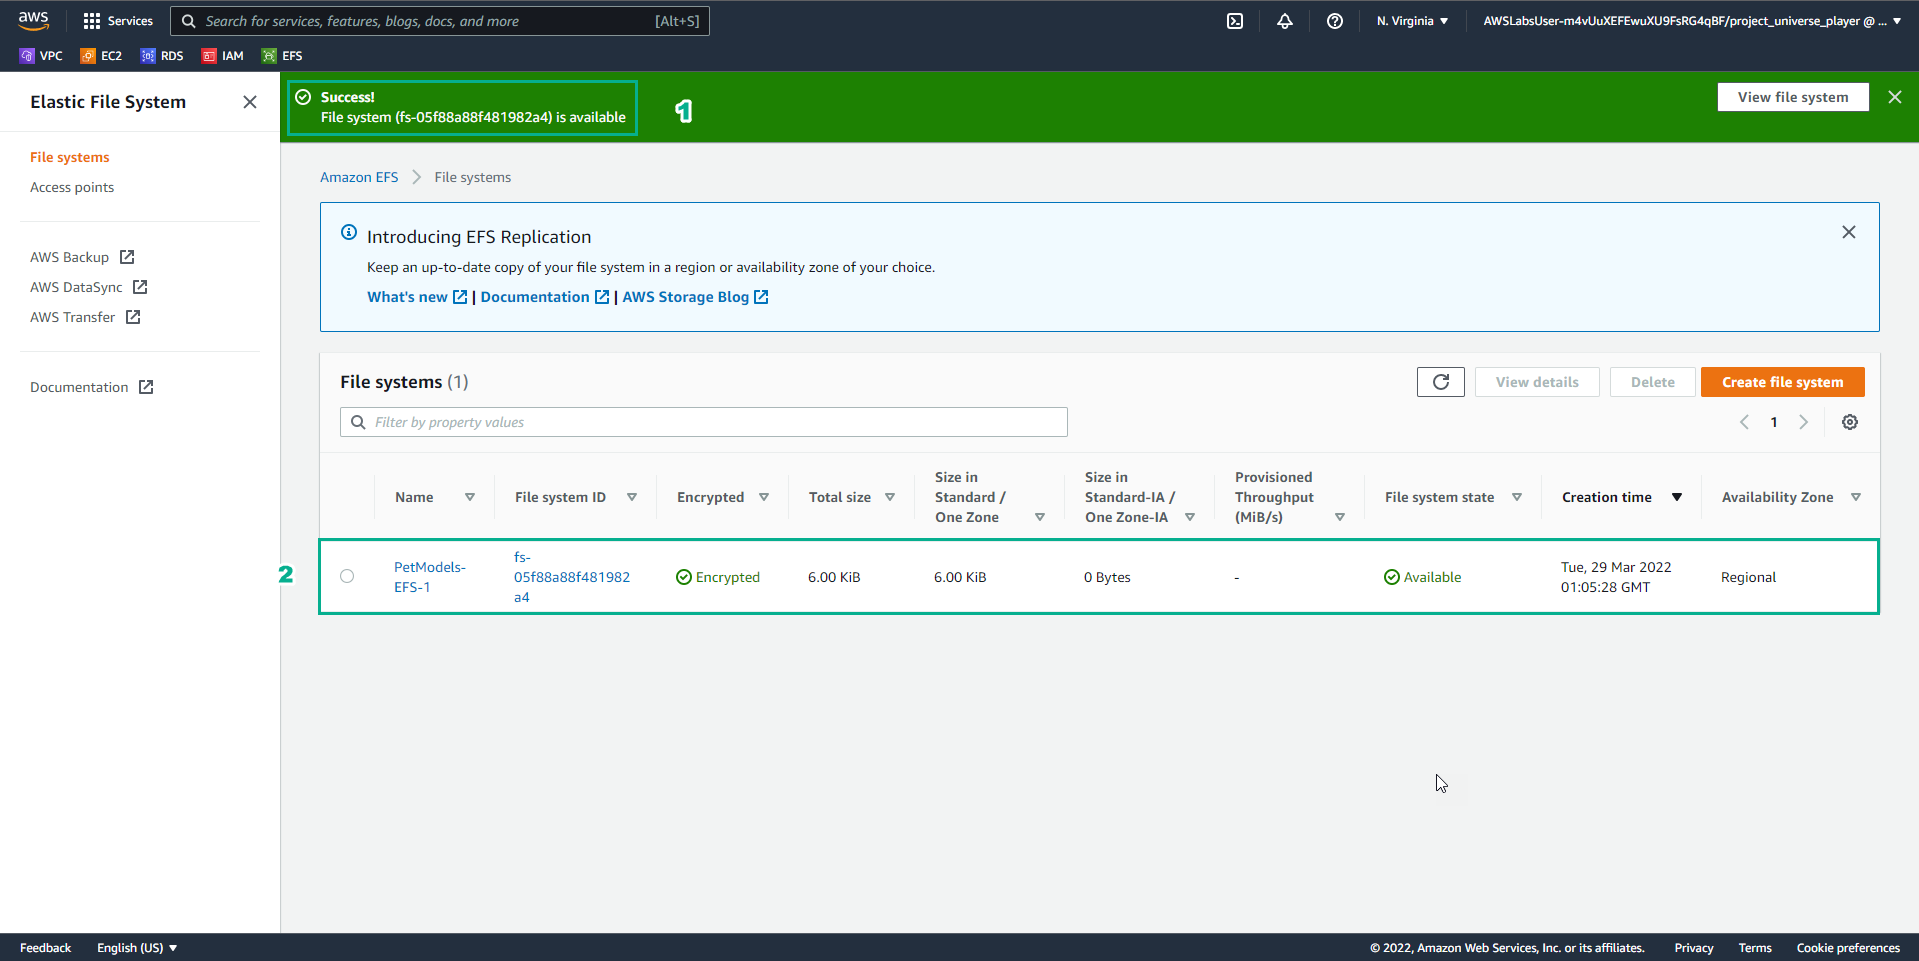
- Trong giao diện EFS
- Xem file system đã tạo thành công
- Chọn File system đã tạo
- Trong giao diên Practice
- Đọc bước 21 của File Systems in the Cloud
- Chọn mũi tên sang phải để xem các bước tiếp theo
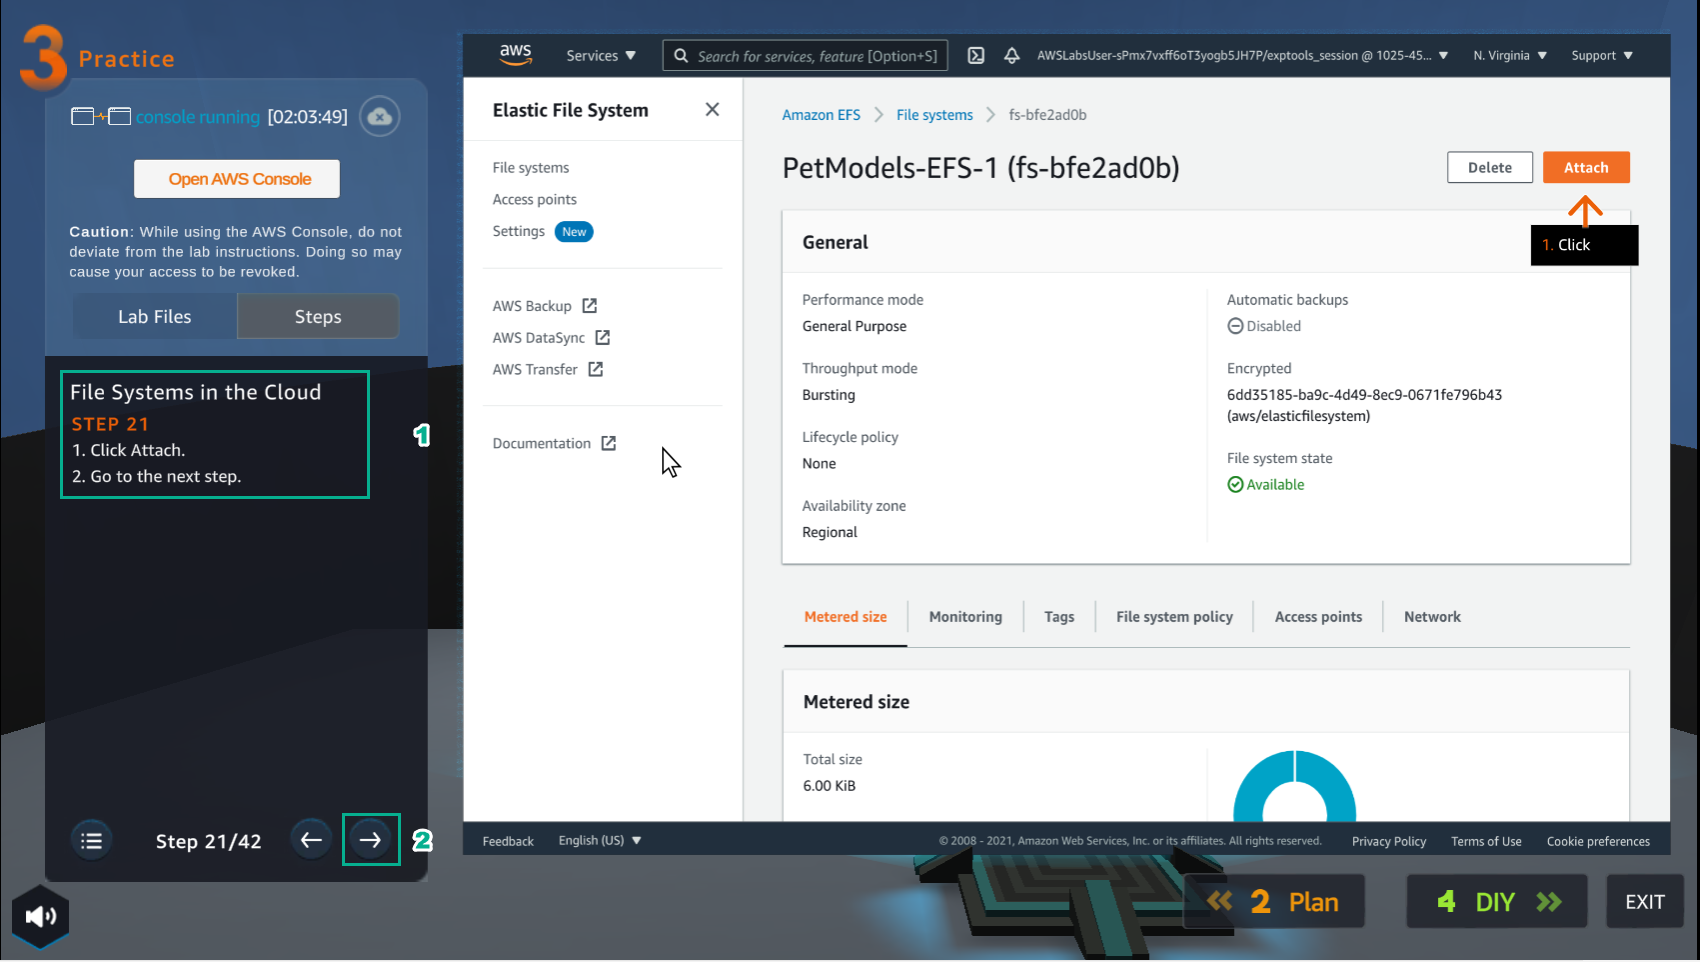
- Trong giao diện file systems
- Chọn Attach
- Trong giao diện Practice
- Đọc bước 22 của File Systems in the Cloud
- Đọc CONCEPT
- Chọn mũi tên sang phải để xem các bước tiếp theo
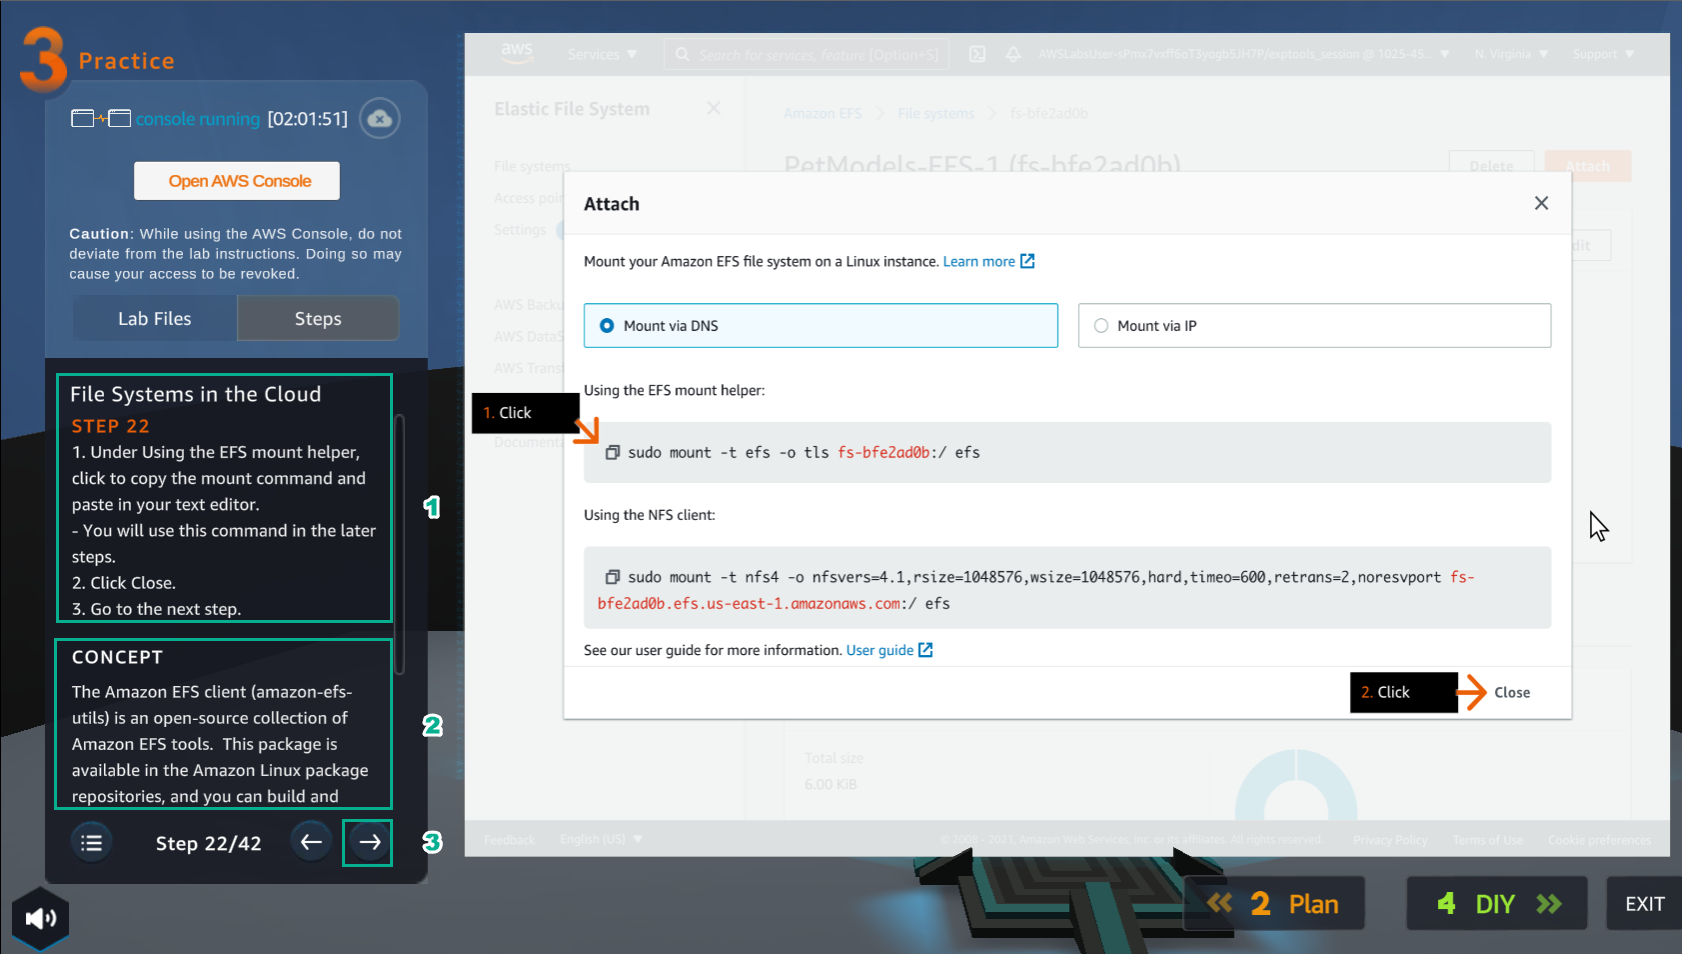
- Trong giao diện Attach
- Trong Using the EFS mount helper, sao chép dòng lệnh
- Chọn Close
- Trong giao diện Practice
- Đọc bước 23 của File Systems in the Cloud
- Đọc CONCEPT
- Chọn mũi tên sang phải để xem các bước tiếp theo
- Trong giao diện AWS Console
- Tìm EC2
- Chọn EC2
- Trong giao diện Practice
- Đọc bước 24 của File Systems in the Cloud
- Chọn mũi tên sang phải để xem các bước tiếp theo

- Trong giao diện EC2
- Chọn Instances
- Trong giao diện Practice
- Đọc bước 25 của File Systems in the Cloud
- Đọc CONCEPT
- Chọn mũi tên sang phải để xem các bước tiếp theo

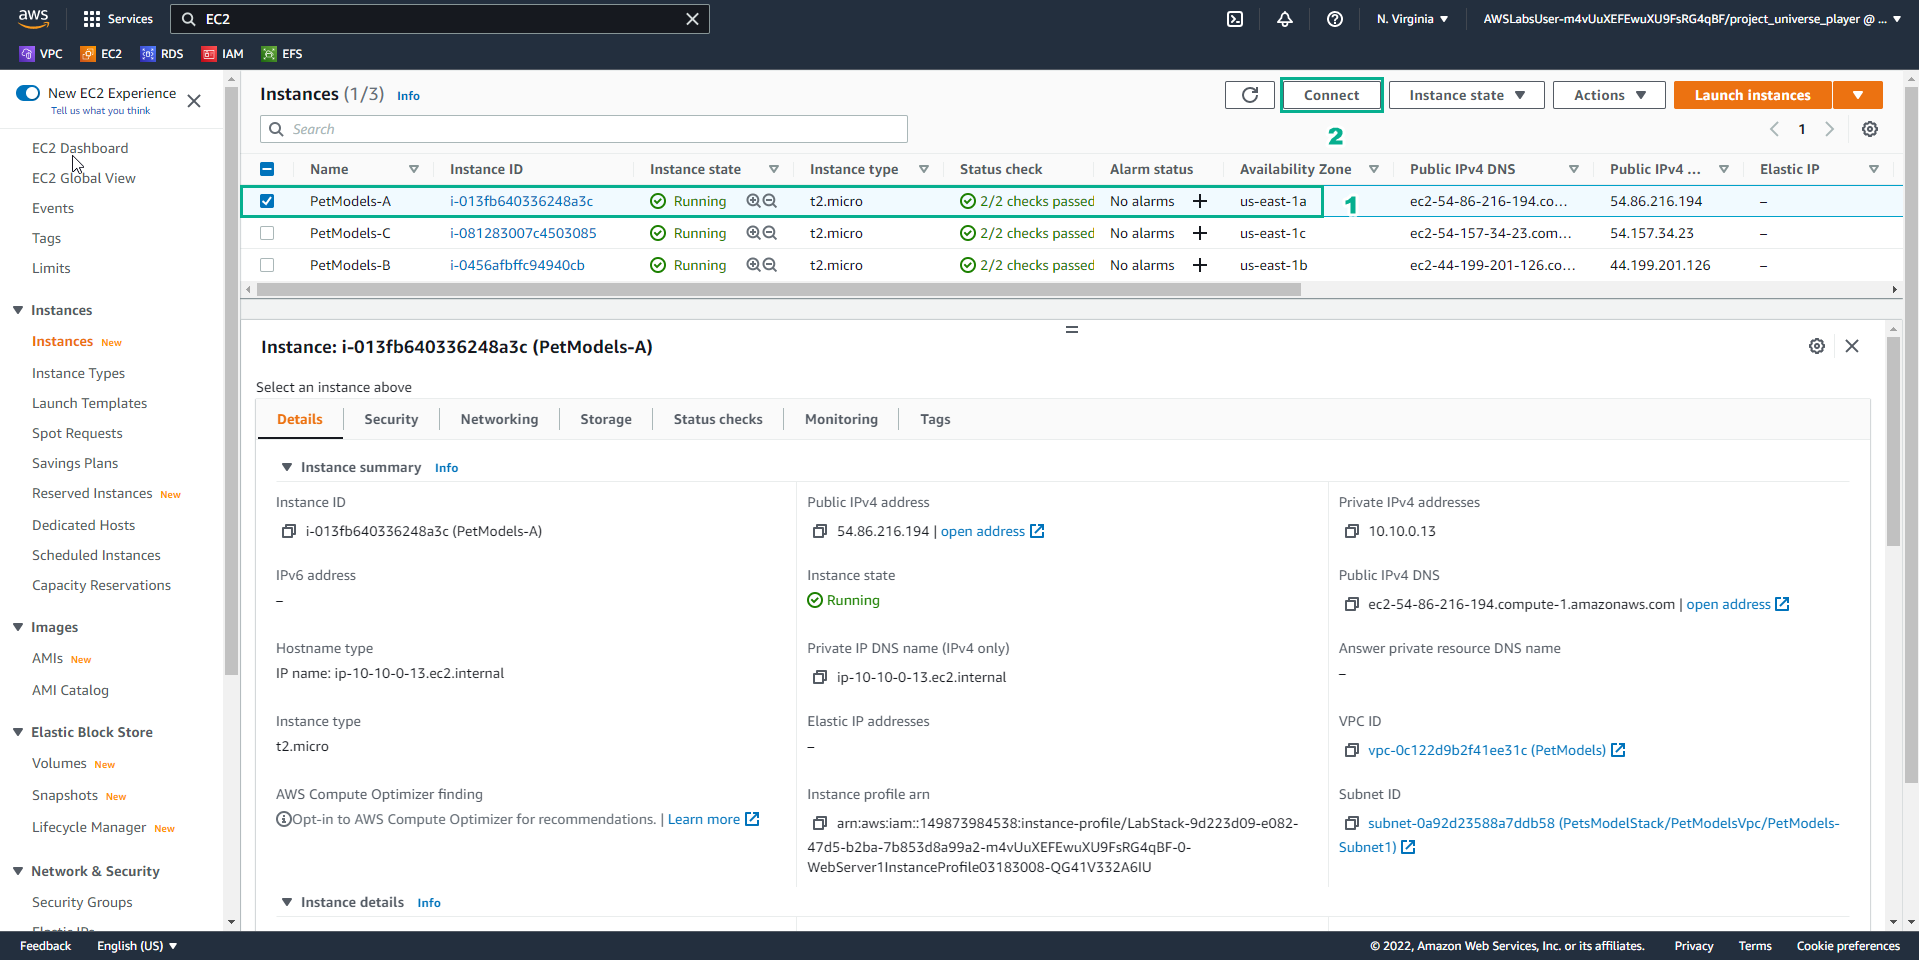
- Trong giao diện Instances
- Chọn PetModels-A instance
- Chọn Connect
- Trong giao diện Practice
- Đọc bước 26 của File Systems in the Cloud
- Đọc CONCEPT
- Chọn mũi tên sang phải để xem các bước tiếp theo
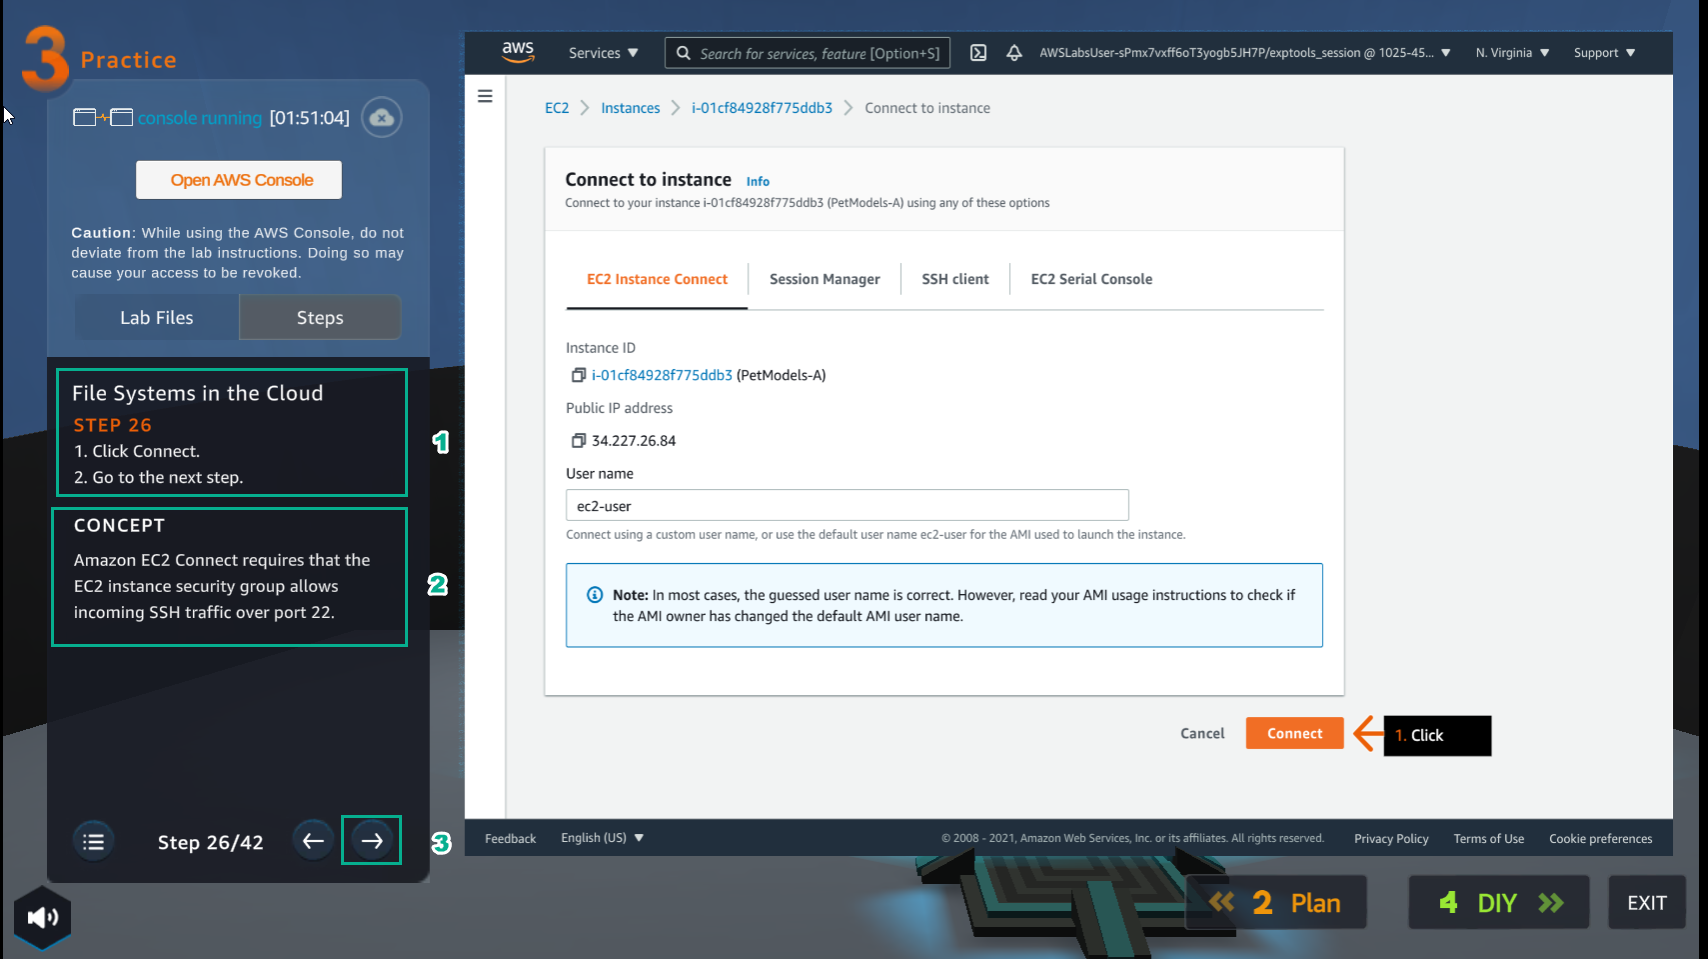
- Trong giao diện Connect to instance
- Chọn EC2 Instance Connect
- Chọn Connect

- Trong giao diện Practice
- Đọc bước 27 của File Systems in the Cloud
- Đọc CONCEPT
- Chọn mũi tên sang phải để xem các bước tiếp theo

- Trong giao diện PetModels-A
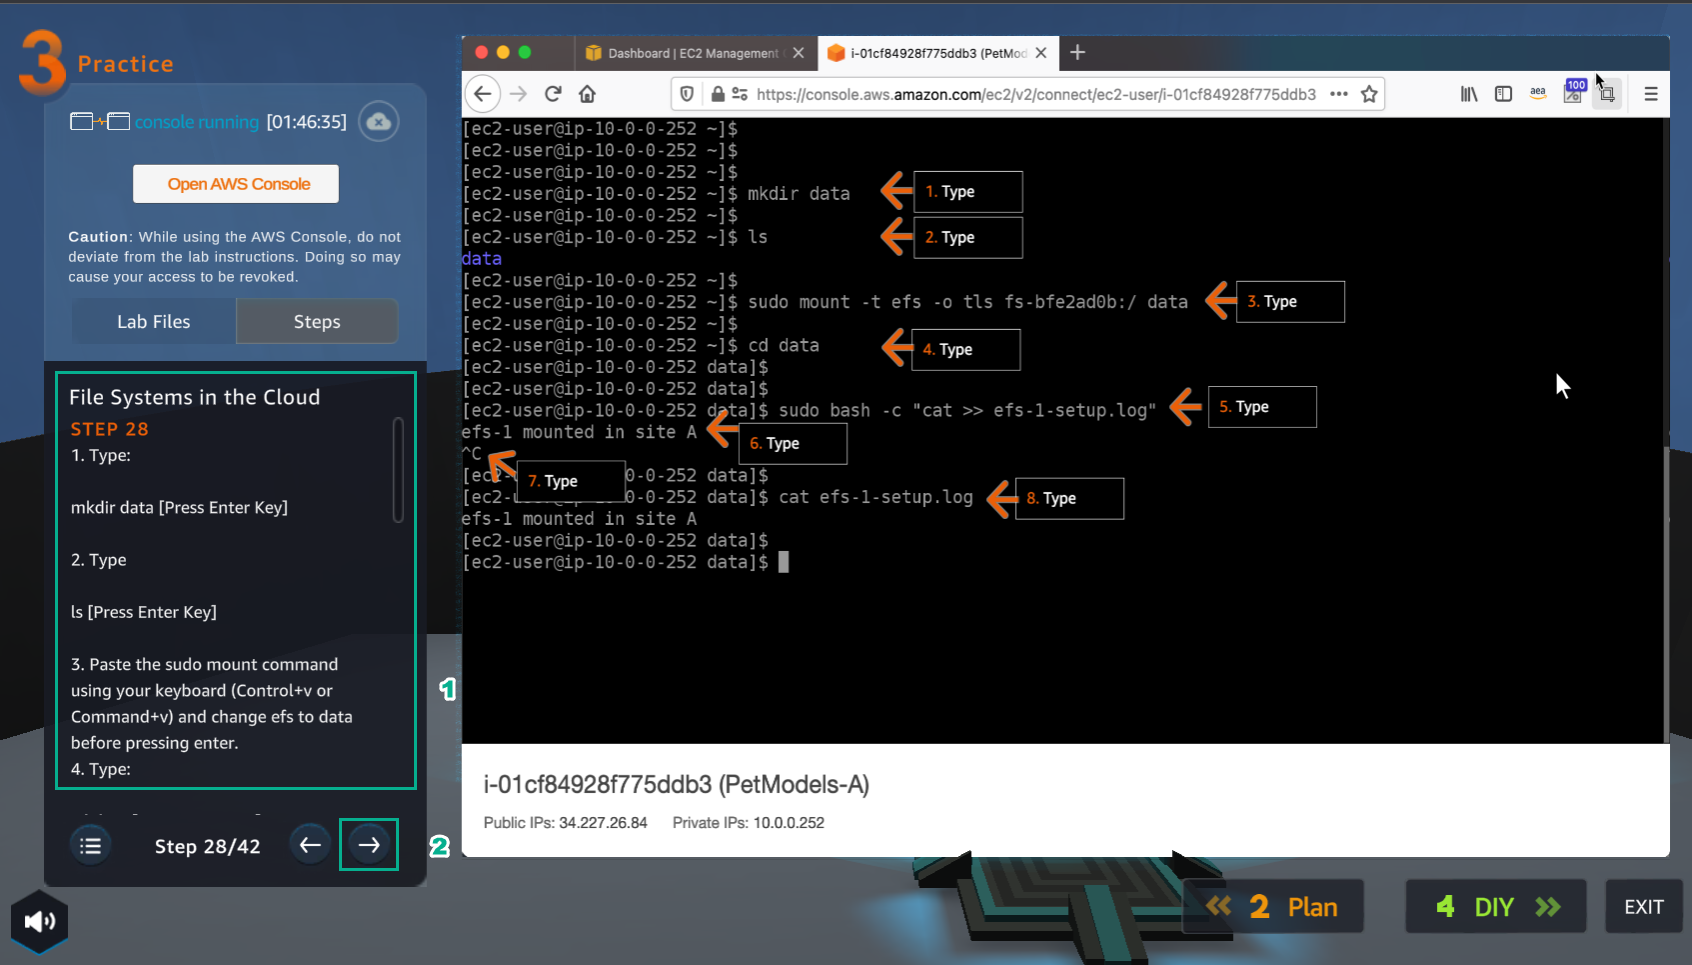
- Nhập
sudo yum install -y amazon-efs-utils - Sau đó, nhấn Enter
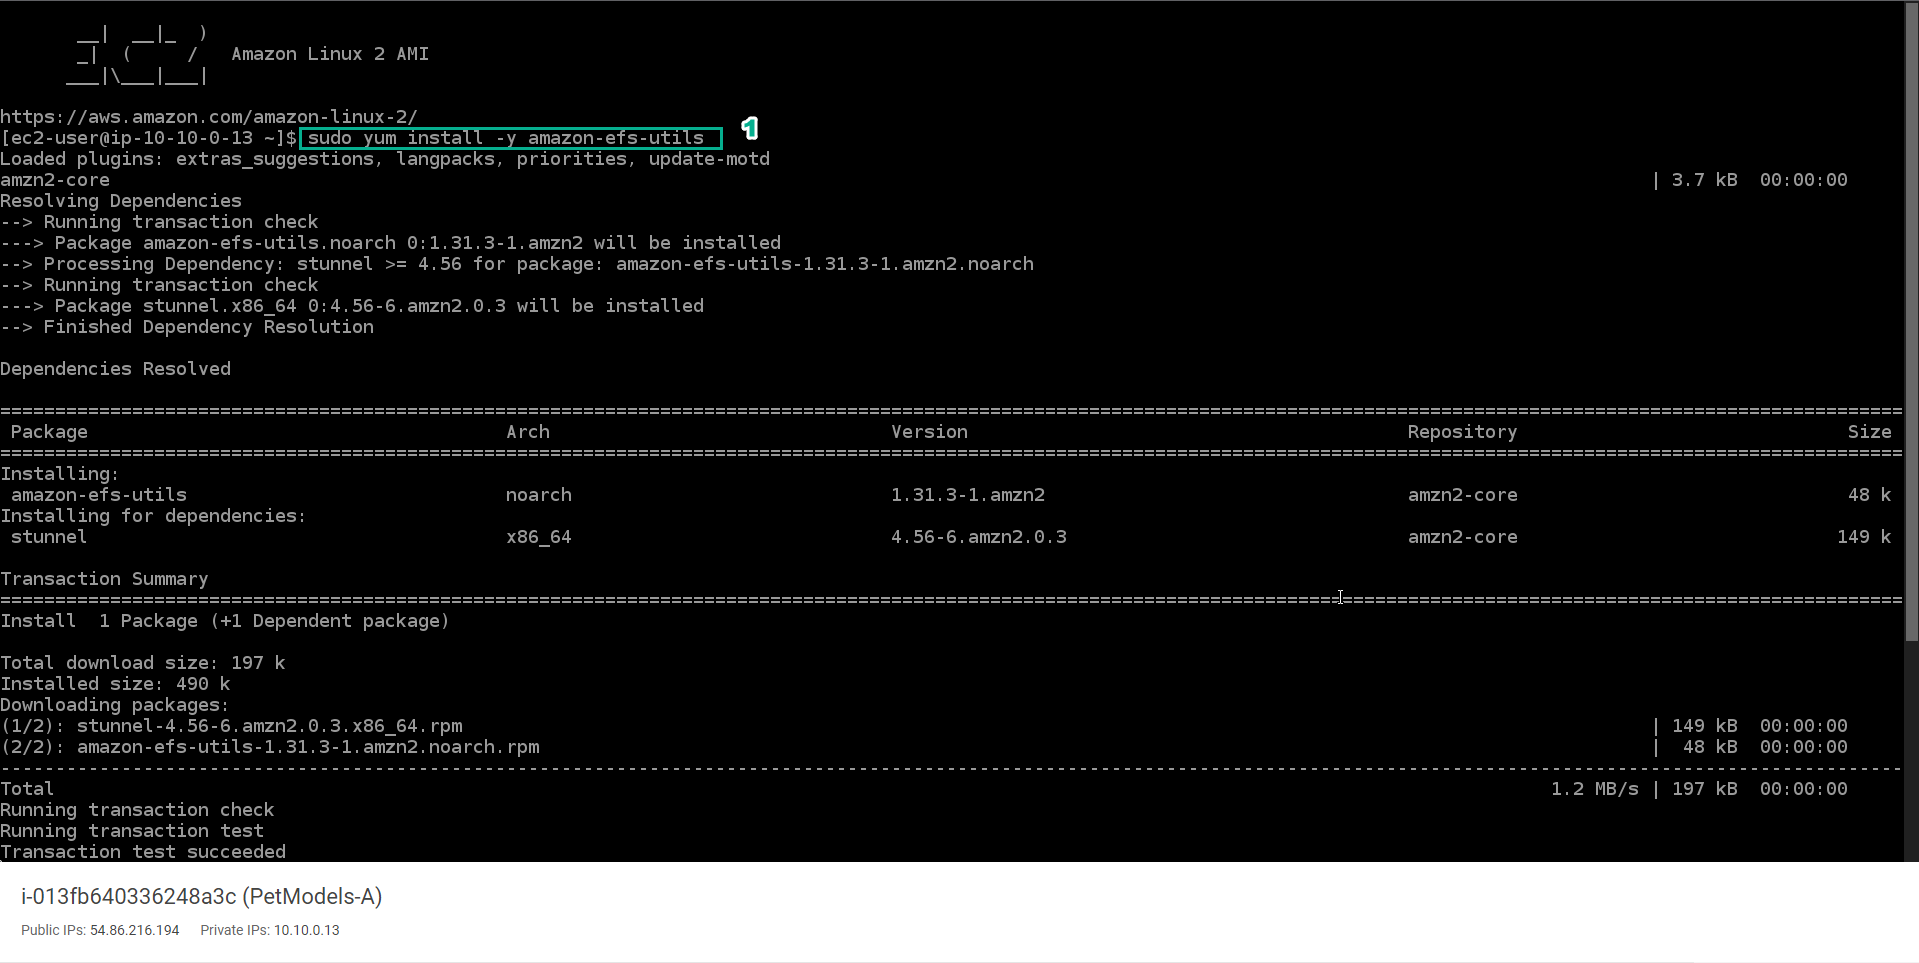
- Trong giao diện Practice
- Đọc bước 28 của File Systems in the Cloud
- Đọc CONCEPT
- Chọn mũi tên sang phải để xem các bước tiếp theo
- Trong giao diện PetModels-A
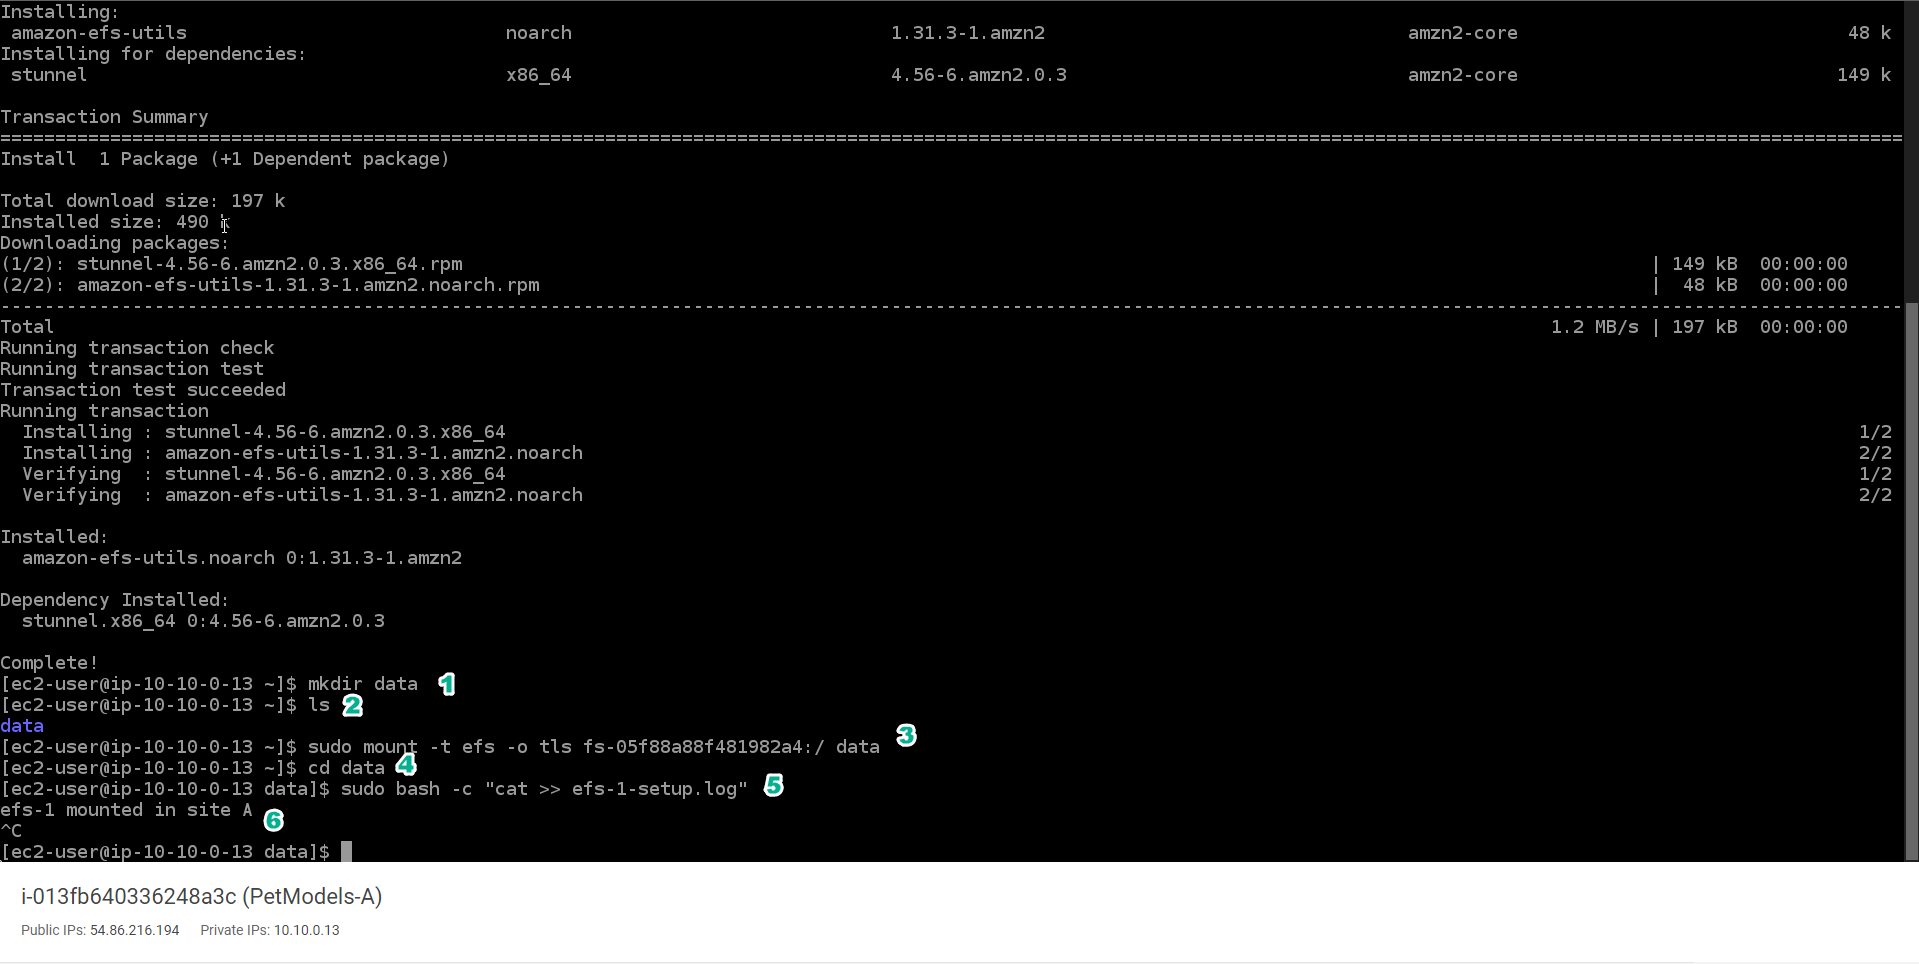
- Nhập
mkdir data - Nhập
ls - Nhập Using the EFS mount helper đã sao chép ở bước 41, và thay efs thành data
- Nhập
cd data - Nhập ```sudo bash -c “cat » efs-l-setup.log”
- Nhập
efs-l mount in site A - Sử dụng Ctrl + C
- Trong giao diện Practice
- Đọc bước 29 của File Systems in the Cloud
- Đọc CONCEPT
- Chọn mũi tên sang phải để xem các bước tiếp theo
- Trong giao diện AWS Console
- Tìm EFS
- Chọn EFS
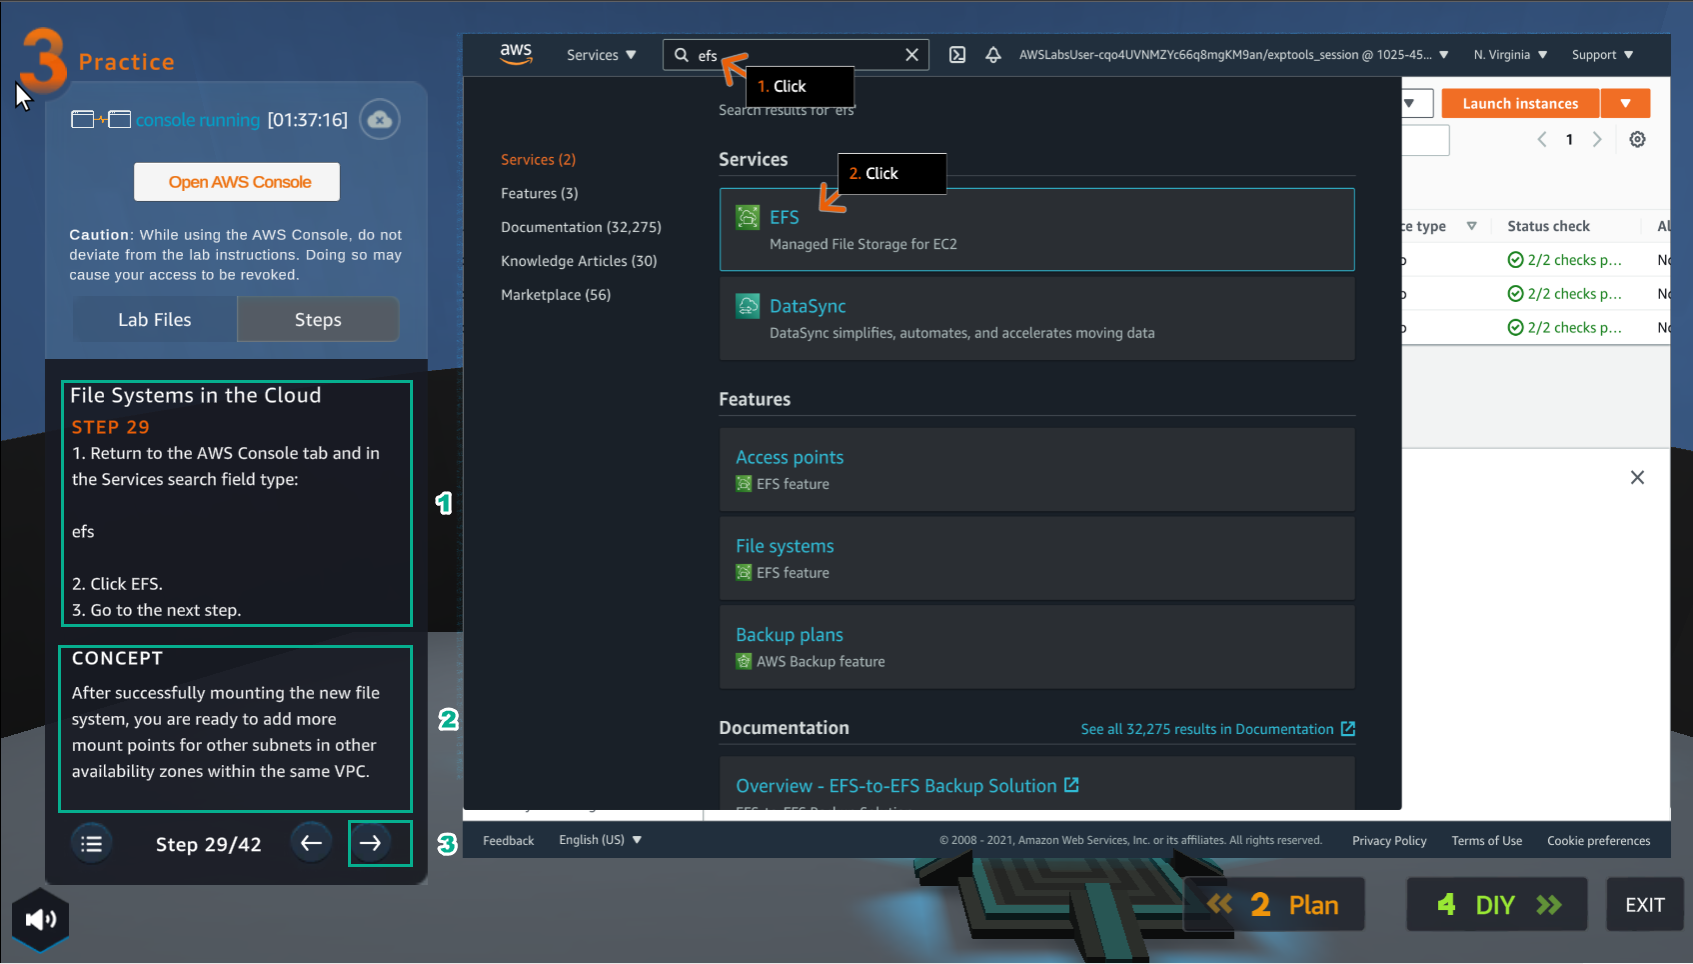
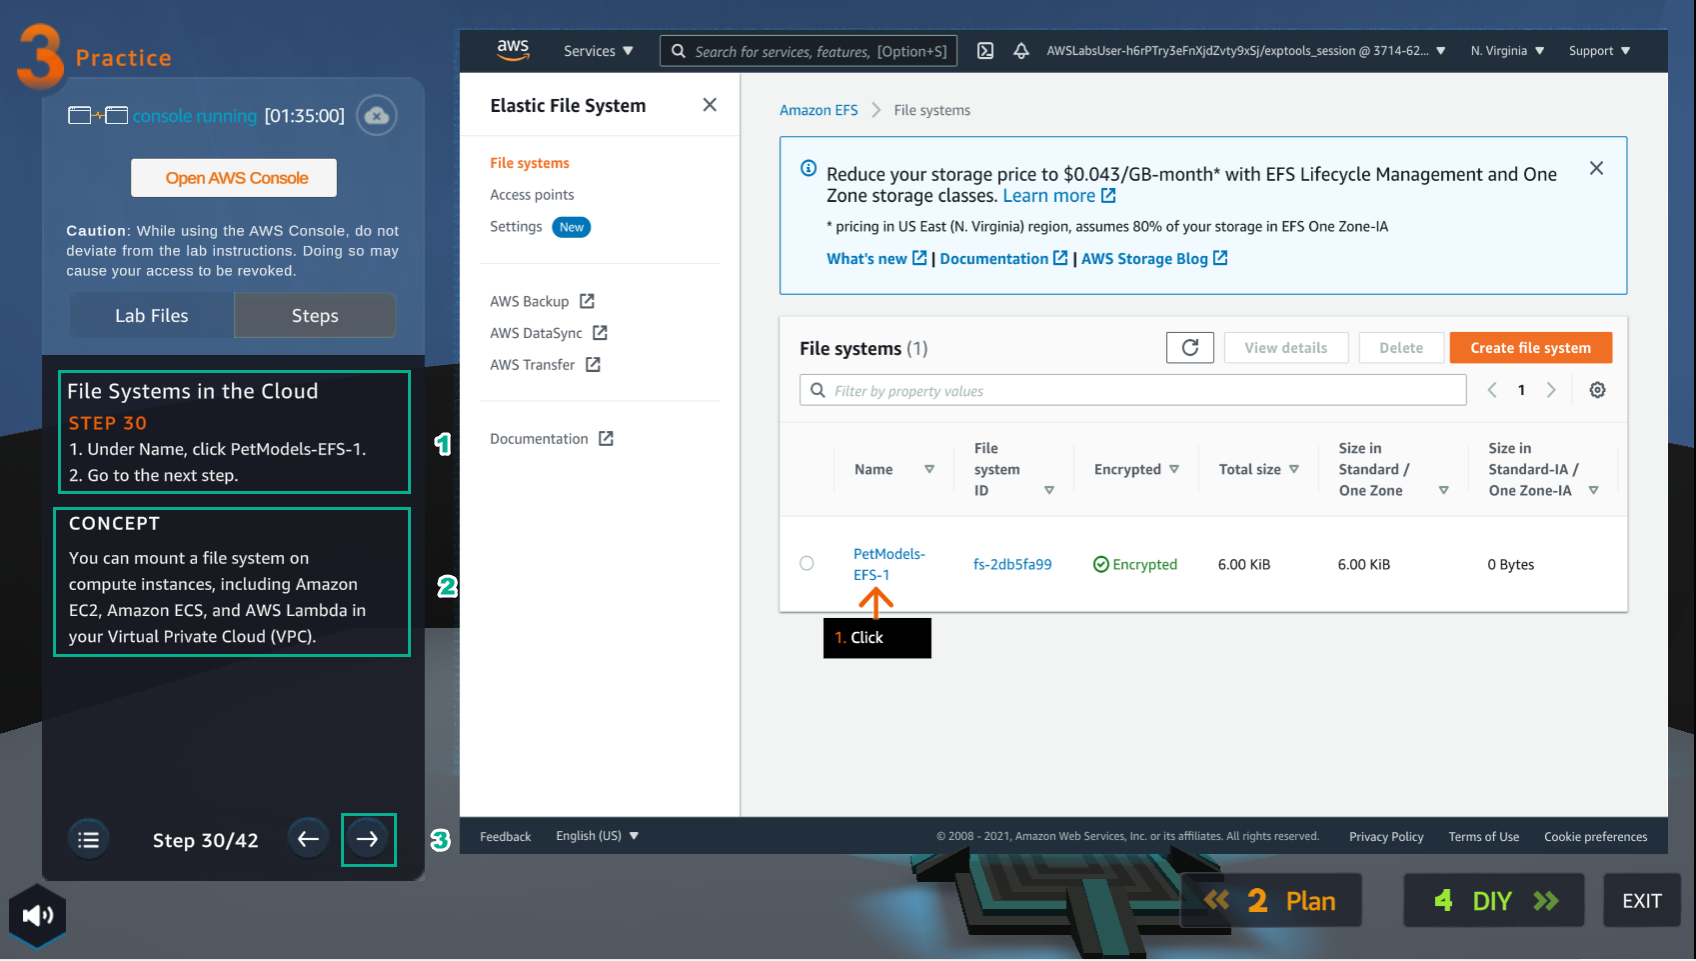
- Trong giao diện Practice
- Đọc bước 30 của File Systems in the Cloud
- Đọc CONCEPT
- Chọn mũi tên sang phải để xem các bước tiếp theo
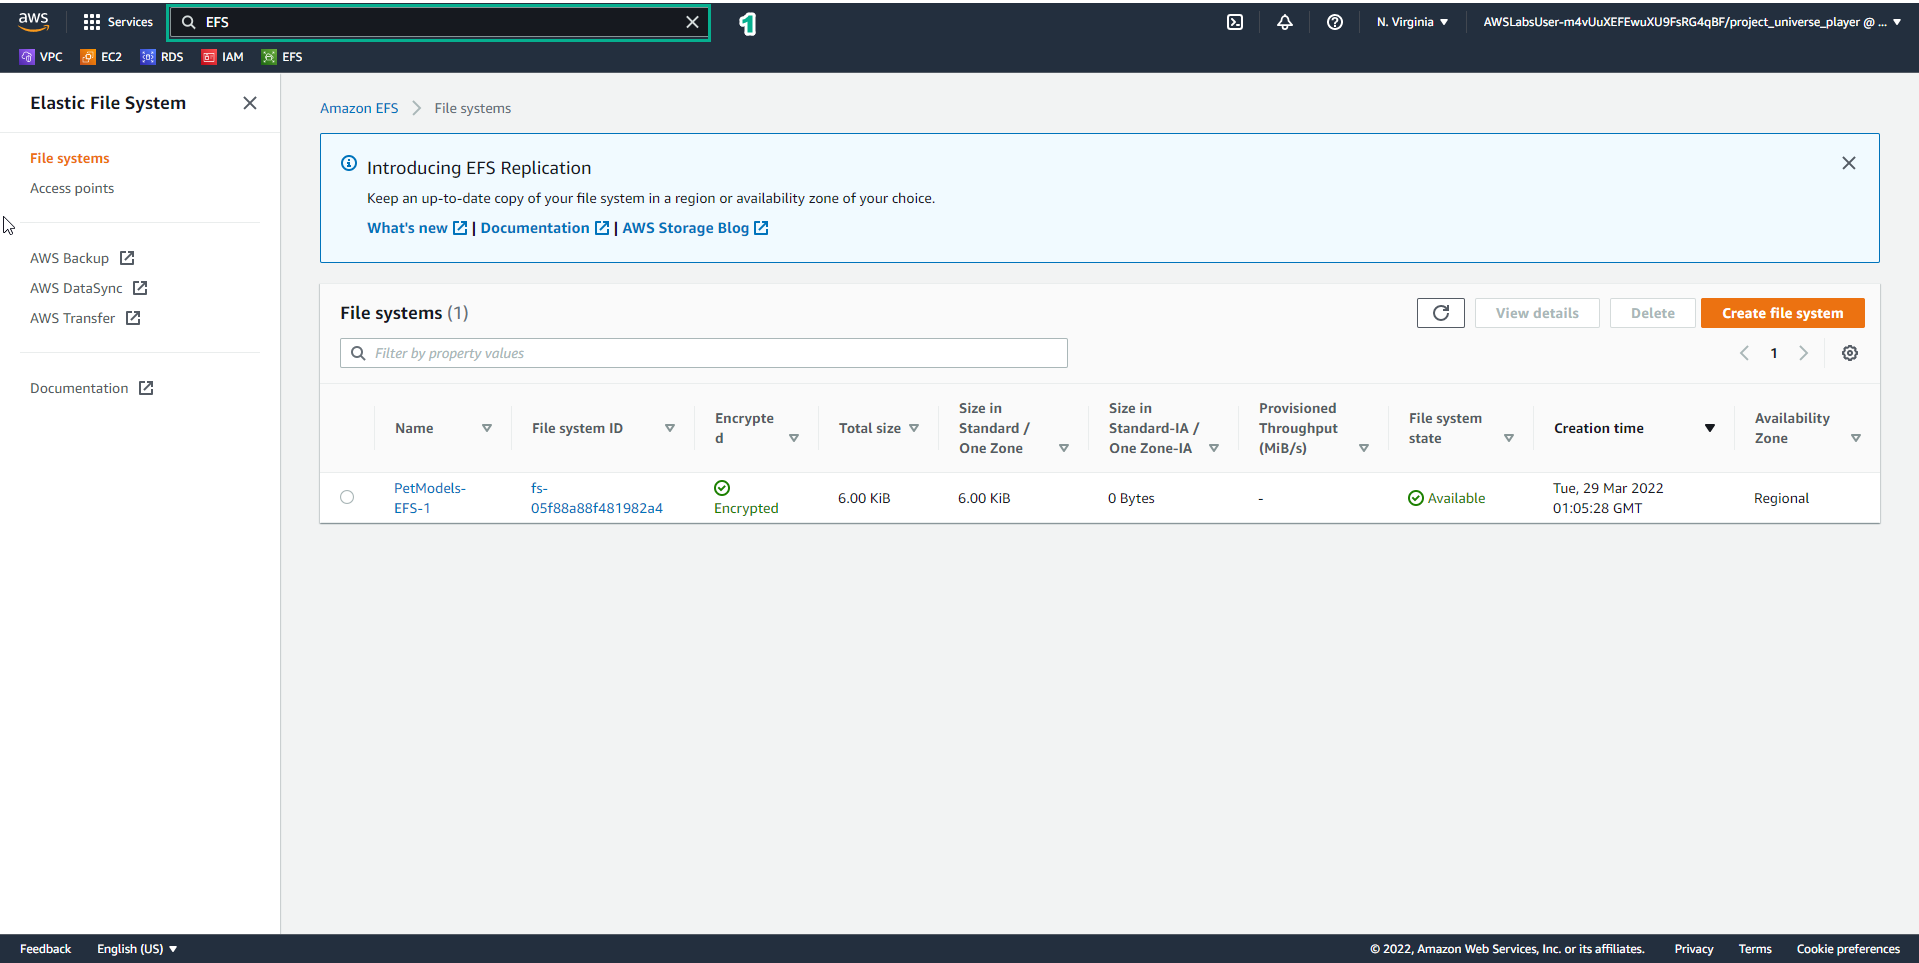
- Trong giao diện Practice
- Đọc bước 31 của File Systems in the Cloud
- Đọc CONCEPT
- Chọn mũi tên sang phải để xem các bước tiếp theo
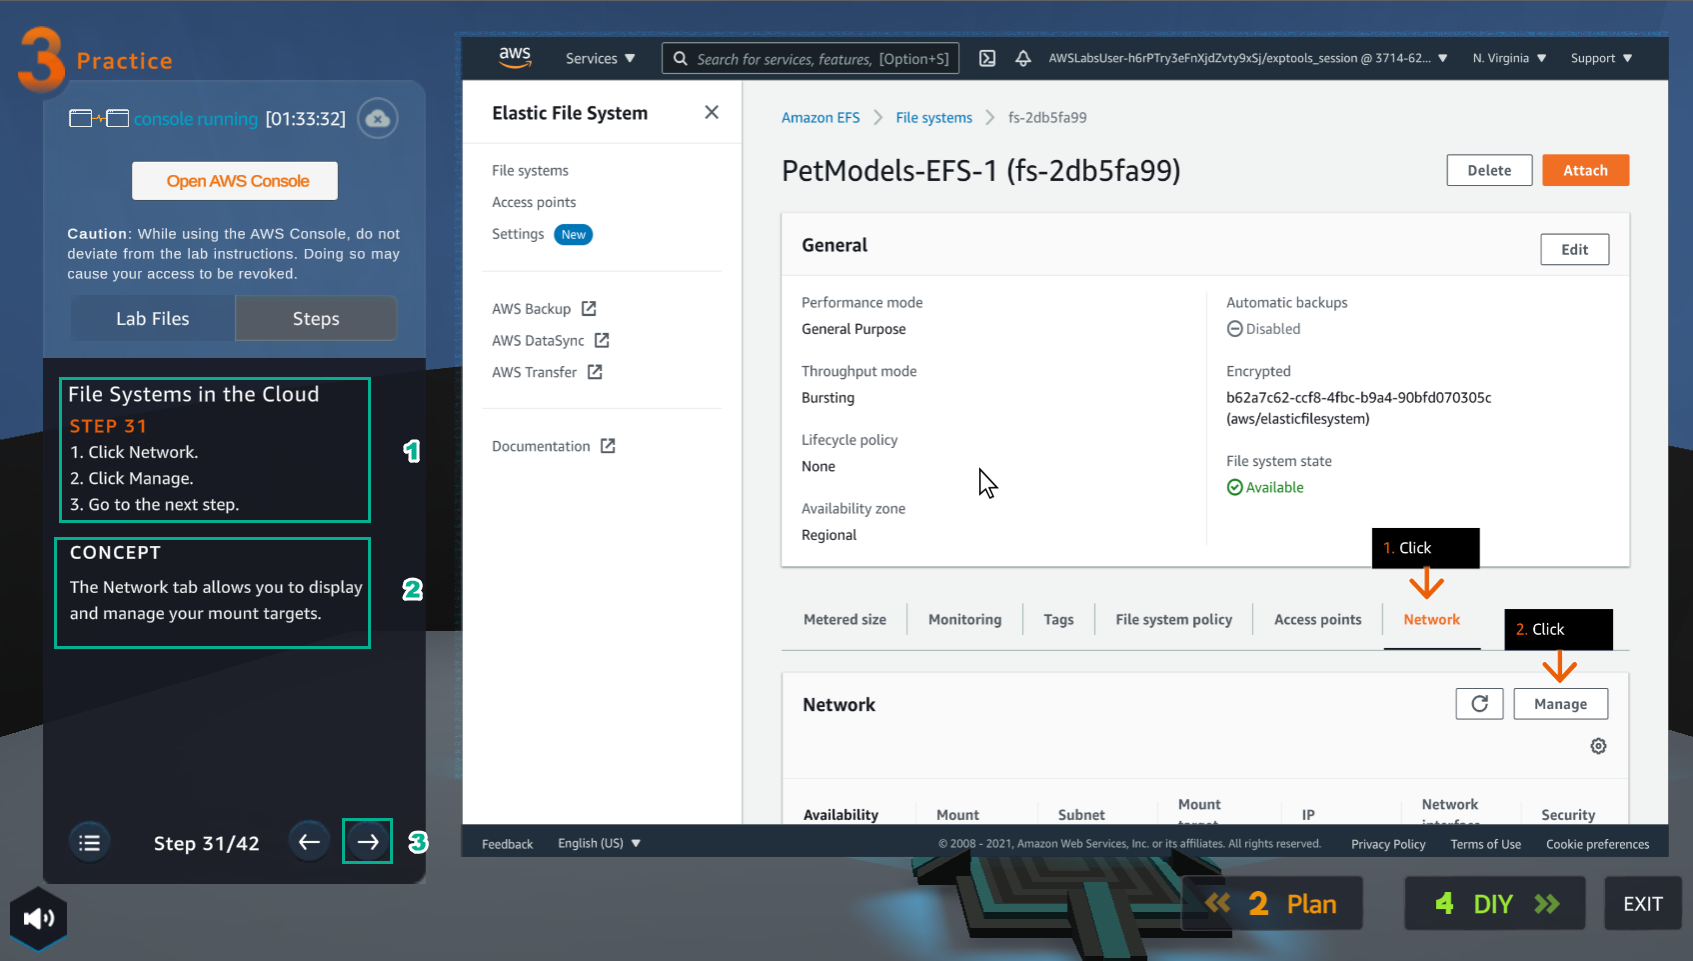
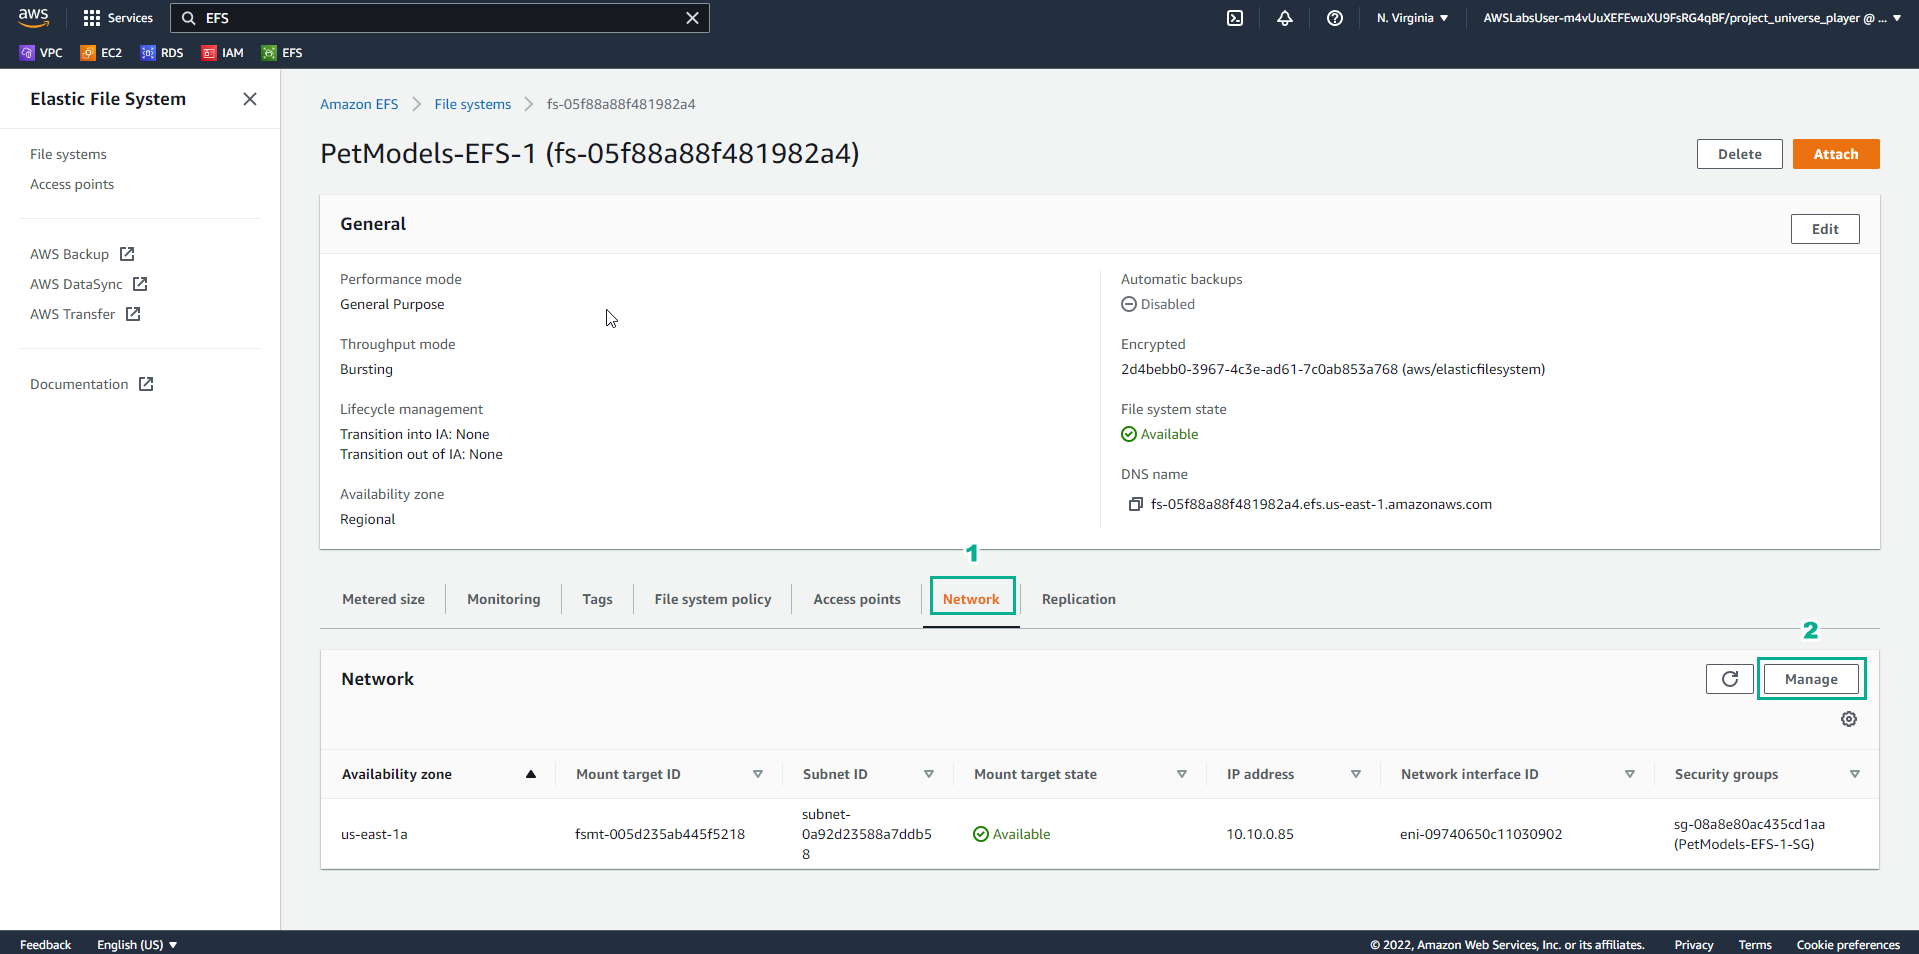
- Trong giao diện EFS
- Chọn Network
- Chọn Manage
- Trong giao diện Practice
- Đọc bước 32 của File Systems in the Cloud
- Đọc CONCEPT
- Chọn mũi tên sang phải để xem các bước tiếp theo
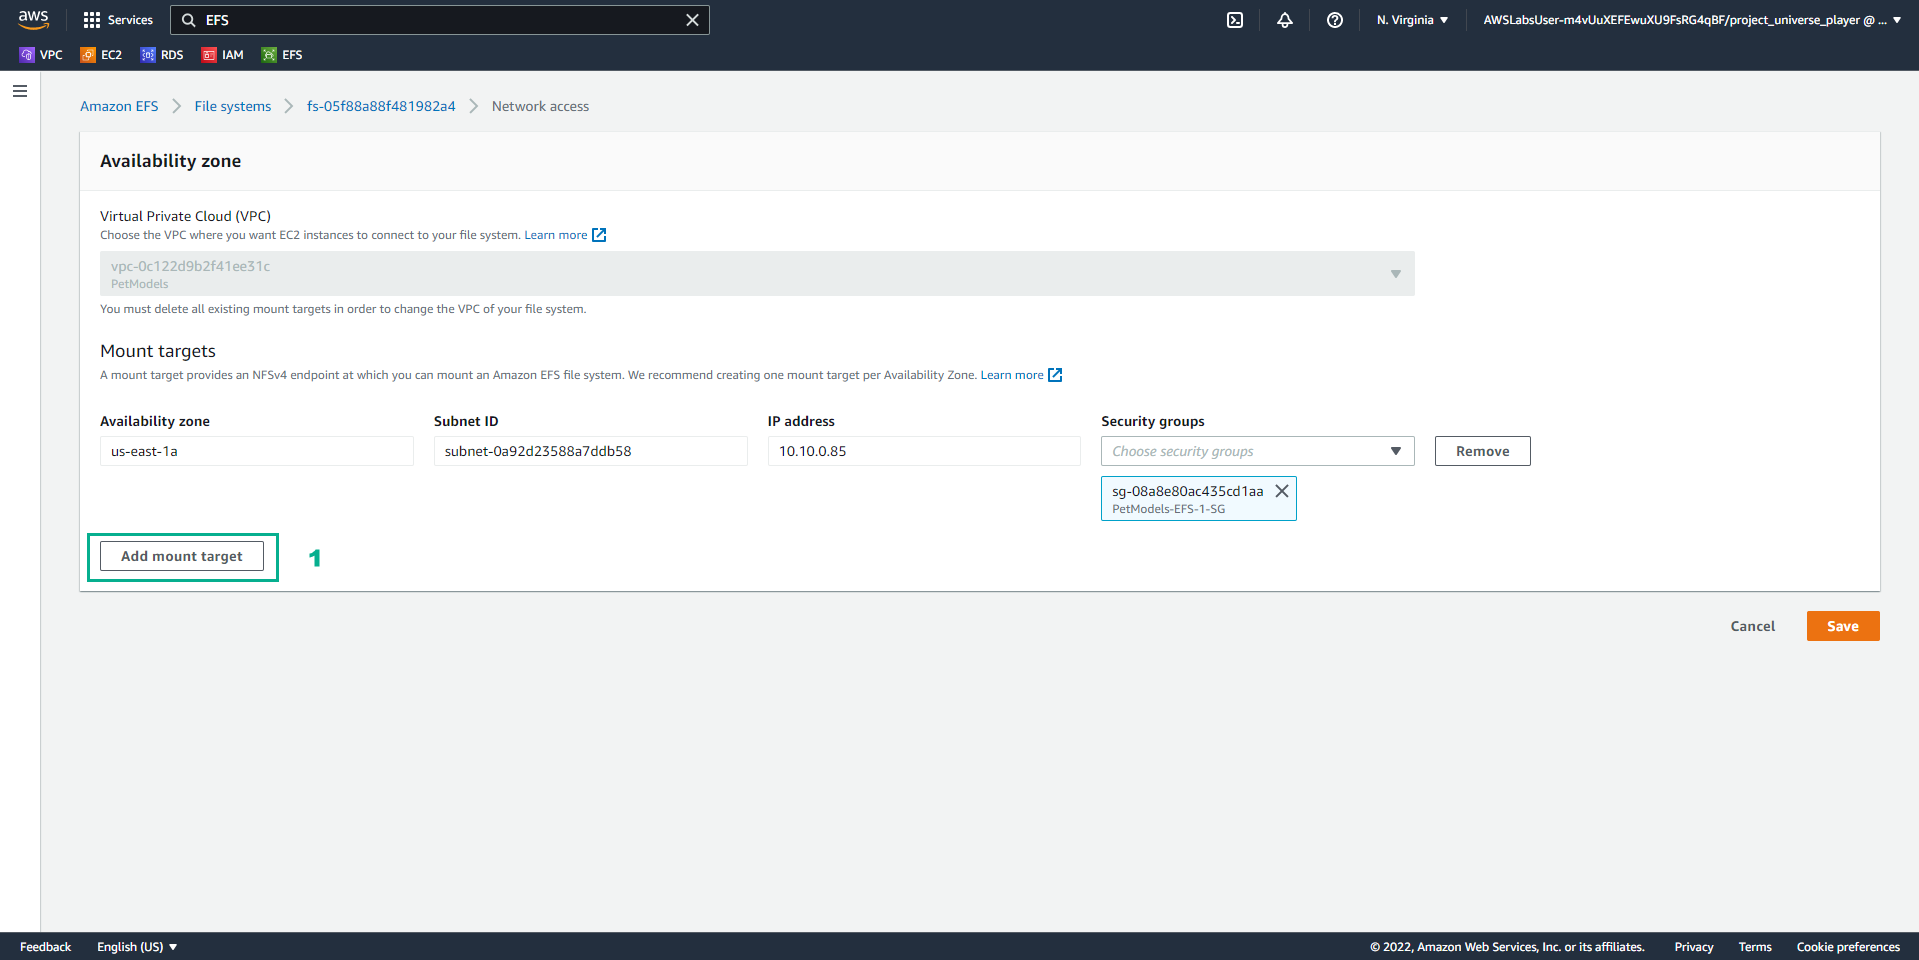
- Trong giao diện Network access
- Chọn Add mount target
- Trong giao diện Practice
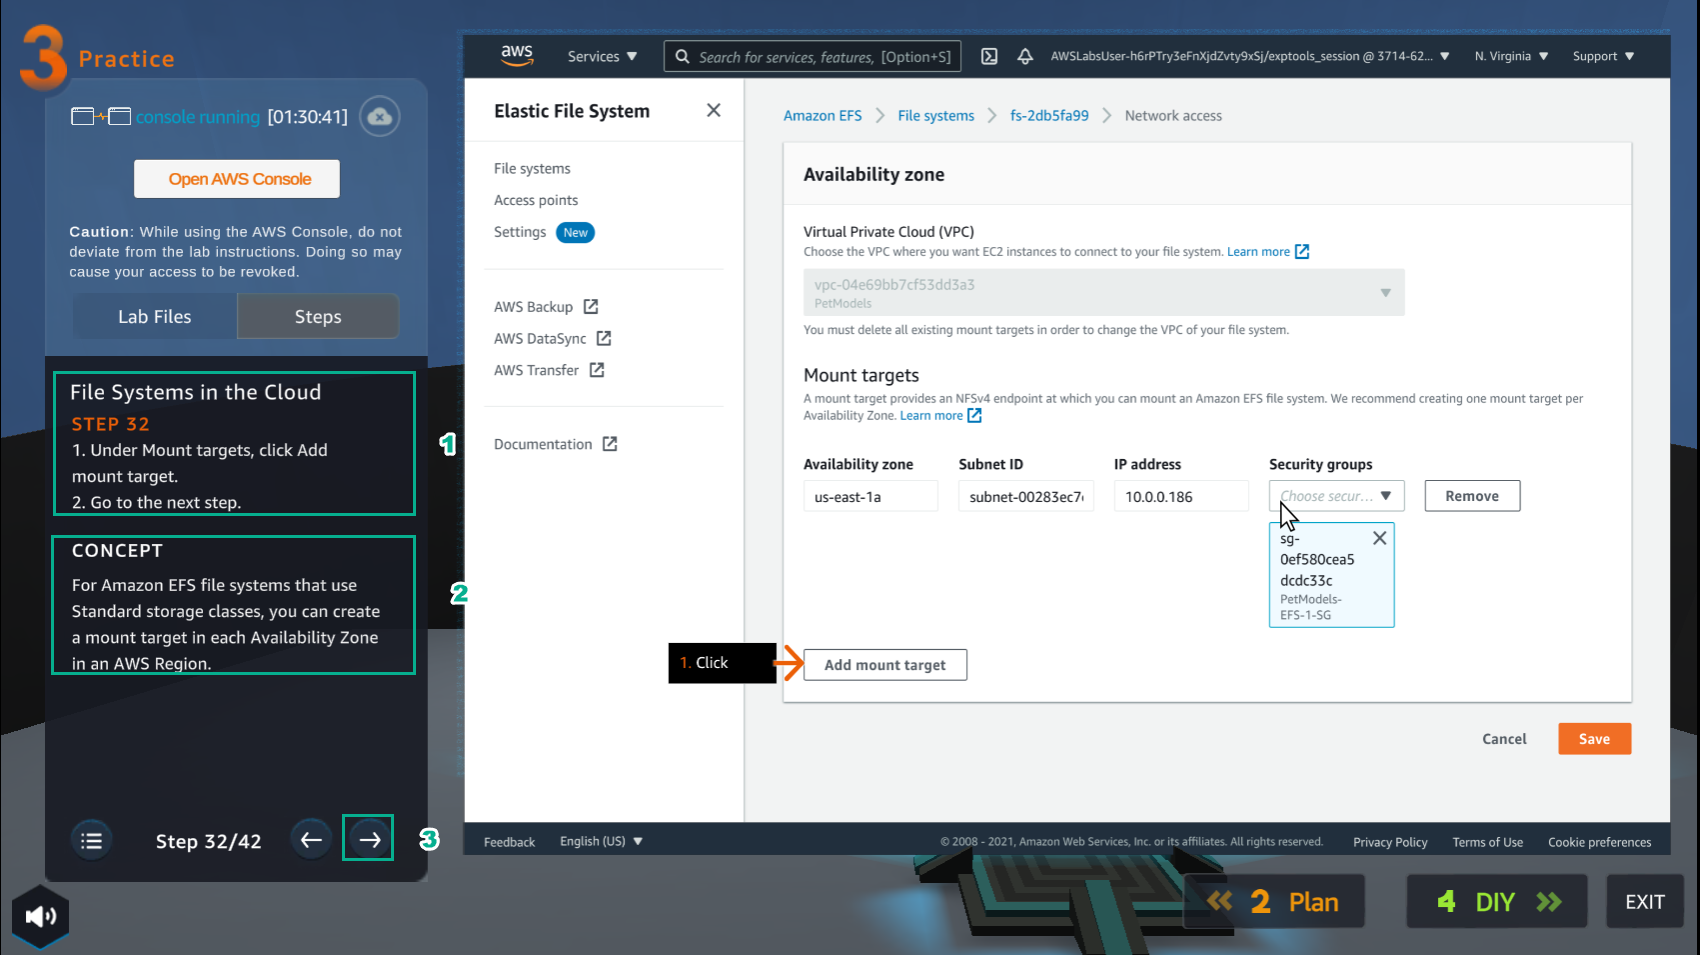
- Đọc bước 33 của File Systems in the Cloud
- Đọc CONCEPT
- Chọn mũi tên sang phải để xem các bước tiếp theo
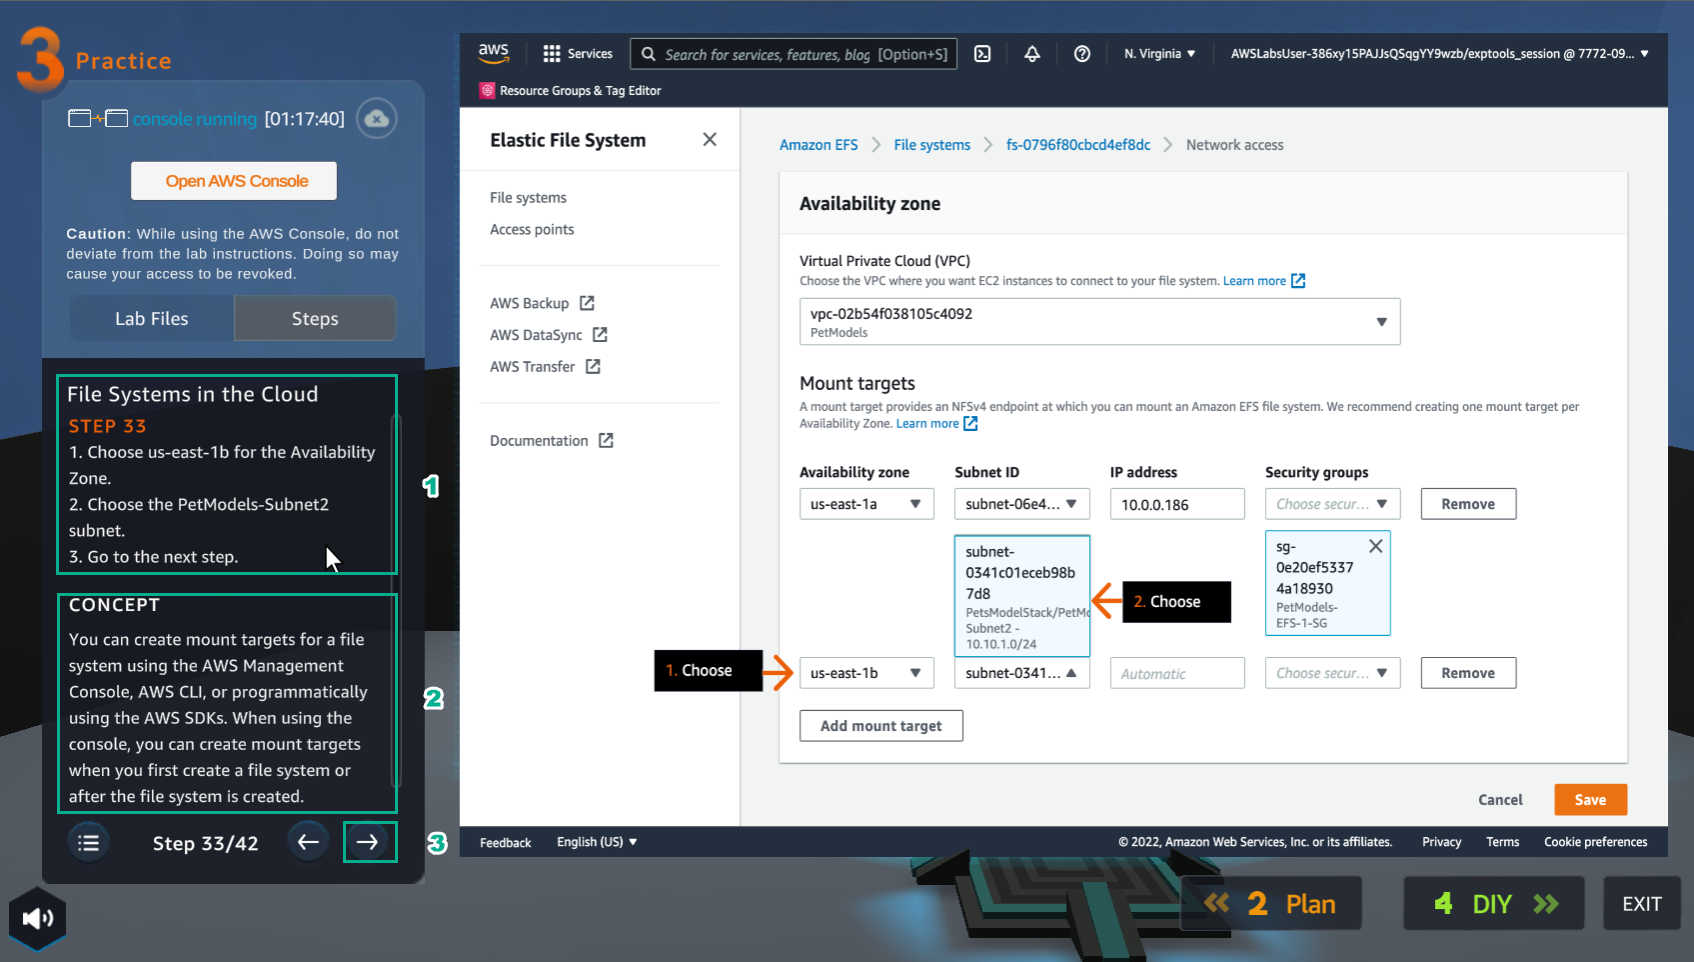
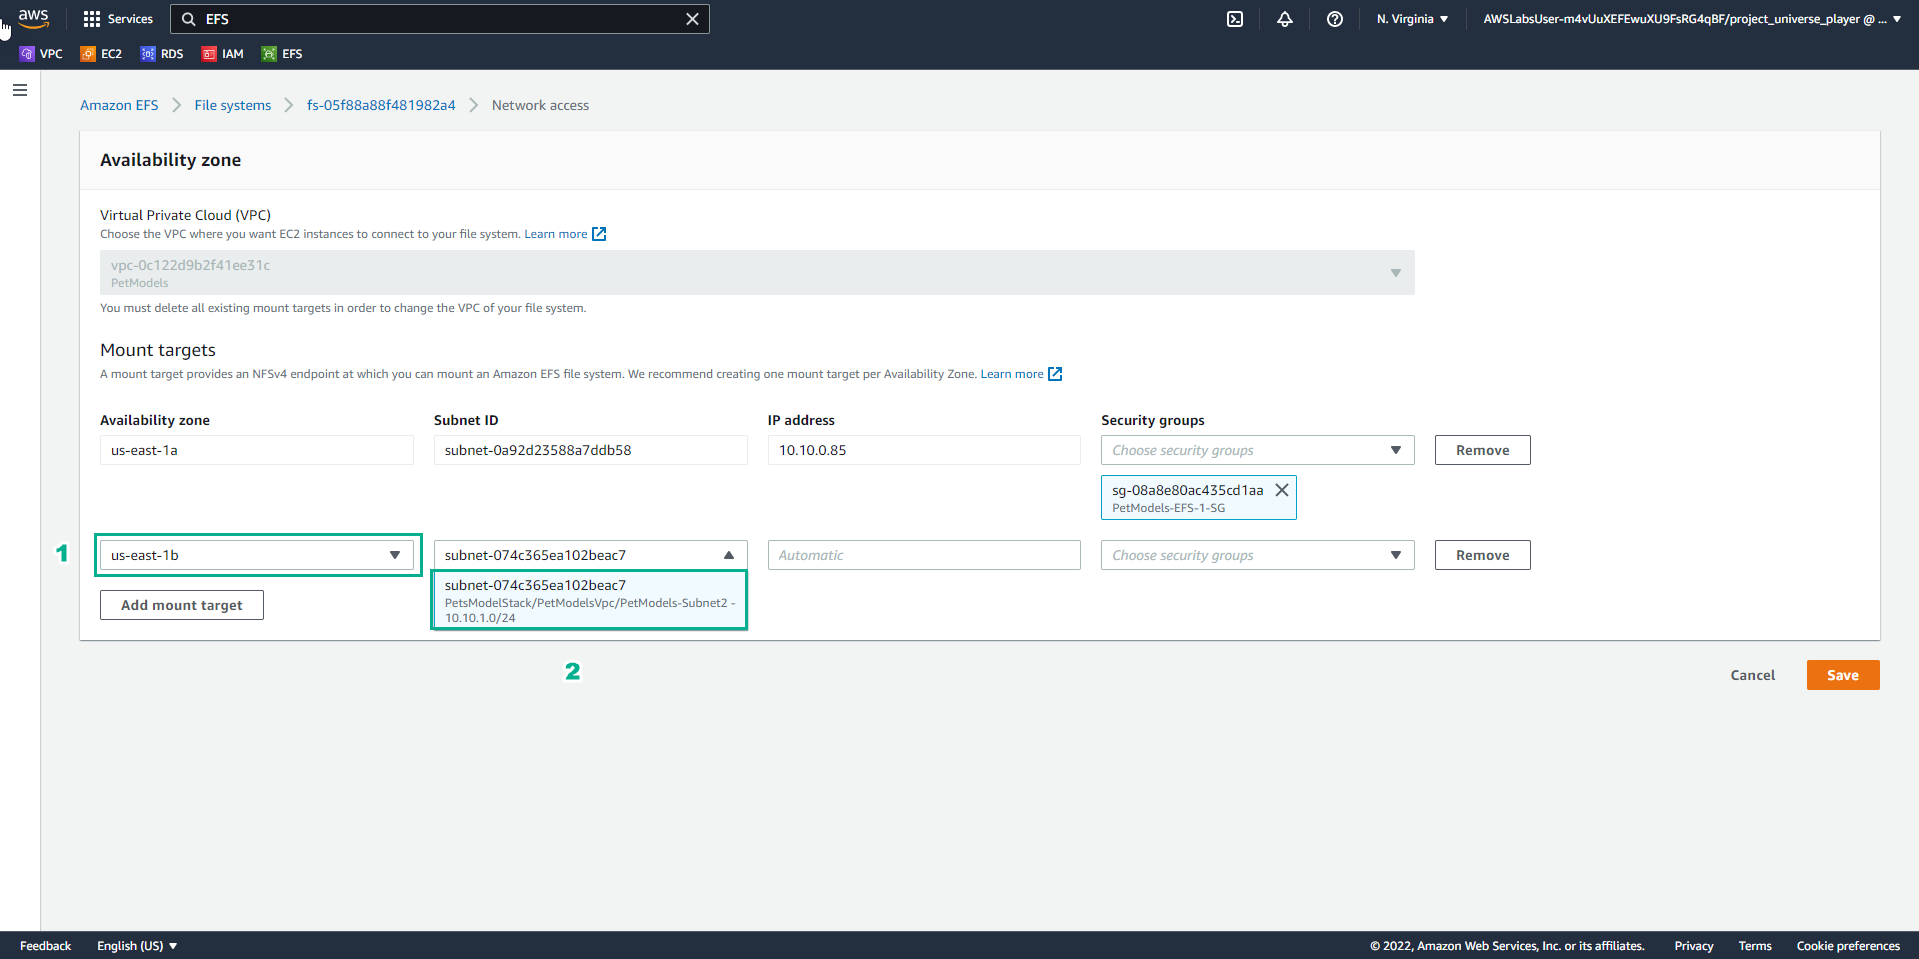
- Trong giao diện Network access
- Sau khi chọn Add mount target, chọn us-east-1b và chọn subnet
- Trong giao diện Practice
- Đọc bước 34 của File Systems in the Cloud
- Đọc CONCEPT
- Chọn mũi tên sang phải để xem các bước tiếp theo
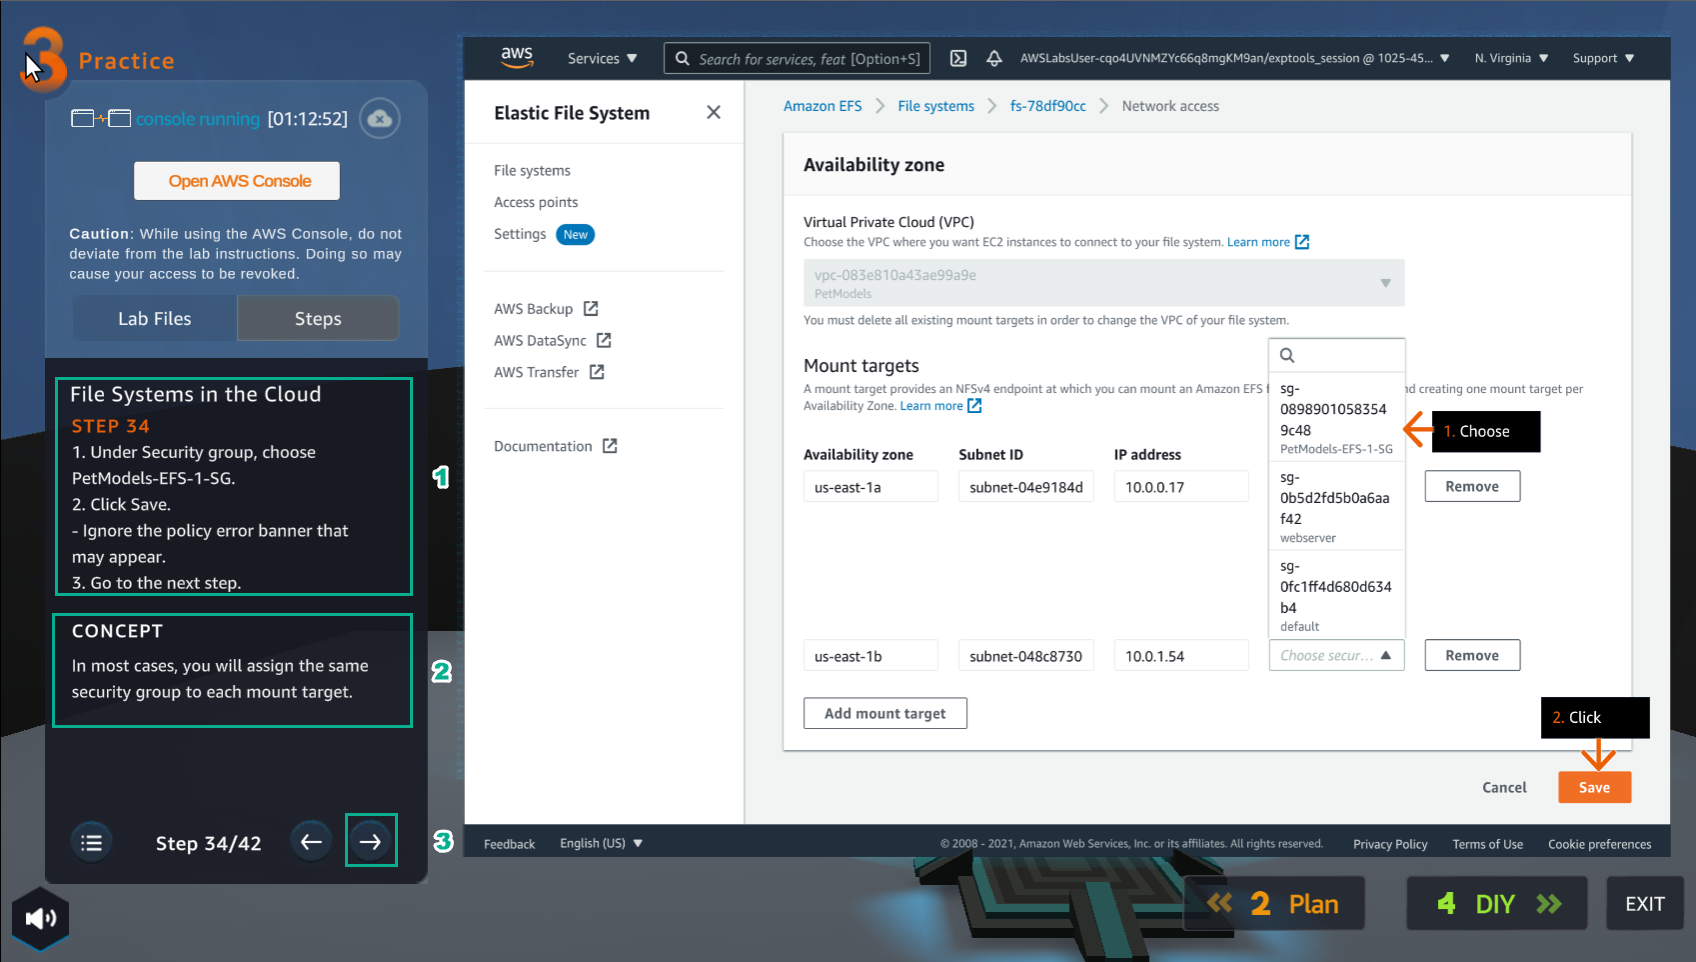
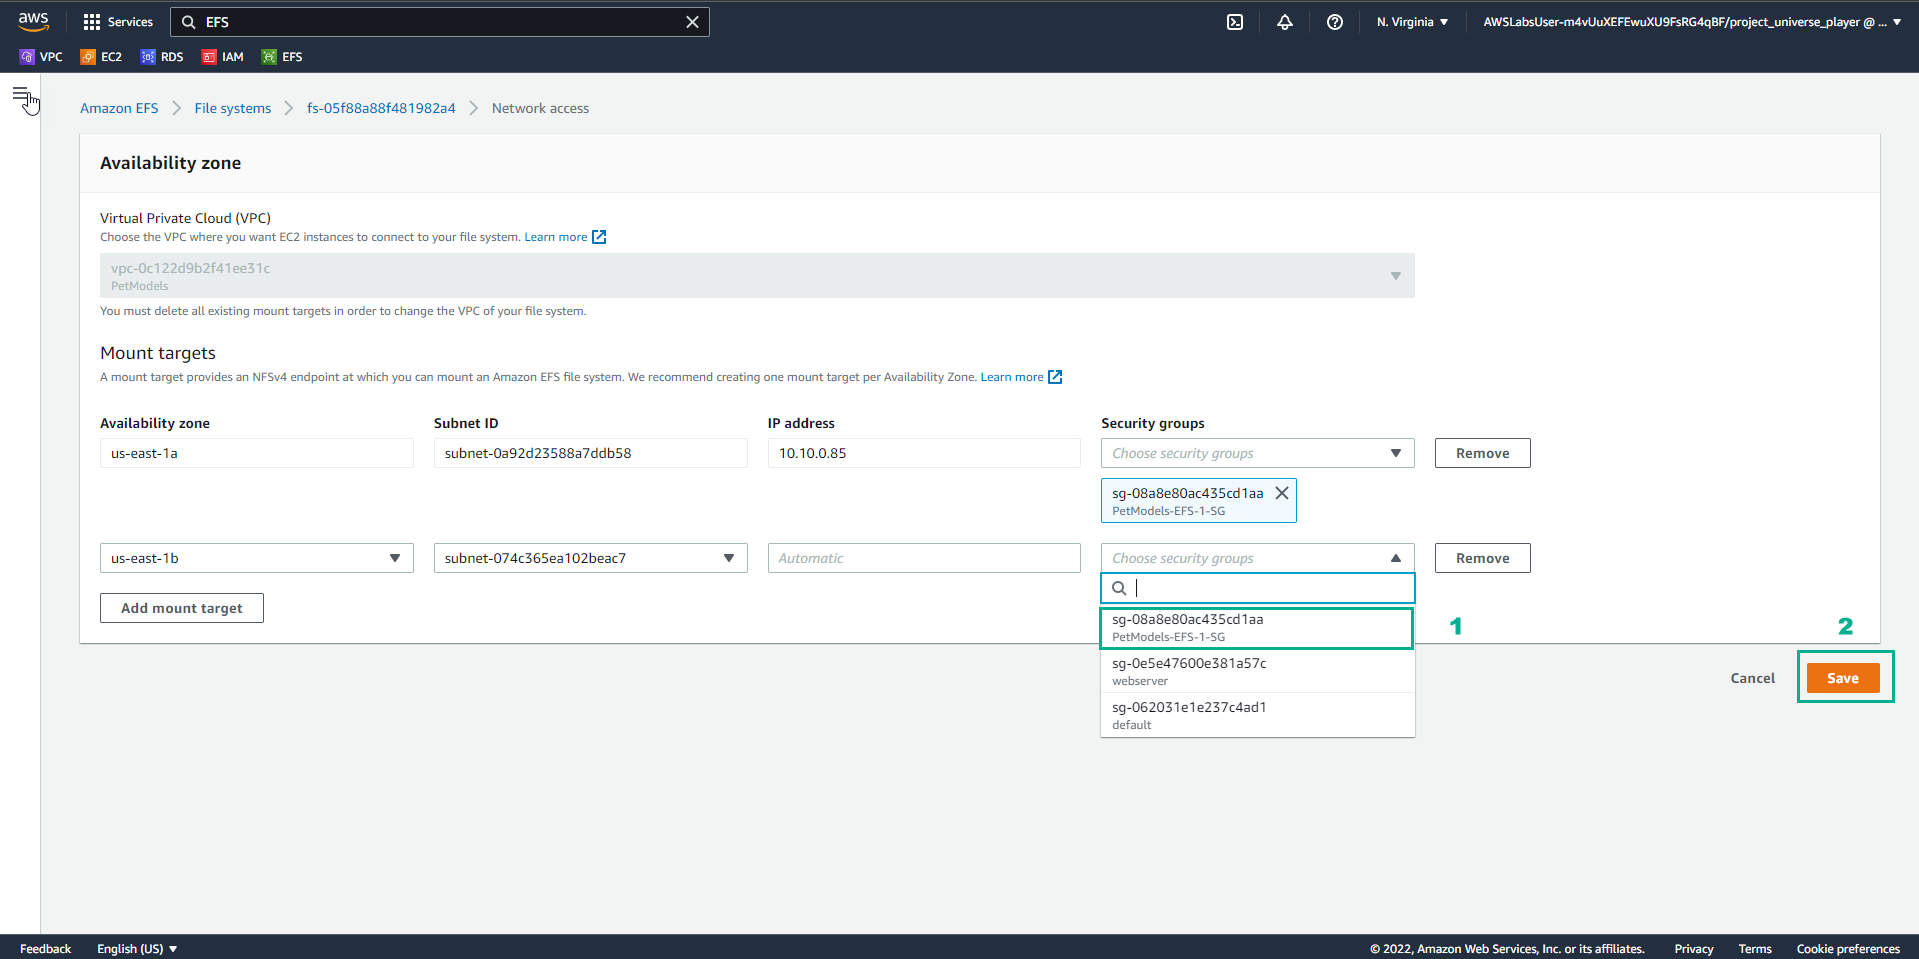
- Trong giao diện Network access
- Chọn Save
- Trong giao diện Practice
- Đọc bước 35 của File Systems in the Cloud
- Đọc CONCEPT
- Chọn mũi tên sang phải để xem các bước tiếp theo
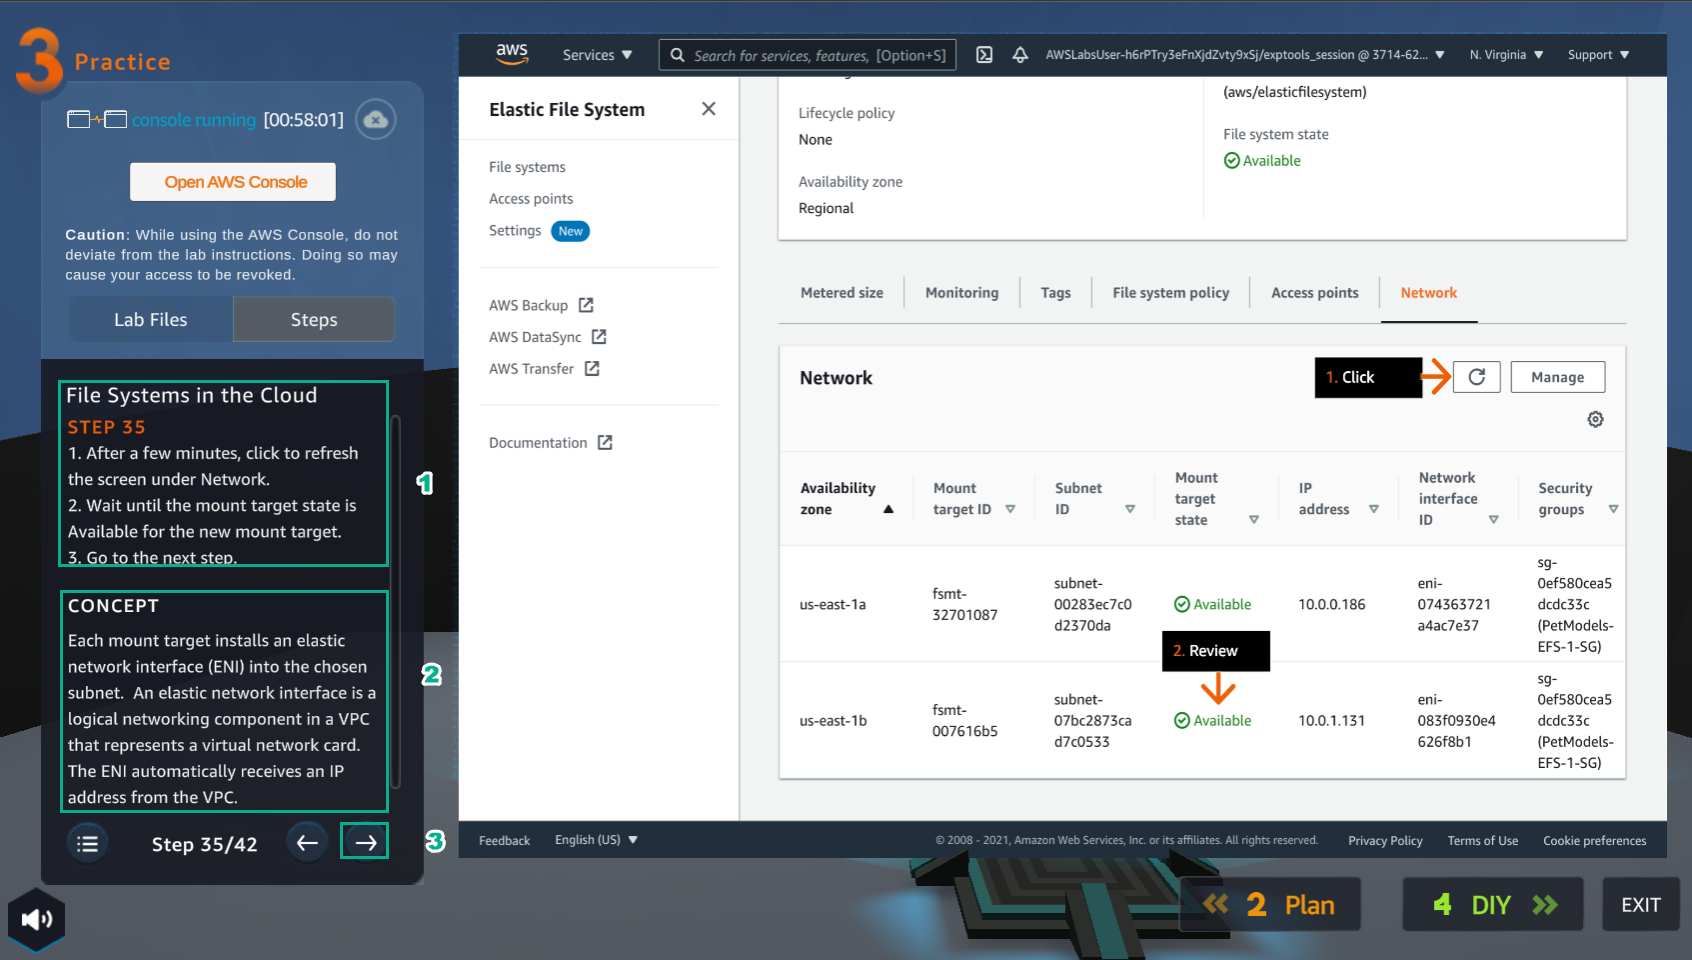
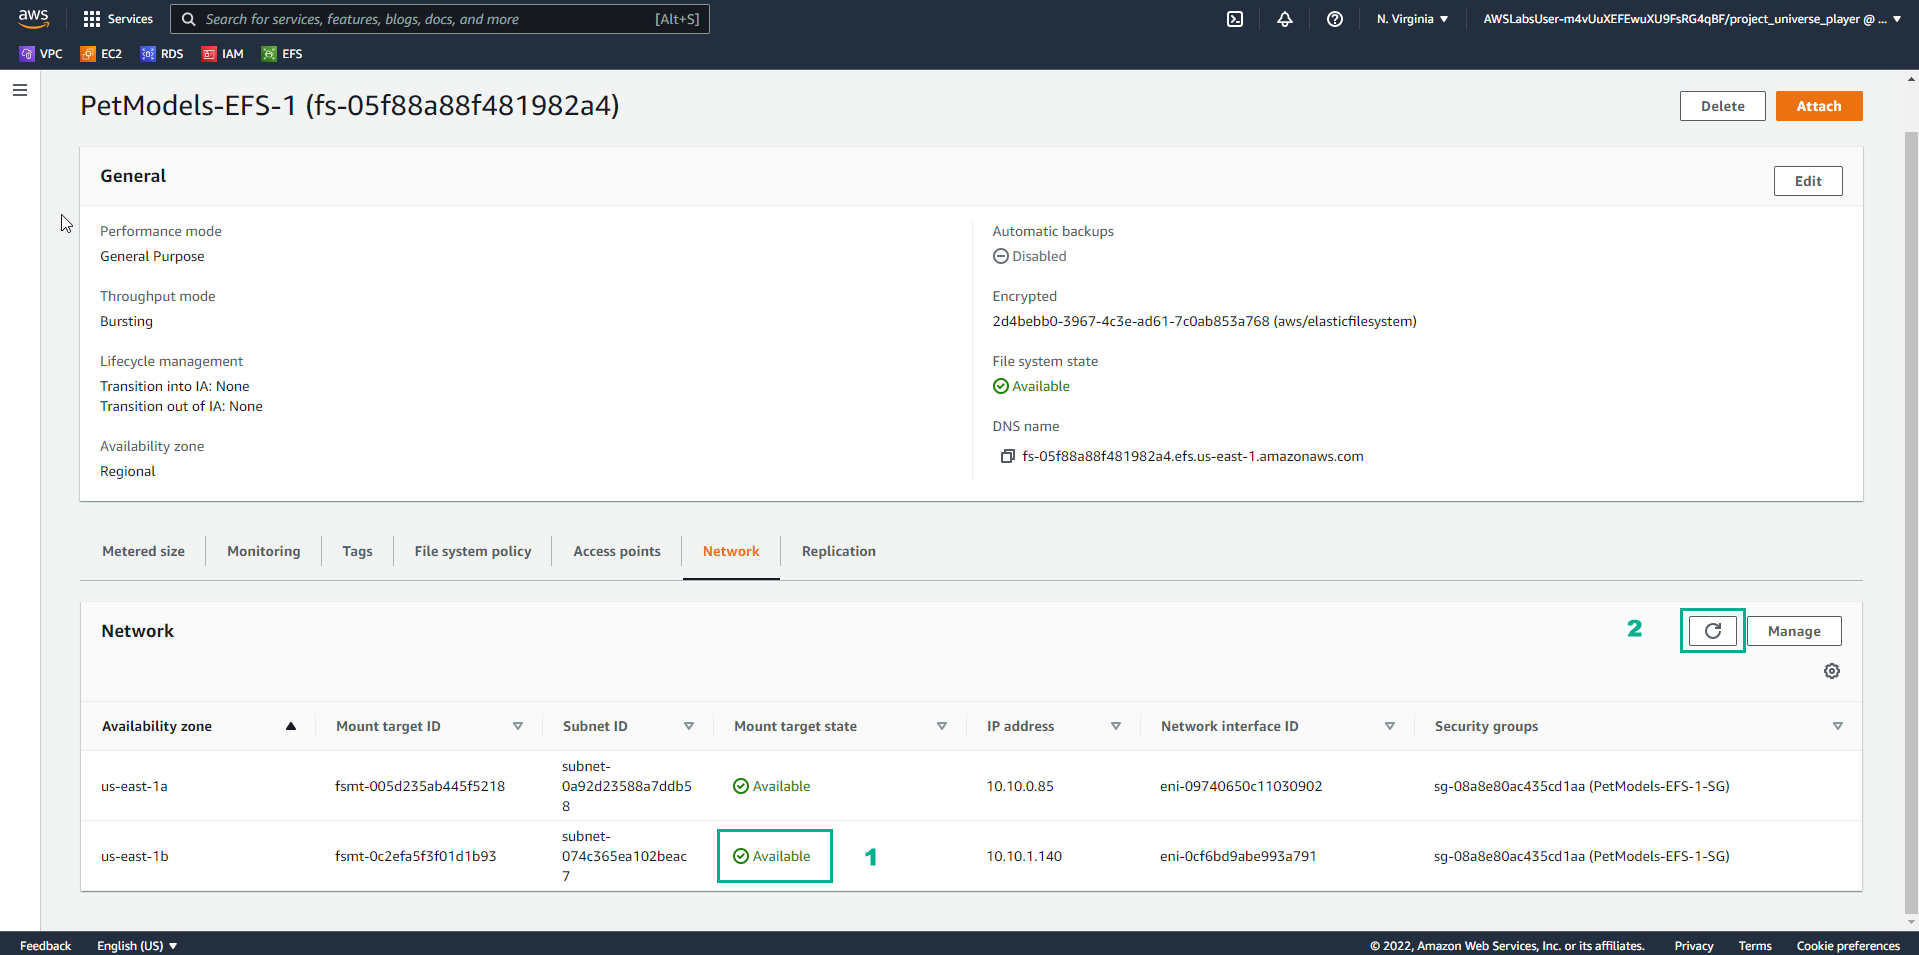
- Trong giao diện EFS
- Xem Mount target state
- Sau đó chọn refresh
- Trong giao diện Practice
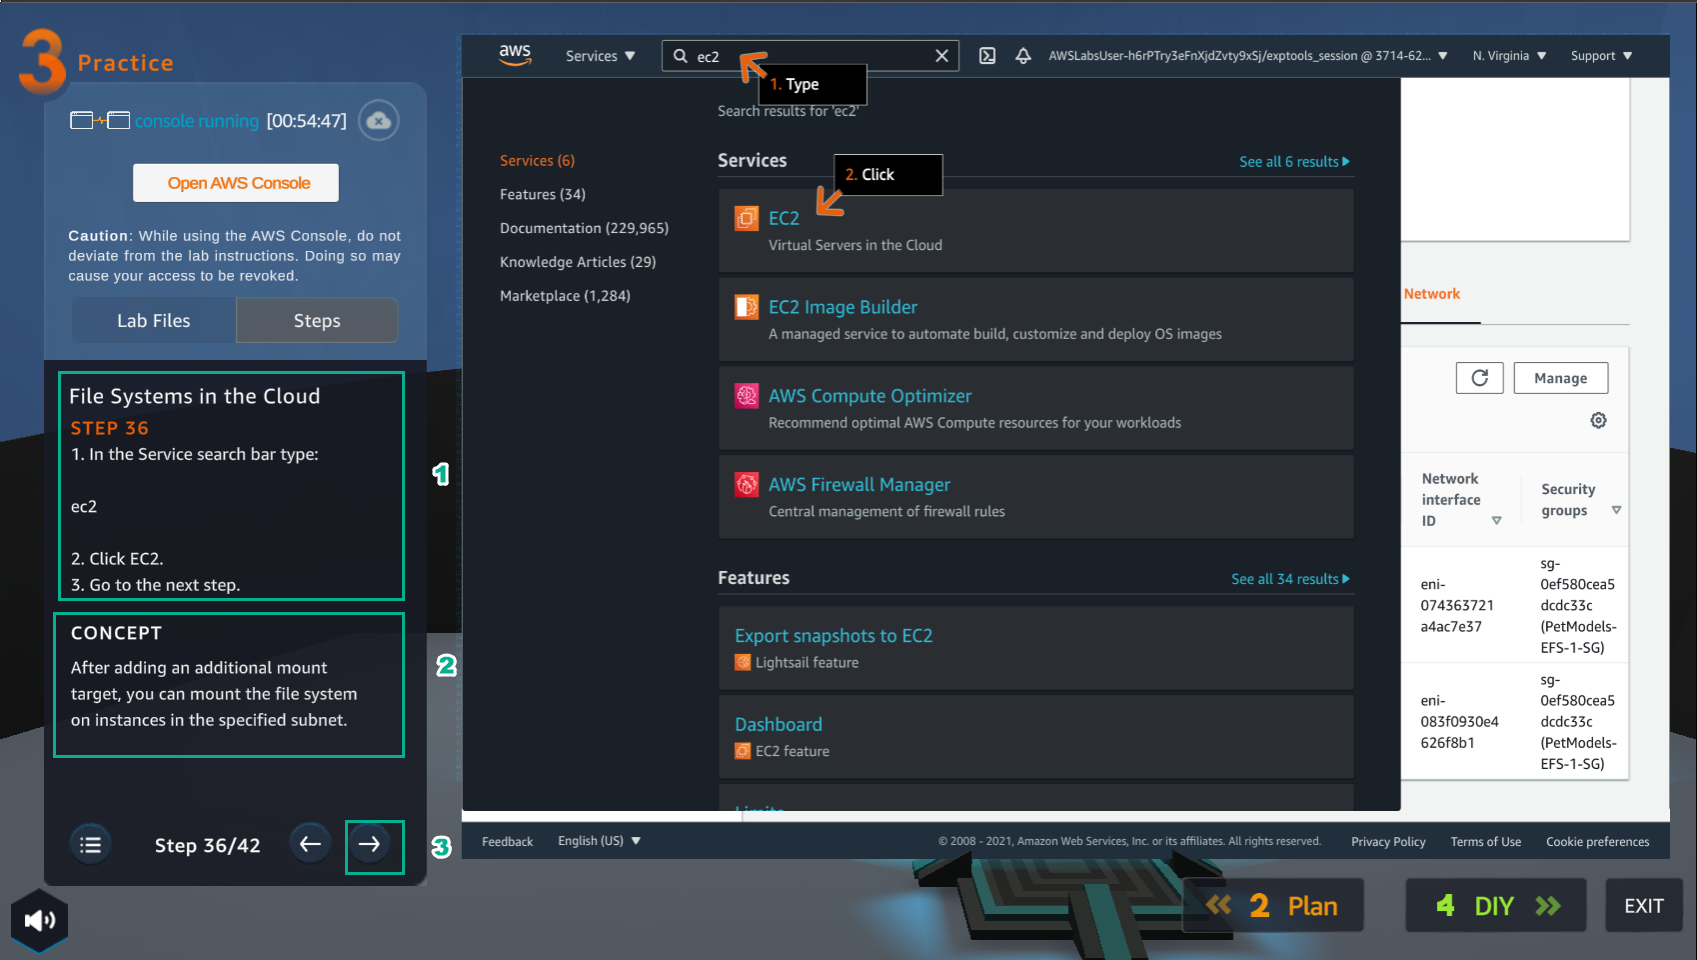
- Đọc bước 36 của File Systems in the Cloud
- Đọc CONCEPT
- Chọn mũi tên sang phải để xem các bước tiếp theo
- Trong giao diện AWS Console
- Tìm EC2
- Chọn EC2
- Trong giao diện Practice
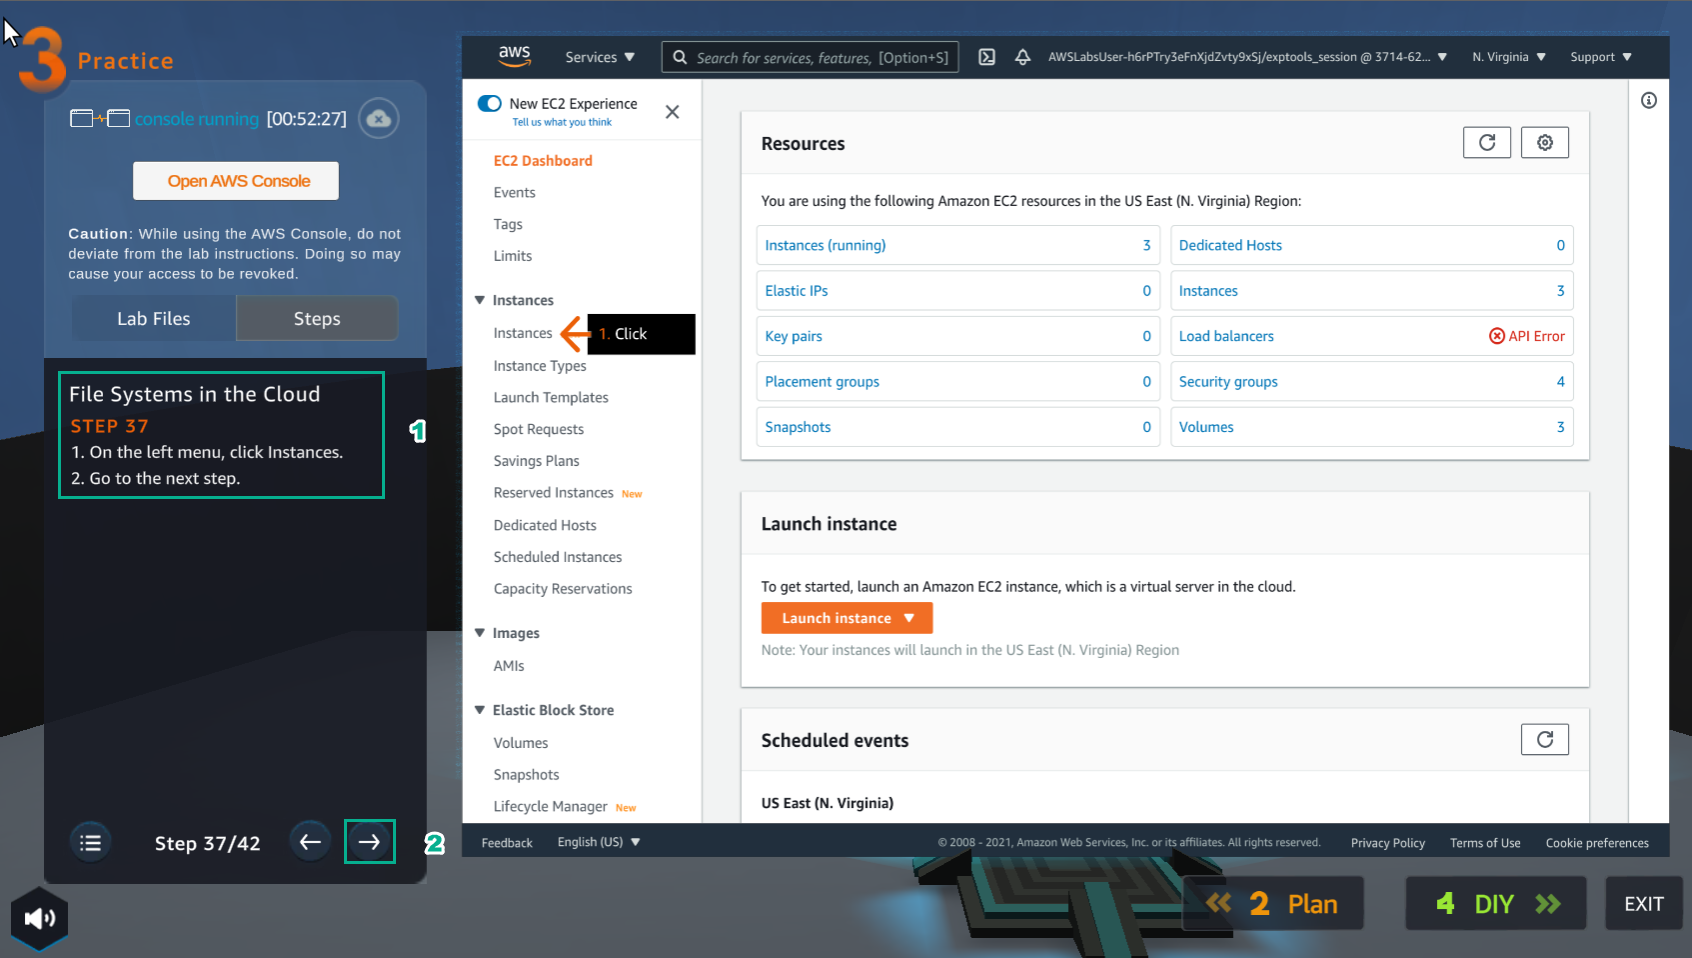
- Đọc bước 37 của File Systems in the Cloud
- Chọn mũi tên sang phải để xem các bước tiếp theo
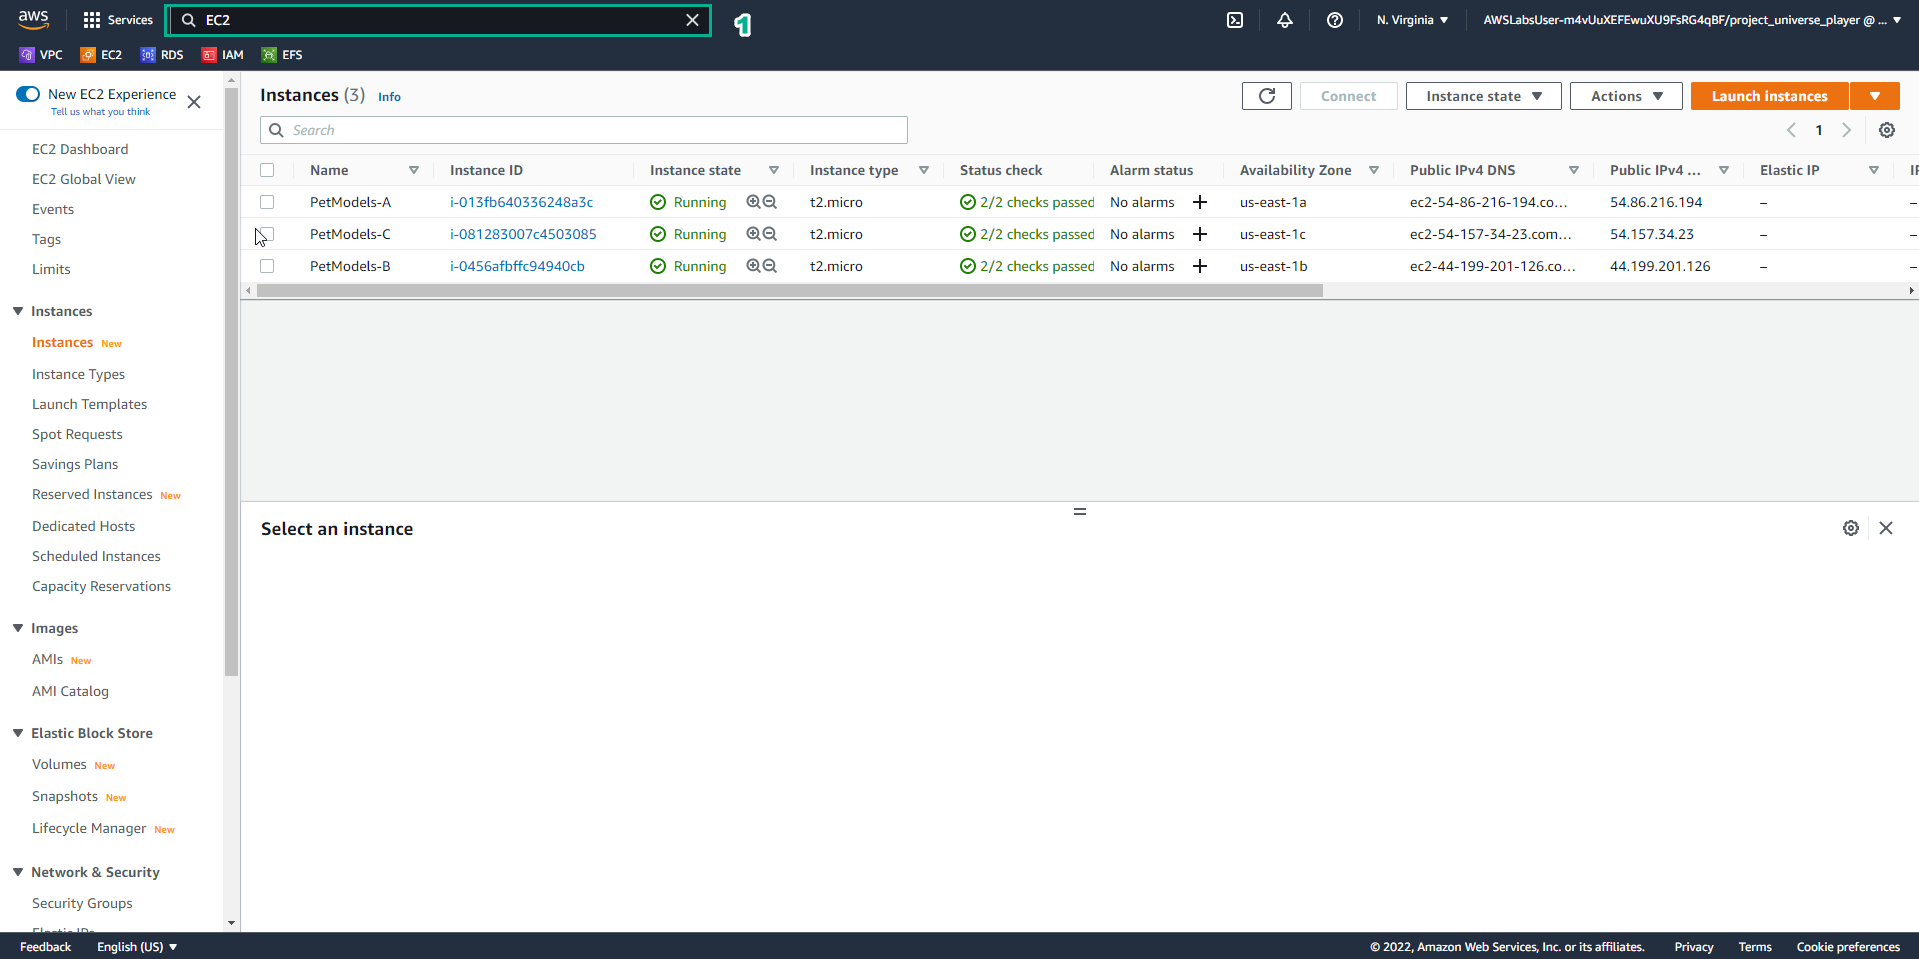
- Trong giao diện EC2
- Chọn Instances

- Trong giao diện Practice
- Đọc bước 38 của File Systems in the Cloud
- Chọn mũi tên sang phải để xem các bước tiếp theo
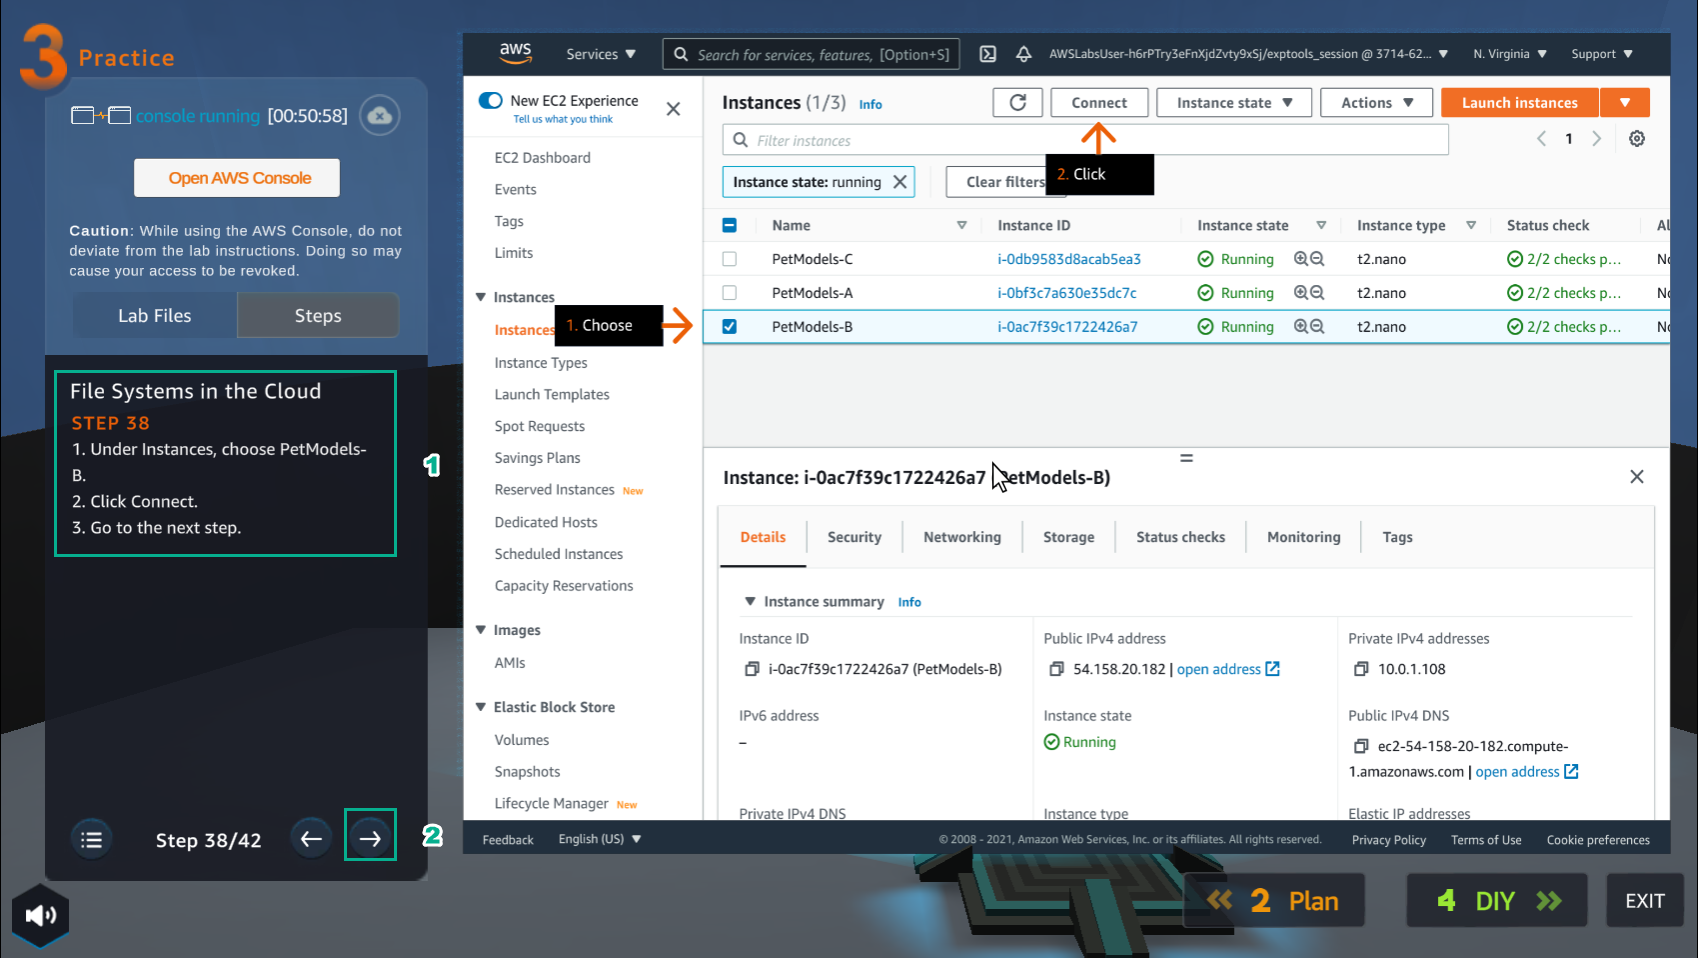
- Trong giao diện Instances
- Chọn PetModels-B
- Trong giao diện Practice
- Đọc bước 39 của File Systems in the Cloud
- Đọc CONCEPT
- Chọn mũi tên sang phải để xem các bước tiếp theo
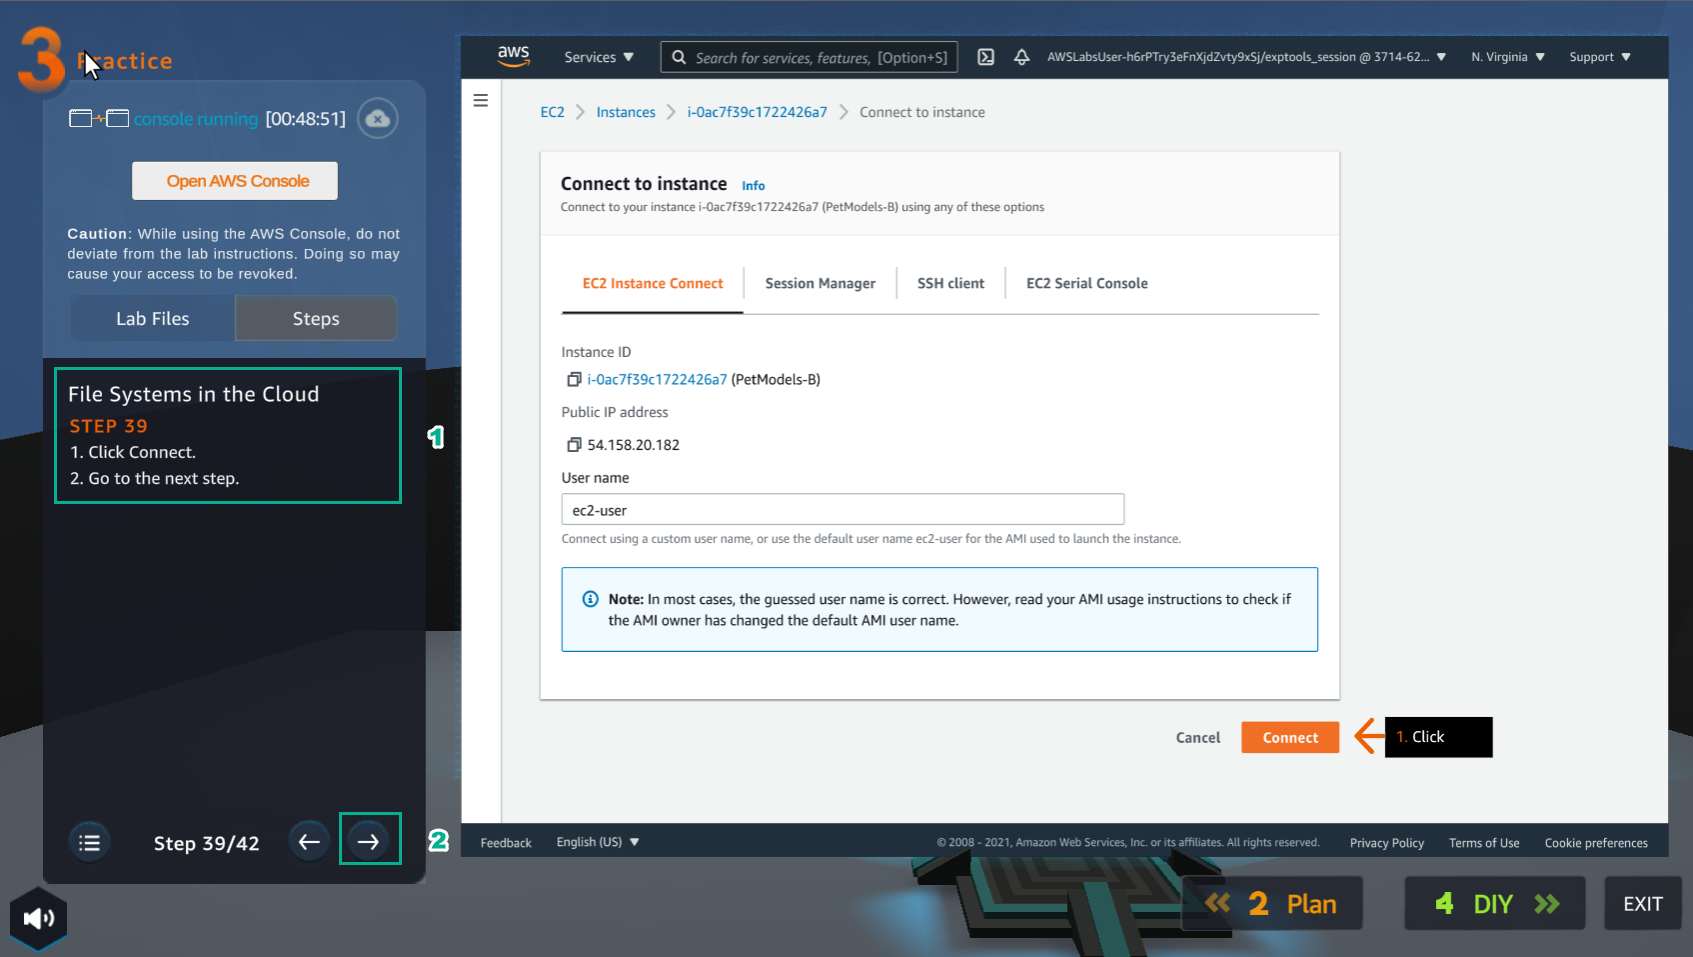
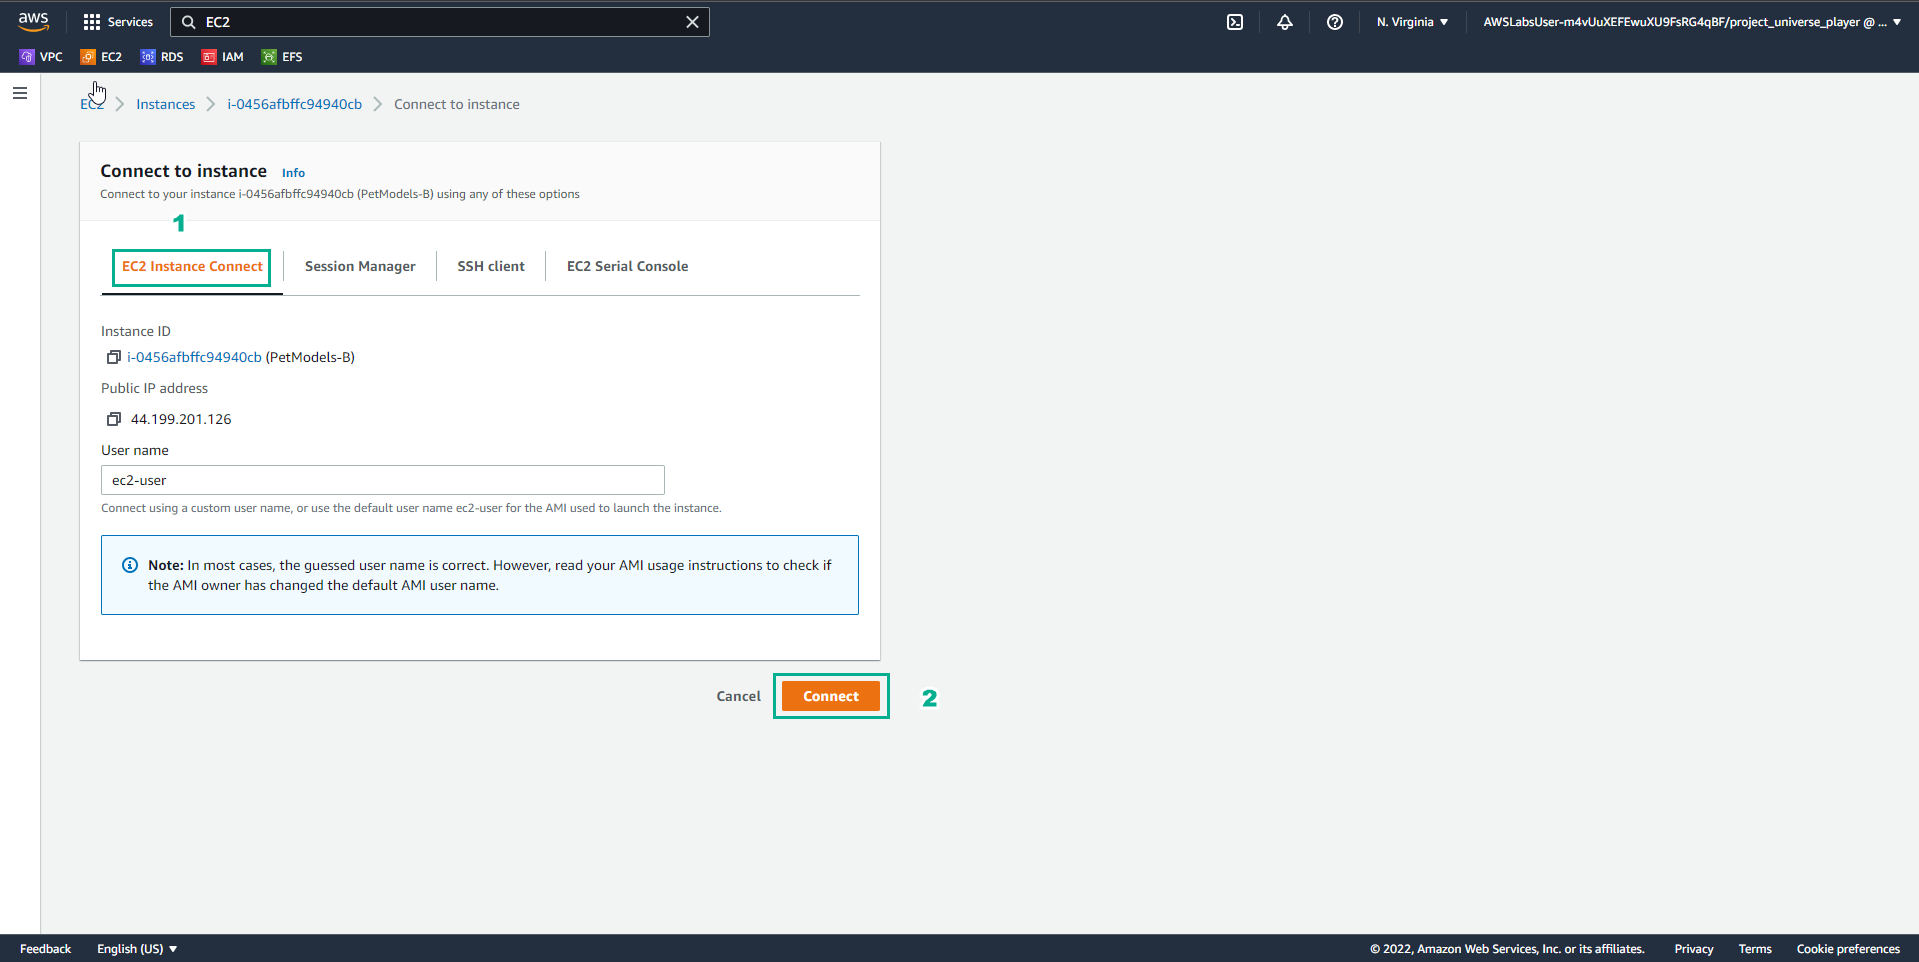
- Trong giao diện Connect to instance
- Chọn EC2 Instance Connect
- Chọn Connect
- Trong giao diện Practice
- Đọc bước 40 của File Systems in the Cloud
- Đọc CONCEPT
- Chọn mũi tên sang phải để xem các bước tiếp theo
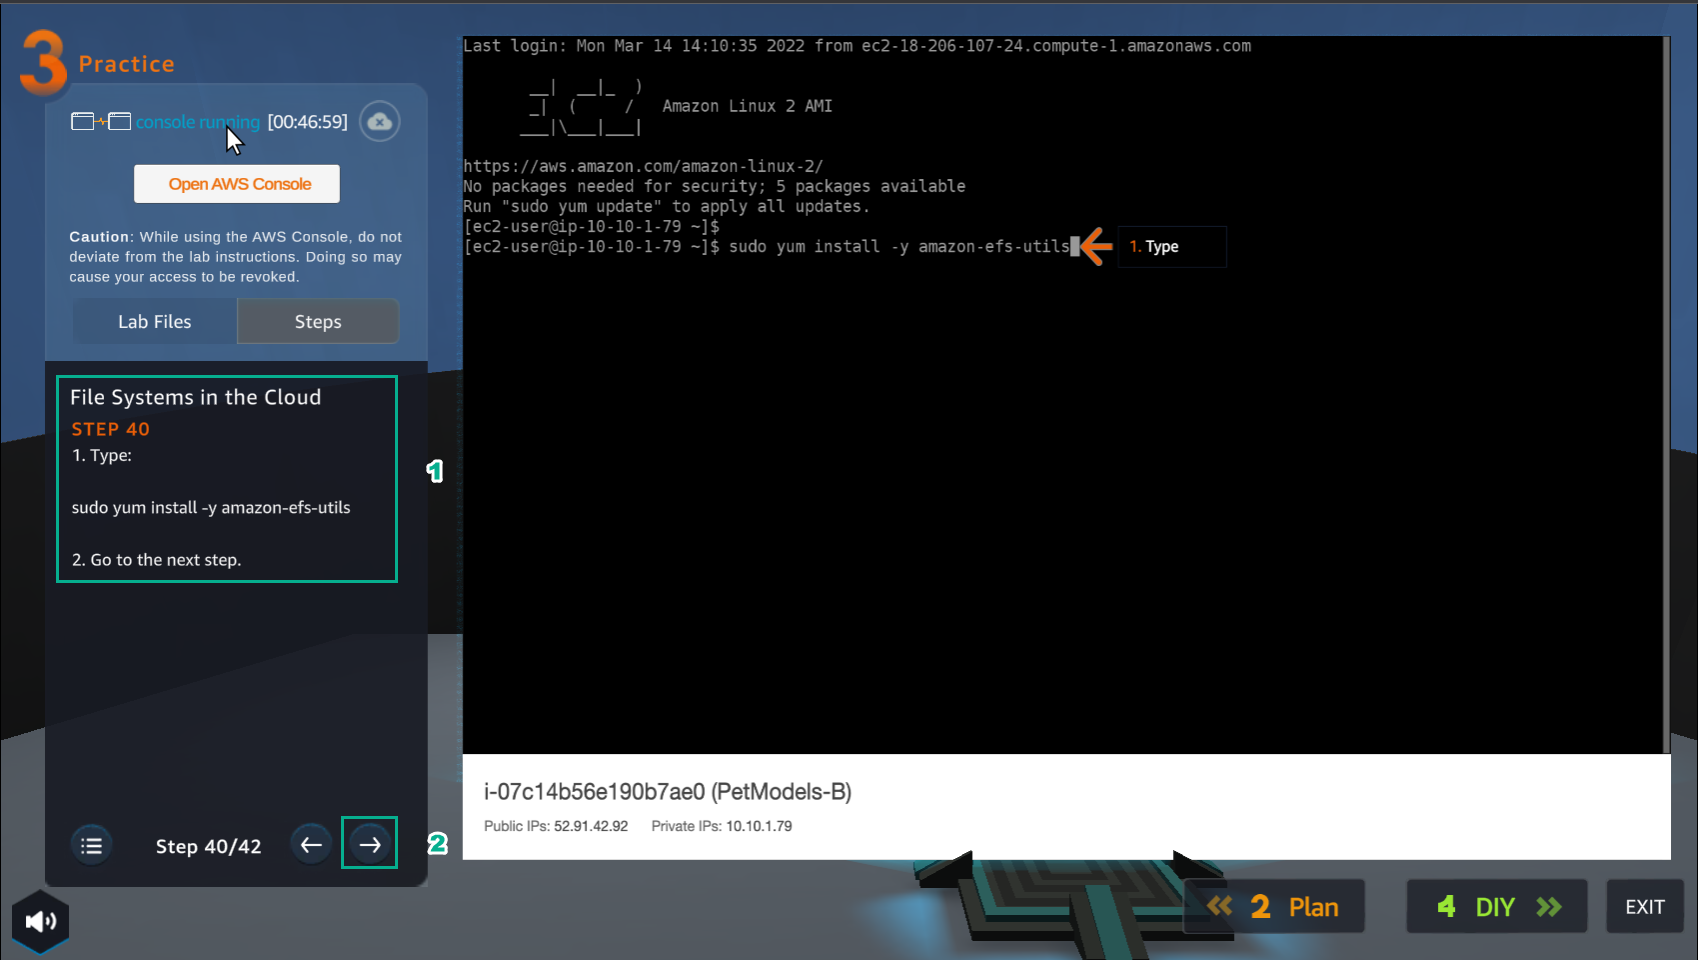
- Trong giao diện PetModels-B
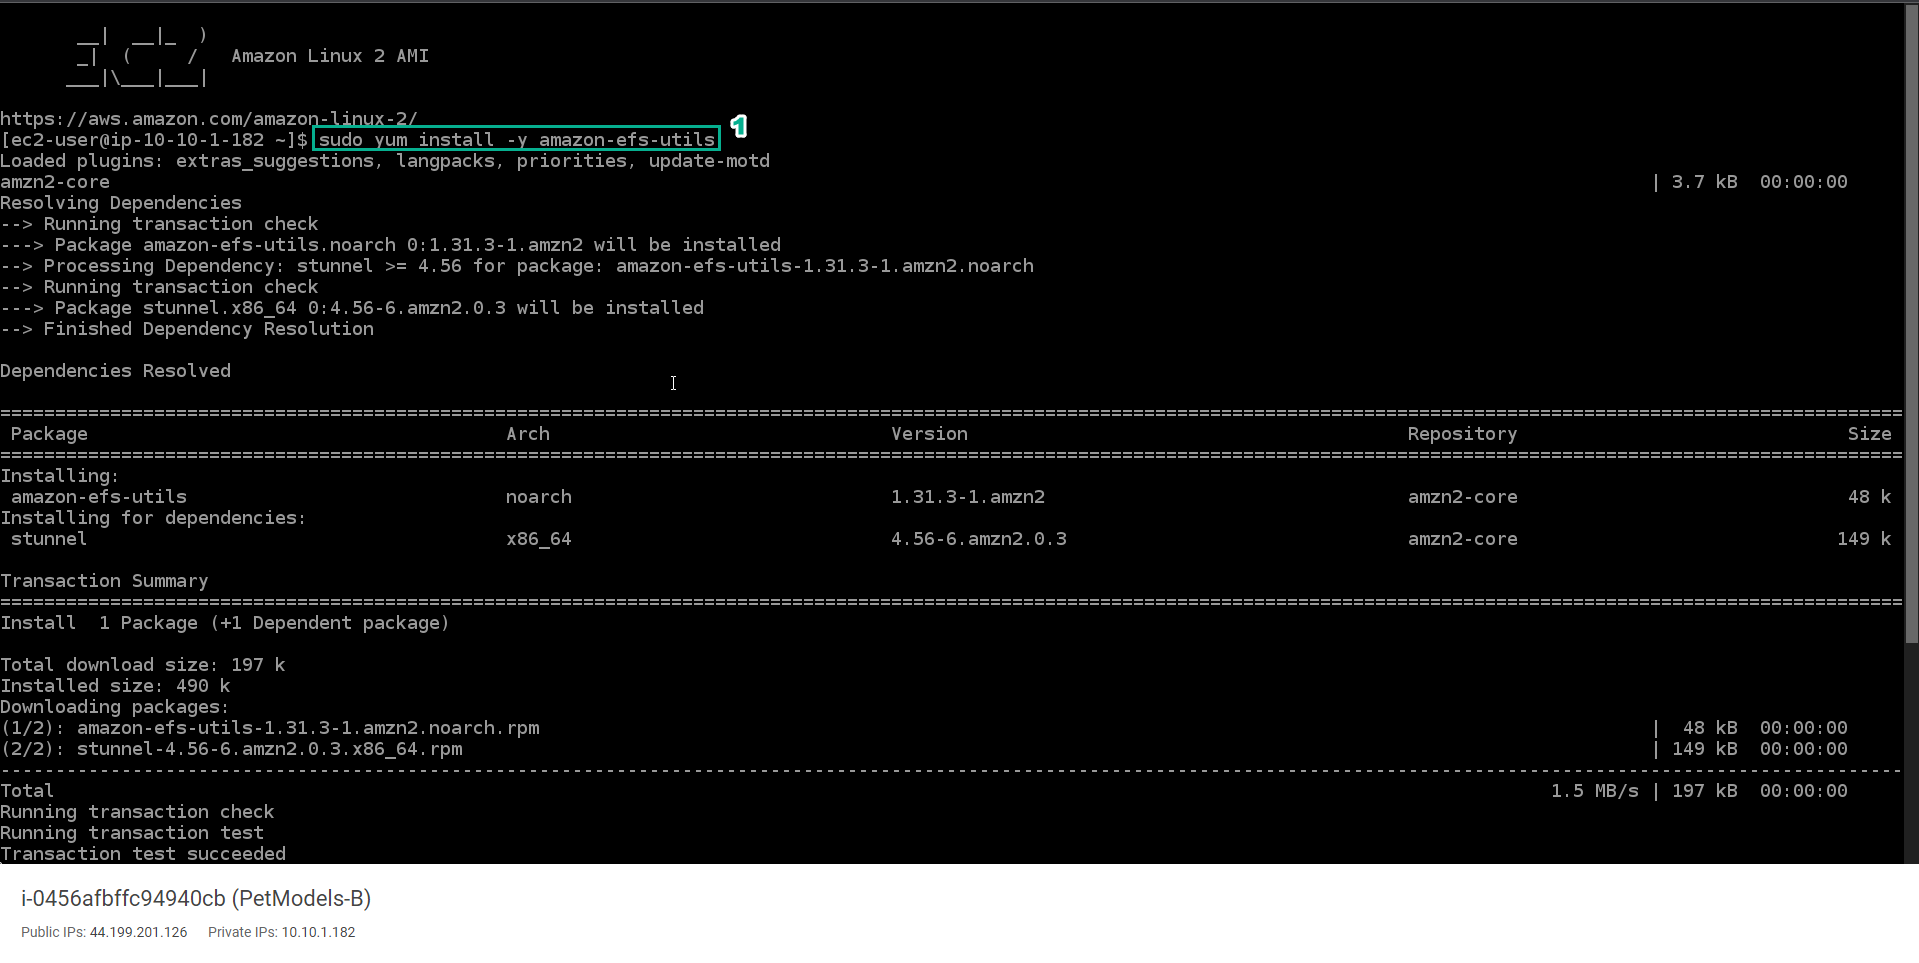
- Nhập
sudo yum install -y amazon-efs-utils
- Trong giao diện Practice
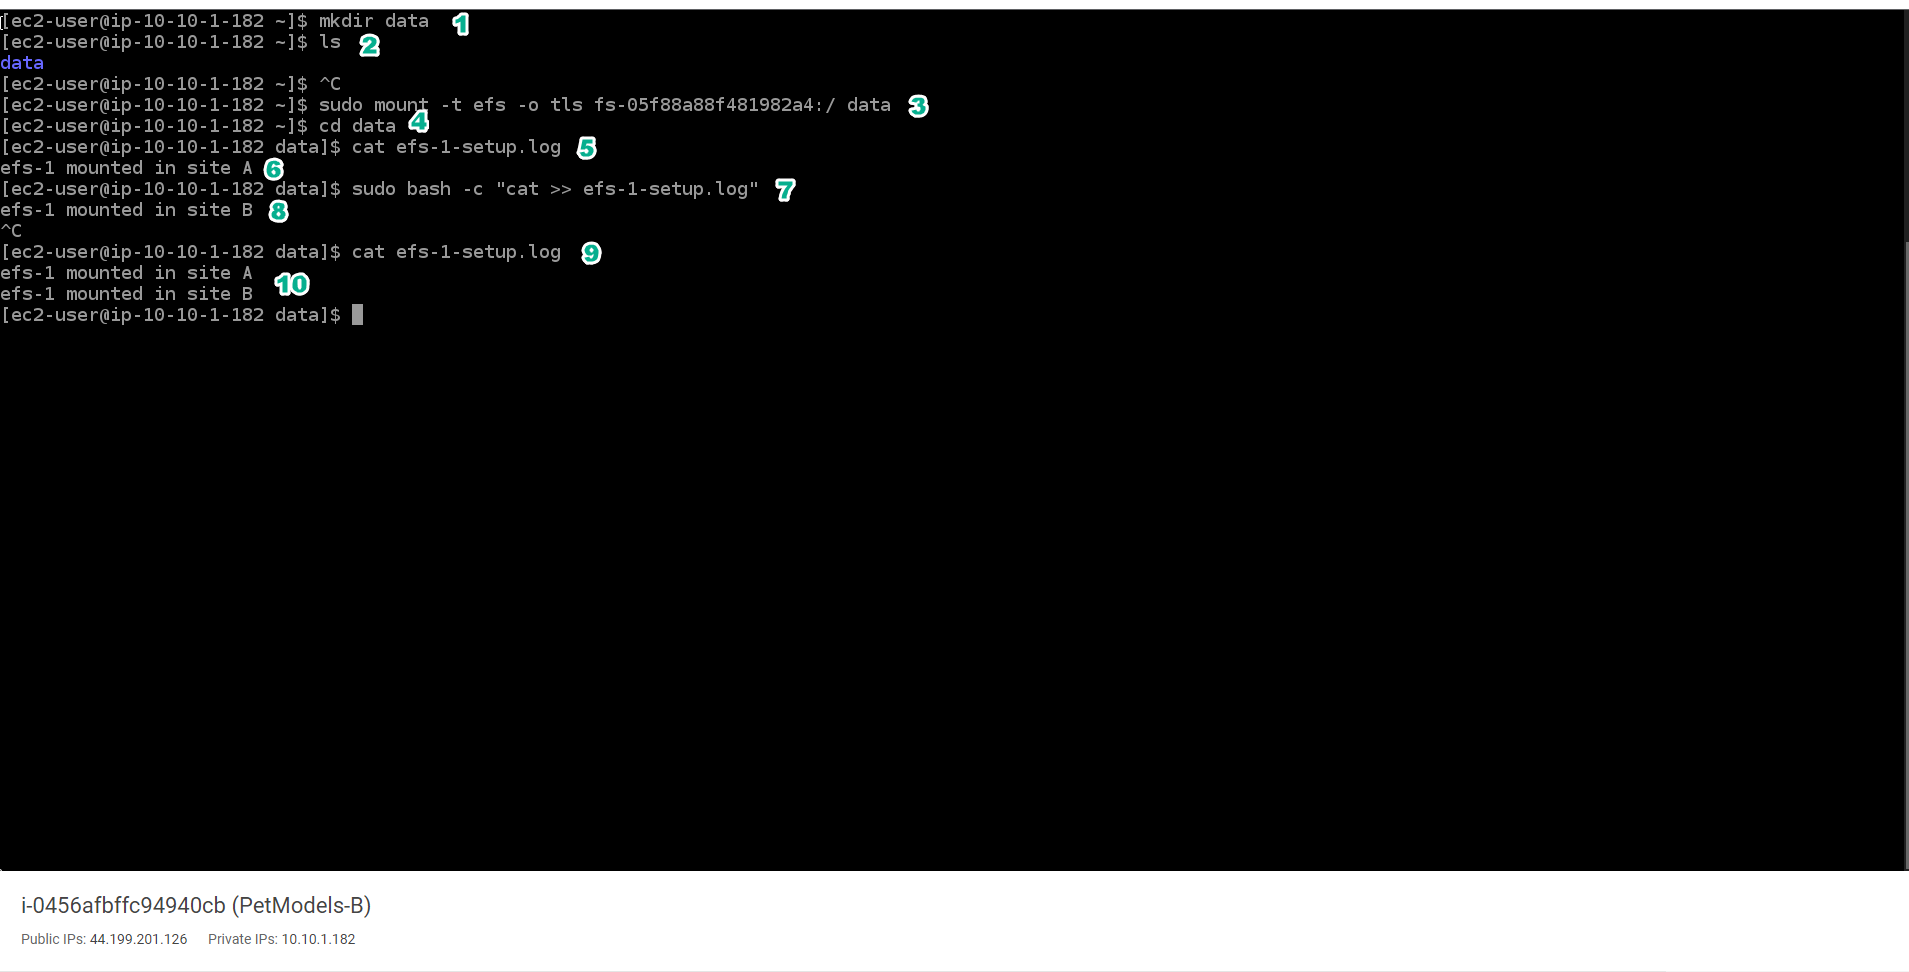
- Đọc bước 41 của File Systems in the Cloud
- Đọc CONCEPT
- Chọn mũi tên sang phải để xem các bước tiếp theo
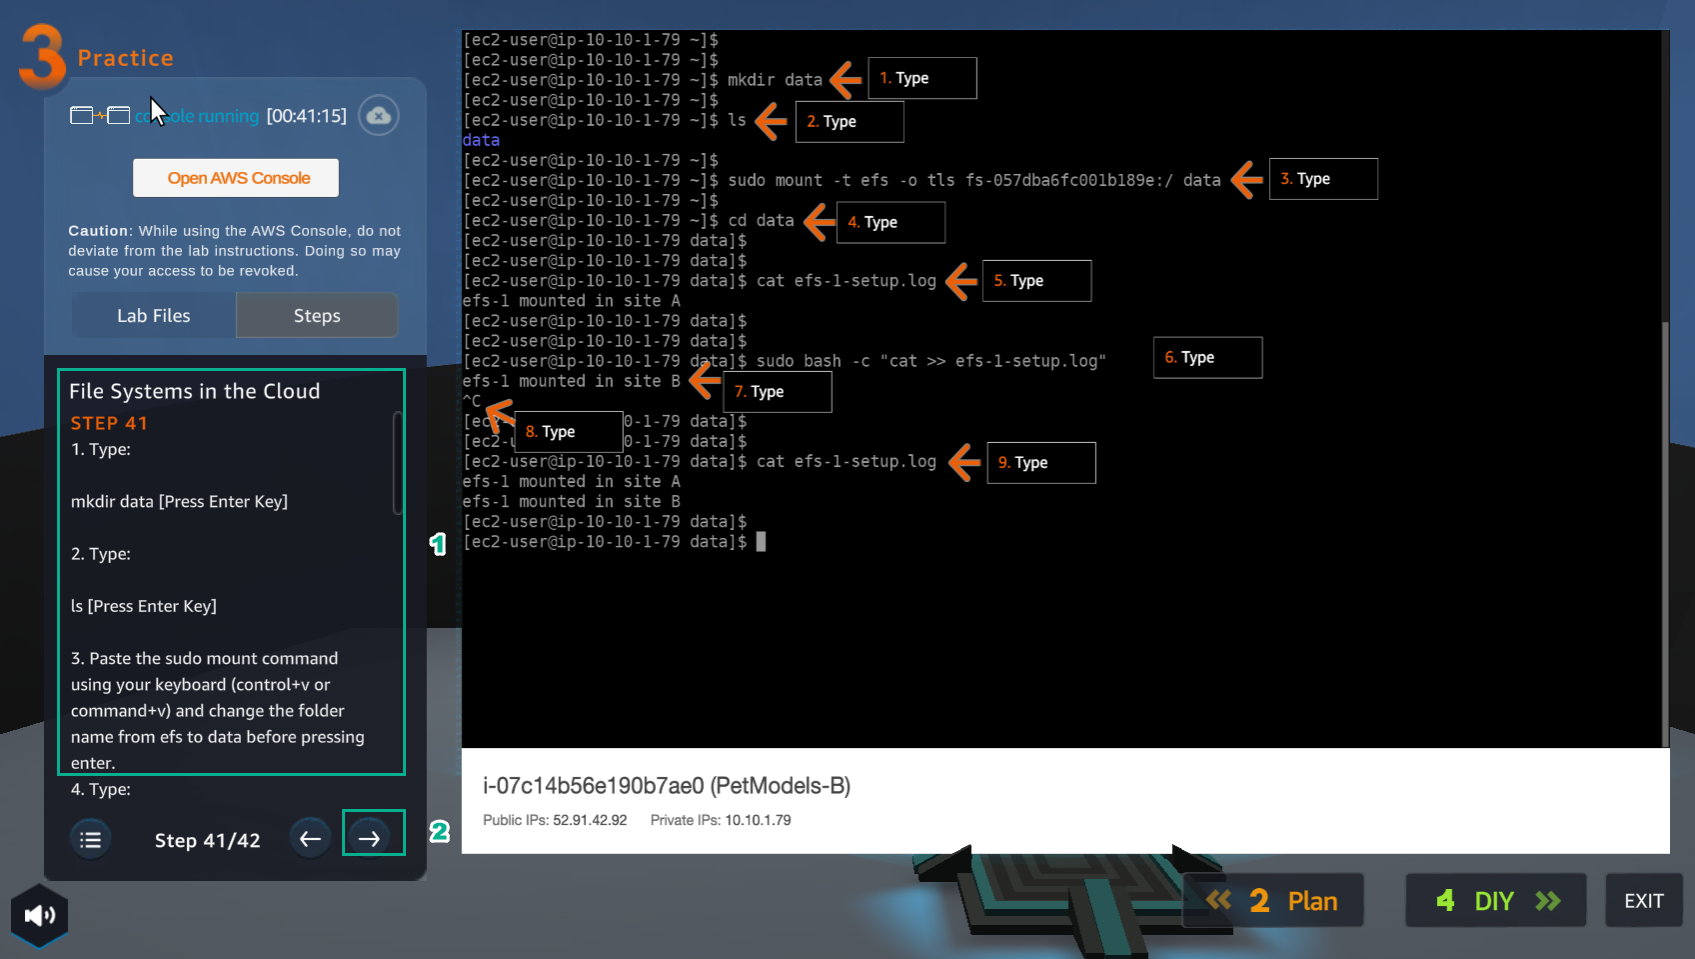
- Trong giao diện PetModels-B
- Nhập
mkdir data - Nhập
ls - Nhập dòng lệnh của Using the EFS mount helper đã sao chép ở bước 41, sao đó thay efs thành data
- Nhập
cd data - Nhập
cat efs-l-setup.log - Nhập
sudo bash -c "cat >> efs-l-setup.log" - Nhập
efs-1-mounted in site B - Sử dụng Ctrl + C
- Nhập
cat efs-l-setup.log - Xem kết quả
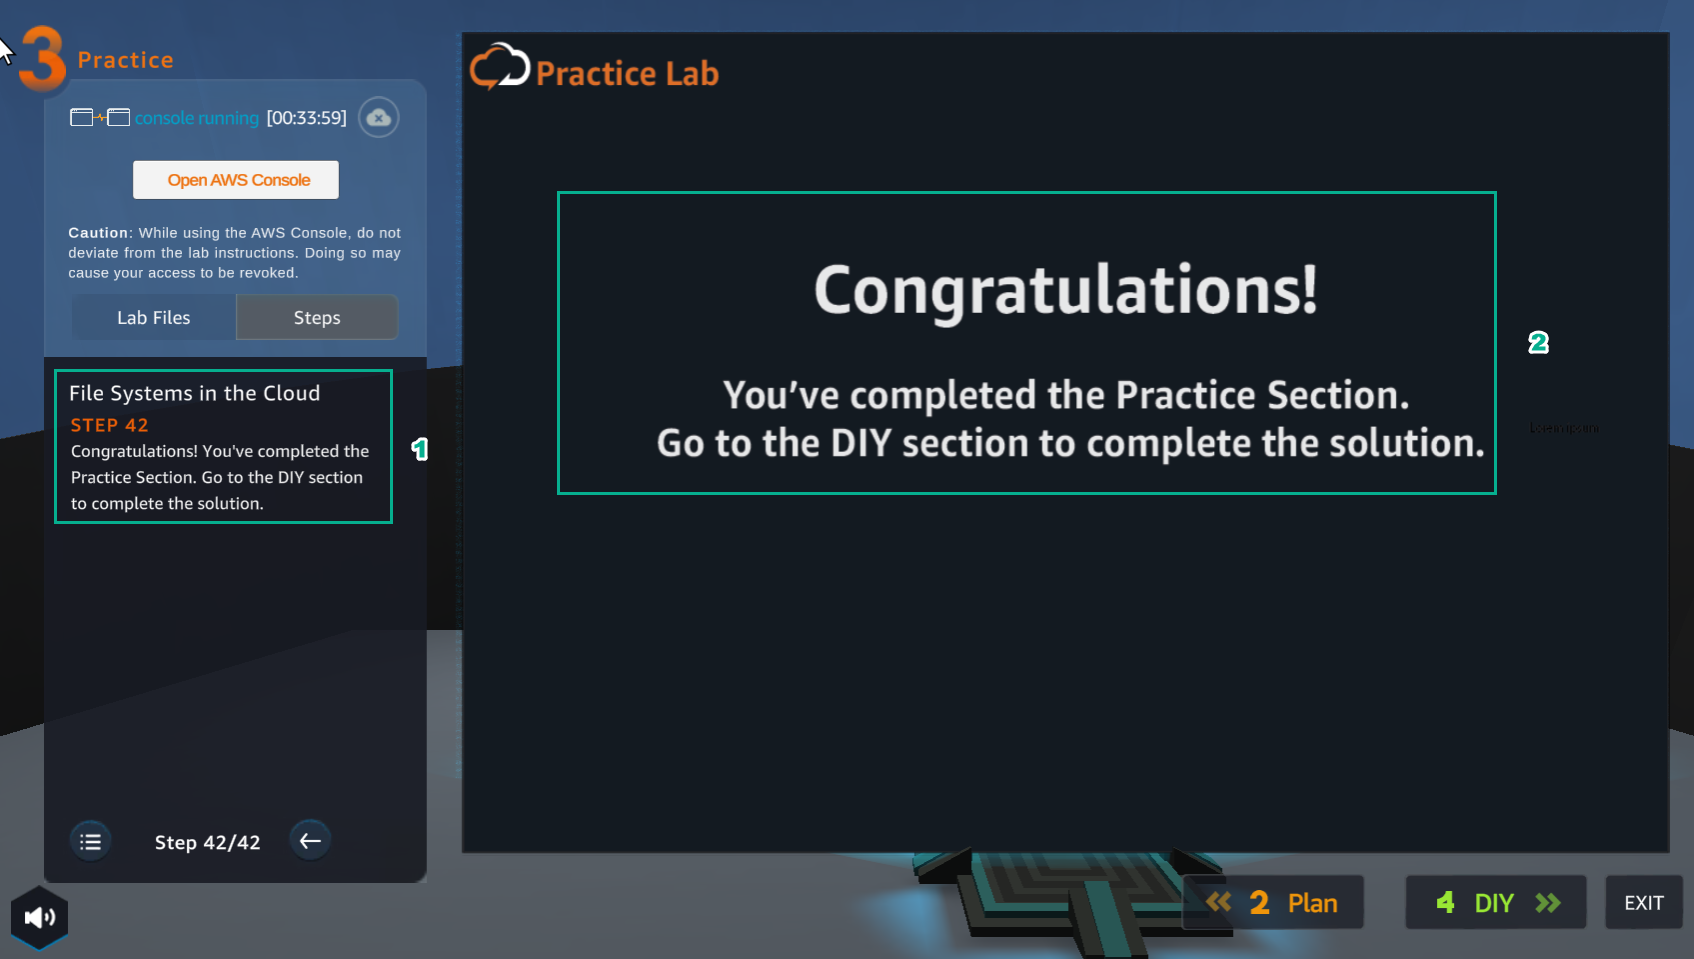
- Chúc mừng người chơi đã hoàn thành bài lab