DIY
After completing the lab, the player does DIY
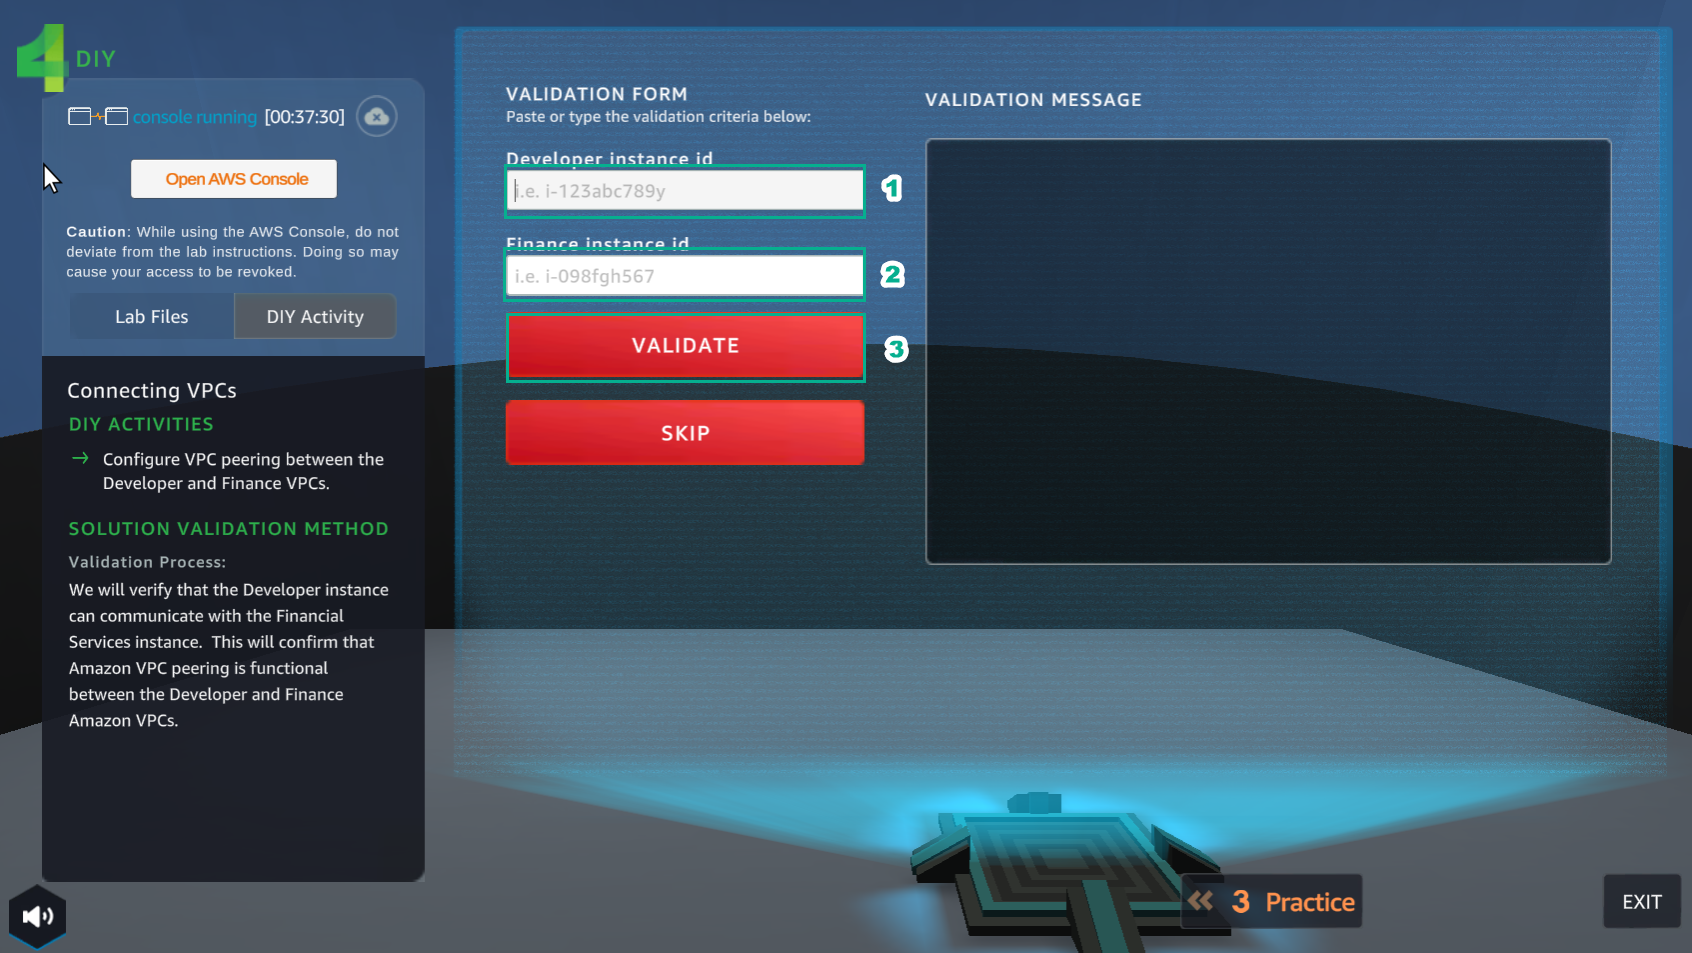
- Interface DIY
- Read DIY ACTIVITIES
- Read SOLUTION VALIDATION METHOD
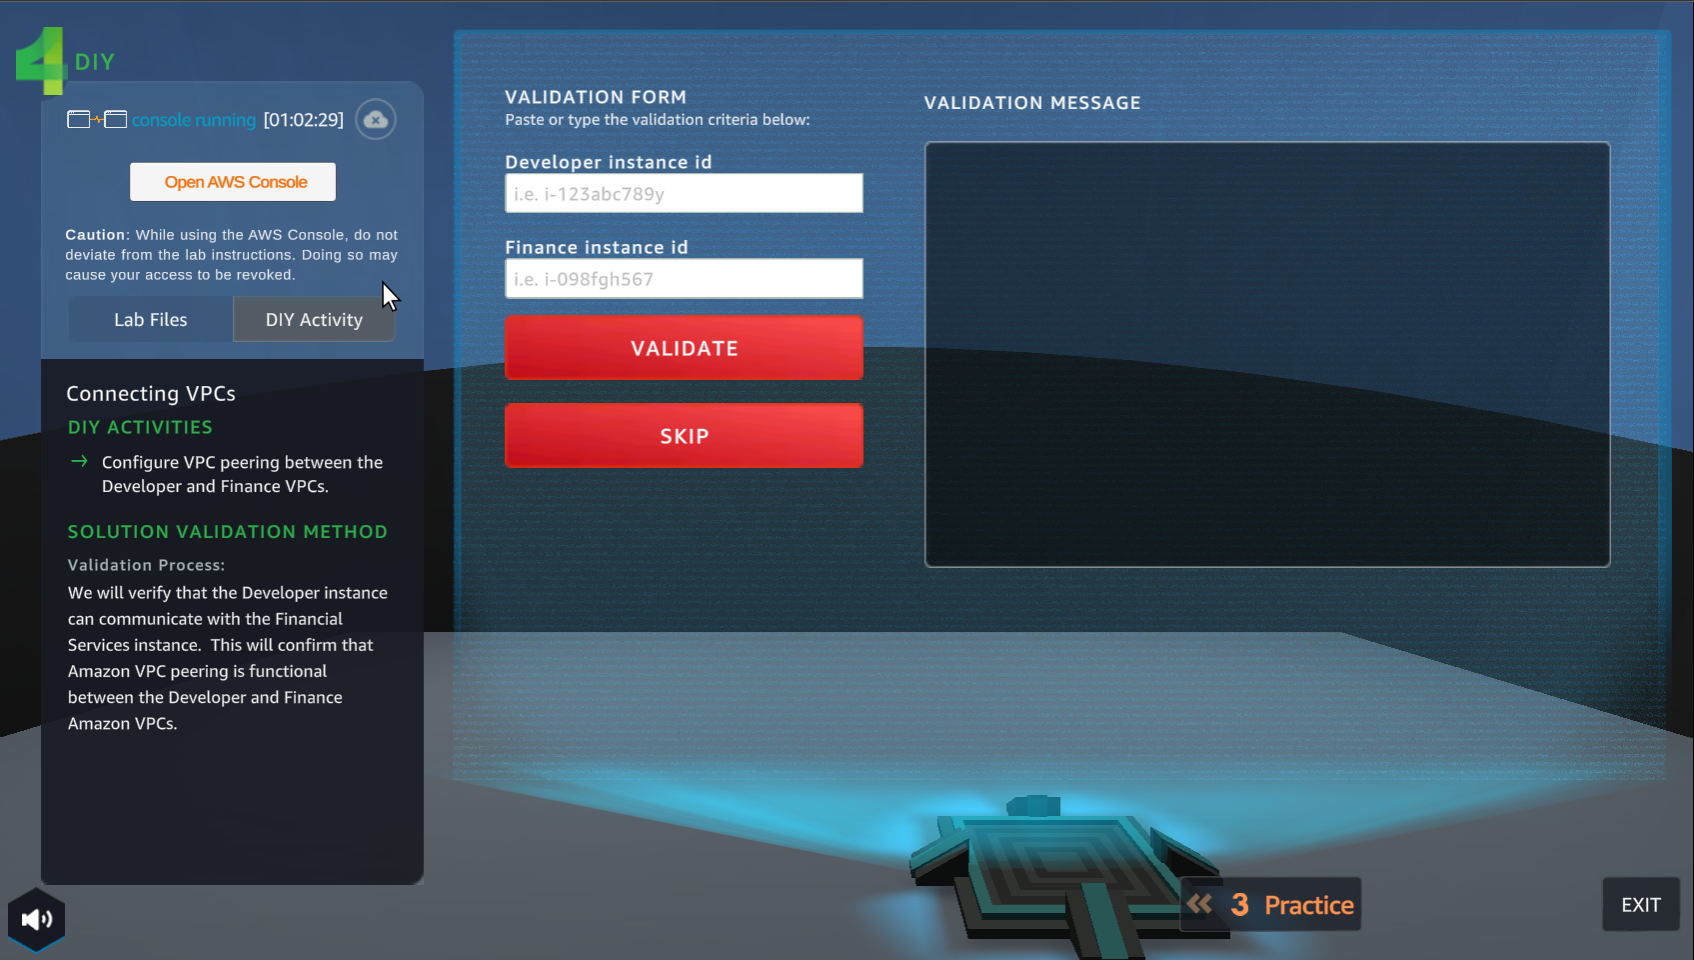
- Select Open AWS Console
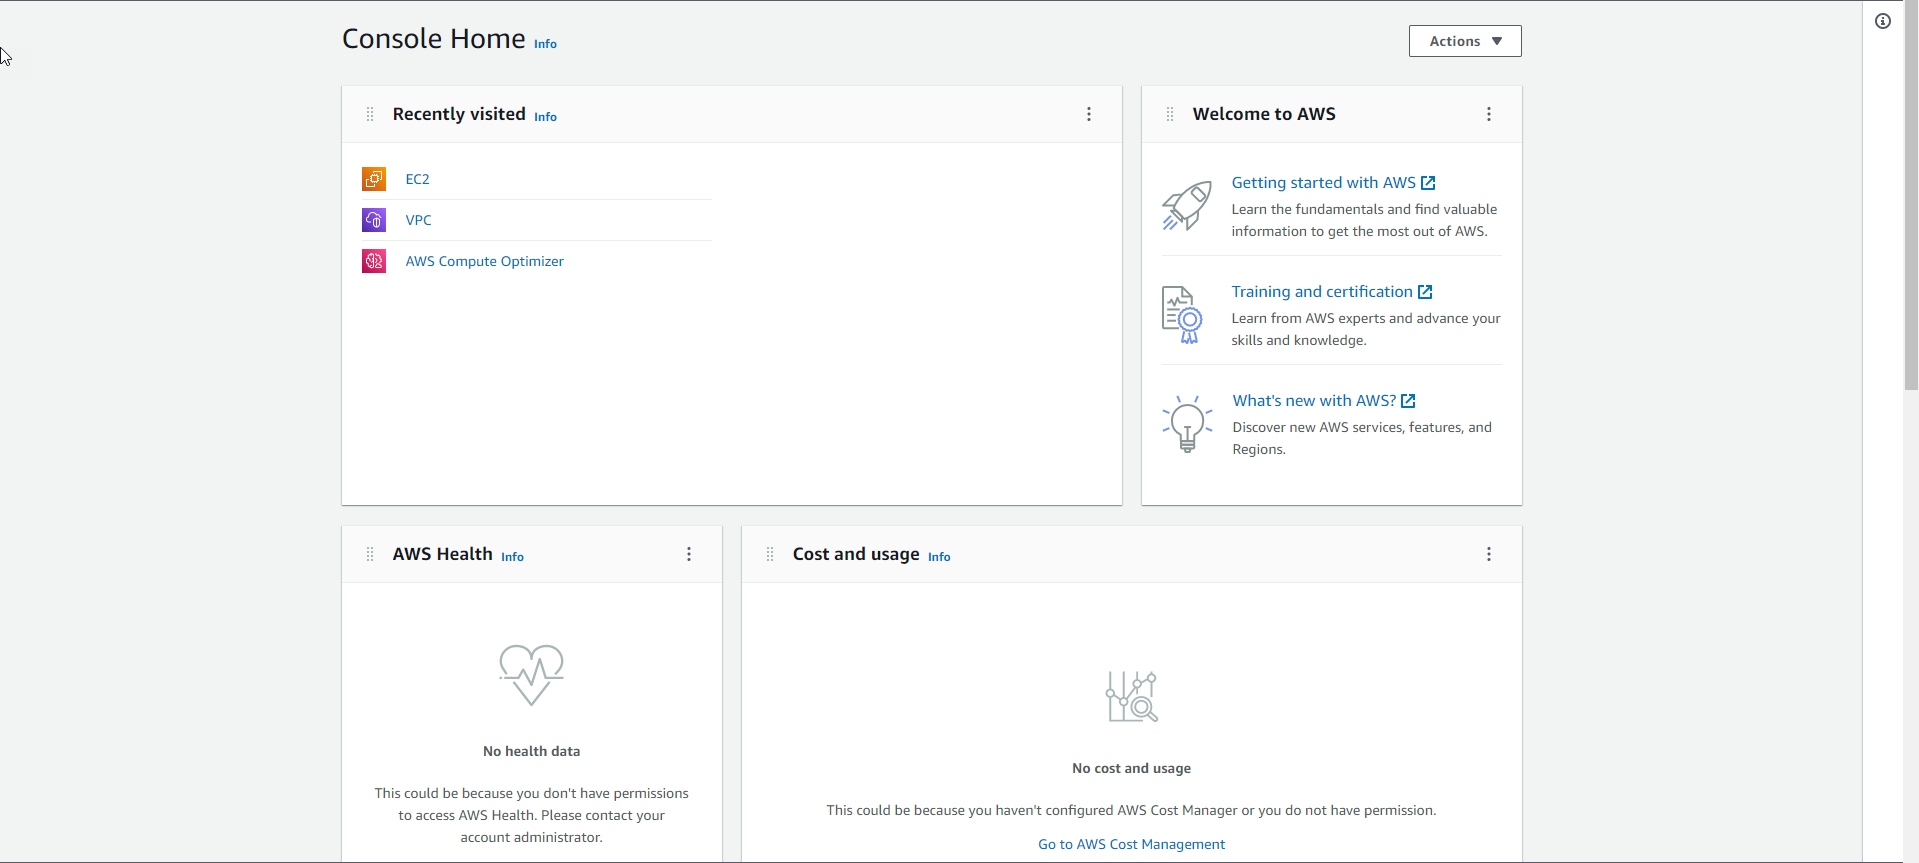
- In the AWS Console interface
- Find VPC
- Select VPC
- Select Your VPCs
- View the VPC

- In the AWS Console interface
- Find EC2
- Select EC2
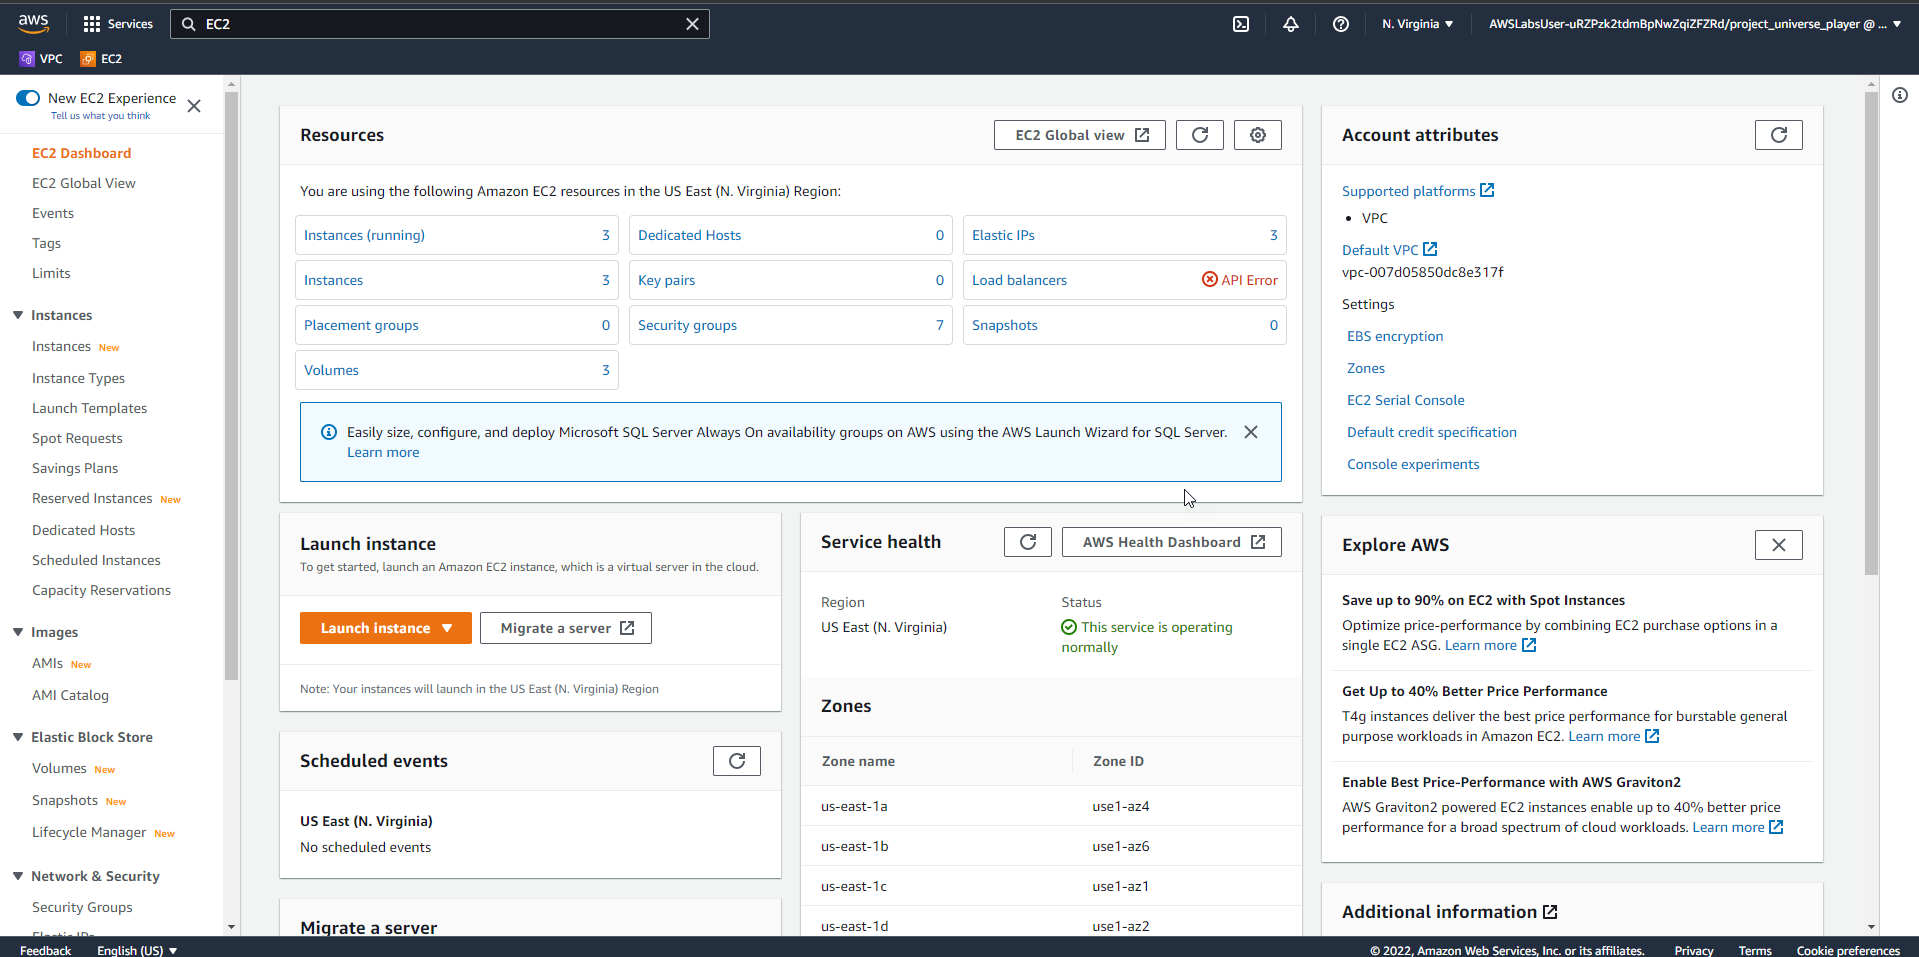
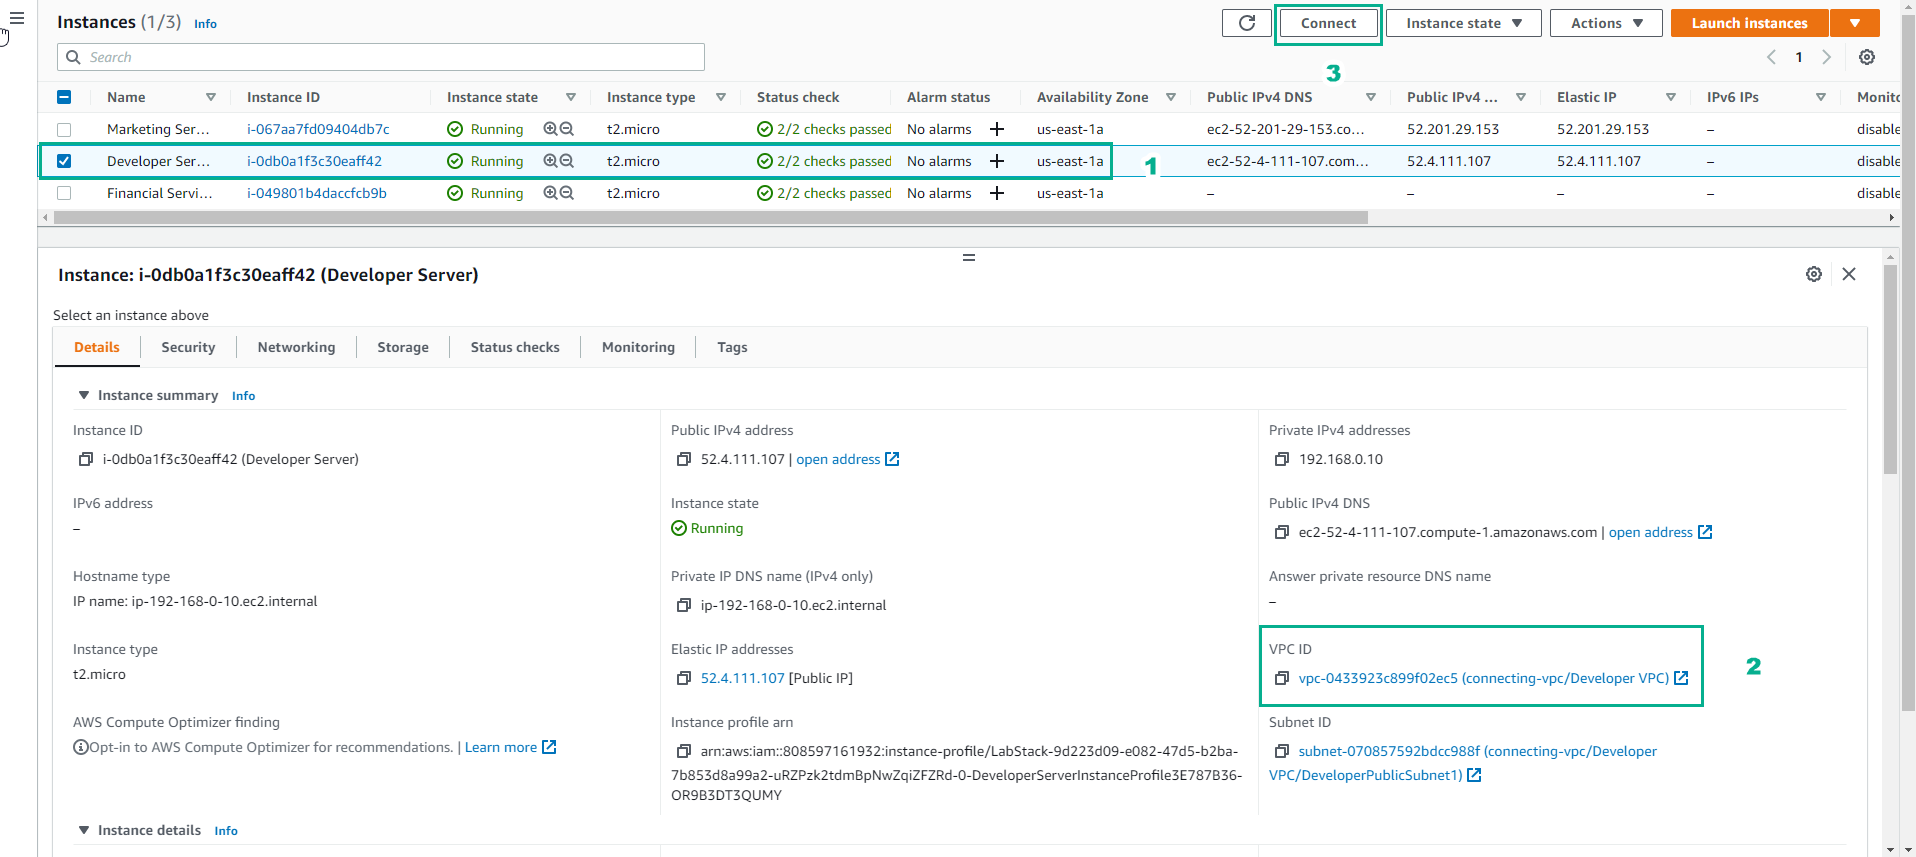
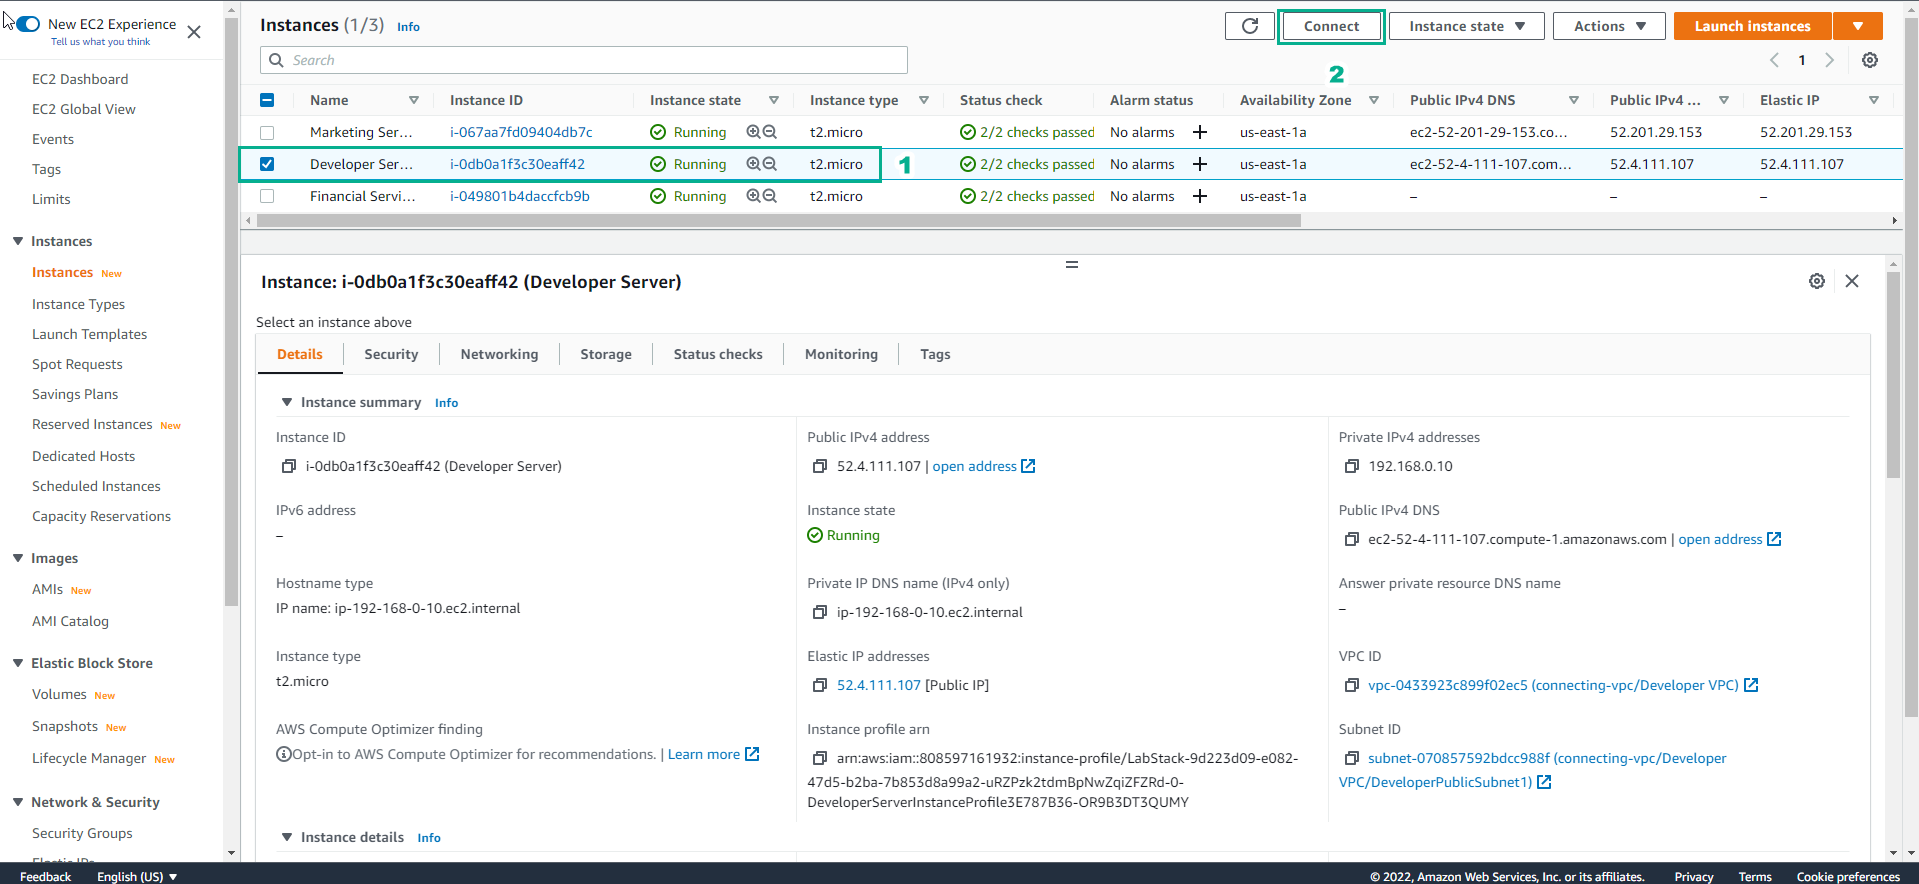
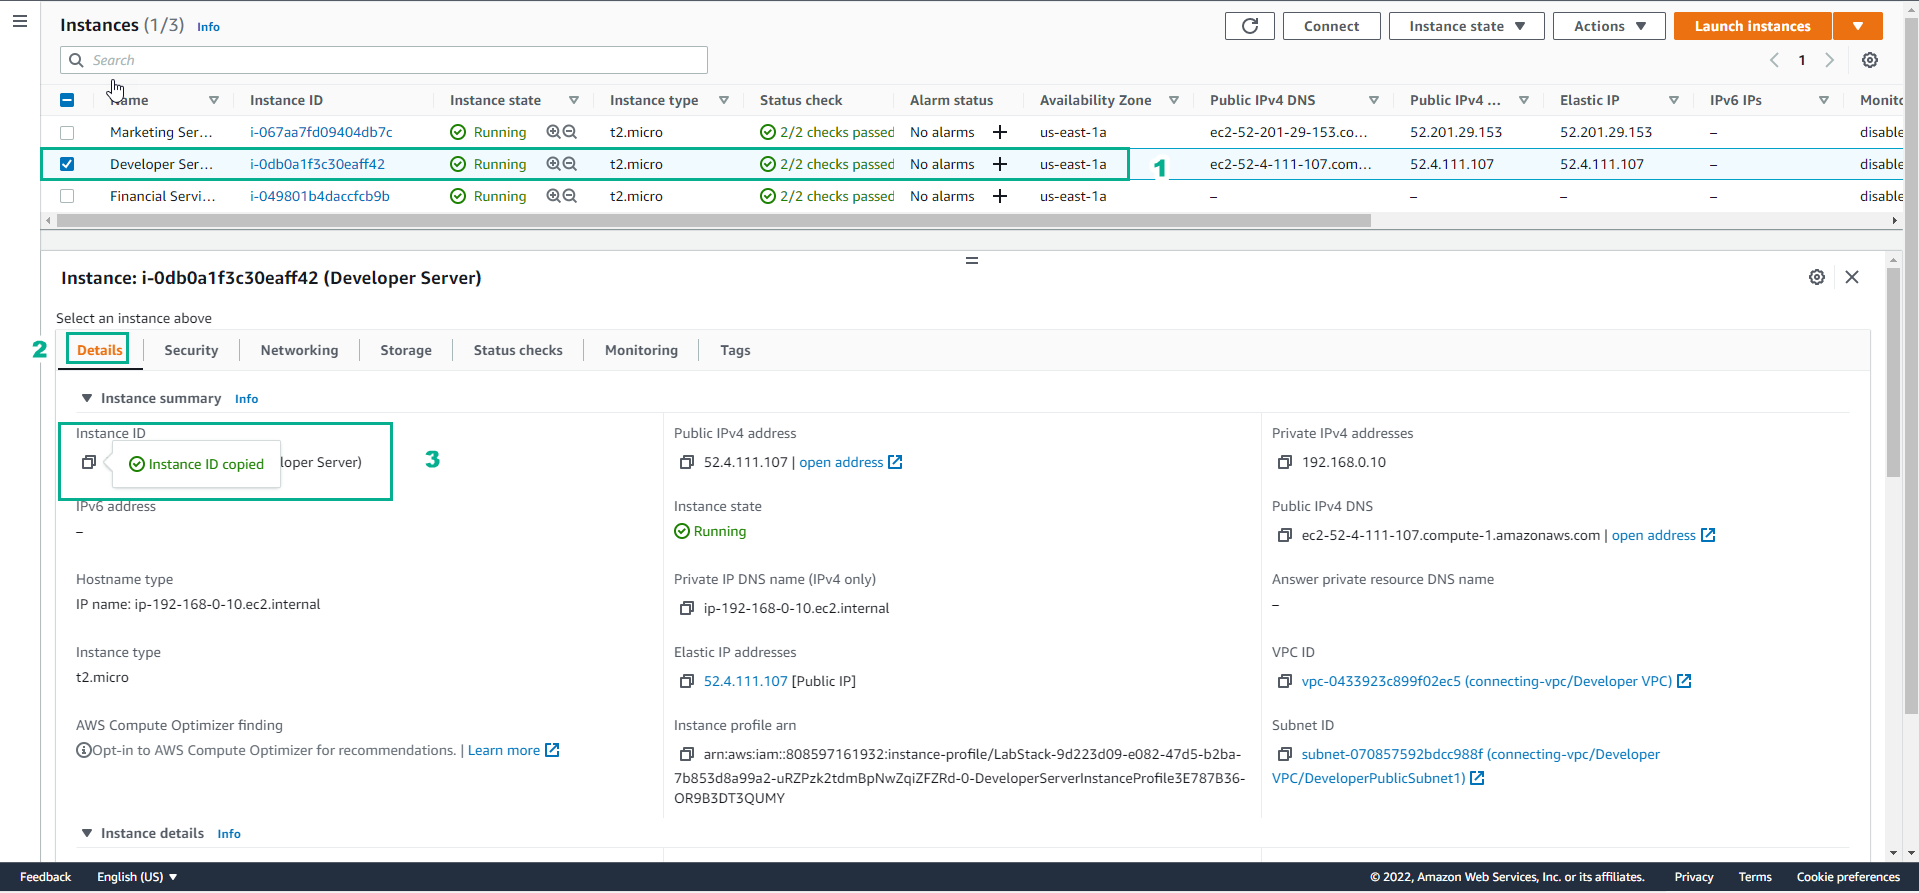
- In the EC2 interface
- Select Instances
- Select Developer Server
- Select Details
- View VPC ID
- Select Connect
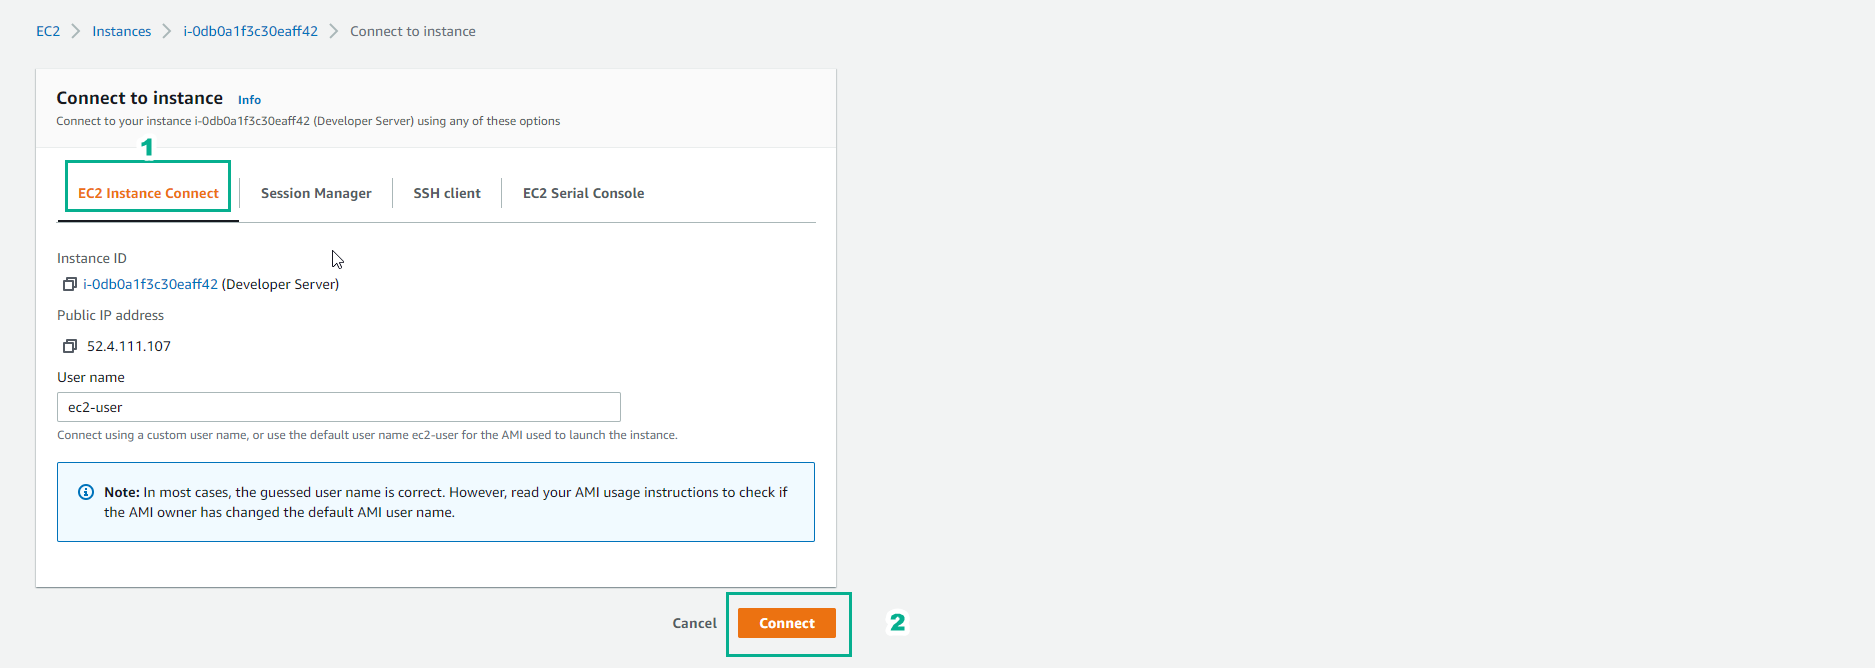
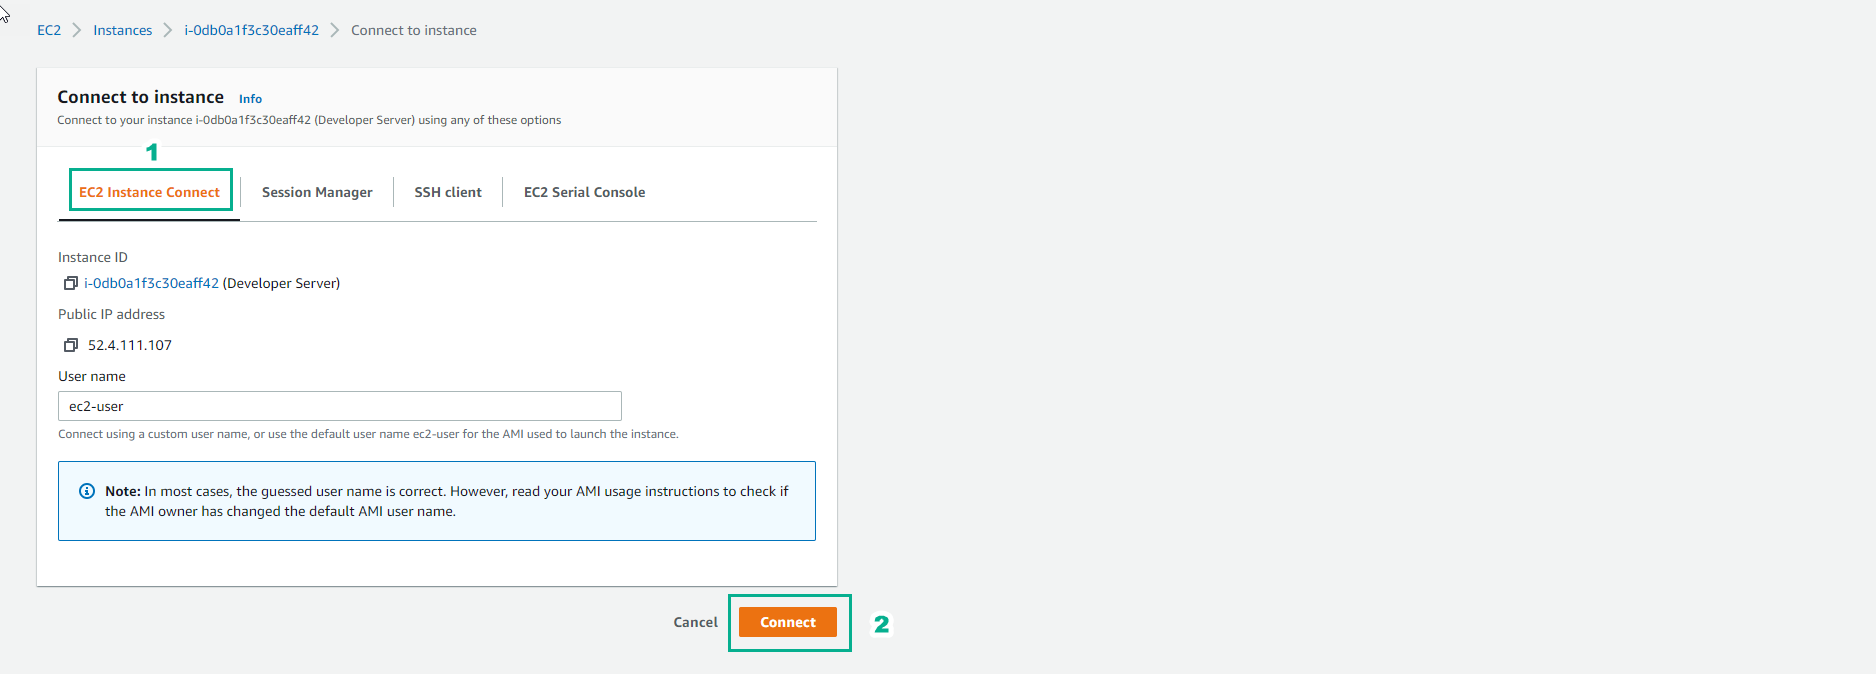
- In the Connect to instance interface
- Select EC2 instance Connect
- Select Connect
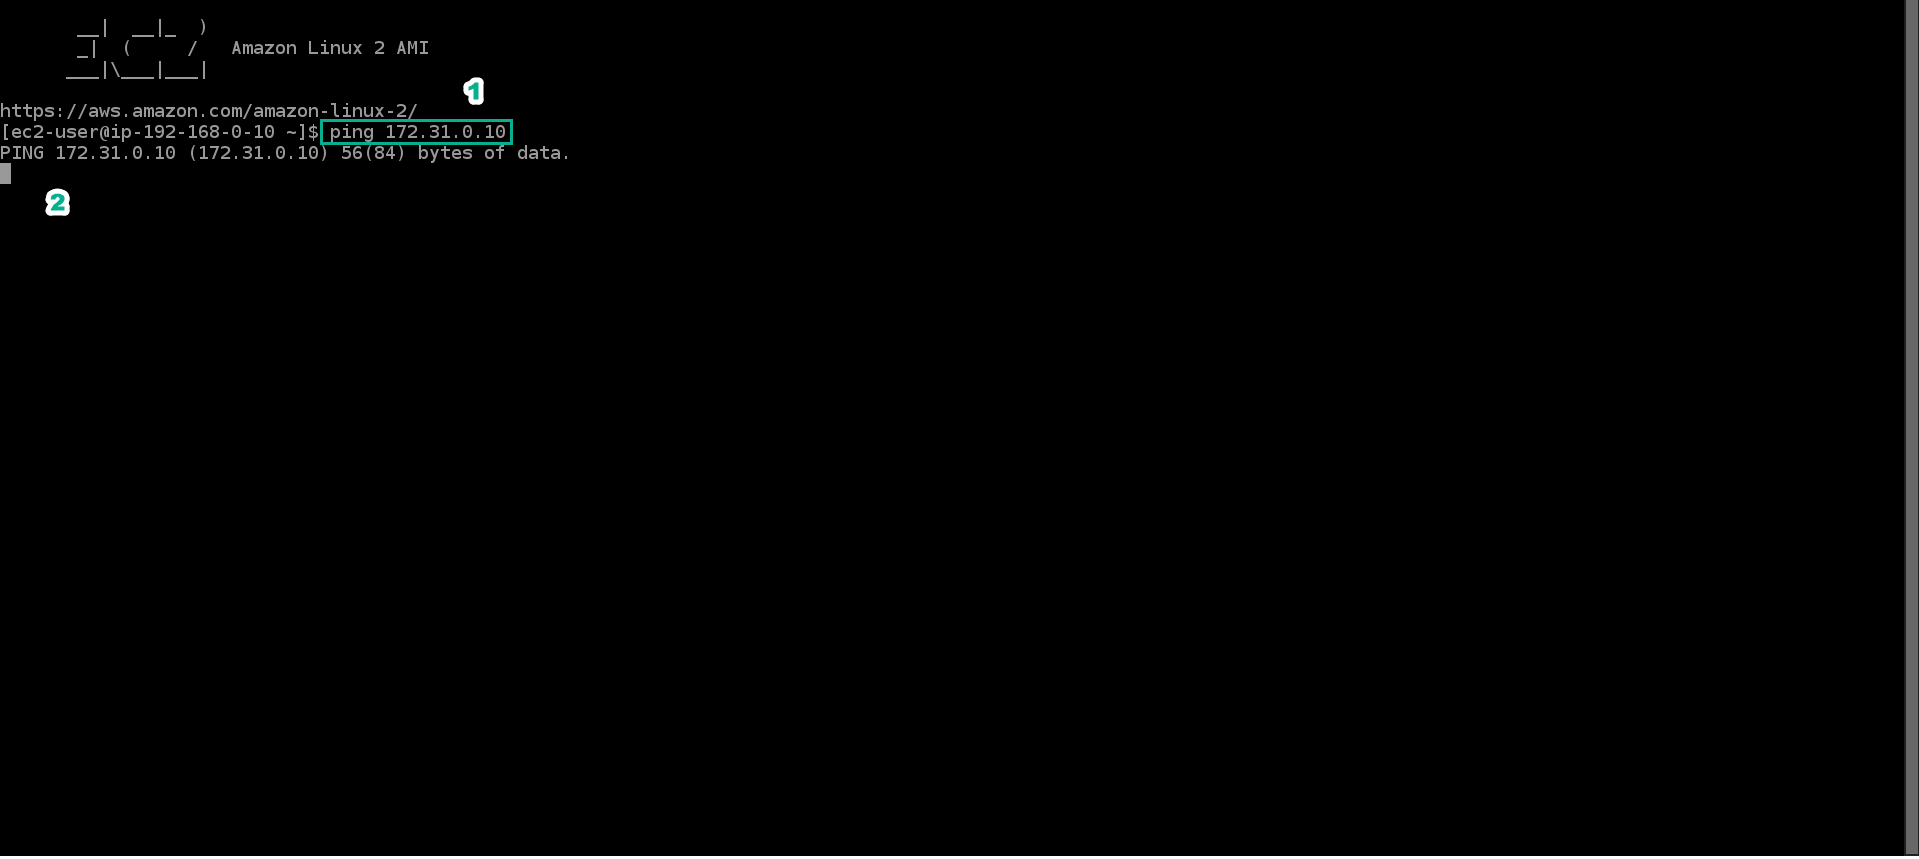
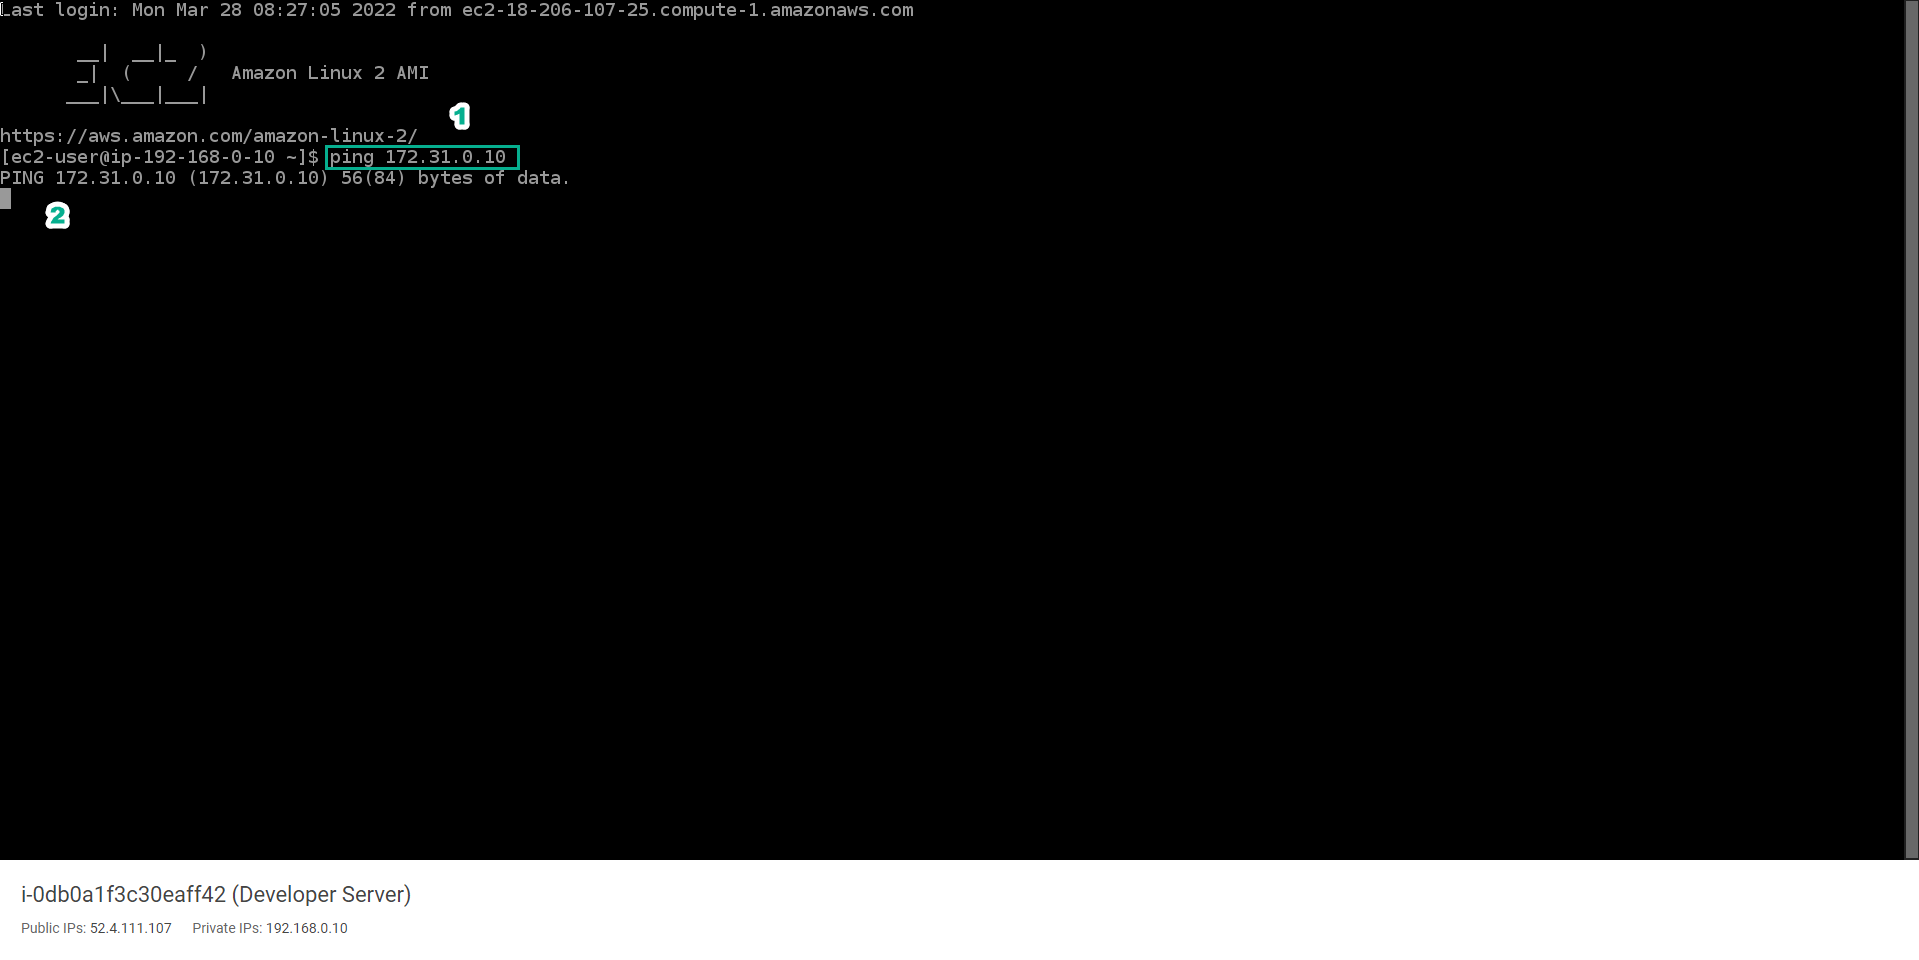
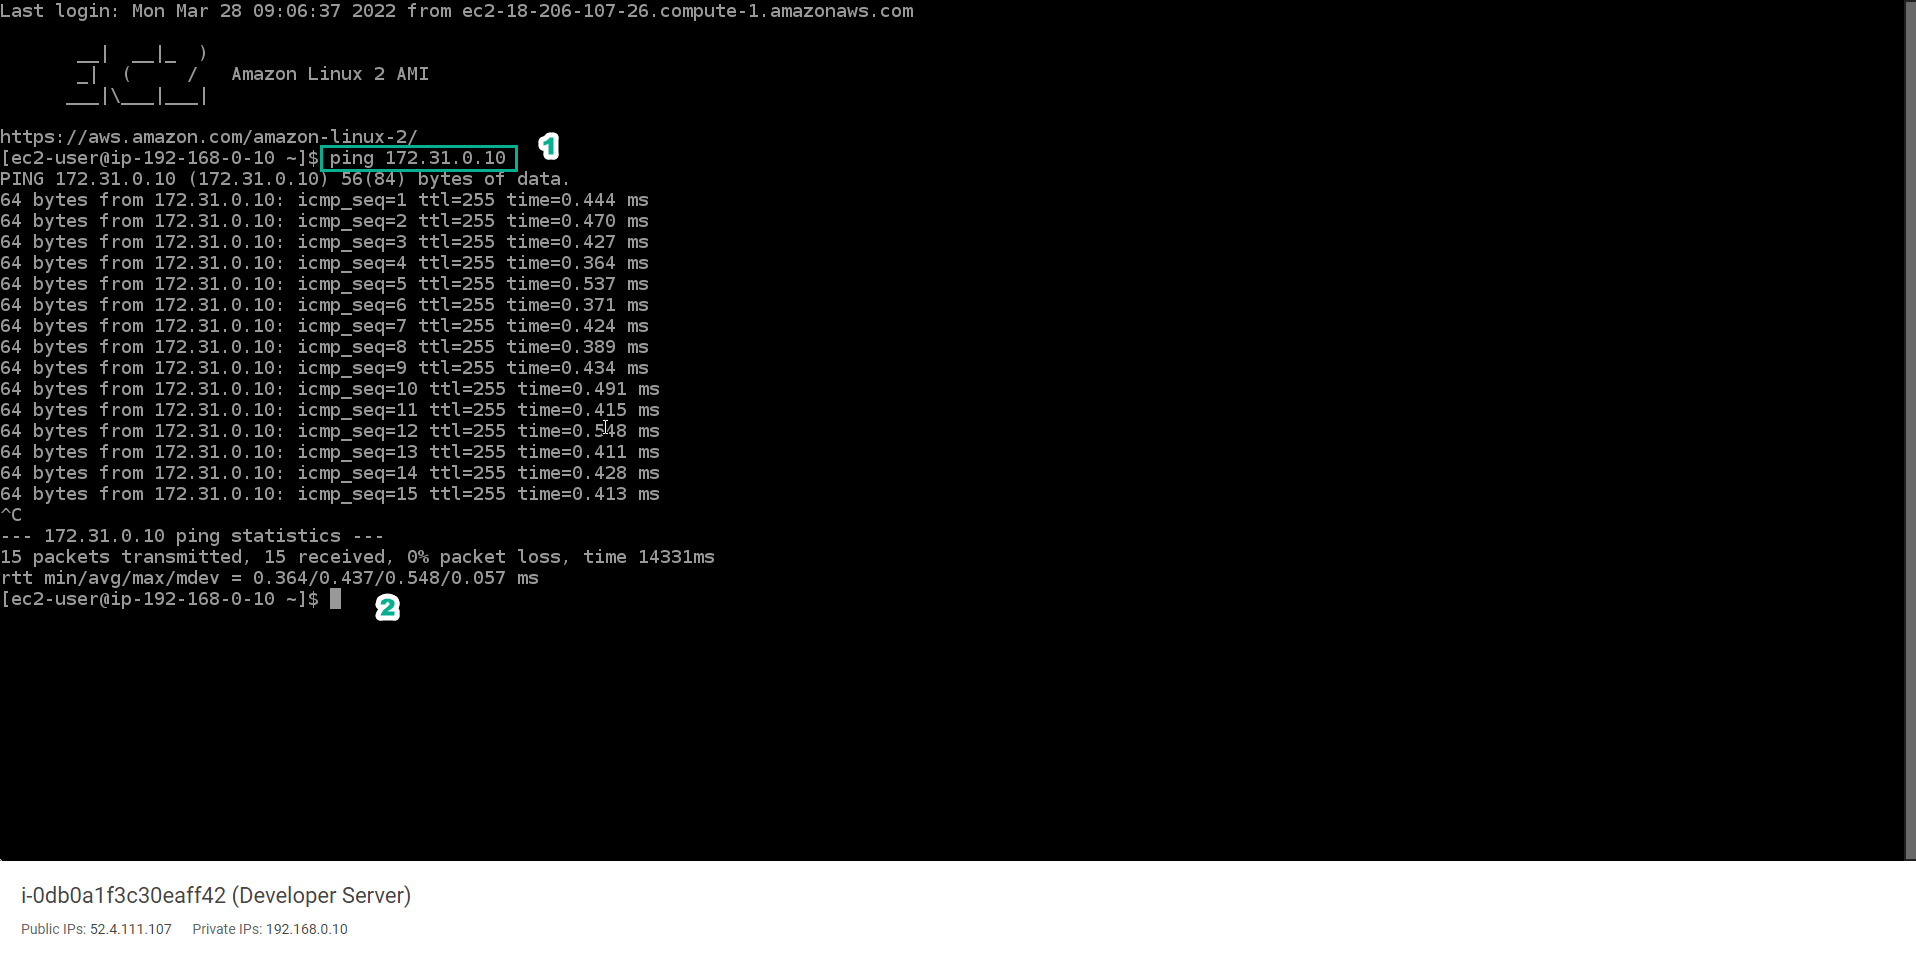
- In CLI . interface
- Enter
ping 172.31.0.10 - View results
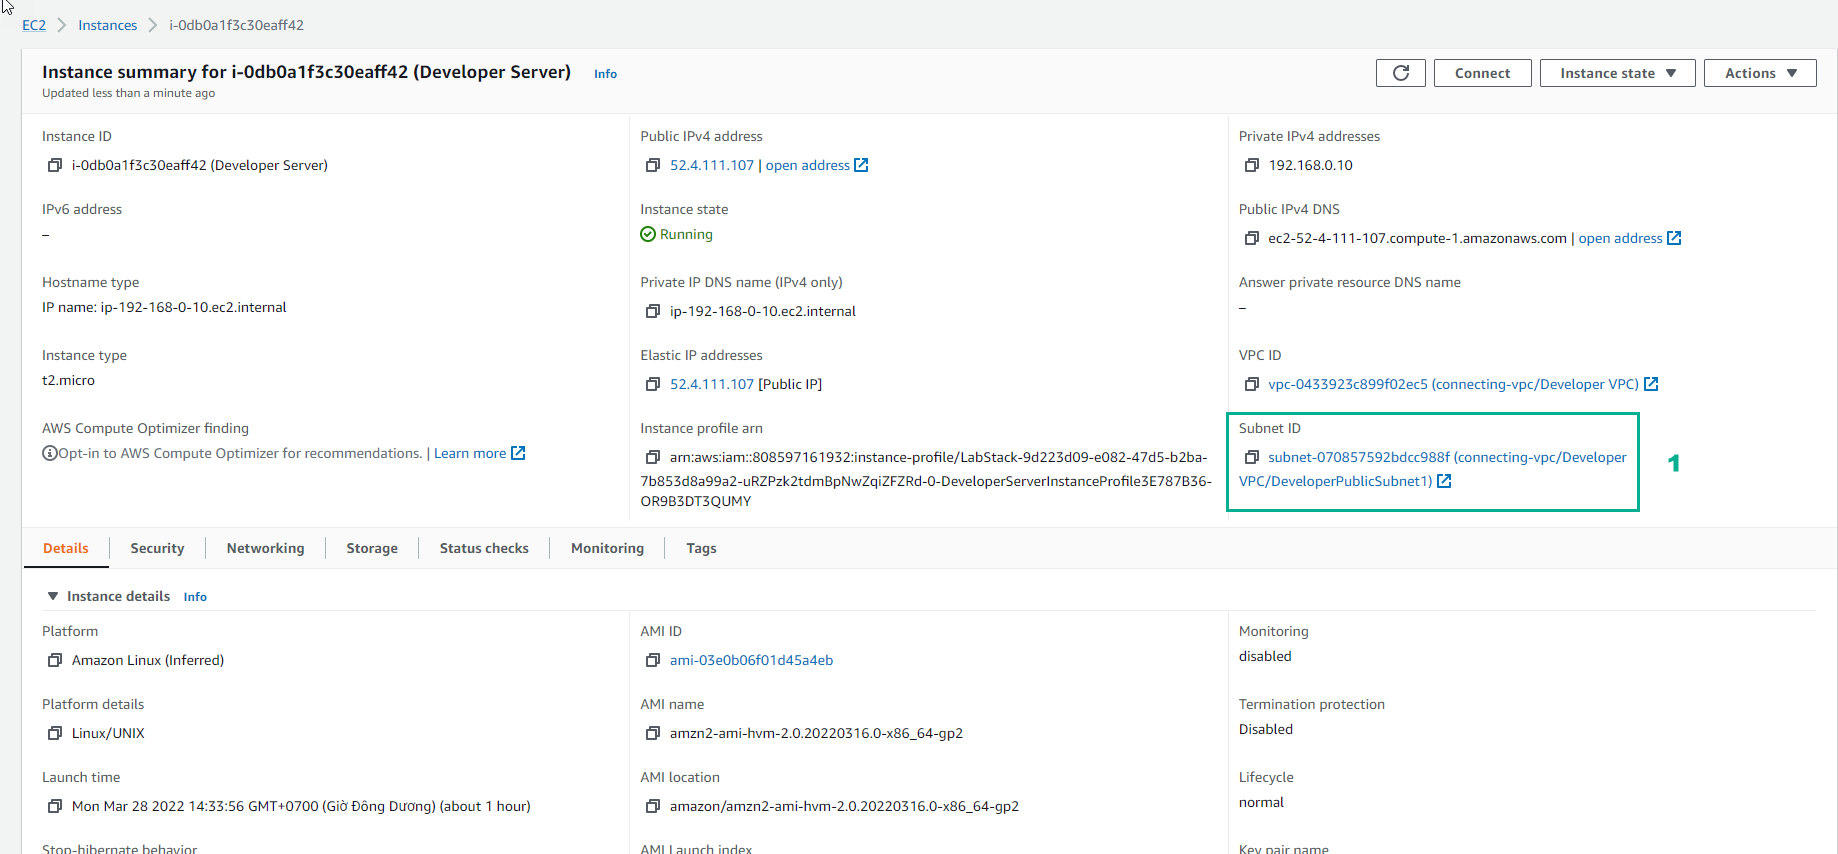
- In the EC2 interface
- Select Developer Server
- Select Subnet ID
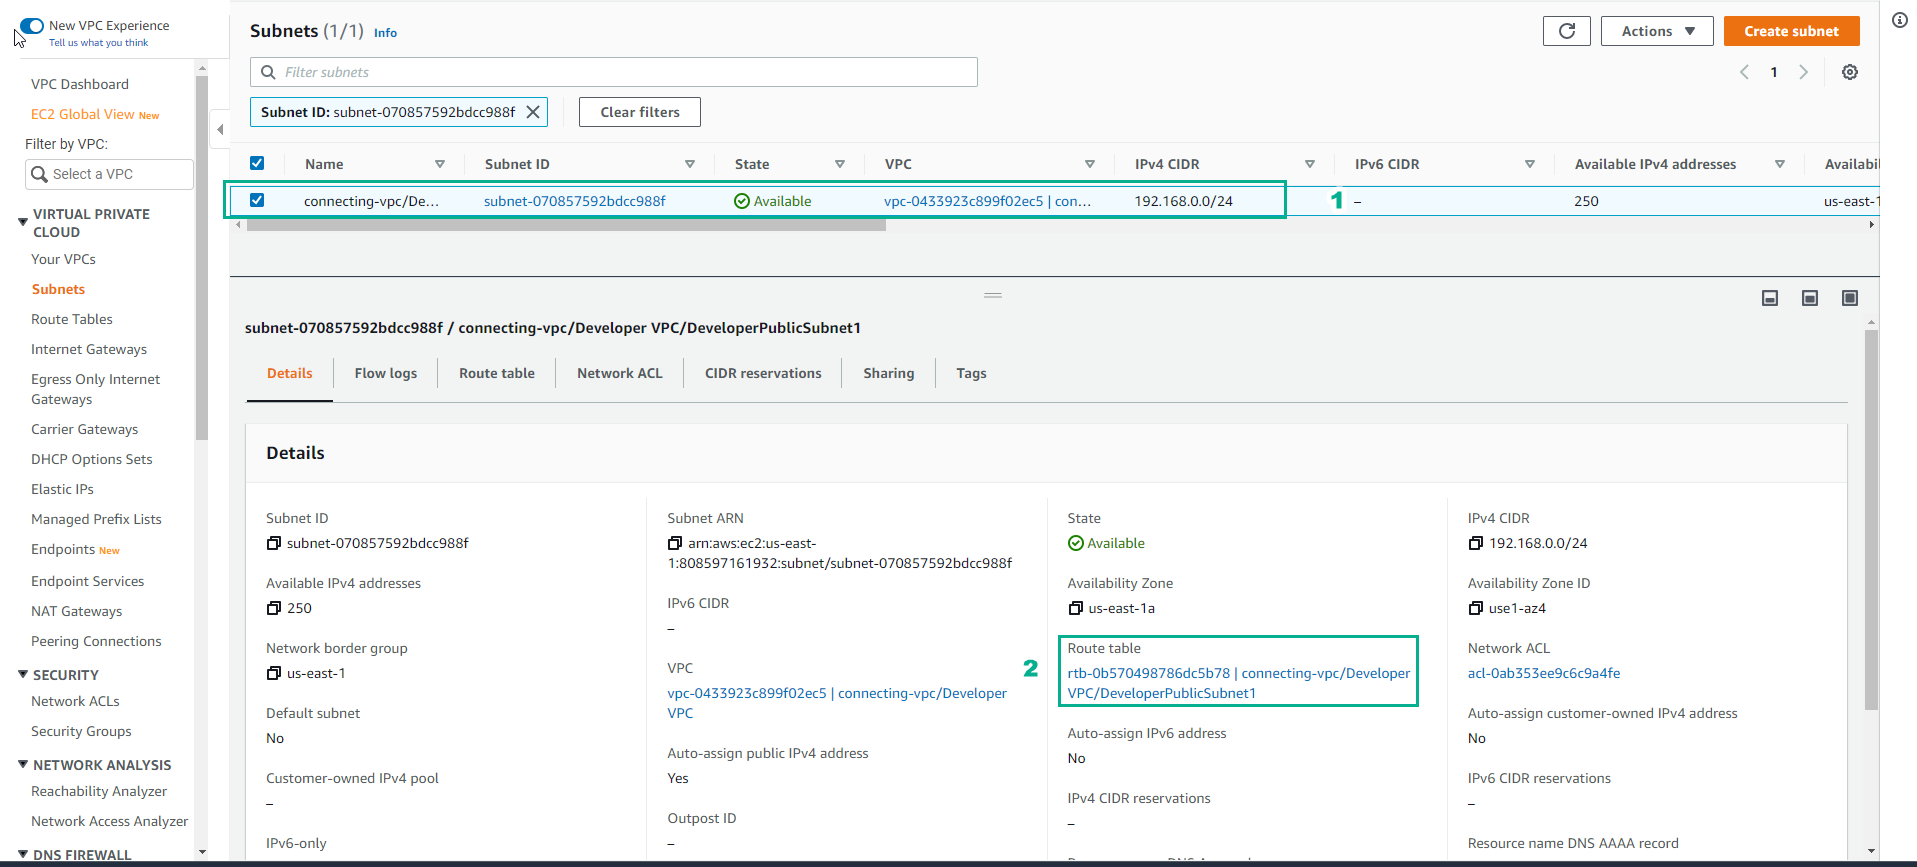
- In the Subnet interface
- Select DeveloperPublicSubnet1
- Select Route table
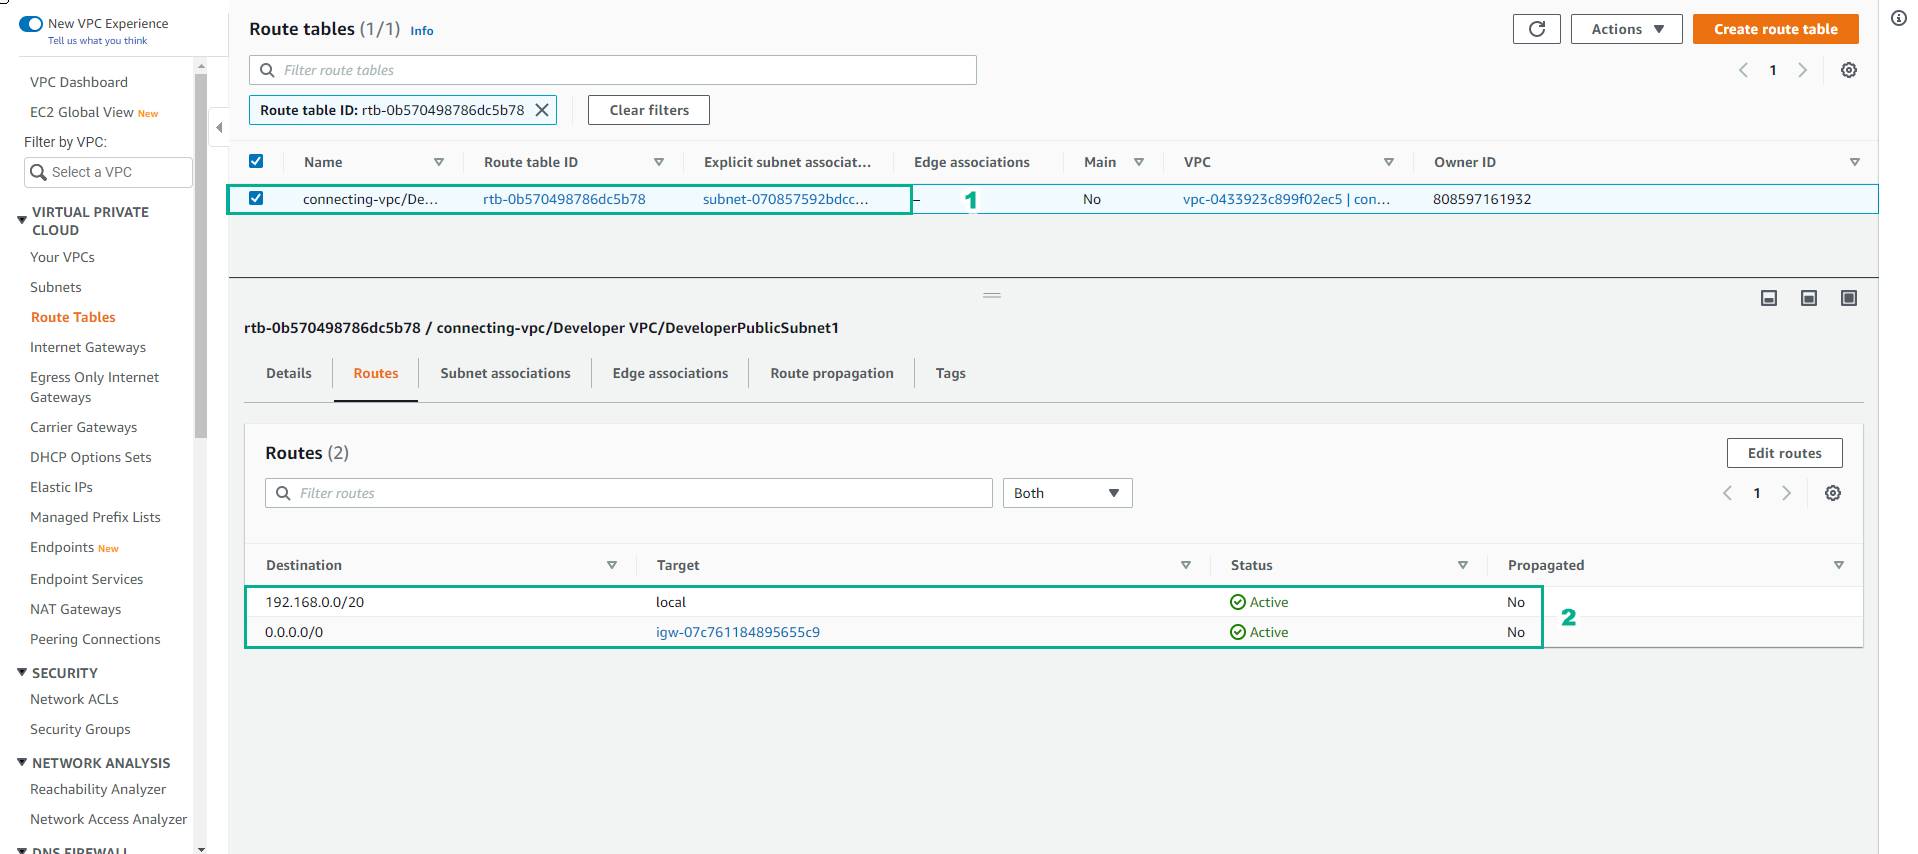
- In the Route tables interface
- Select DeveloperPublicSubnet1
- Select Routes
- View the route rules
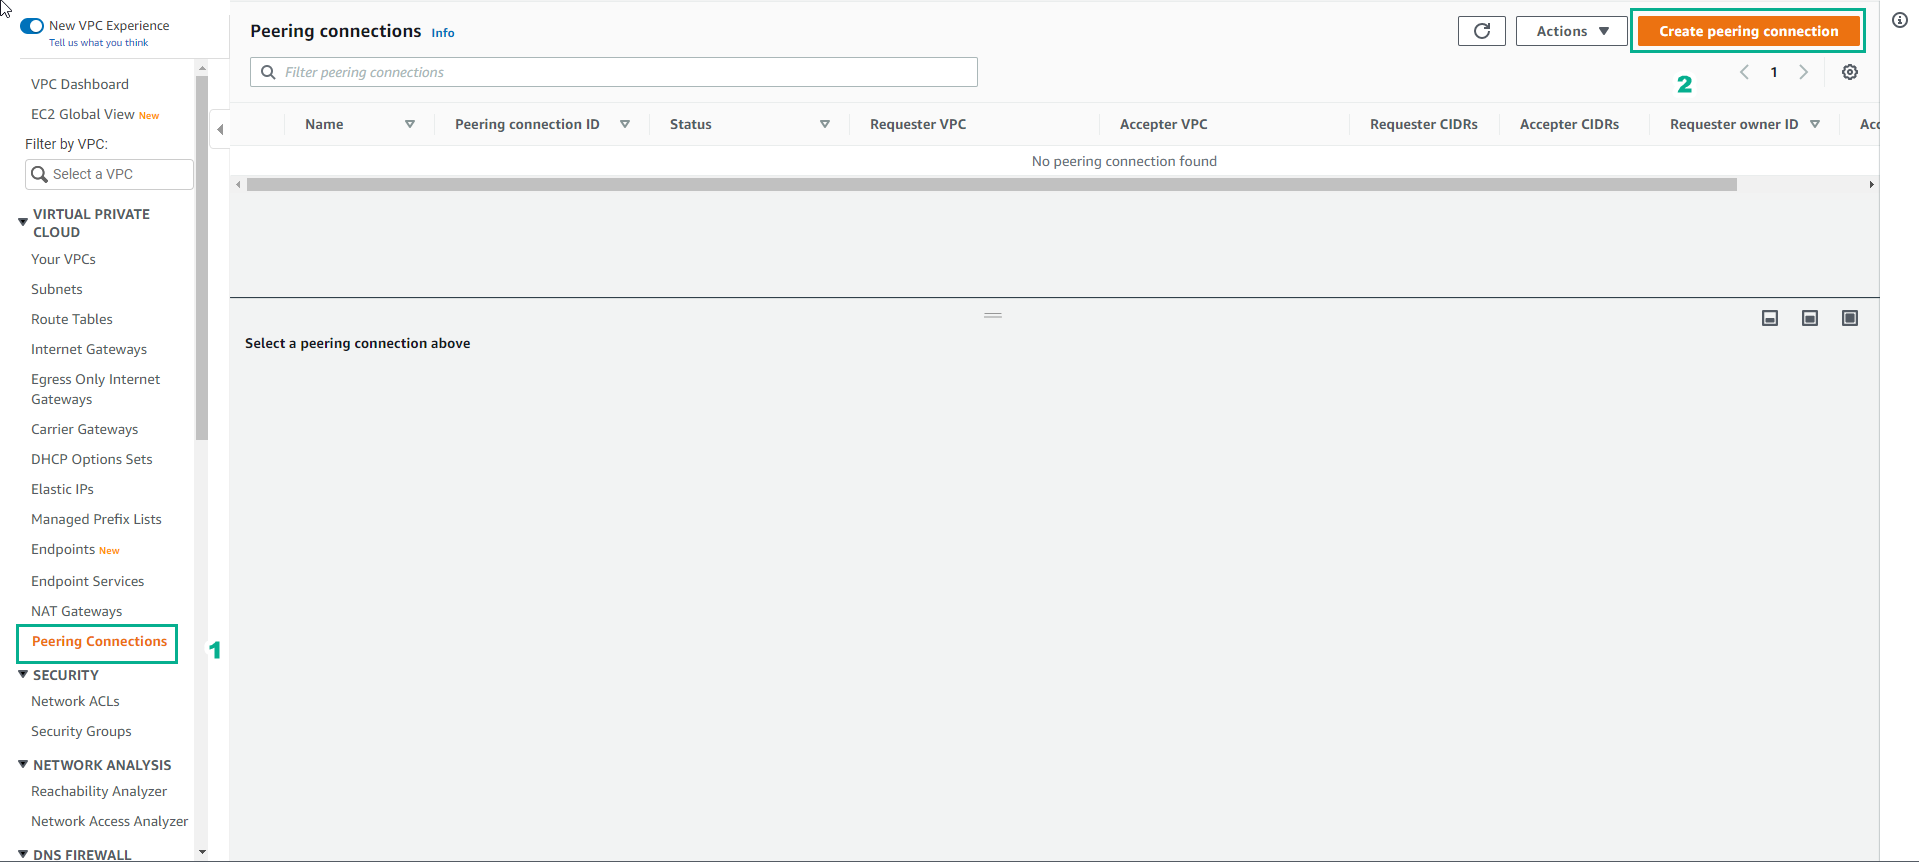
- In the VPC interface
- Select Peering Connections
- Select Create peering connection
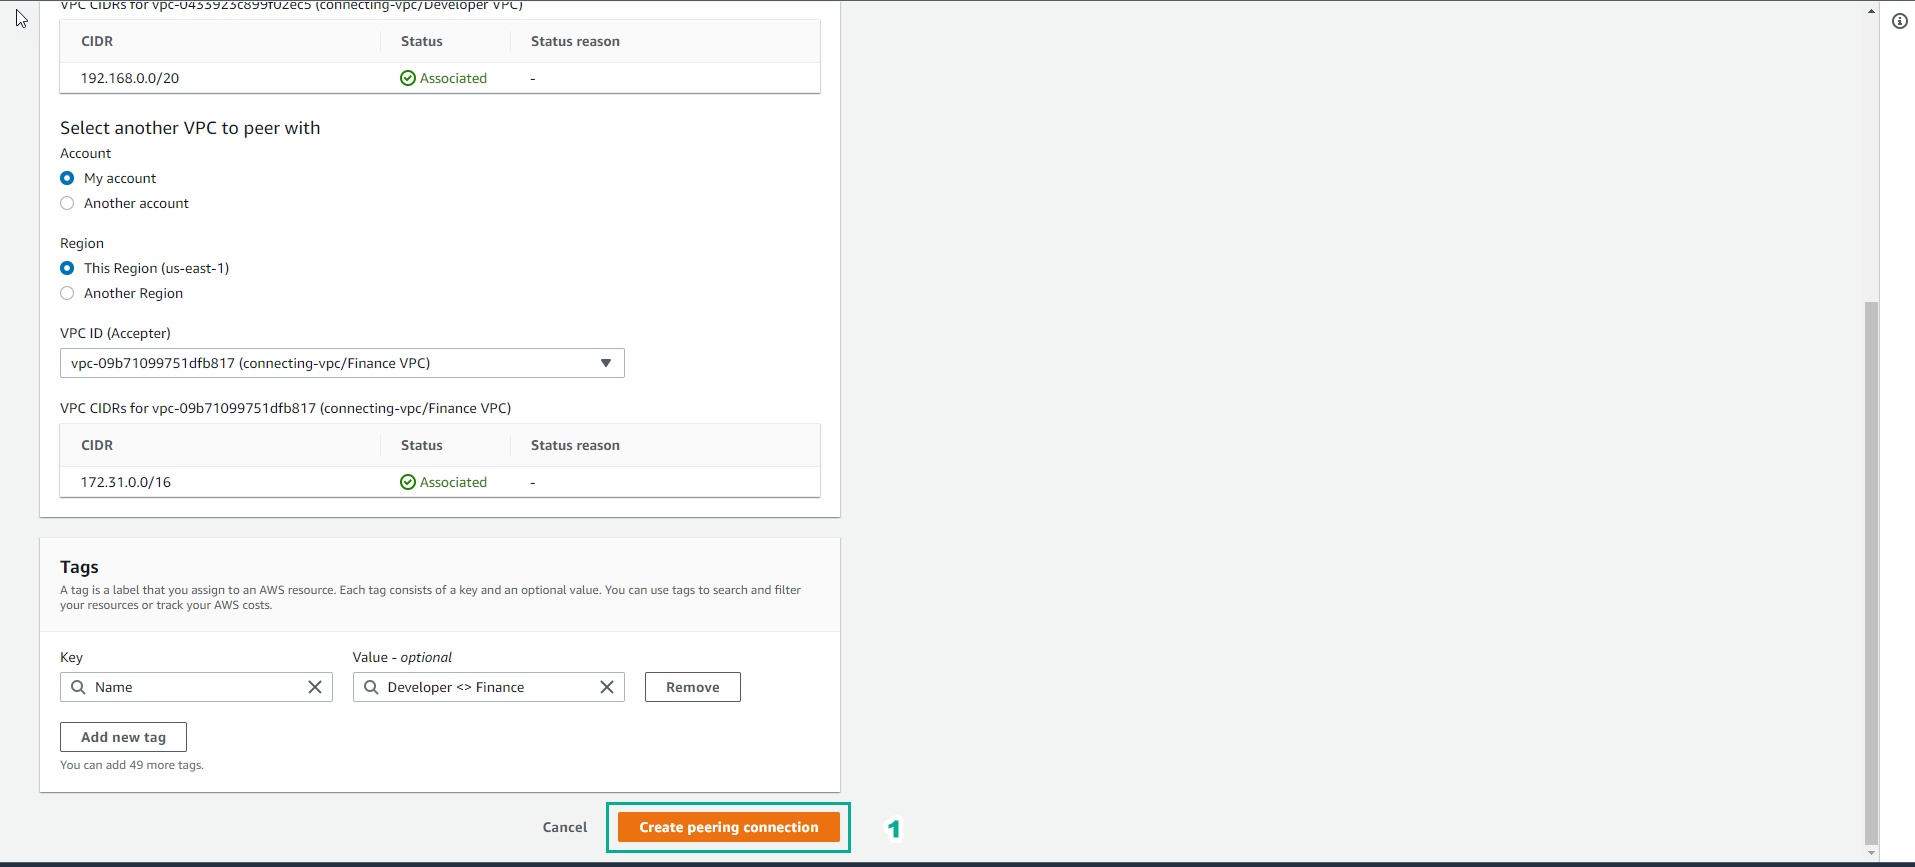
- In the Peering connection settings interface
- Name, enter
Developer <> Finance - Select VPC ID
- Account, select My account
- Region, select This Region (us-east-1)

- In the Peering connection settings interface
- Select Create peering connection
- Initialization result
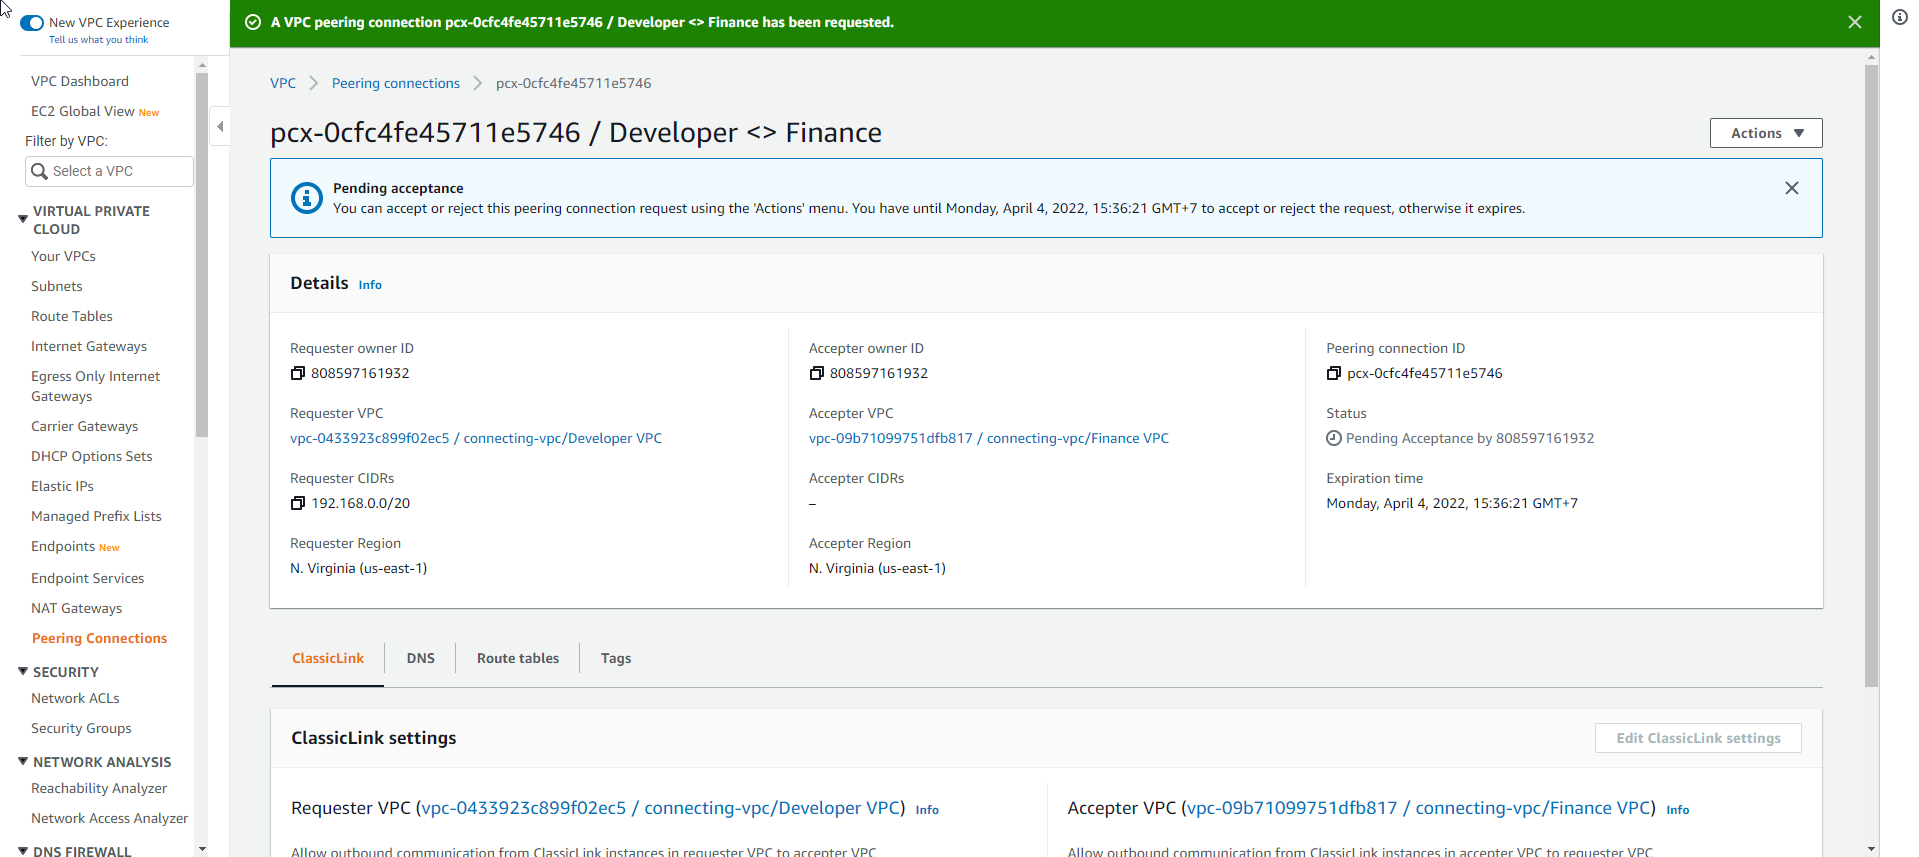
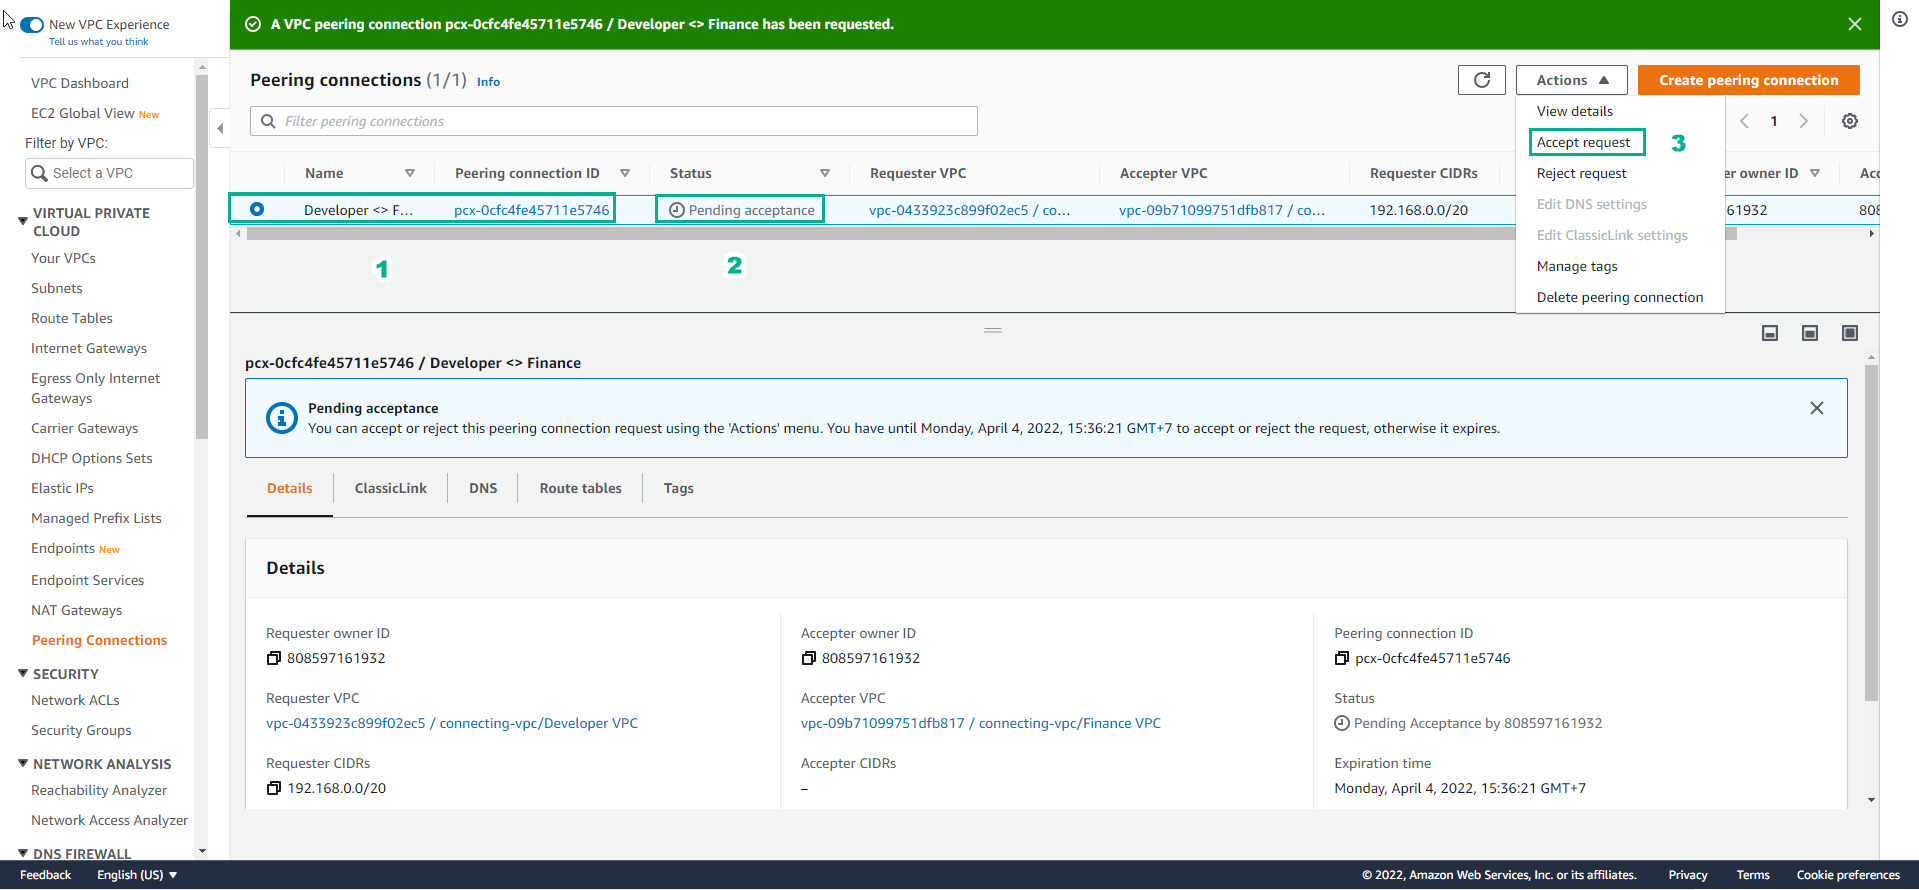
- In the VPC interface
- Select Peering Connections
- Select Developer <> Finance
- View Status
- Select Actions
- Select Accept request
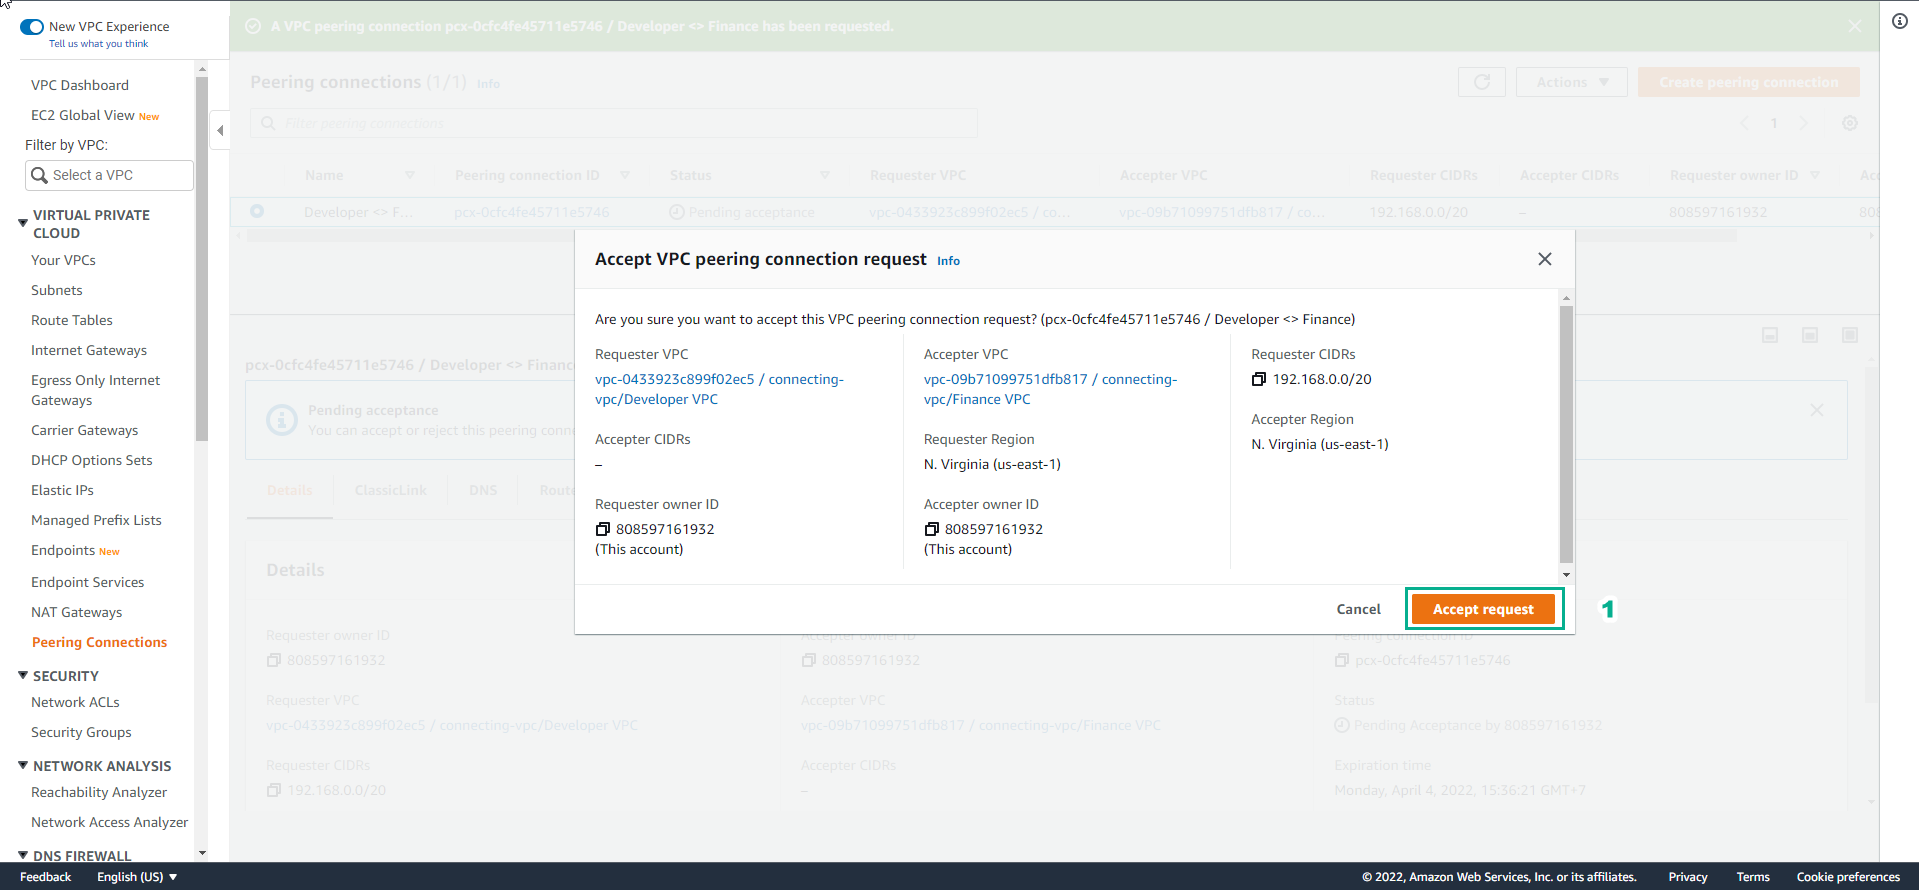
- In the Accept VPC peering connection request interface
- Select Accept request
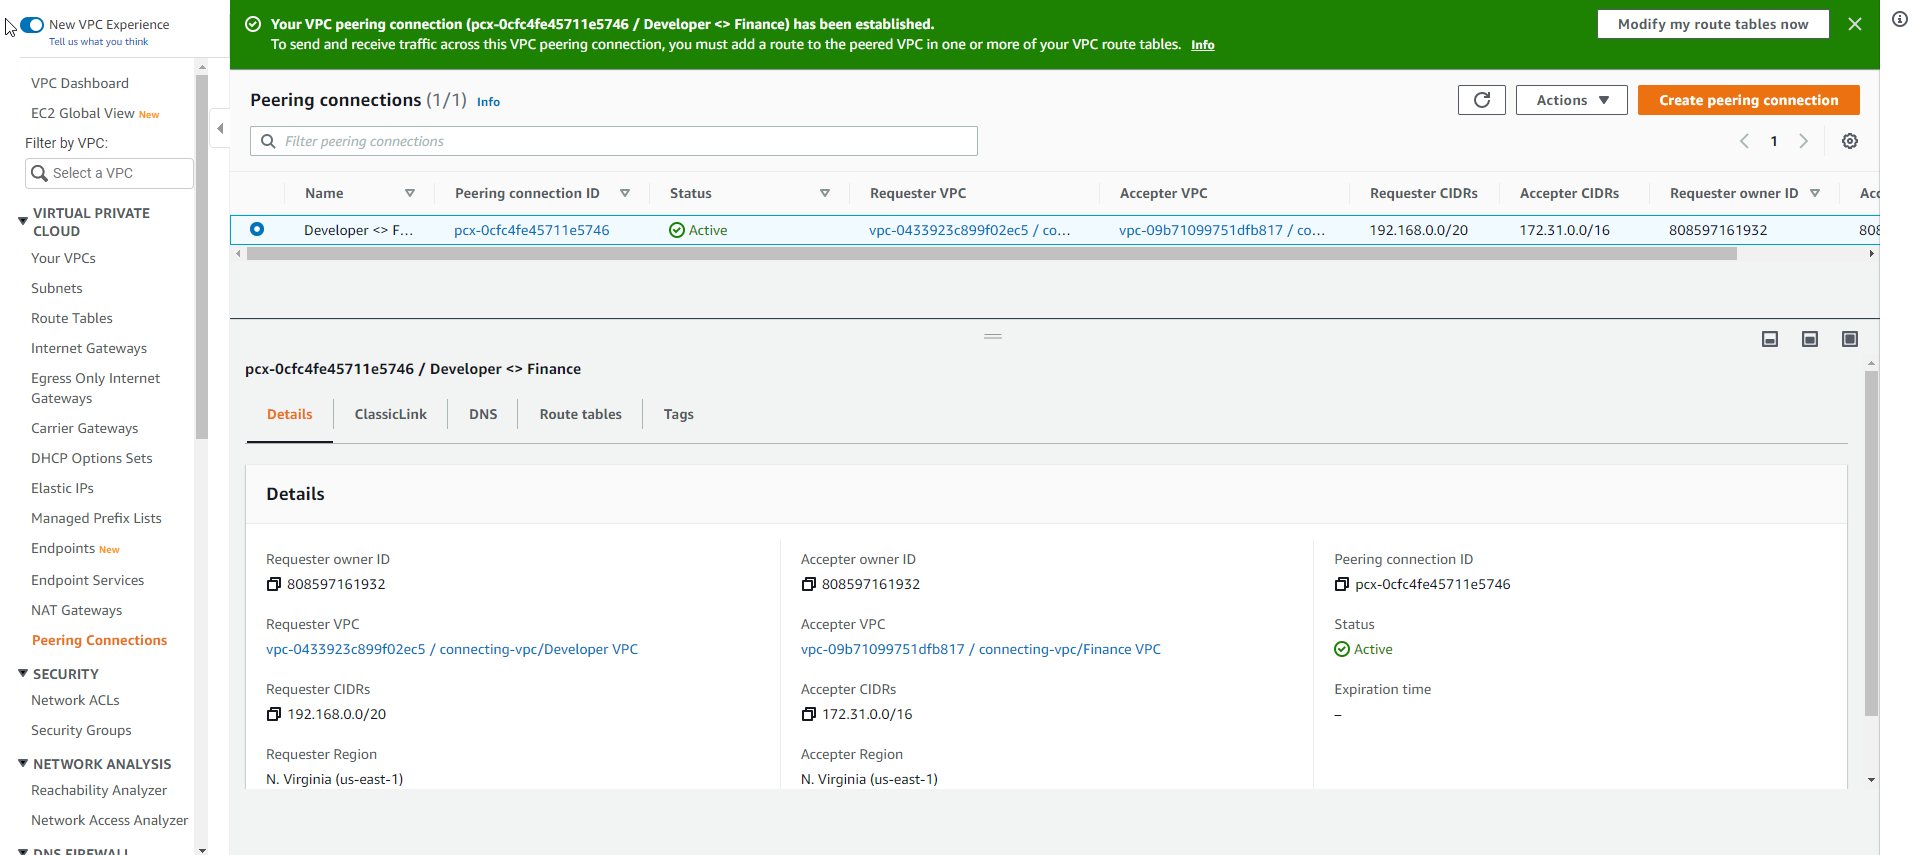
- Result
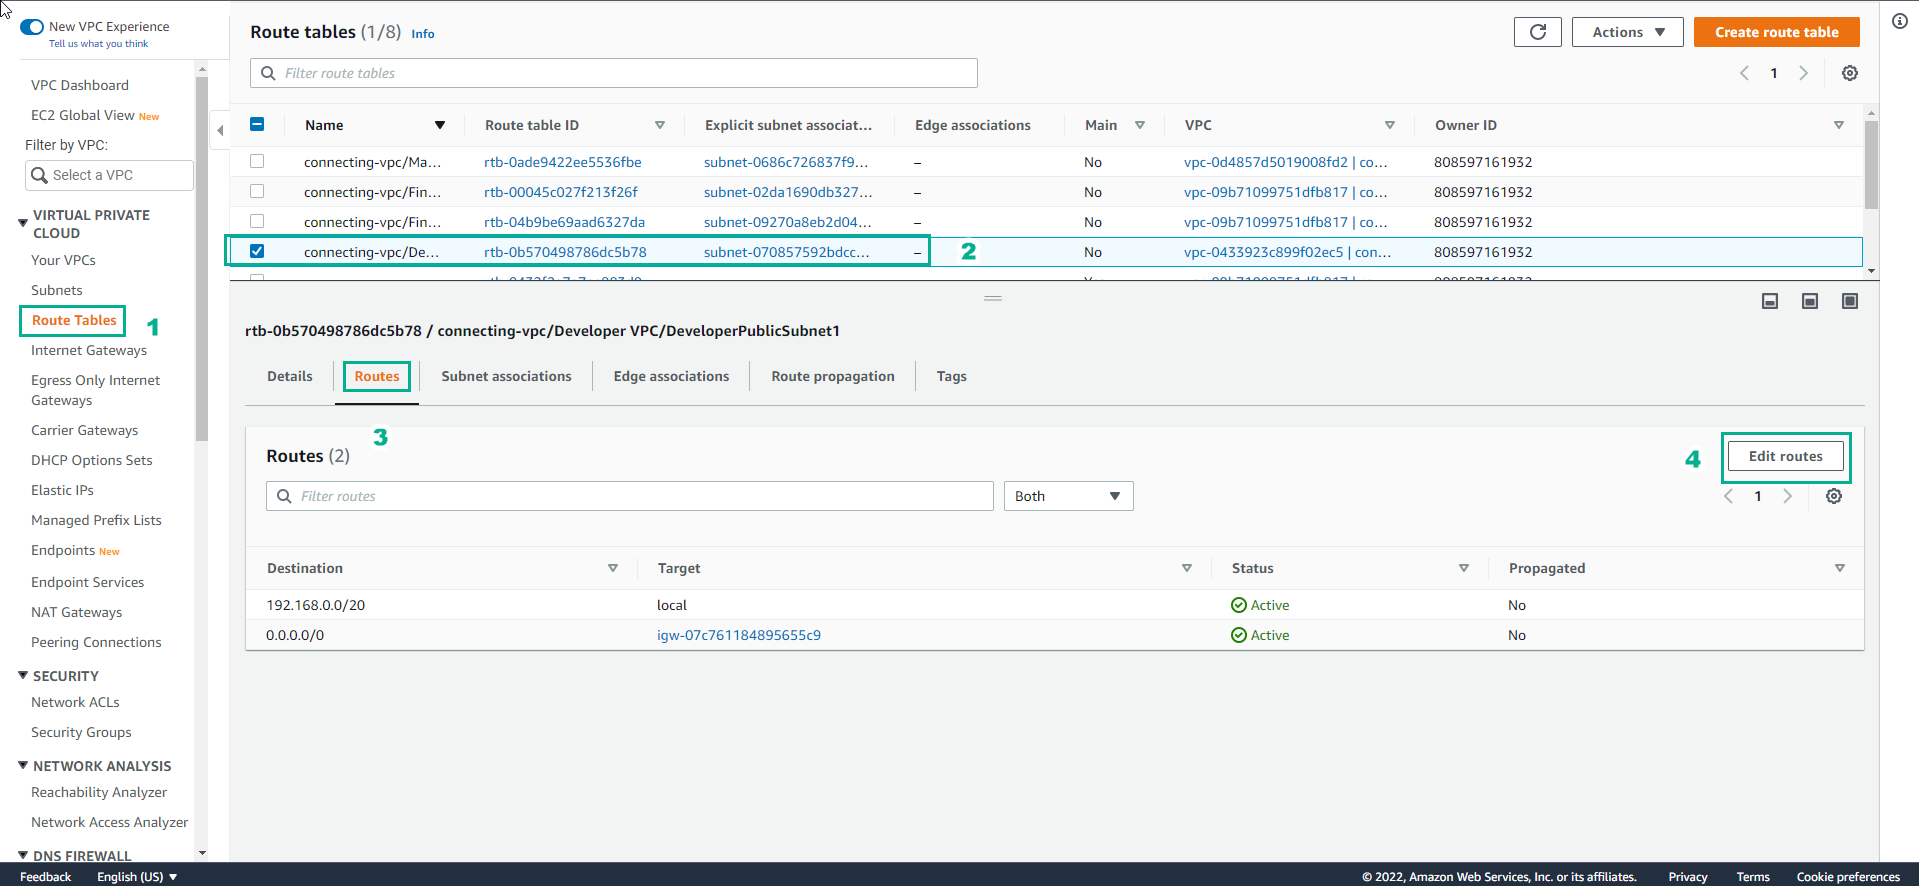
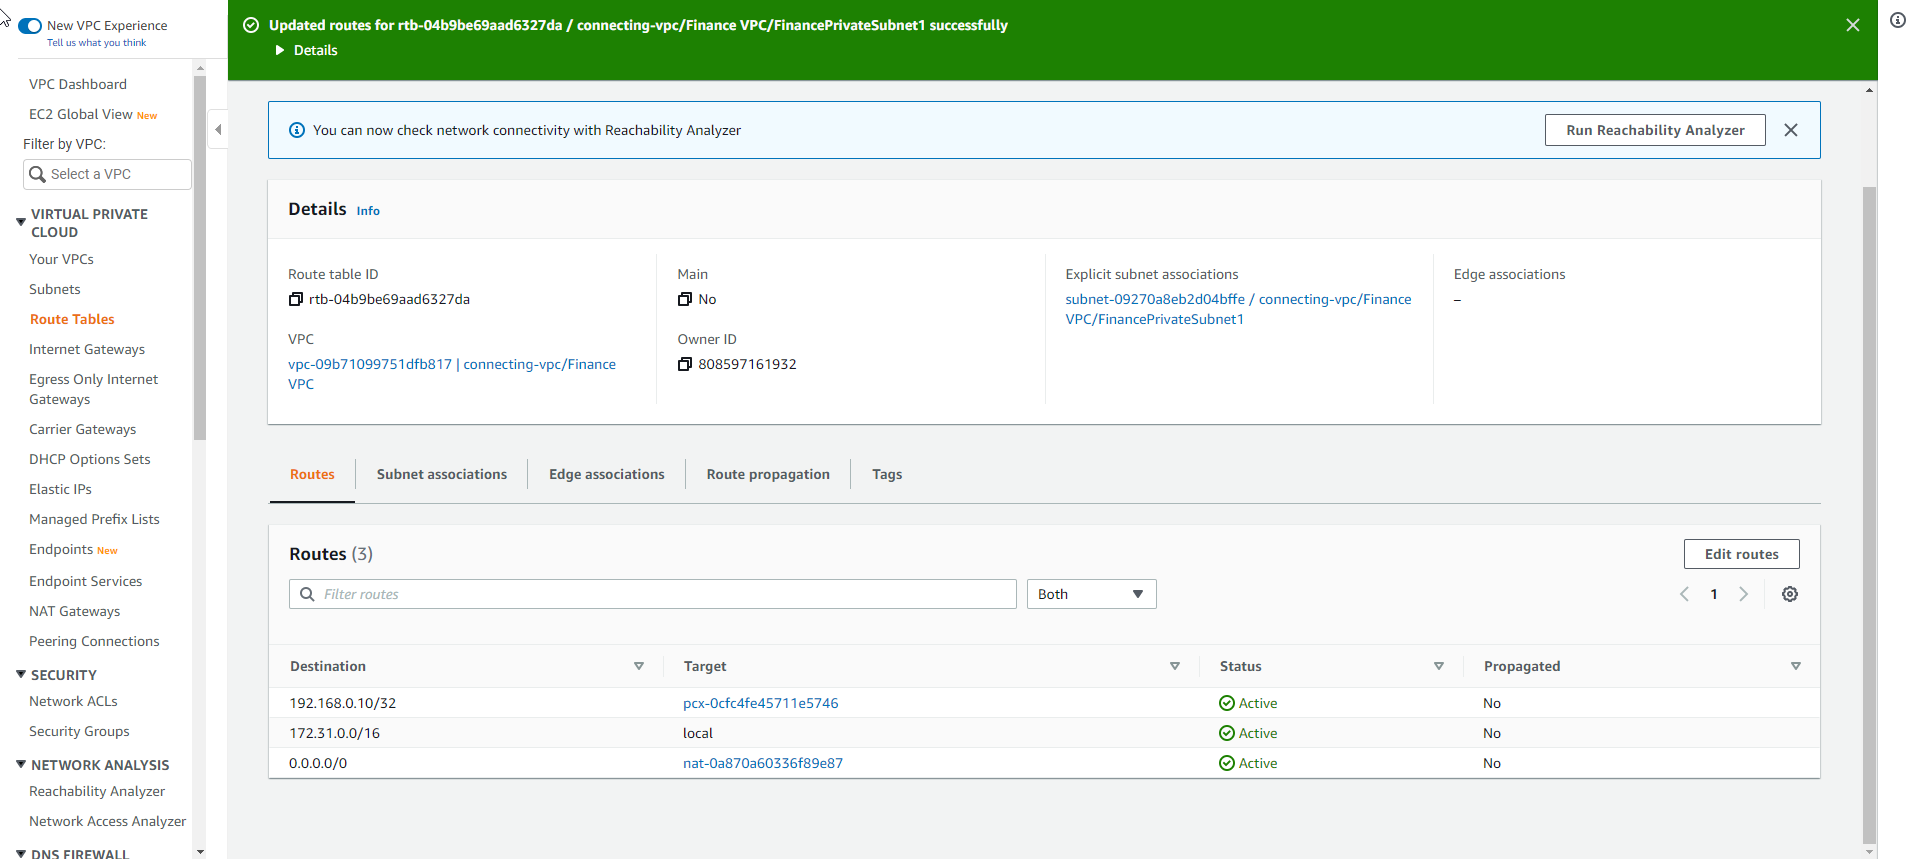
- In the VPC interface
- Select Route Tables
- Select DeveloperPublicSubnet1
- Select Routes
- View the route rules
- Select Edit routes
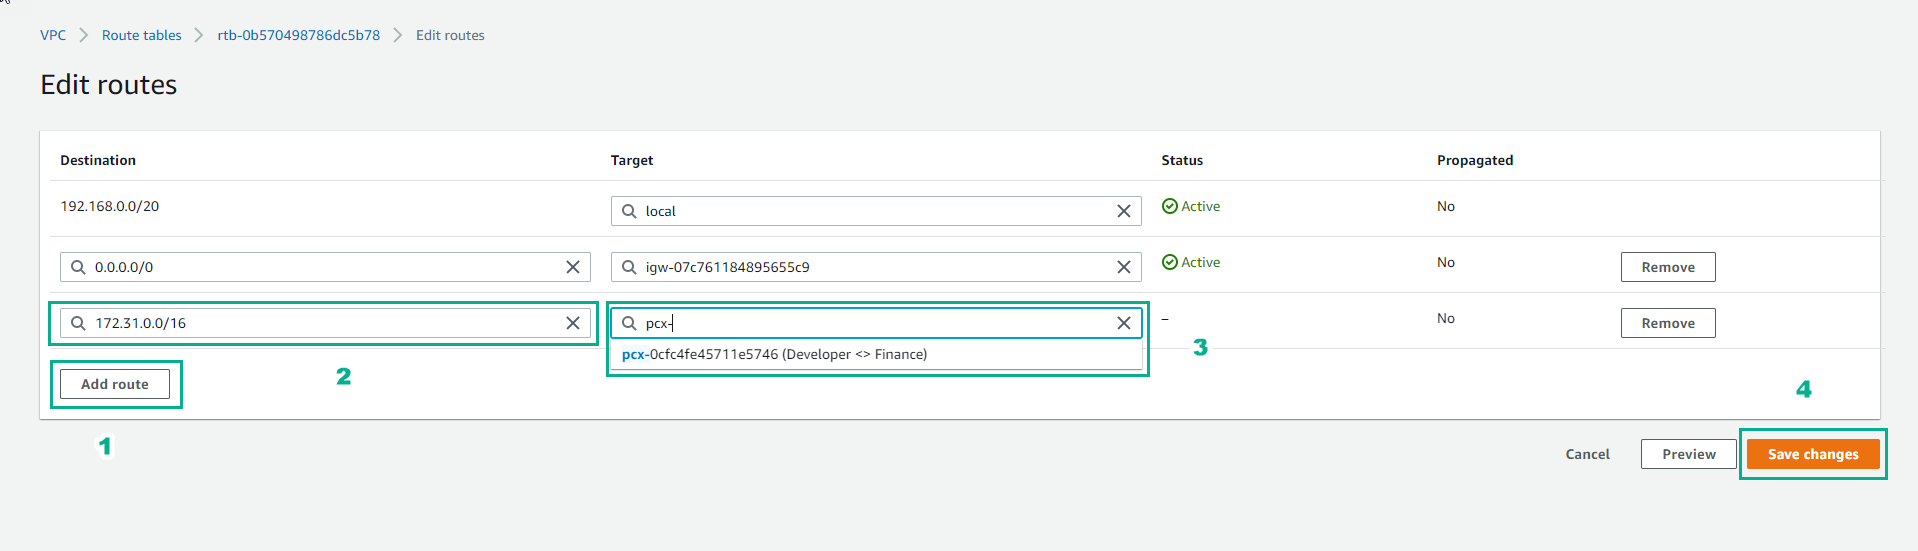
- In the Edit routes interface
- Select Add route
- In Destination, enter
172.31.0.0/16 - Select Target, select Developer <> Finance
- Select Save changes
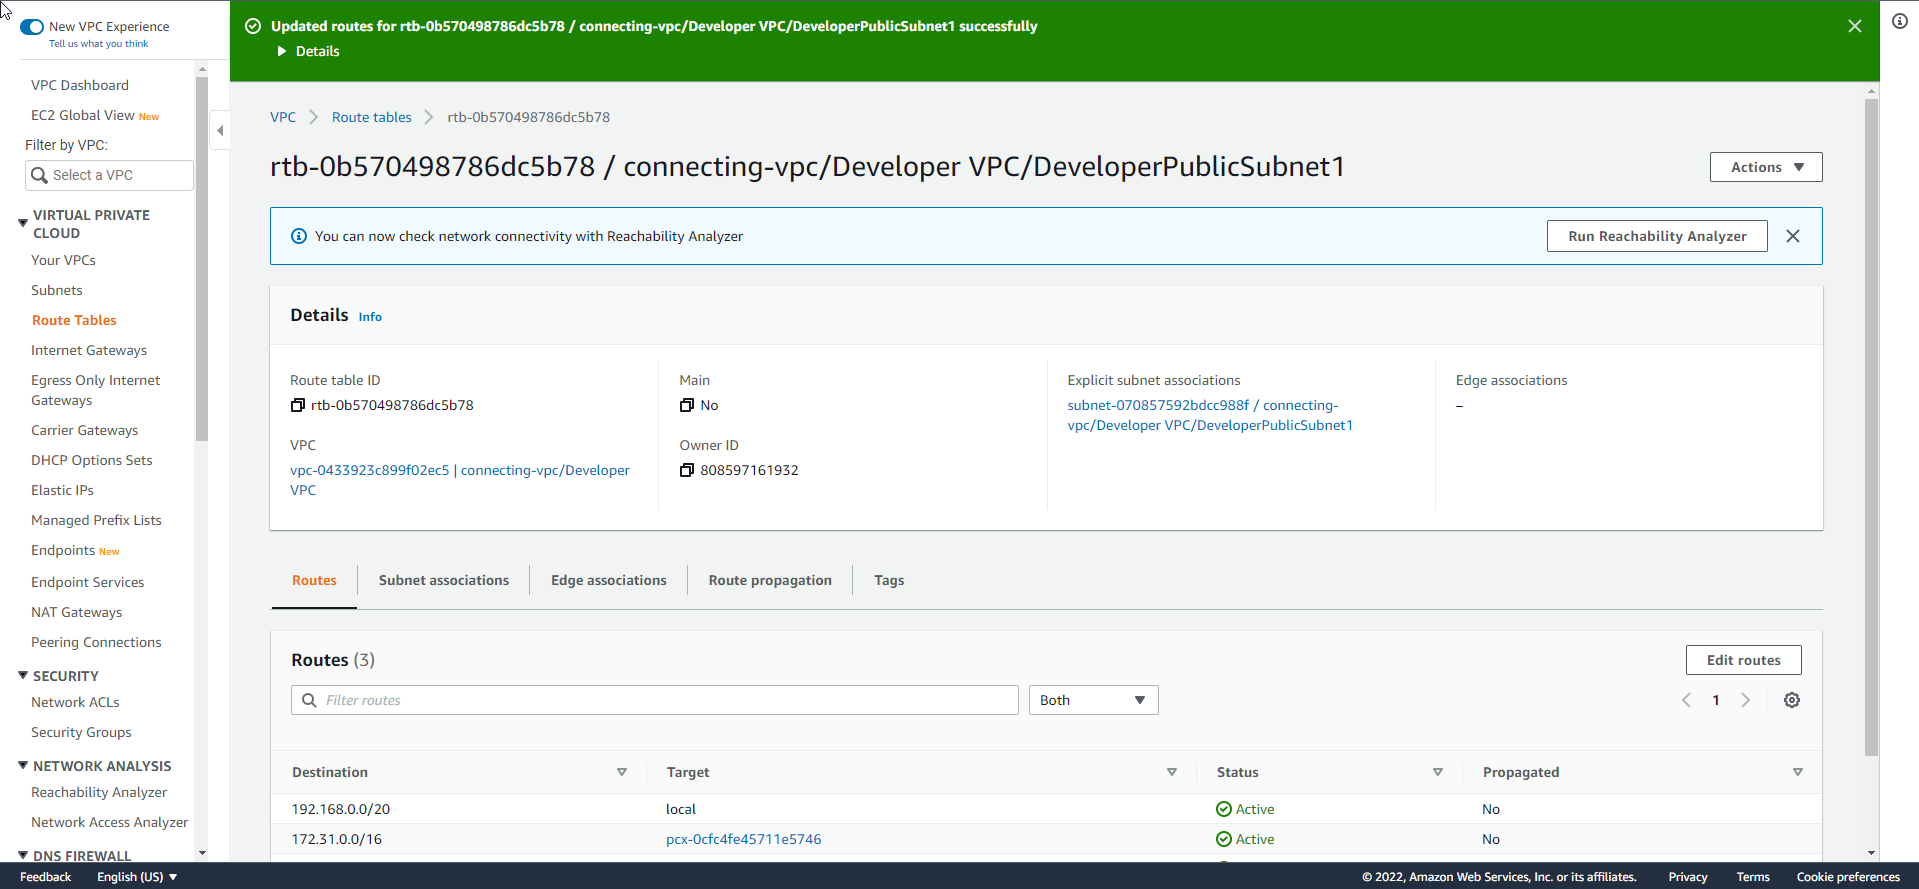
- Results after initialization
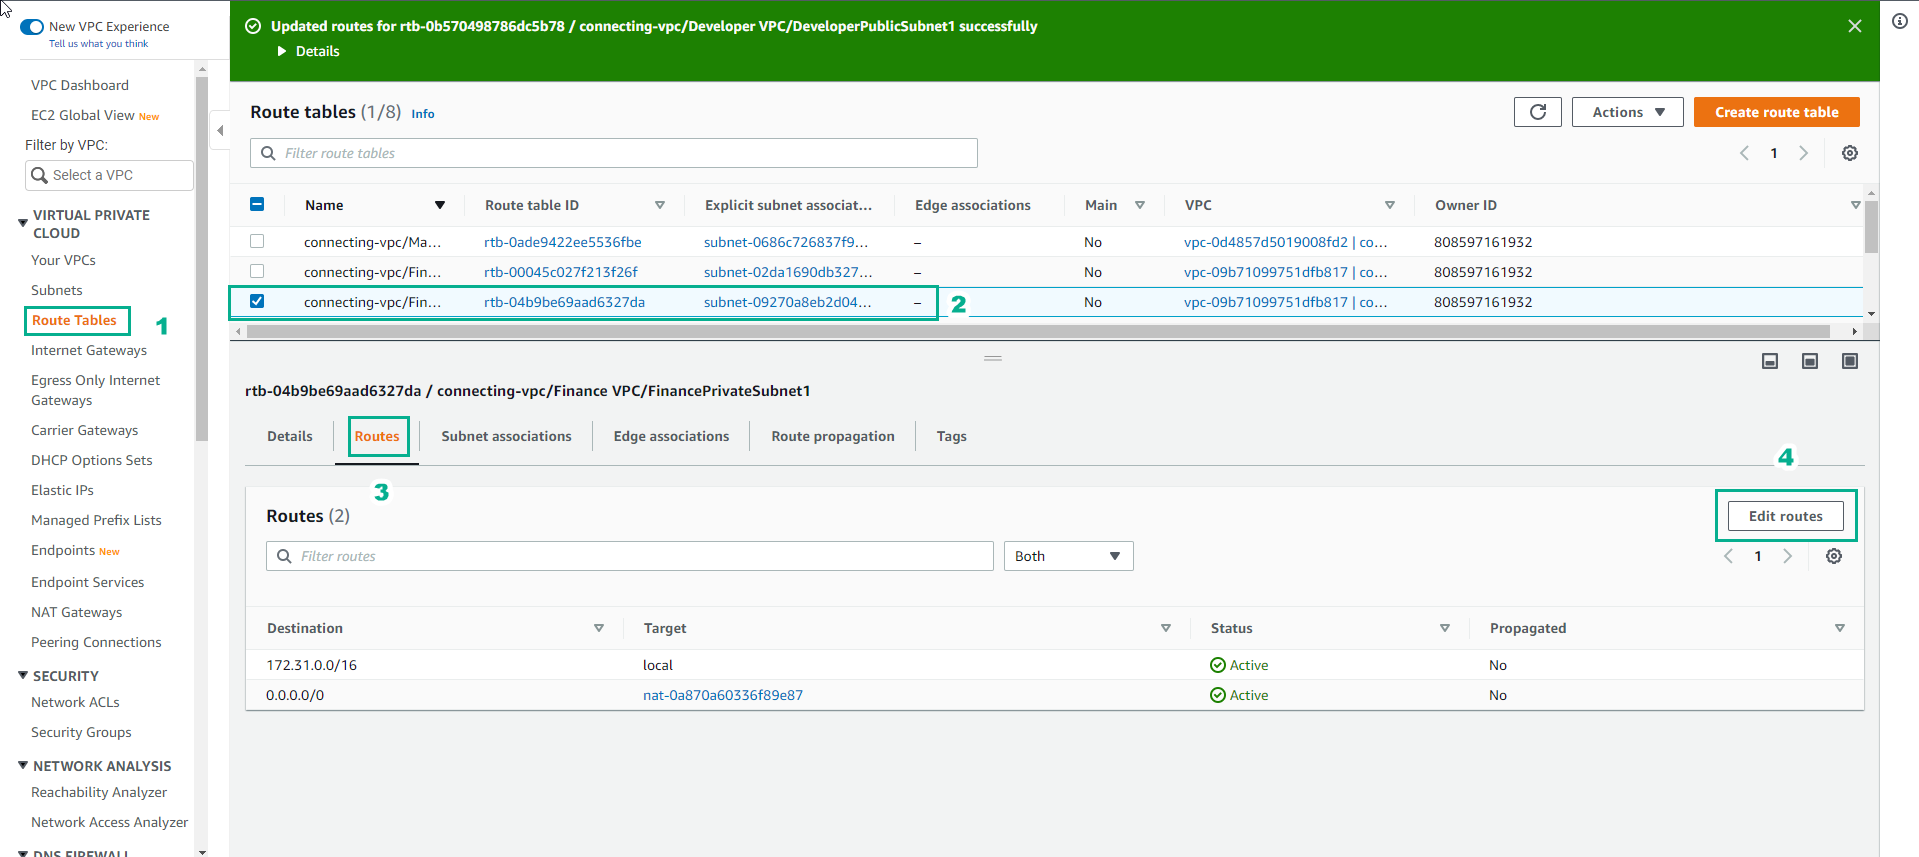
- Trong giao diện VPC
- Chọn Route Tables
- Chọn FinancePrivatesSubnet1
- Chọn Routes
- Xem các route rule
- Chọn Edit routes
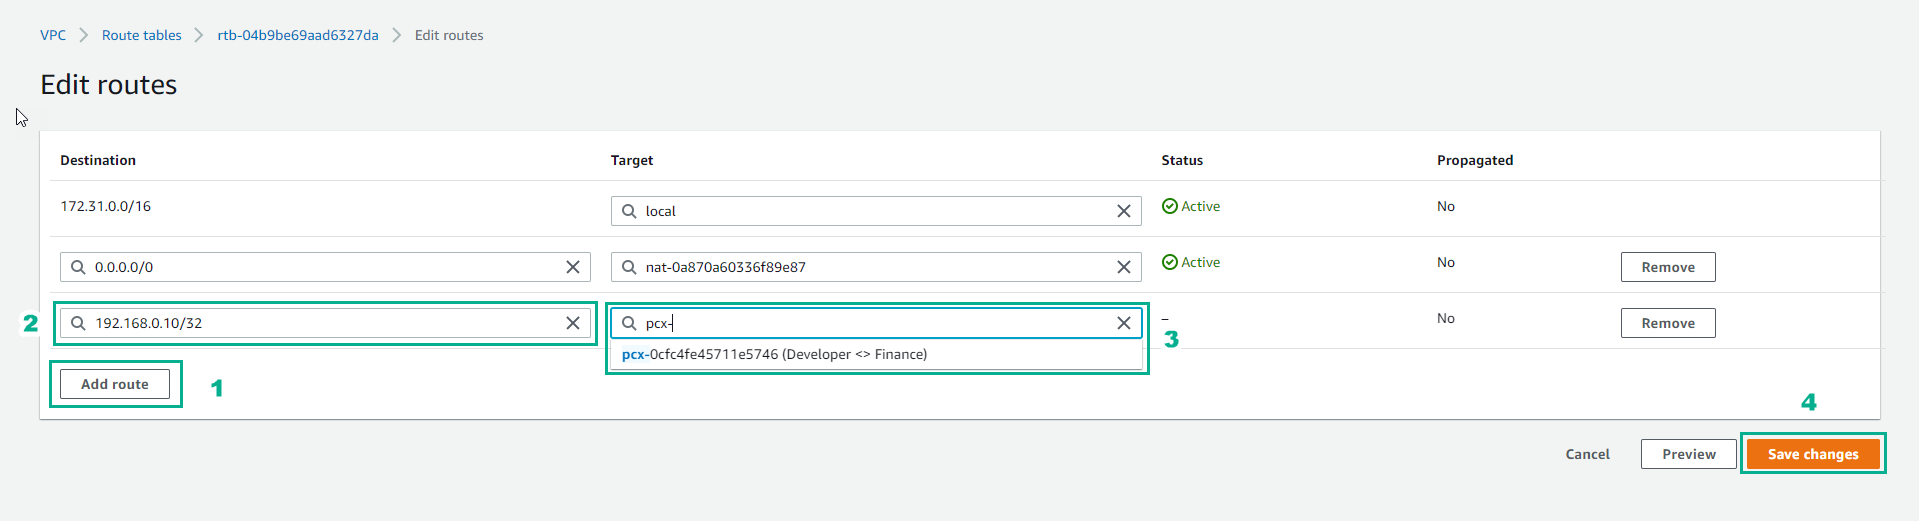
- Trong giao diện Edit routes
- Chọn Add route
- Trong Destination, nhập
192.168.0.10/32 - Trong Target, chọn Developer <> Finance
- Chọn Save changes
- Kết quả khởi tạo
- Trong giao diện EC2
- Chọn Instances
- Chọn Developer Server
- Chọn Connect
- Trong giao diện Connect to instance
- Chọn EC2 Instance Connect
- Chọn Connect
- Trong giao diện Developer Server
- Nhập
ping 172.31.0.10 - Xem kết quả
- Trong giao diện EC2
- Chọn Instances
- Chọn Finacial Services Server
- Chọn Security
- Chọn Security groups
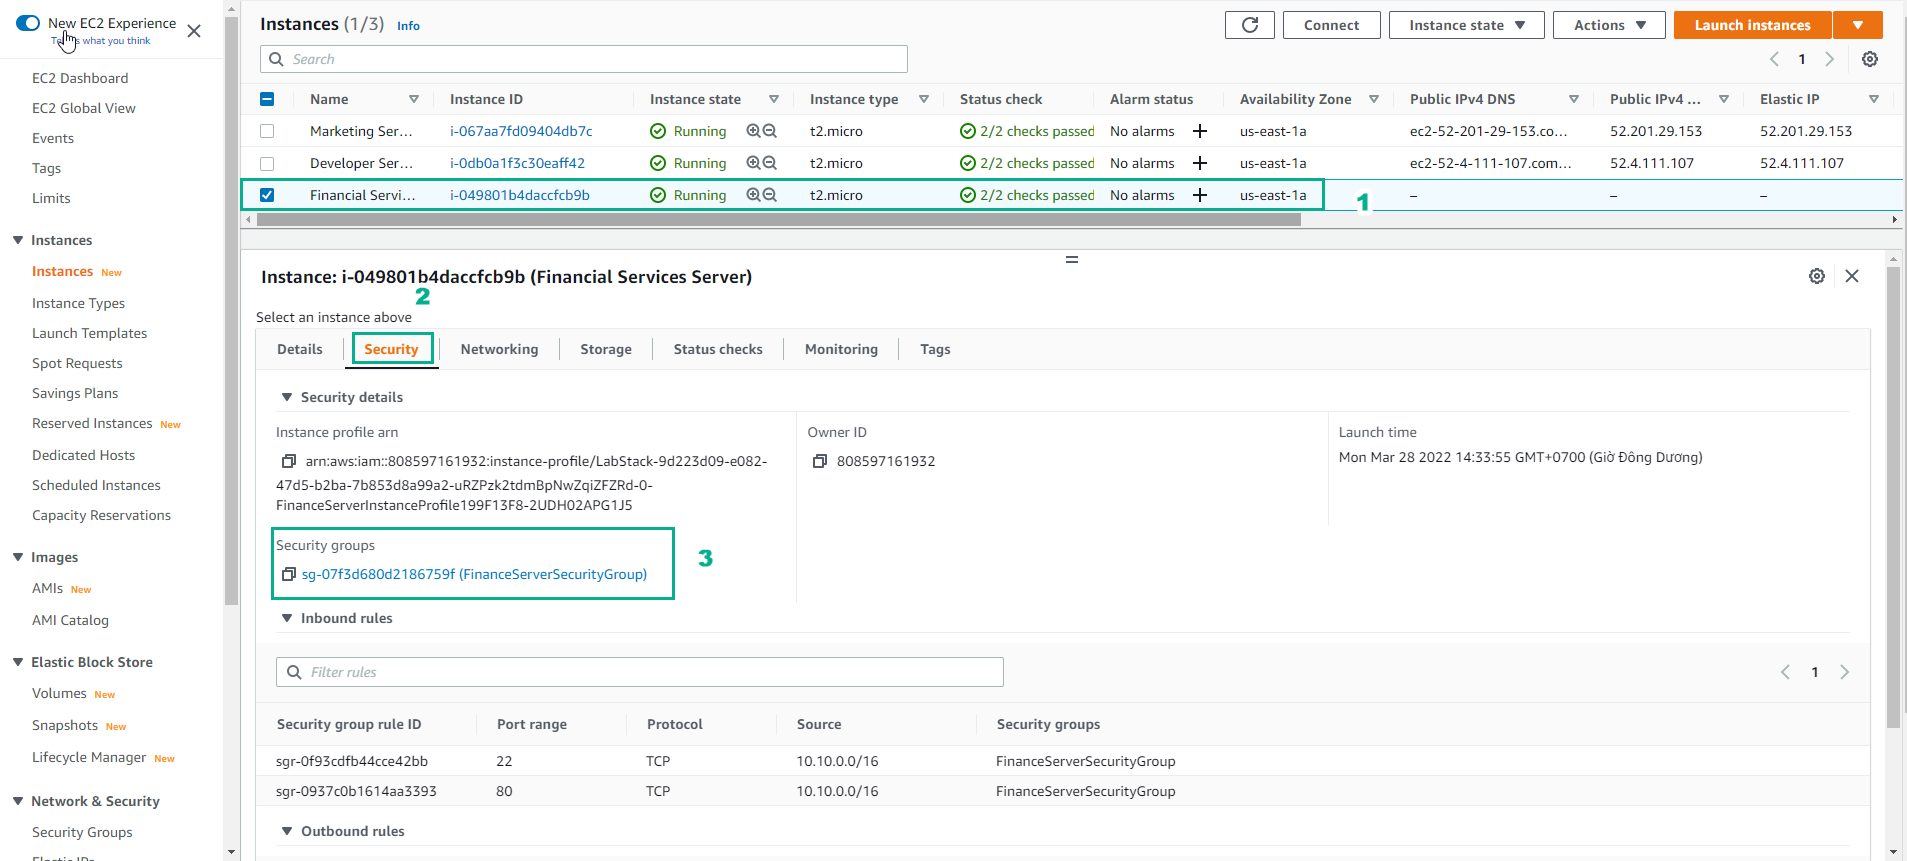
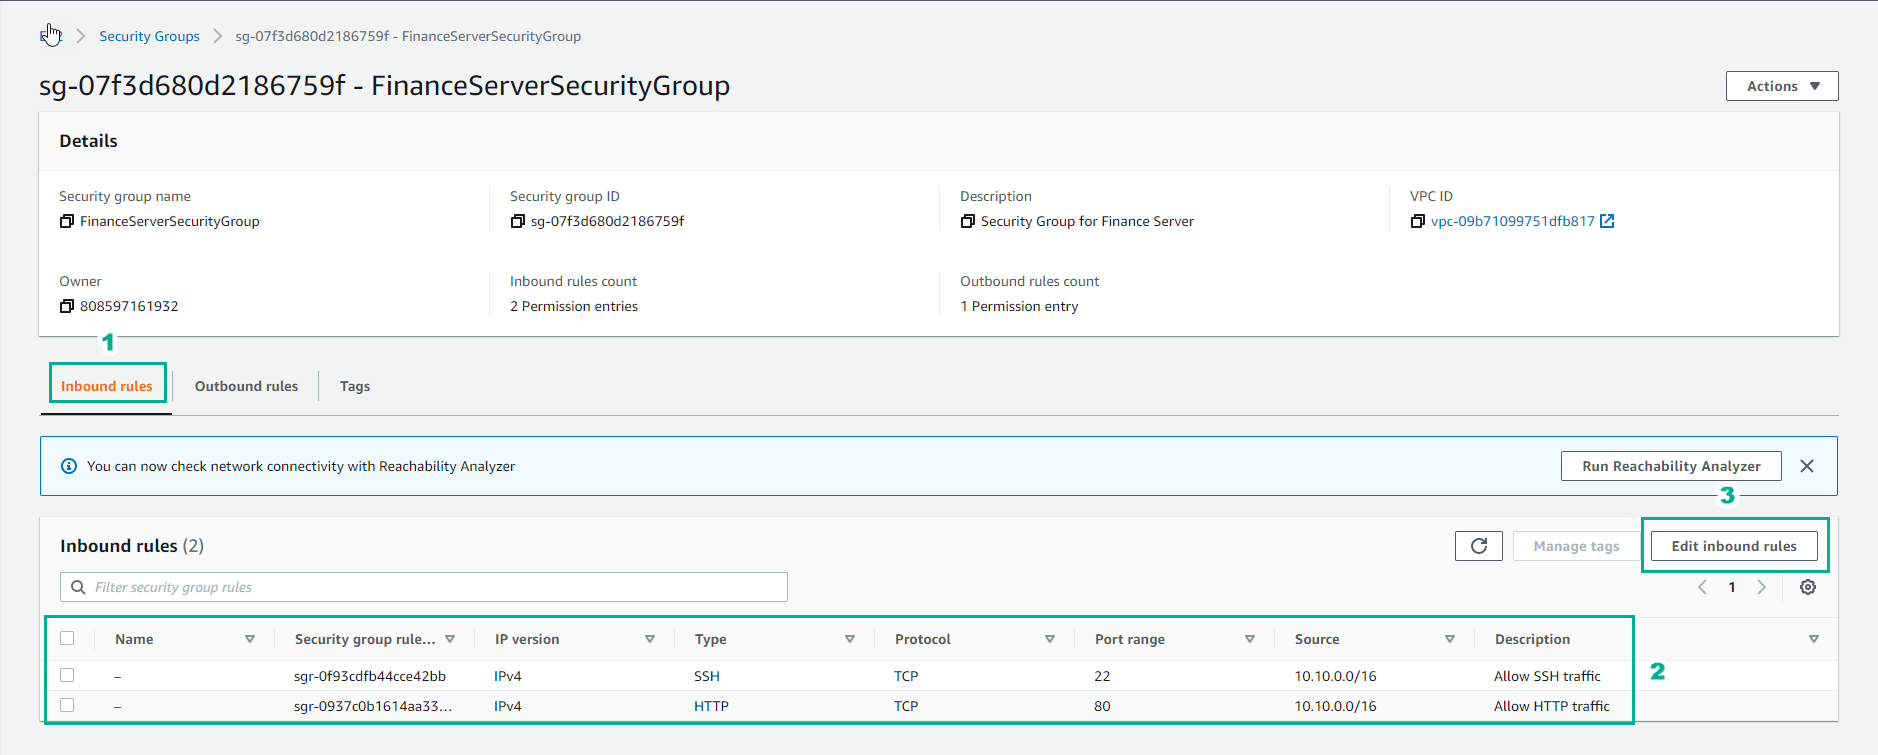
- Trong FinanceServerSecurityGroup
- Chọn Inbound rules
- Xem các inbound rule
- Chọn Edit inbound rules
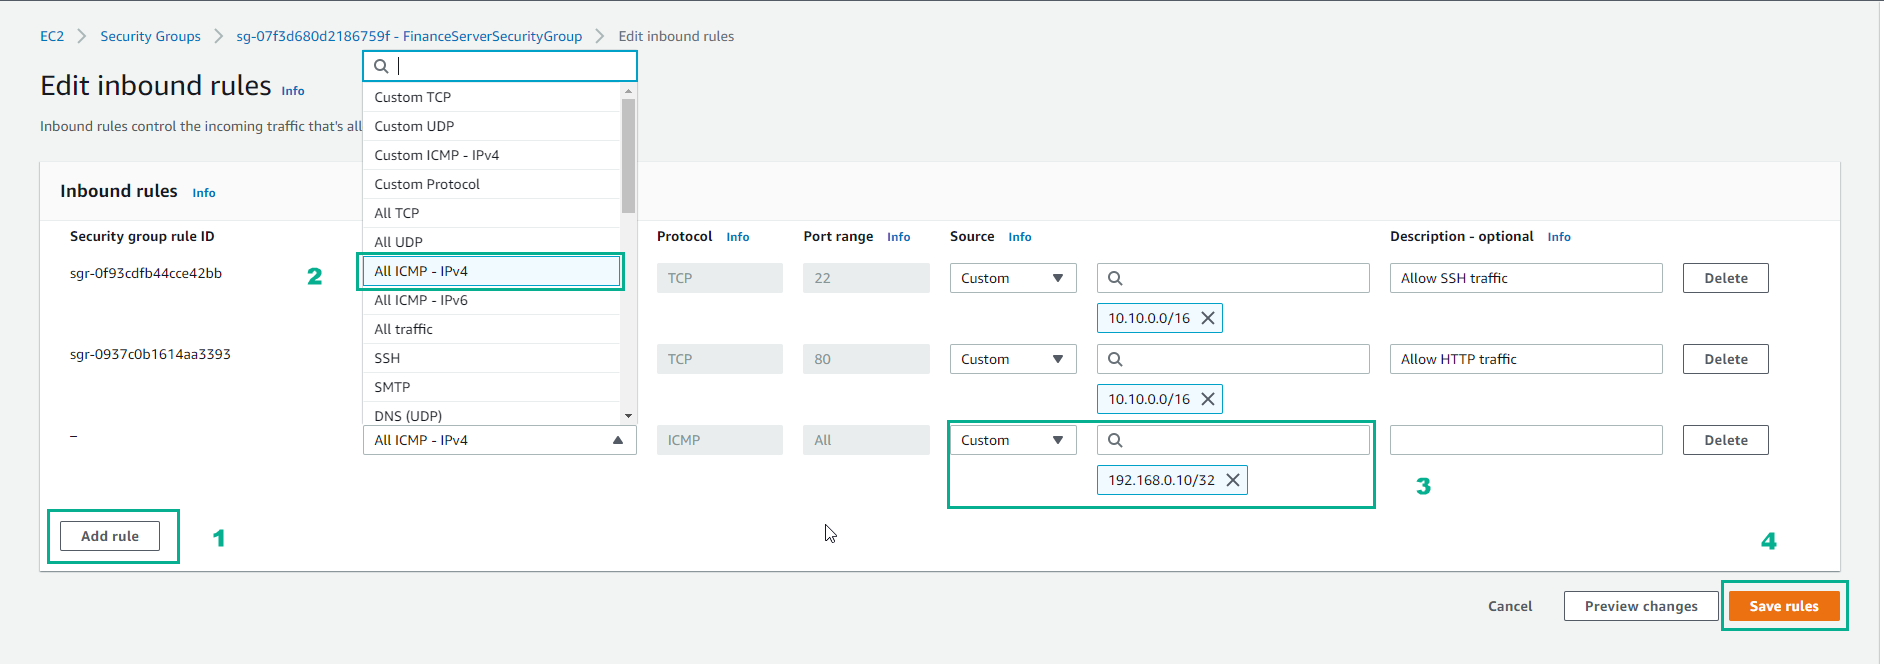
- Trong giao diện Edit inbound rules
- Chọn Add rule
- Chọn All ICMP-IPv4
- Chọn Custom
- Chọn 192.168.10.32
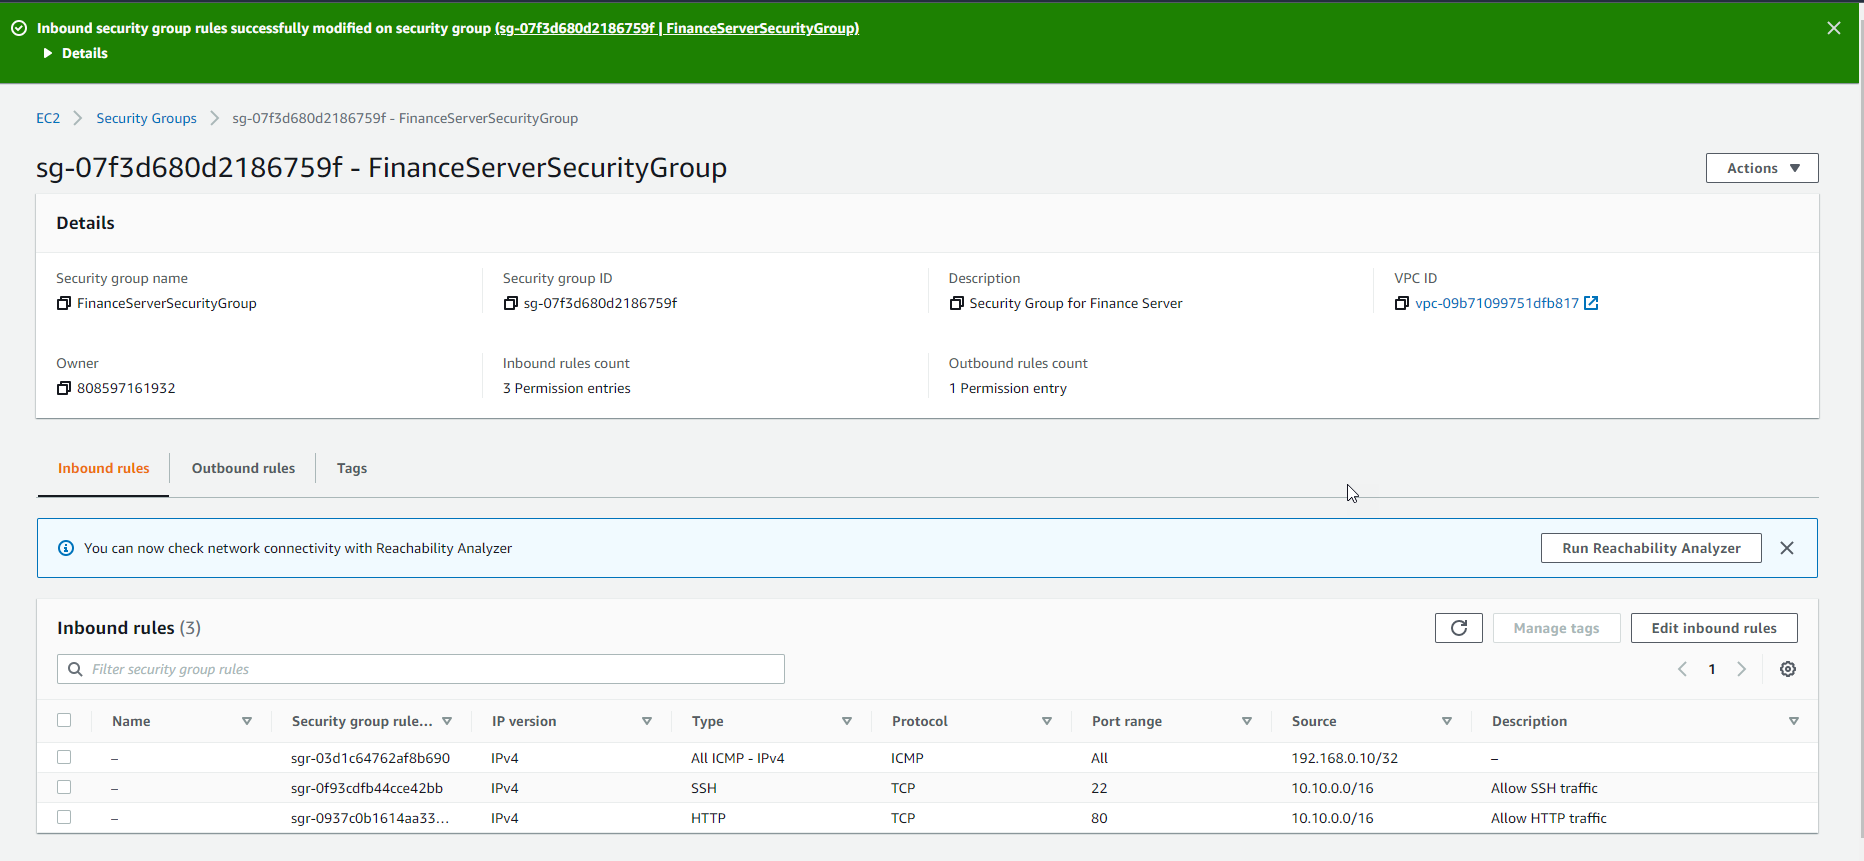
- Chọn Save rules
- Kết quả sau khởi tạo
- Trong giao diện CLI
- Nhập
ping 172.31.0.10 - Xem kết quả
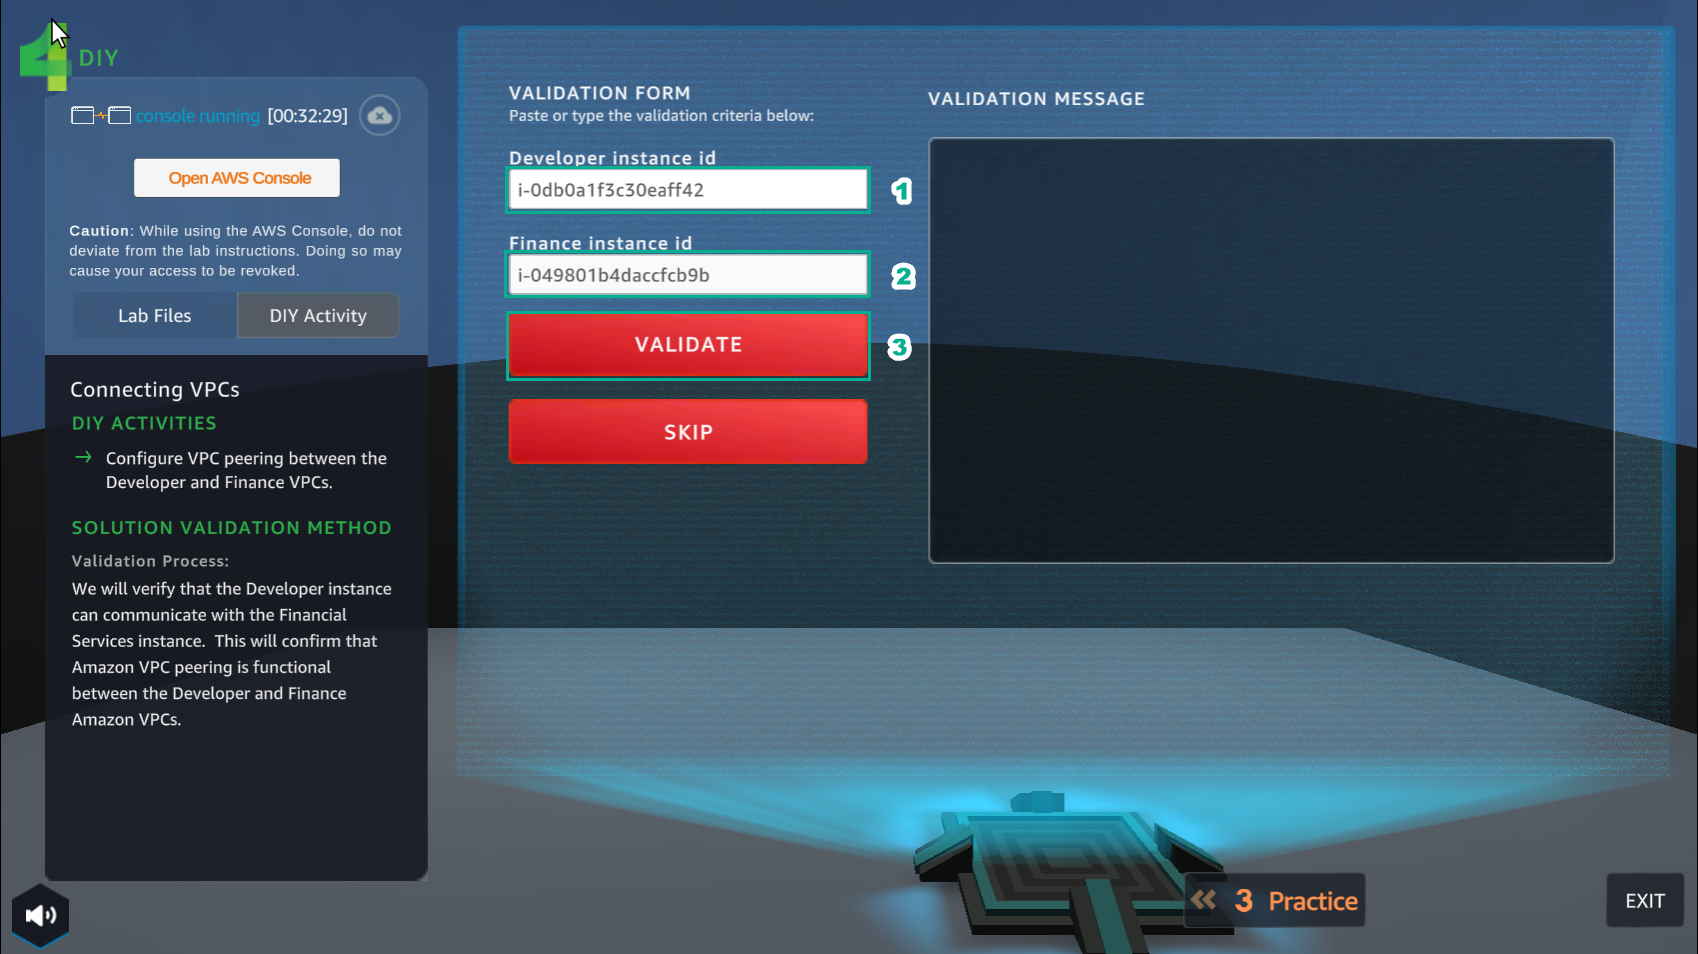
- Trong giao diện DIY
- Nhập Developer instance id
- Nhập Finance instance id
- Sau đó, chọn VALIDATE
- Trong giao diện EC2
- Chọn Instances
- Chọn Developer Server
- Chọn Details
- Sao chép Instance ID
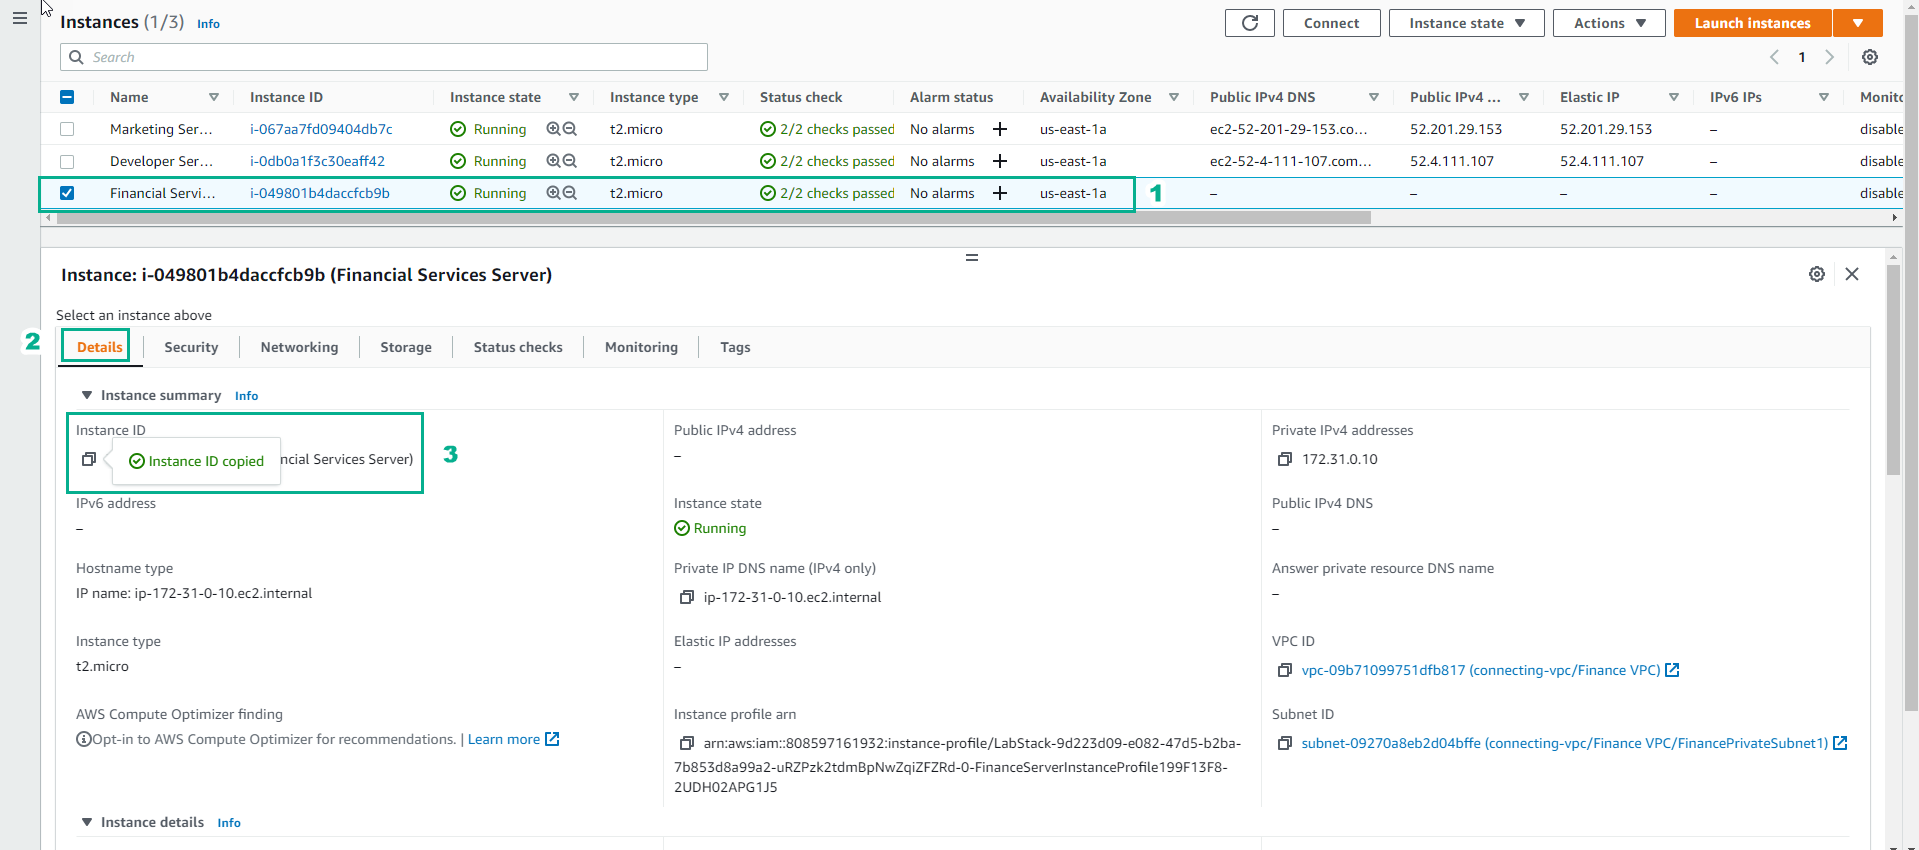
- Trong giao diện EC2
- Chọn Instances
- Chọn Financial Services Server
- Chọn Details
- Sao chép Instance ID
- Trong giao diện DIY
- Dán 2 Instance ID vào VALIDATION FORM
- Chọn VALIDATE
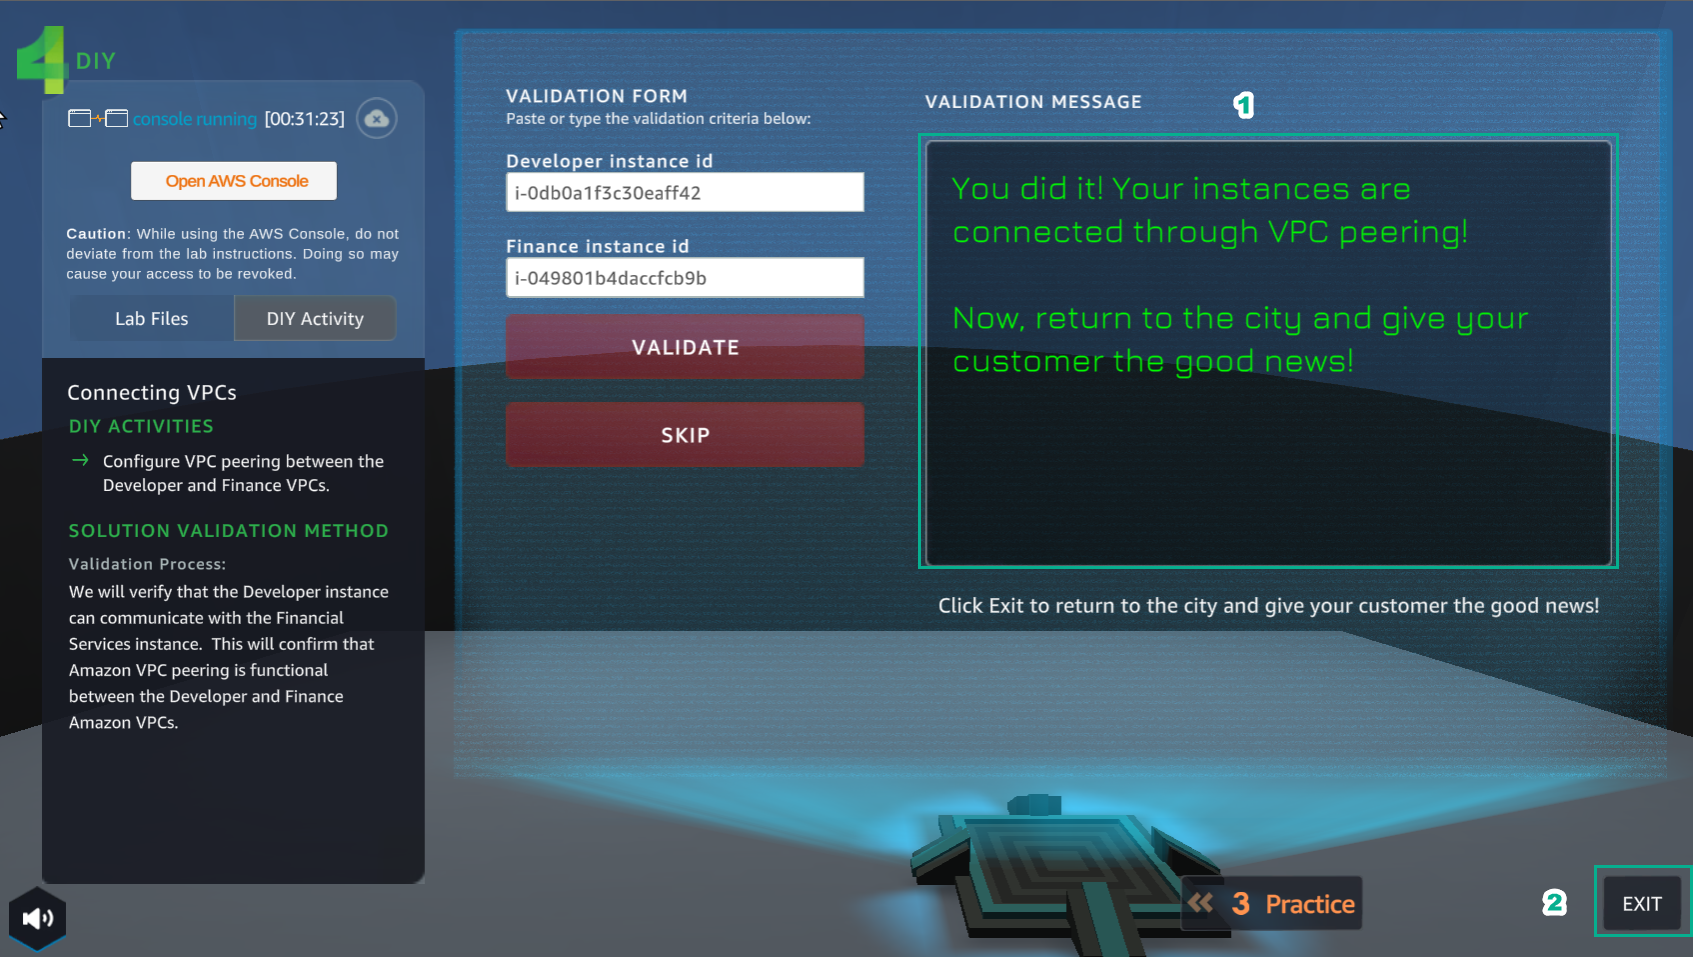
- Trong giao diện VALIDATION MESSAGE
- Xuất hiện You dit it!…
- Chọn EXIT để thoát
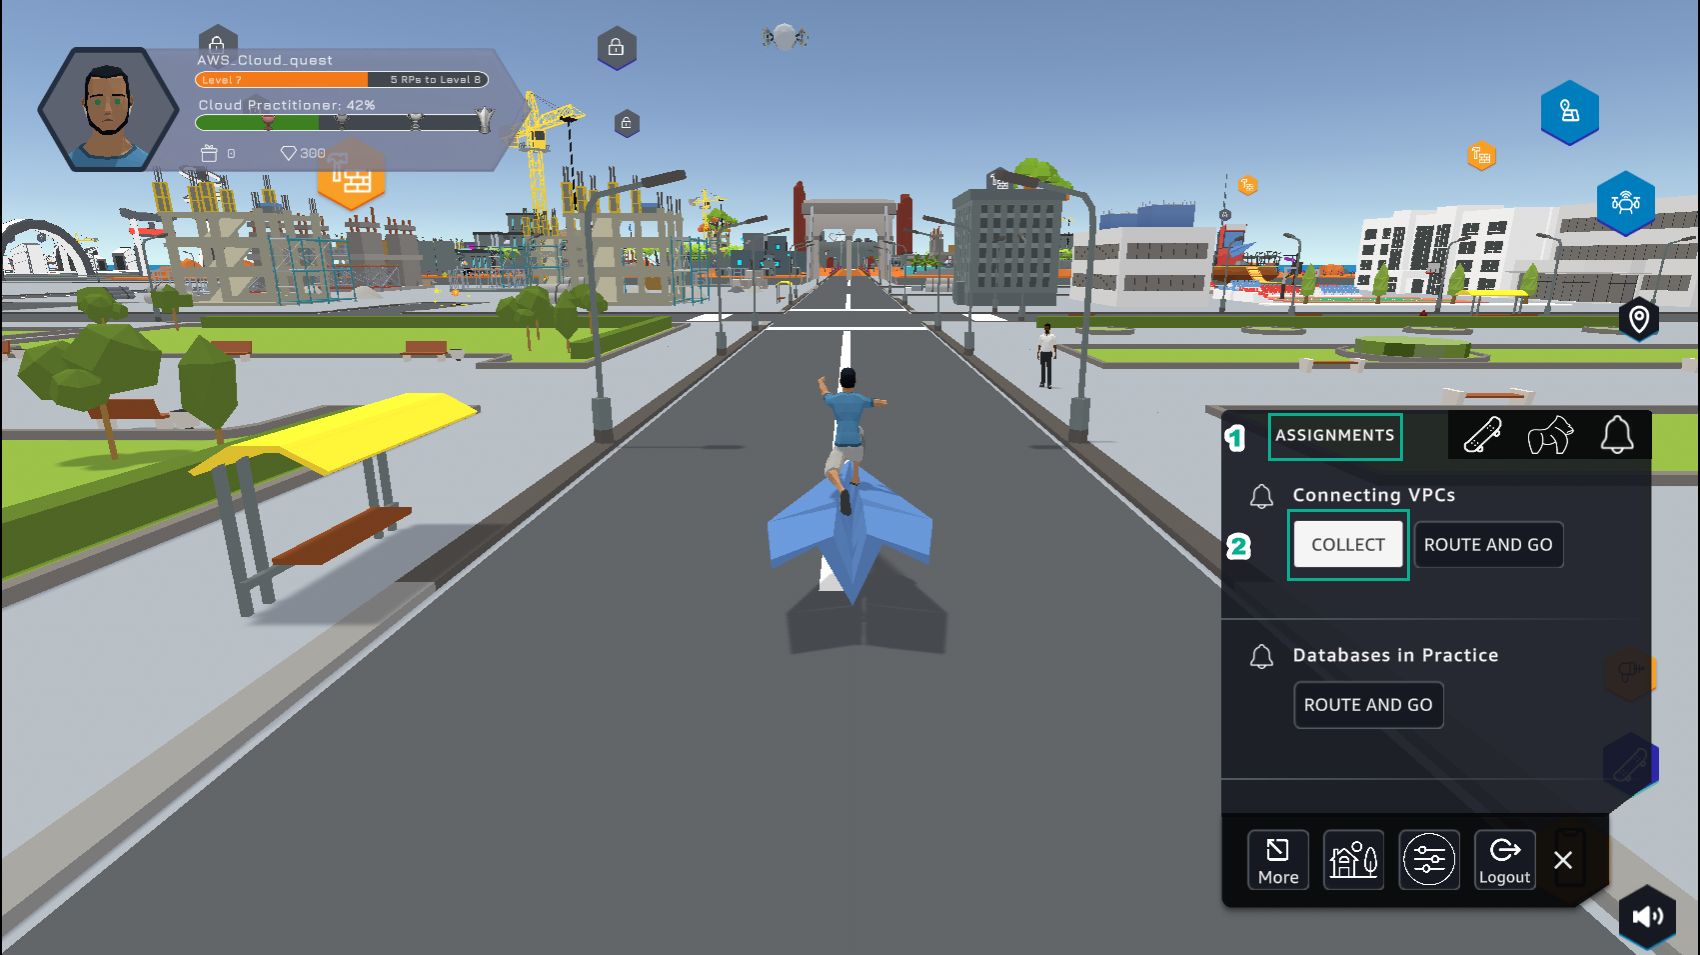
- Trong giao diện thành phố
- Chọn ASSIGNMENTs
- Chọn COLLECT
- Chọn NEXT
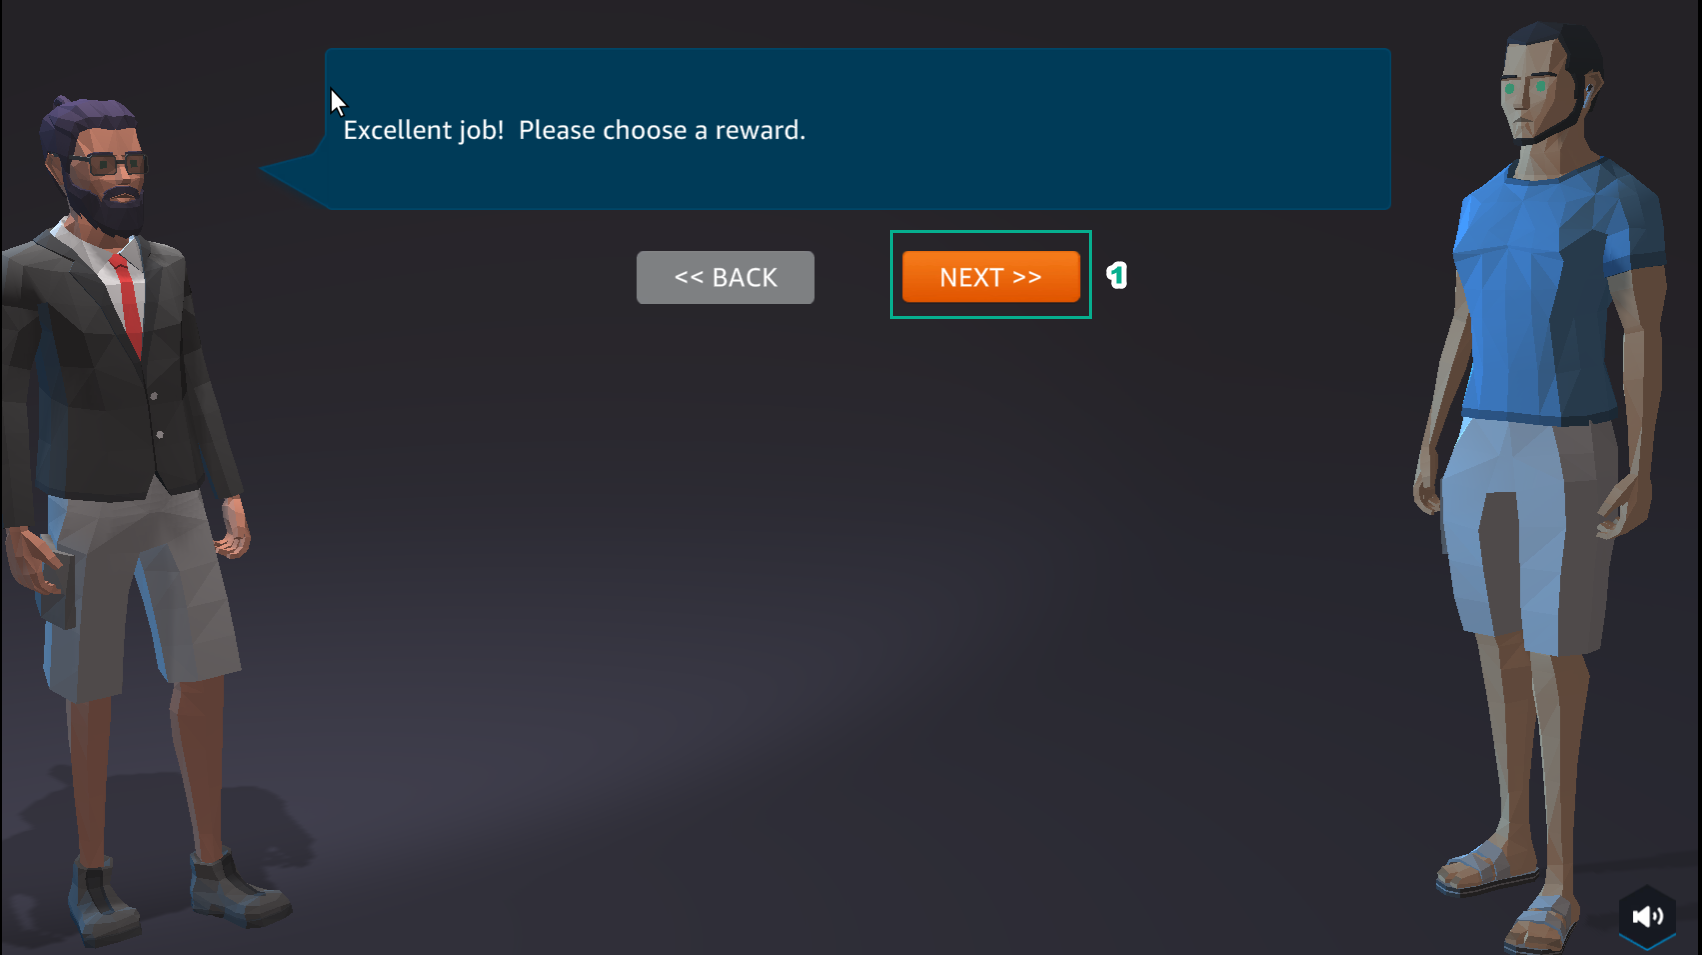
- Chọn COLLECT
- Chúc mừng người chơi đã hoàn thành bài lab