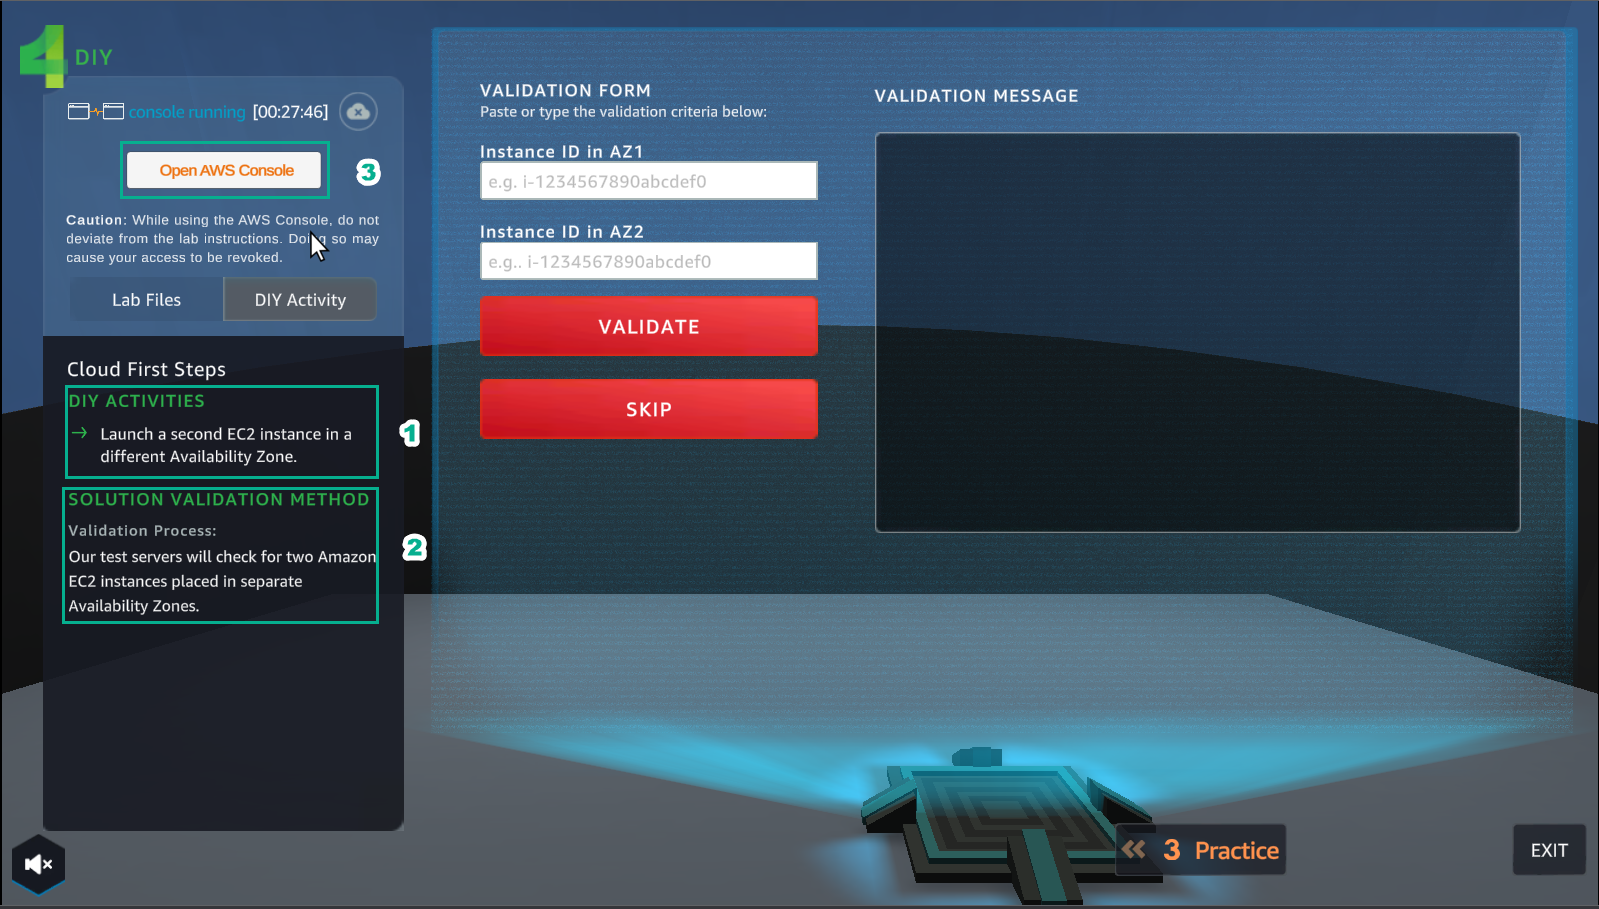
DIY
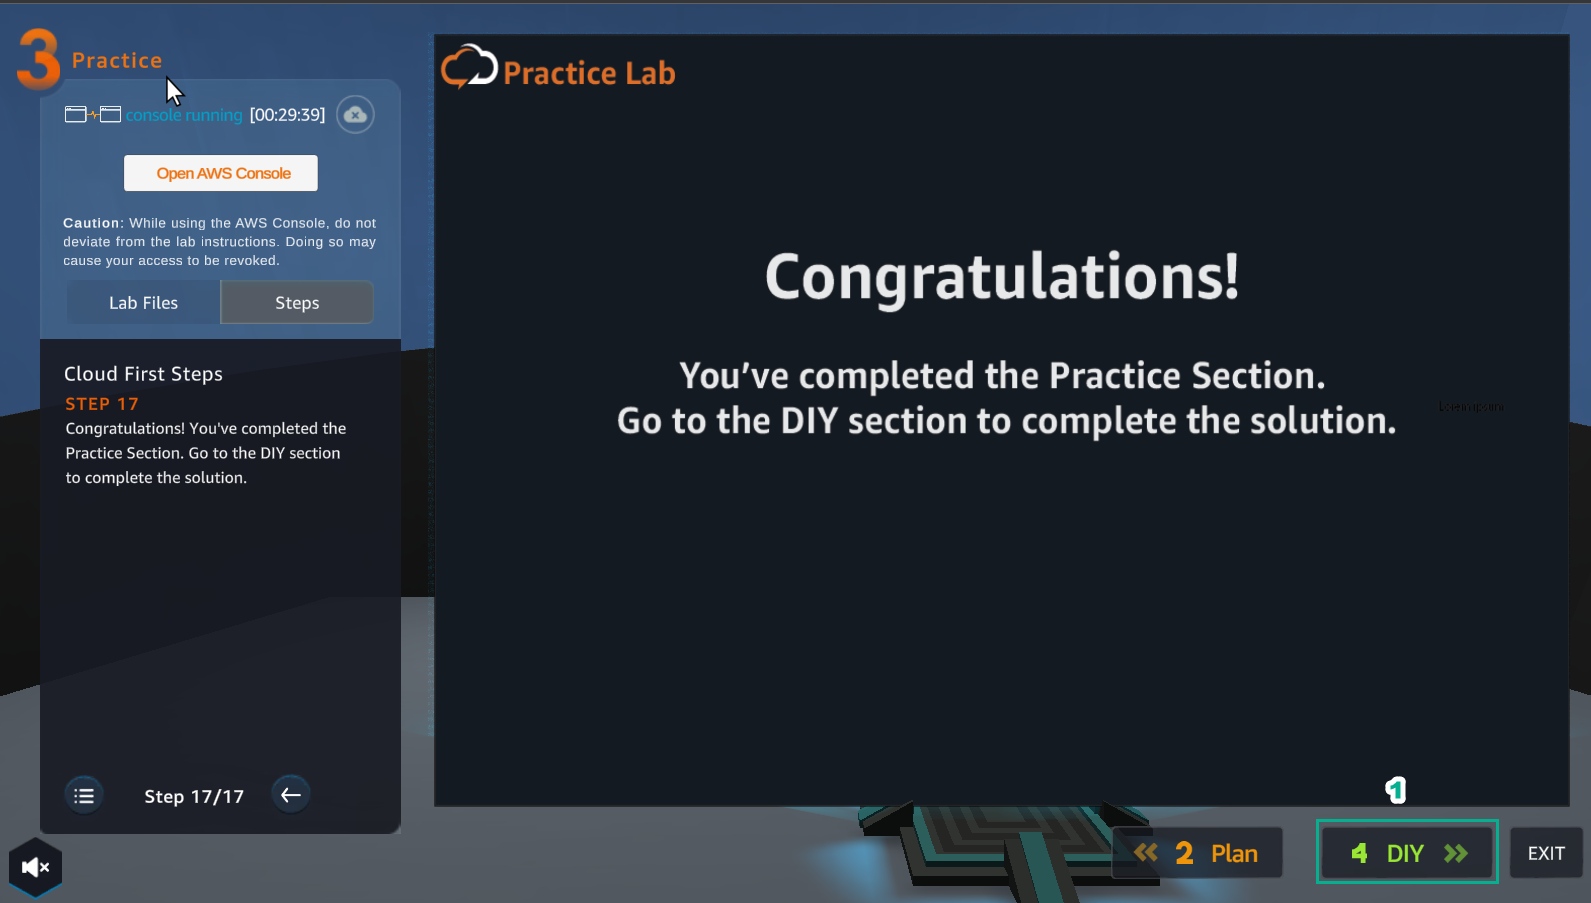
After completing the lab, the player does DIY
- Select DIY to make
- In the Plan interface
- Read DIY ACTIVITIES
- Read SOLUTION VALIDATION METHOD
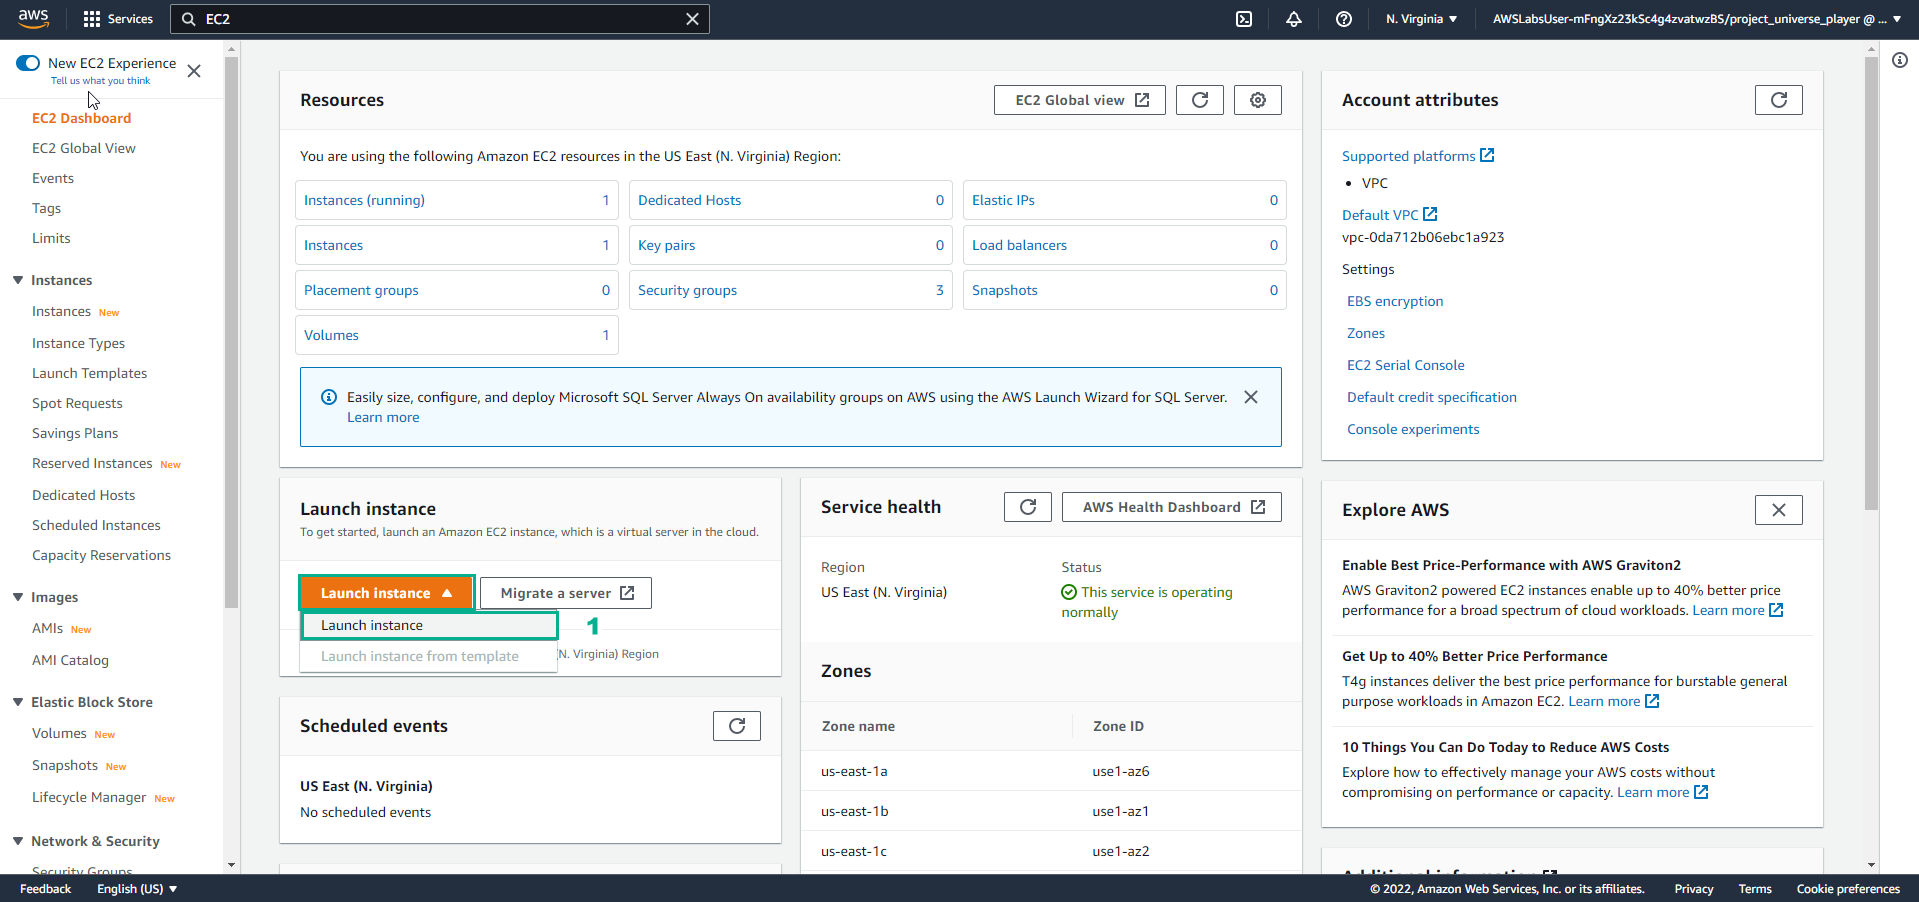
- Select Open AWS Console
- In AWS Console, find and select EC2
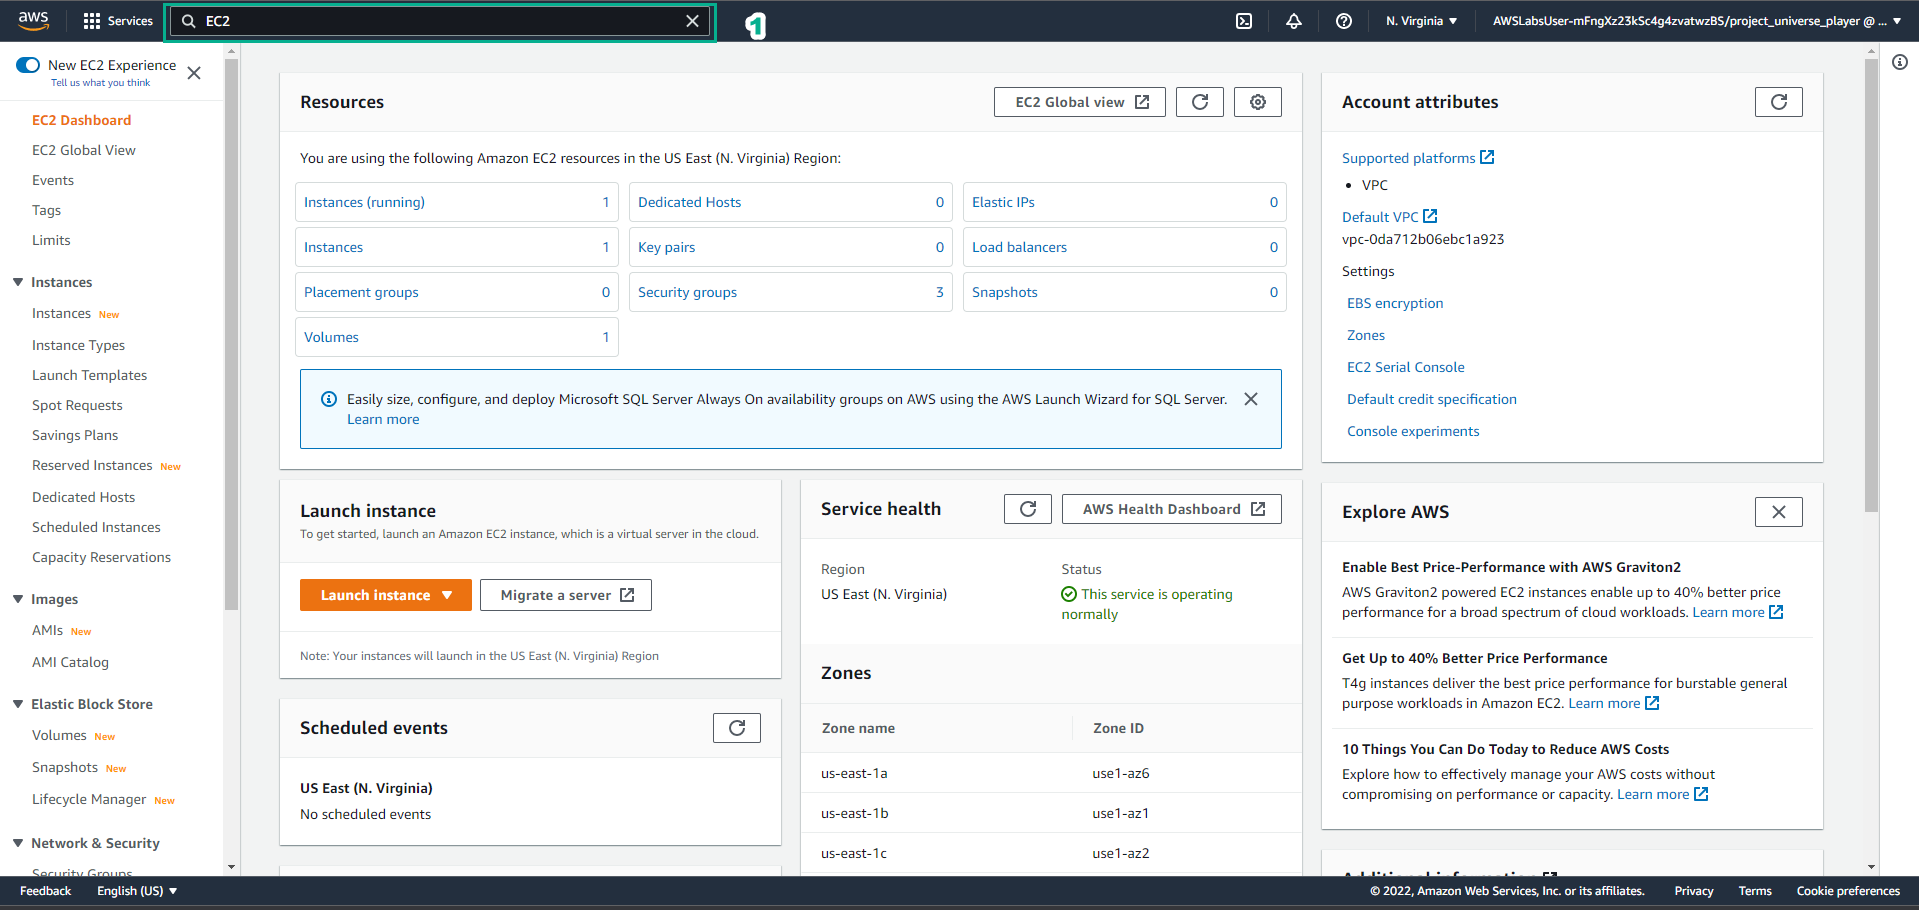
- Select Launch instance
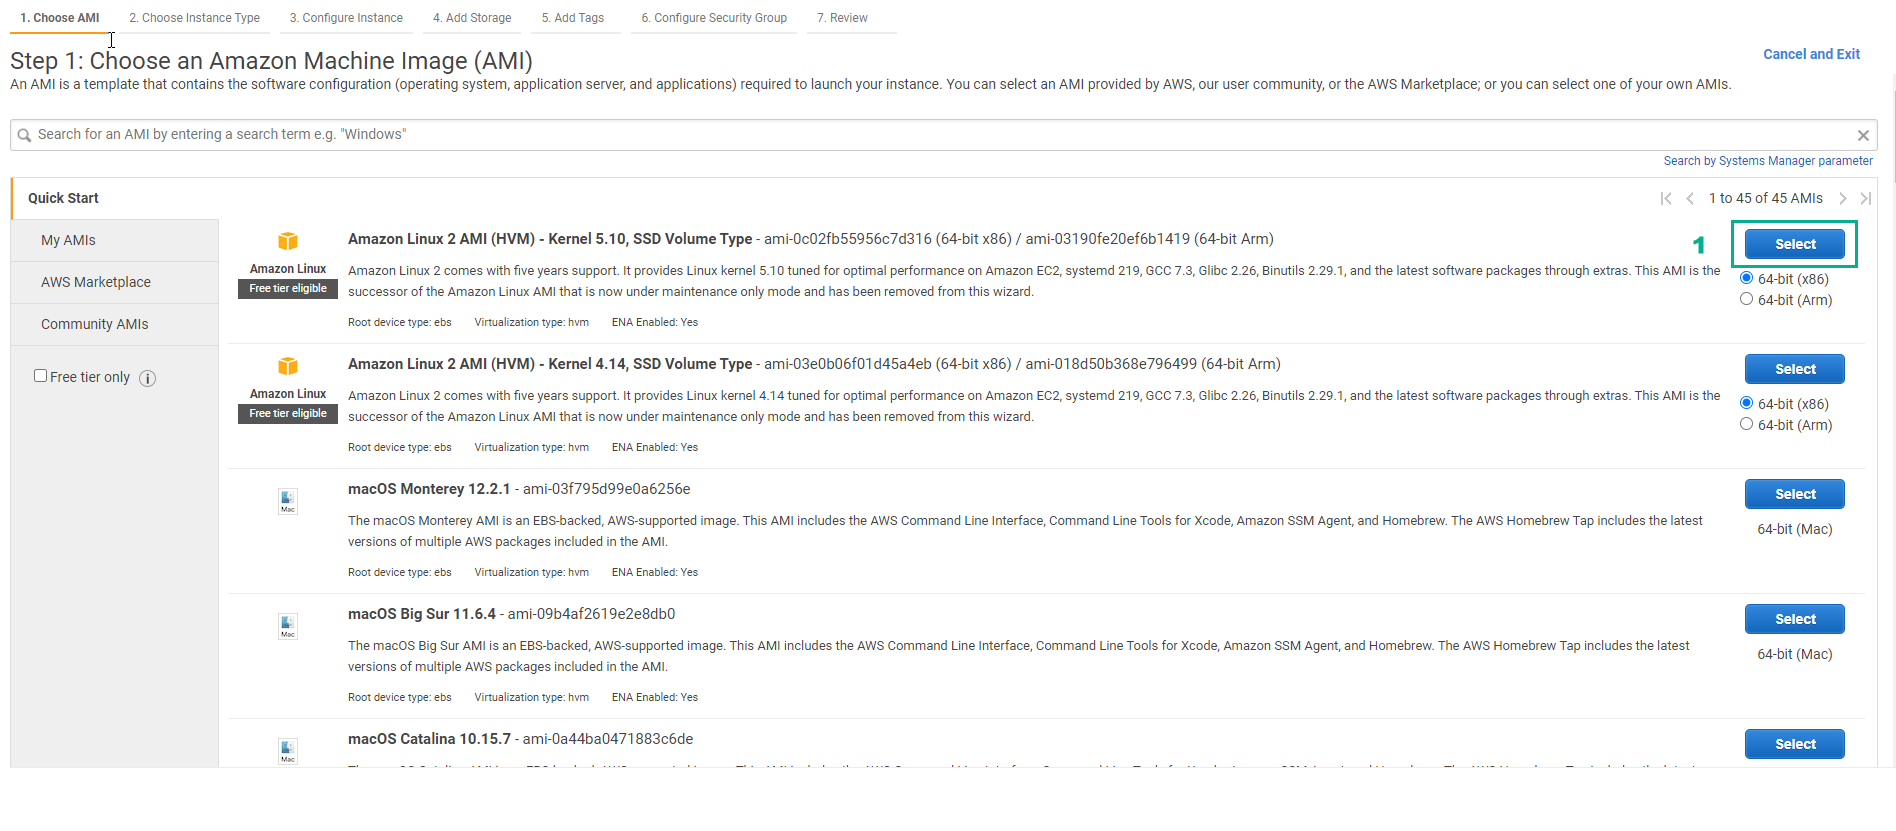
- In Choose an Amazon Machine Image (AMI)
- Select Amazon Linux 2 AMI (HVM) - Kernel 5.10, SSD Volume Type
- Select Select
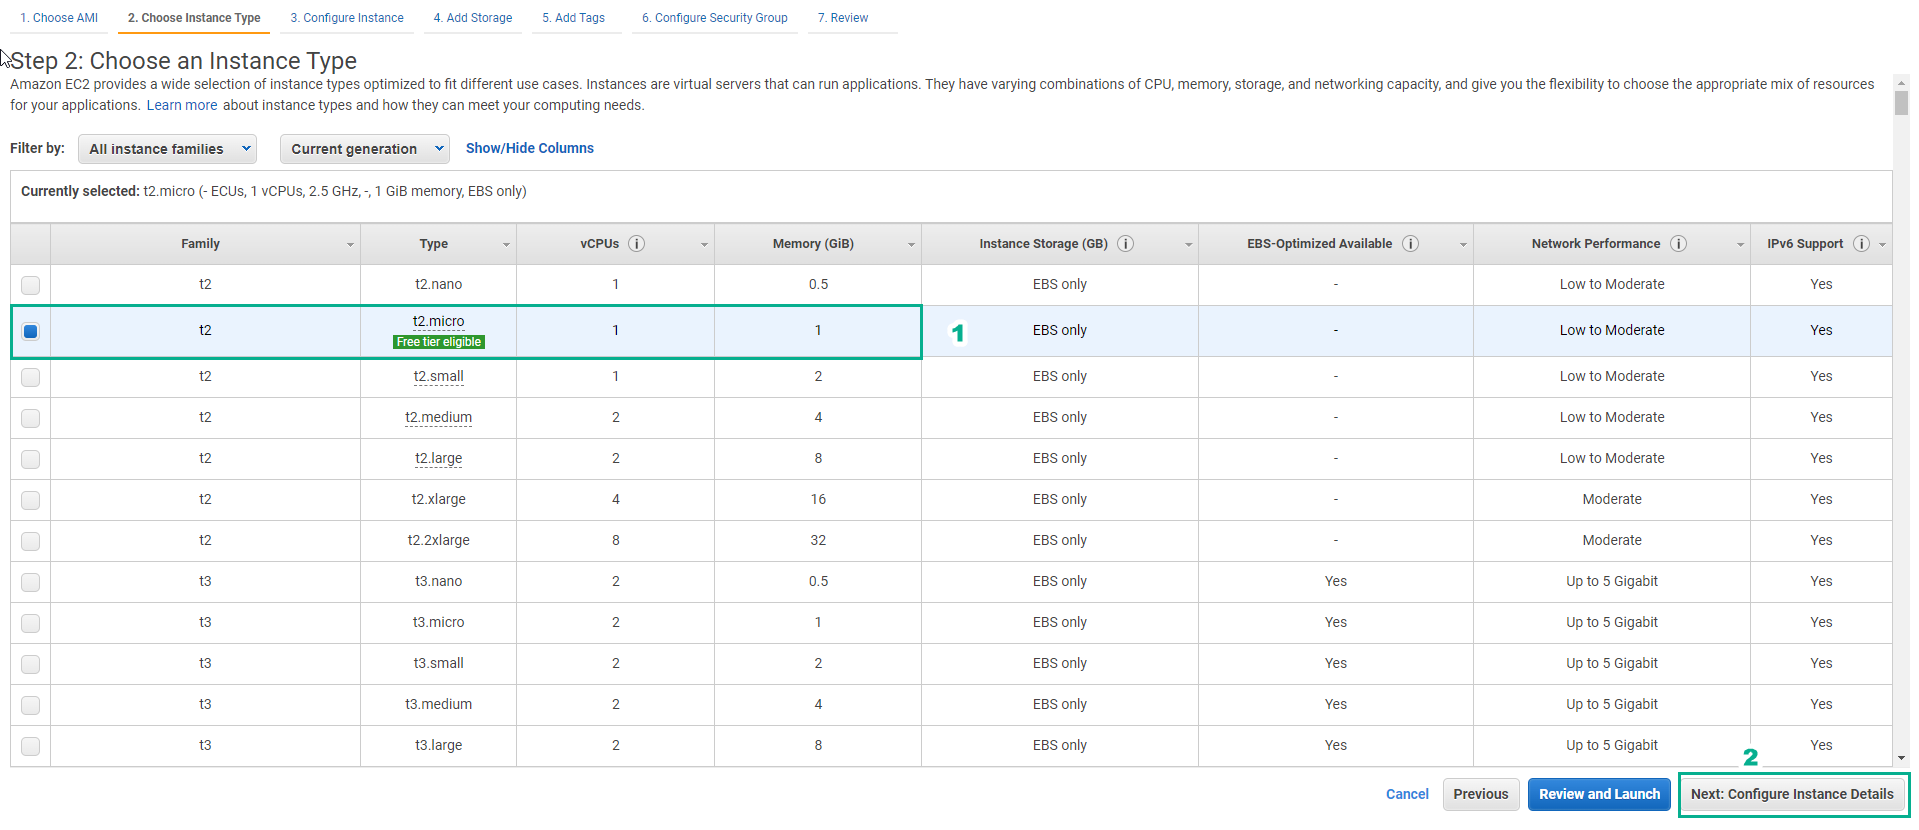
- In Choose an Instance Type
- Select t2.micro
- Then select Next: Configure Instance Details
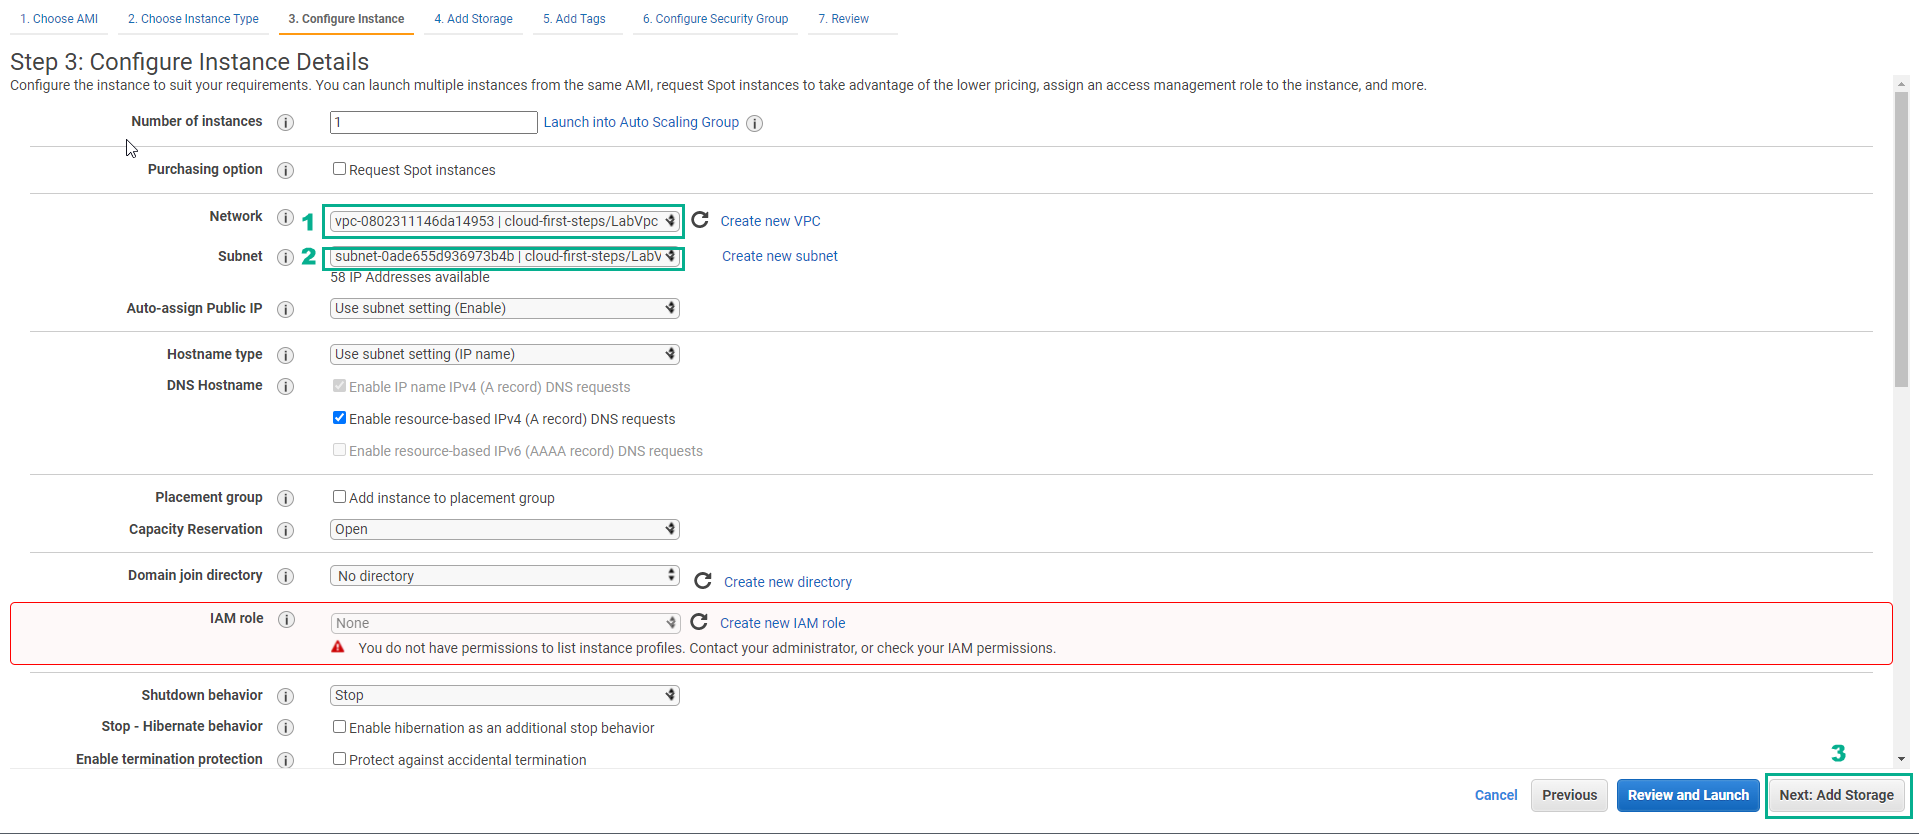
- In Configure Instance Details
- Select VPC
- Choose Subnet different from the subnet of Practice
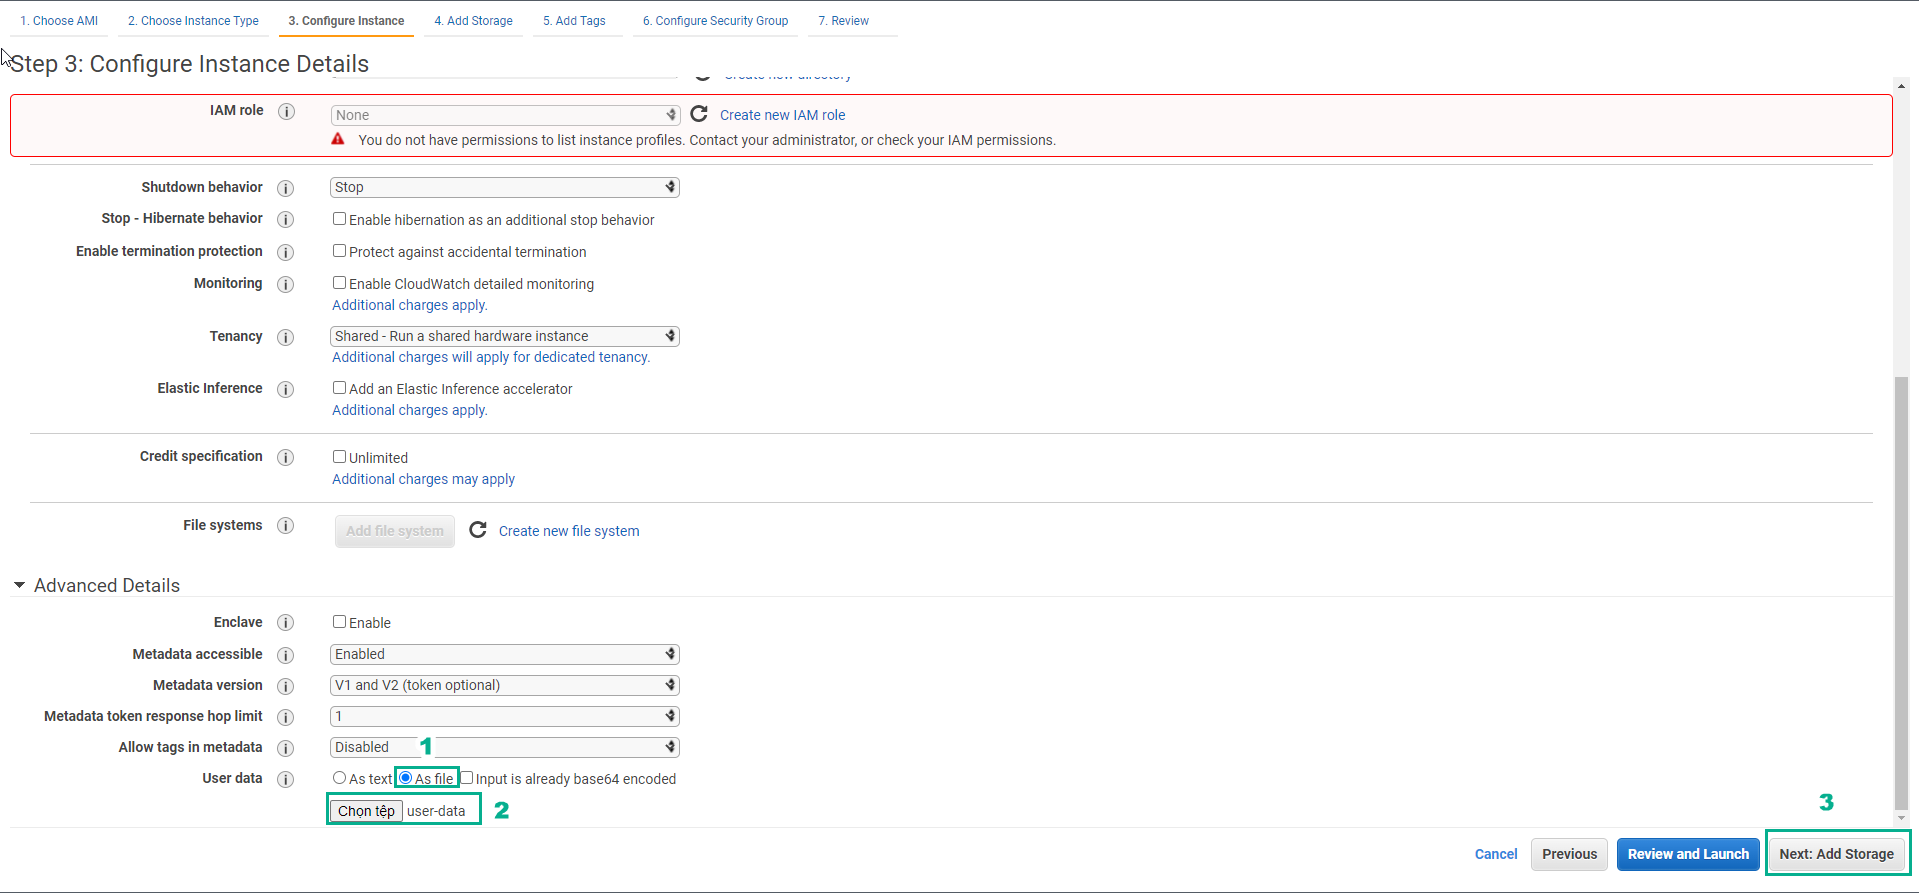
- In Advanced Details
- Select As file
- Select Select file and download the file user-data
- Select Next: Add Storage
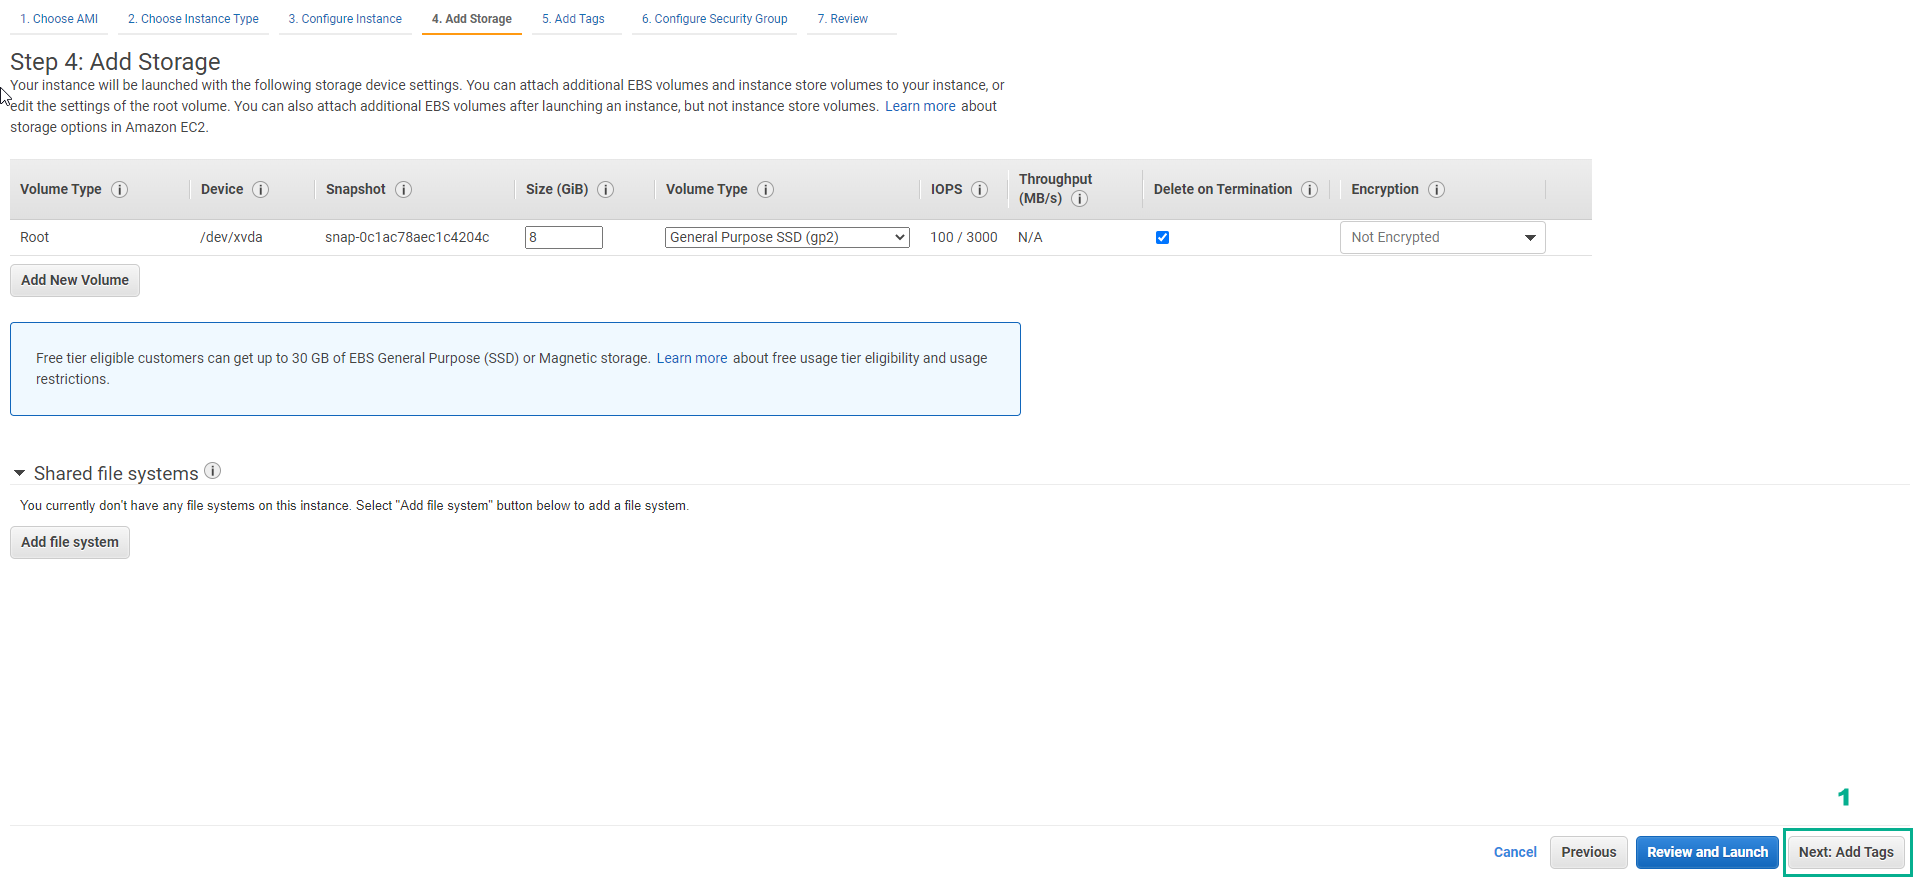
- In Add Storage, select Next: Add Tags
-
In Add Tags, select Next: Configure Security Group
-
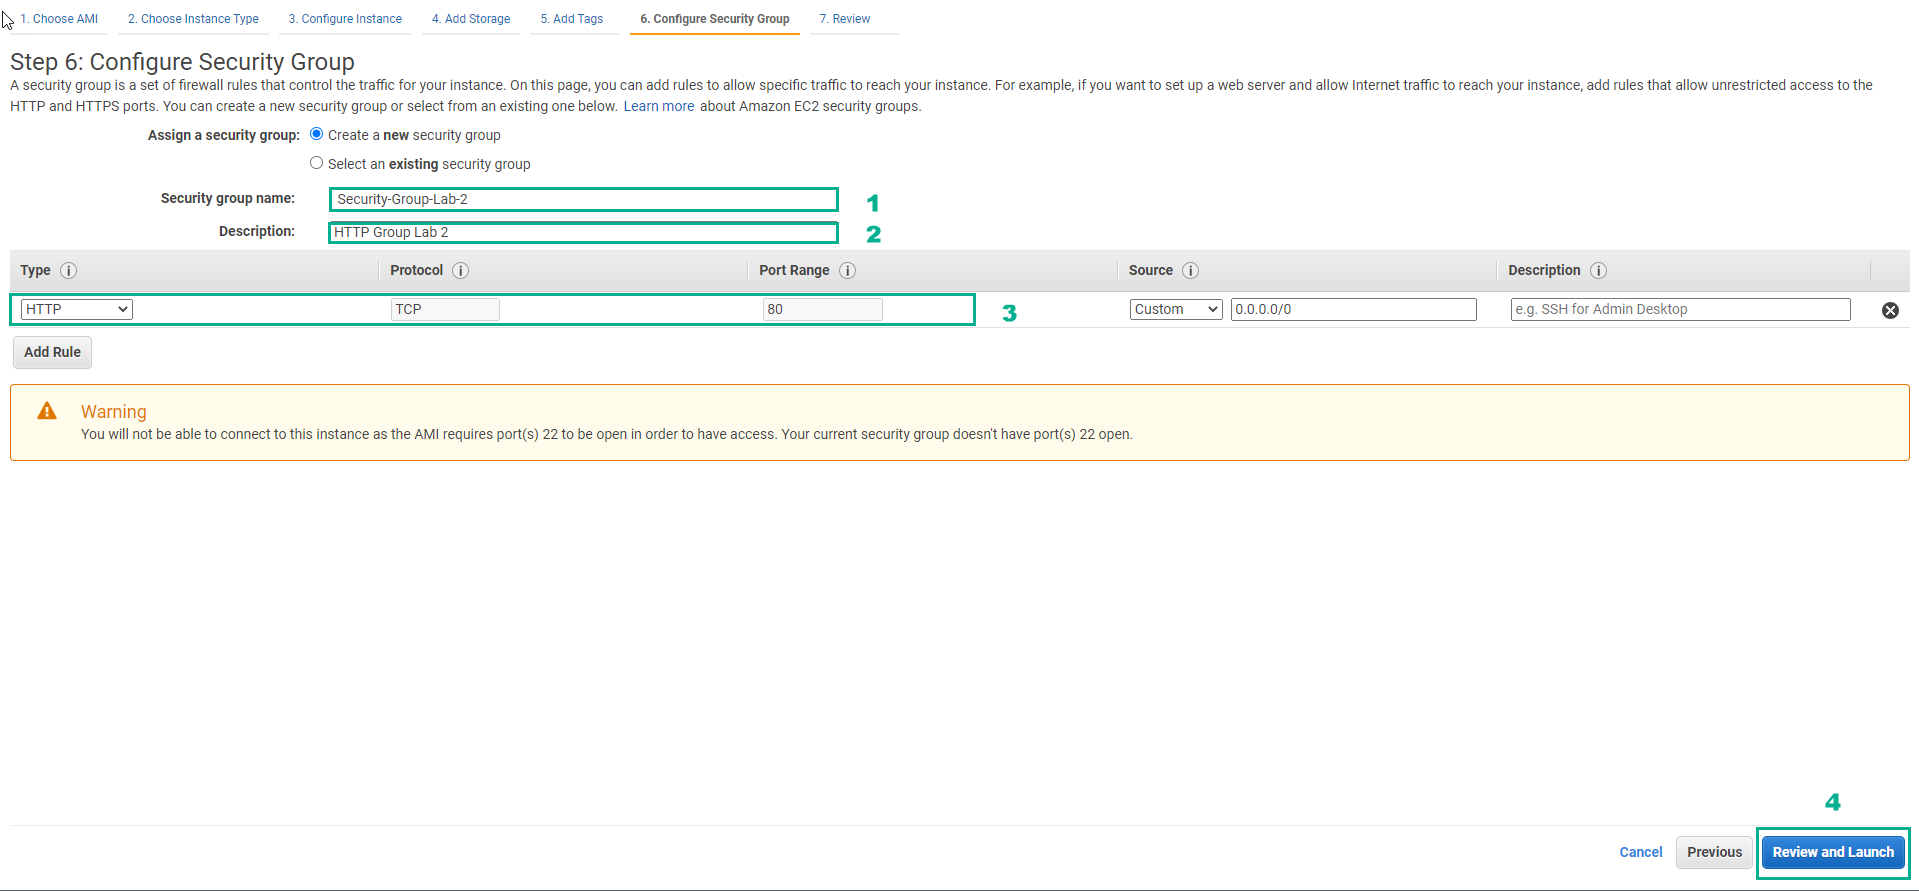
In Configure Security Group, create a security group
- Security group name, enter
Security-Group-Lab-2 - Description, enter
HTTP Group Lab 2 - Rule, select HTTP
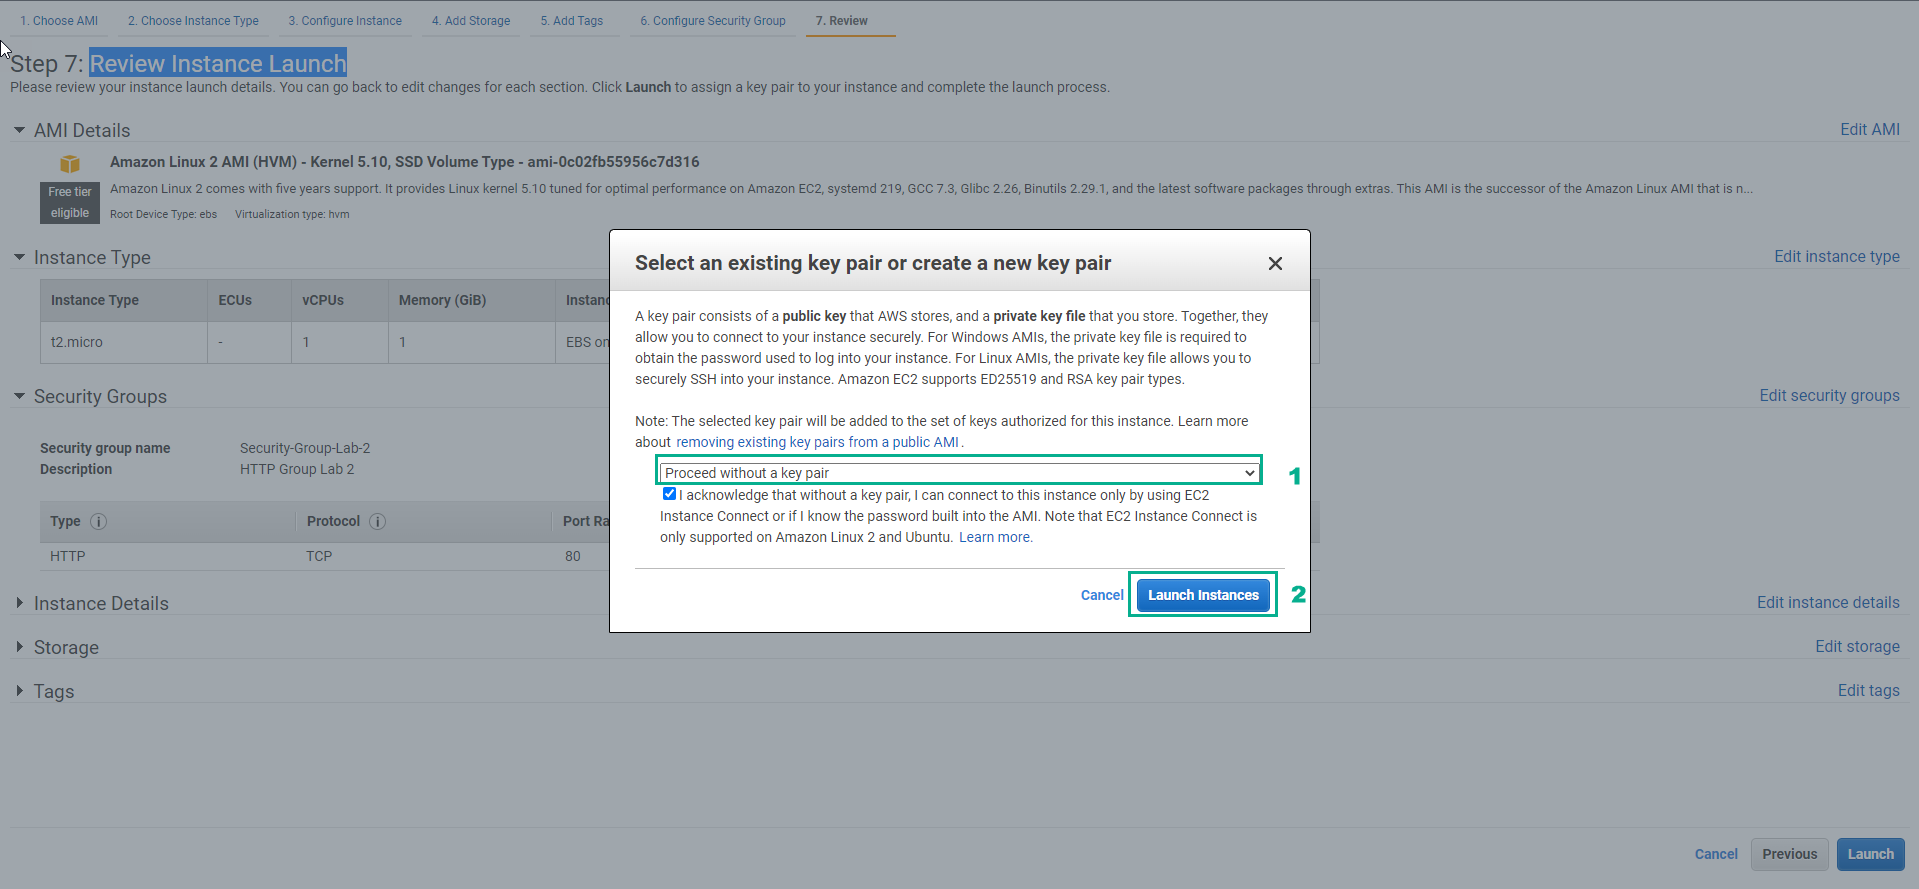
- Select Review and Launch
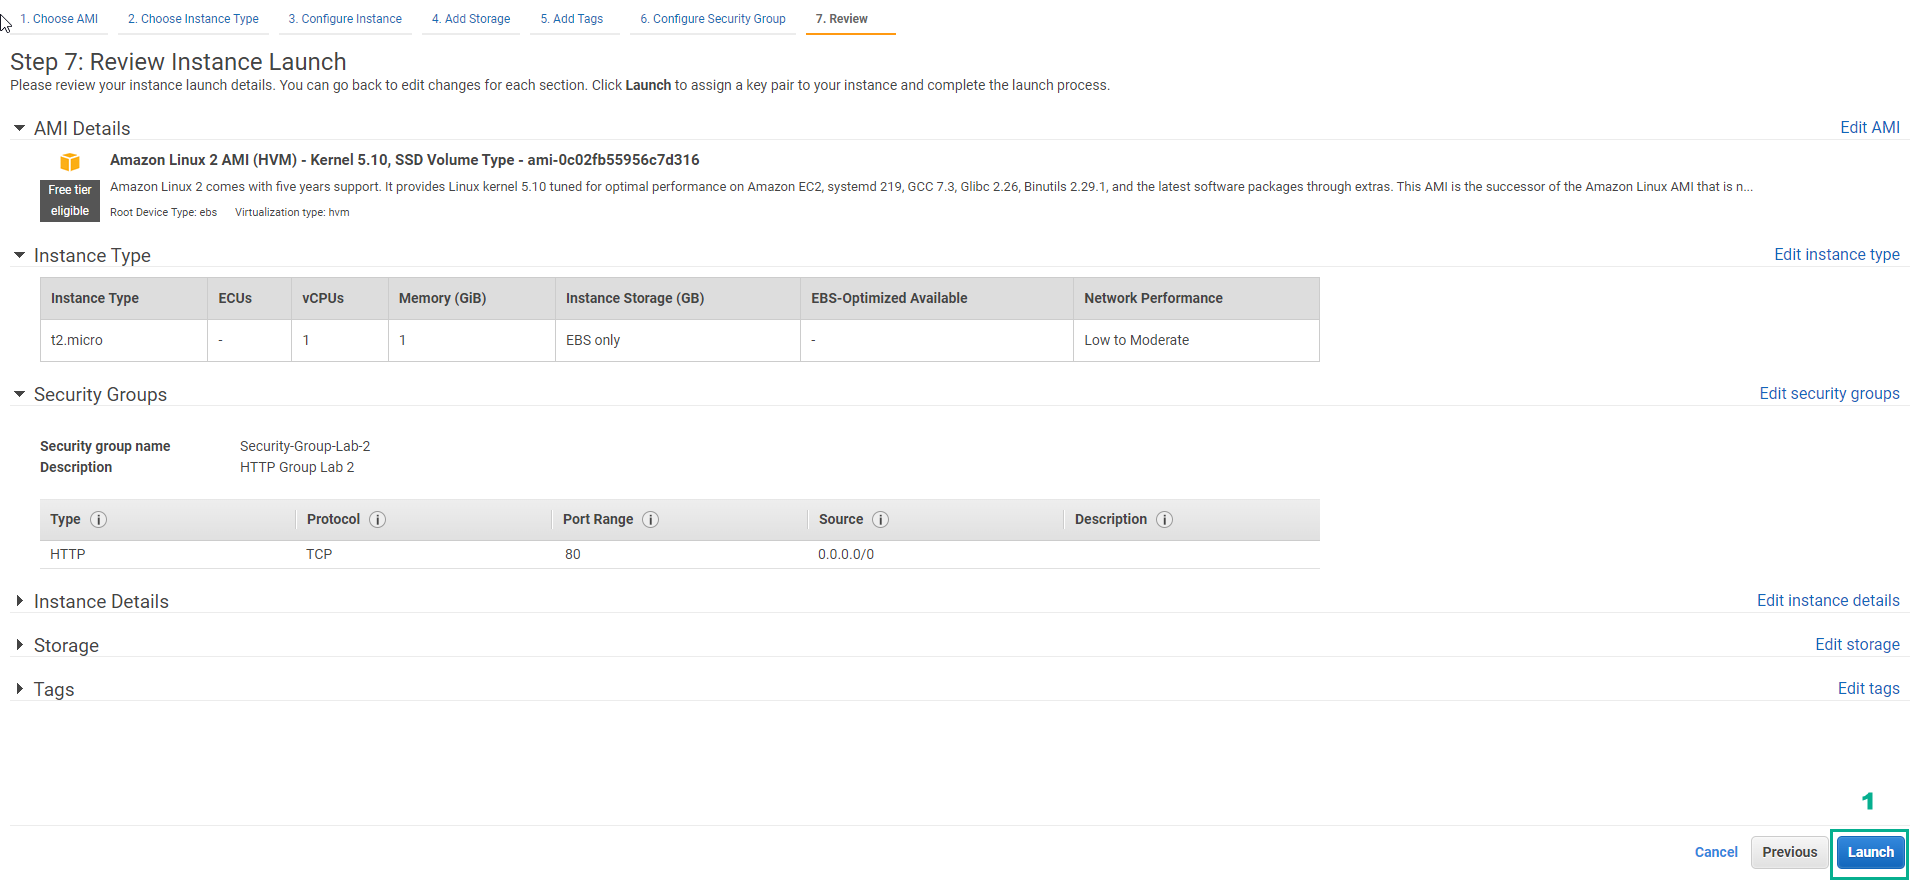
- In Review Instance Launch, double check and select Launch
- In Select an existing key pair or create a new key pair
- Select Proceed without a key pair
- Select I acknowledge…
- Select Launch Instances
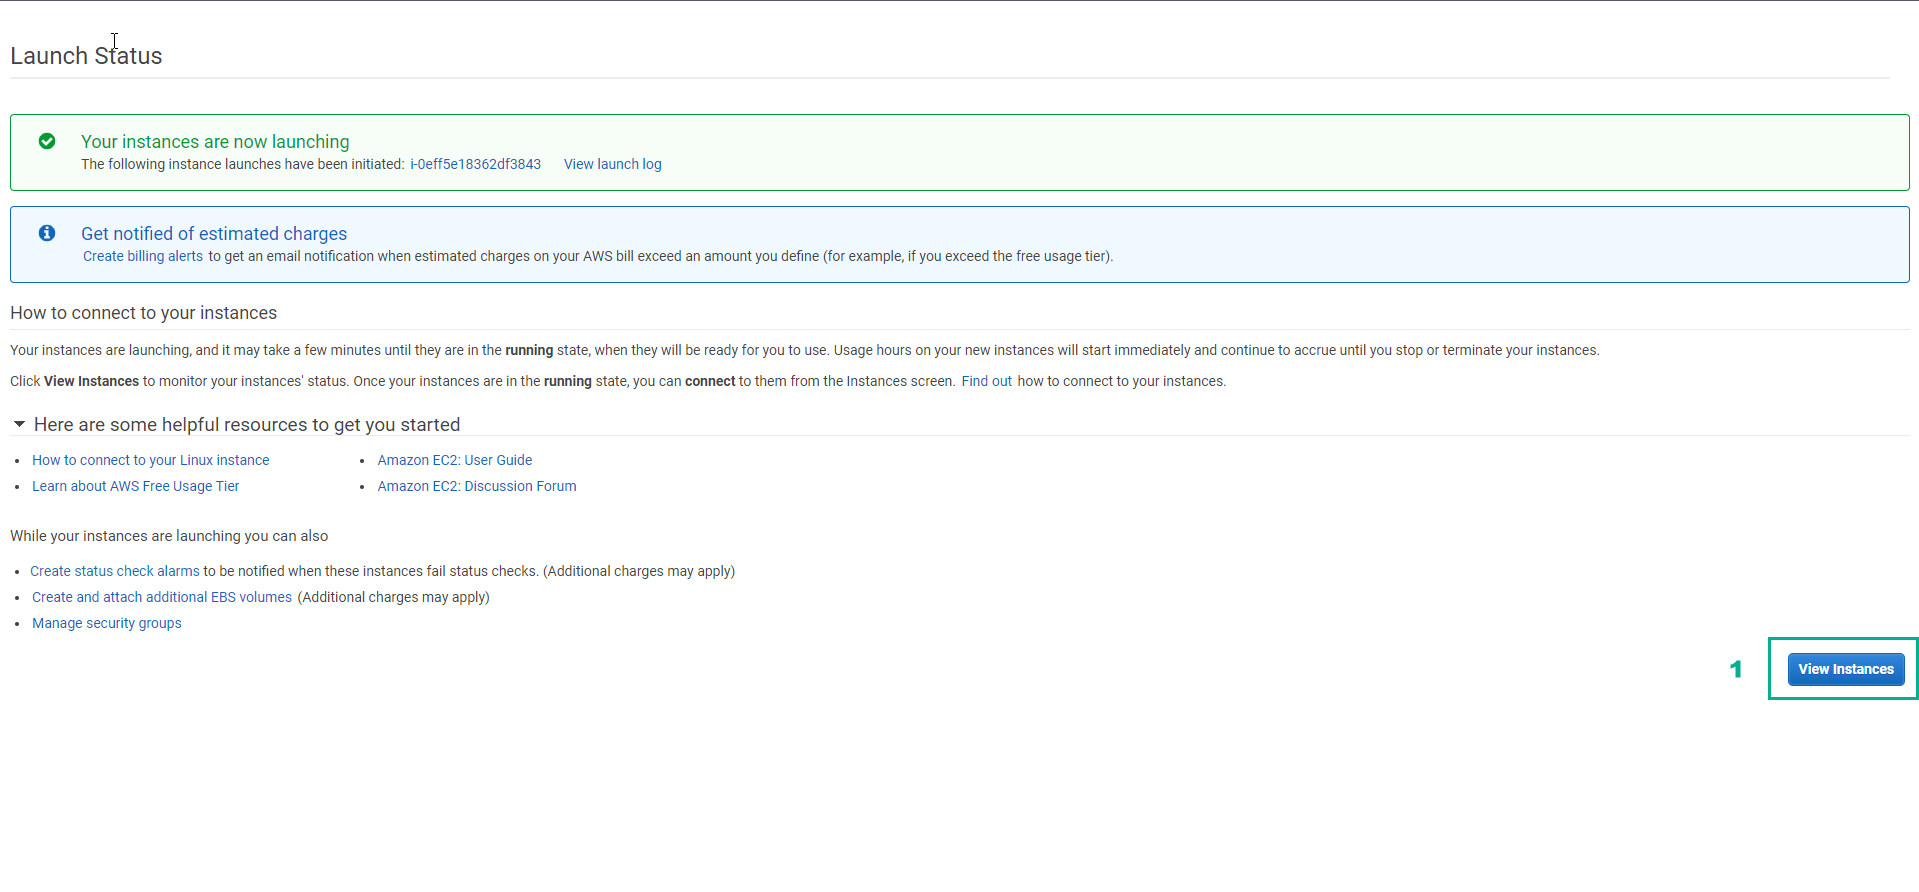
- Select View Instances
- Result of creating 2 Amazon EC2 Instance
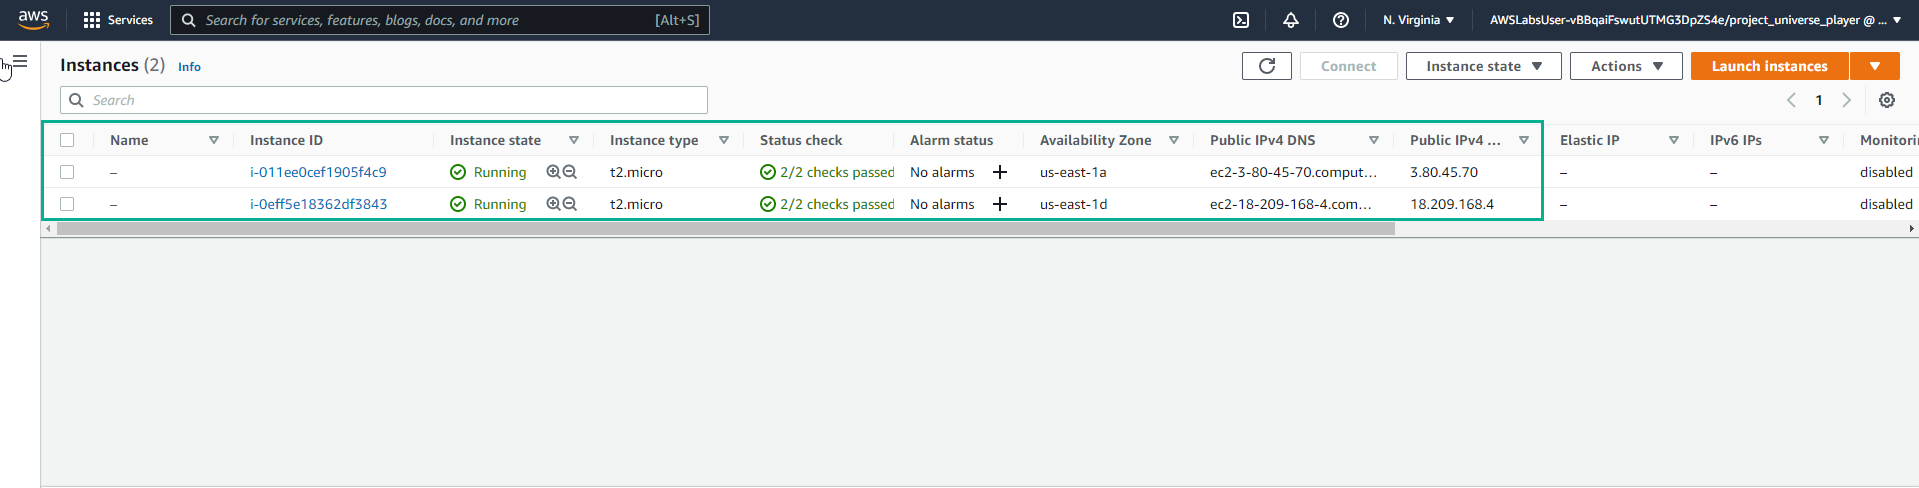
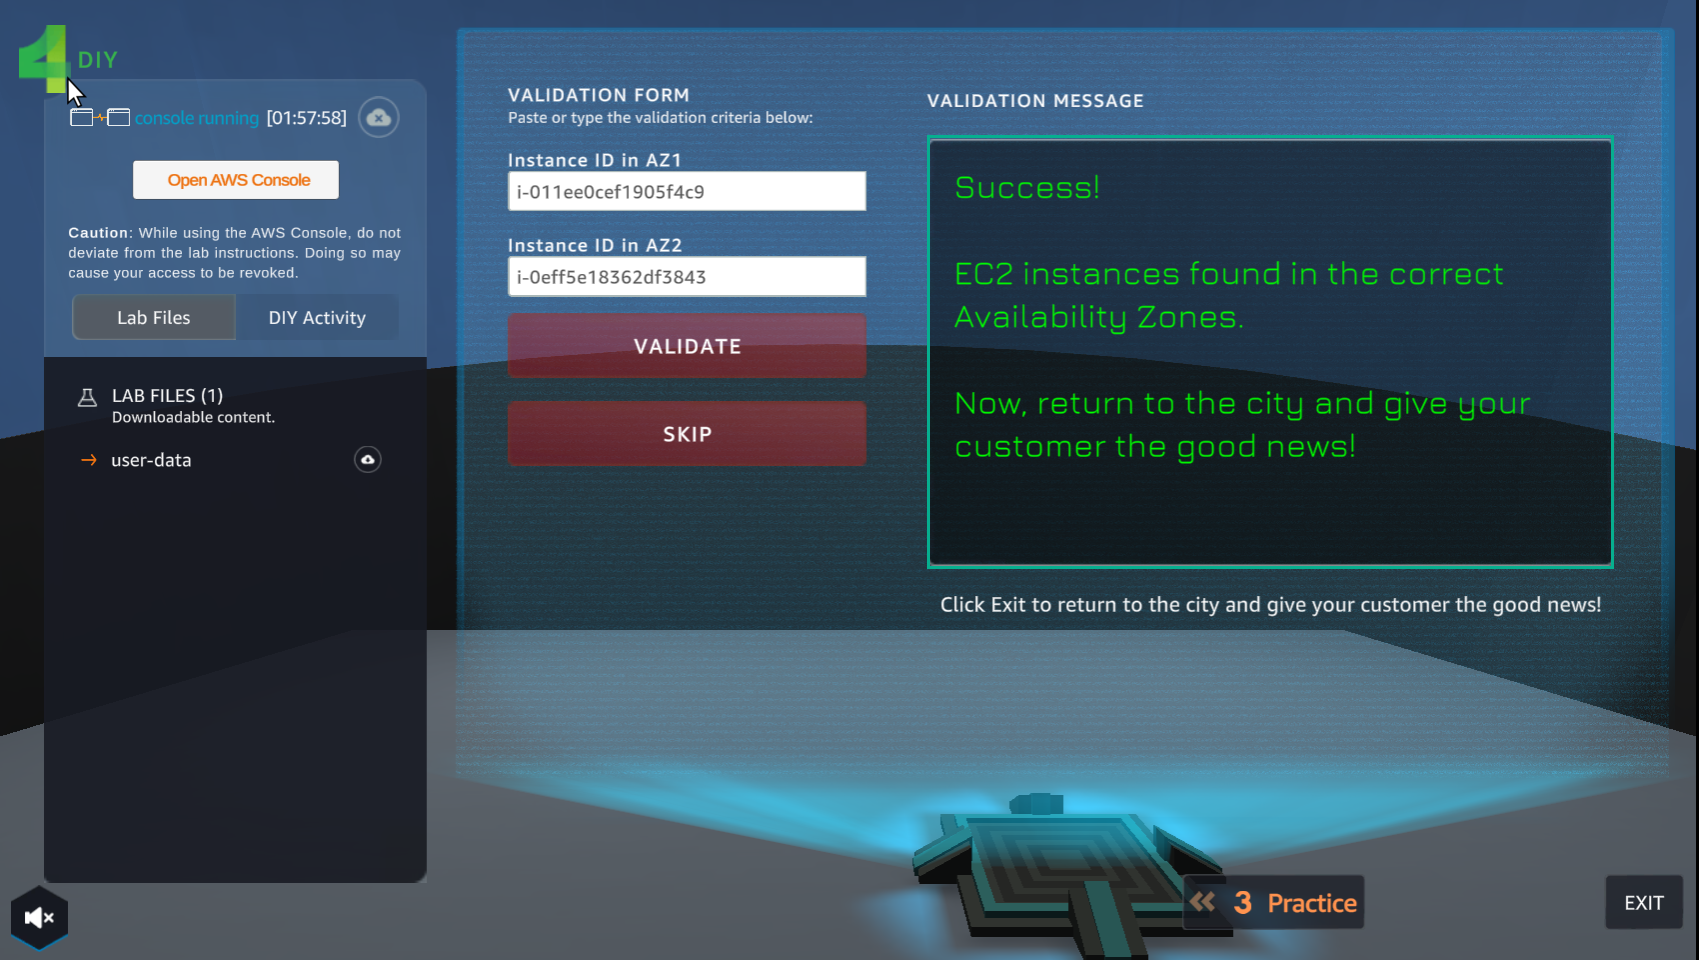
- After creating 2 Amazon EC2 Instance, copy both Instance ID
- Paste in Instance ID in AZ1
- Paste in Instance ID in AZ2
- Select VALIDATE
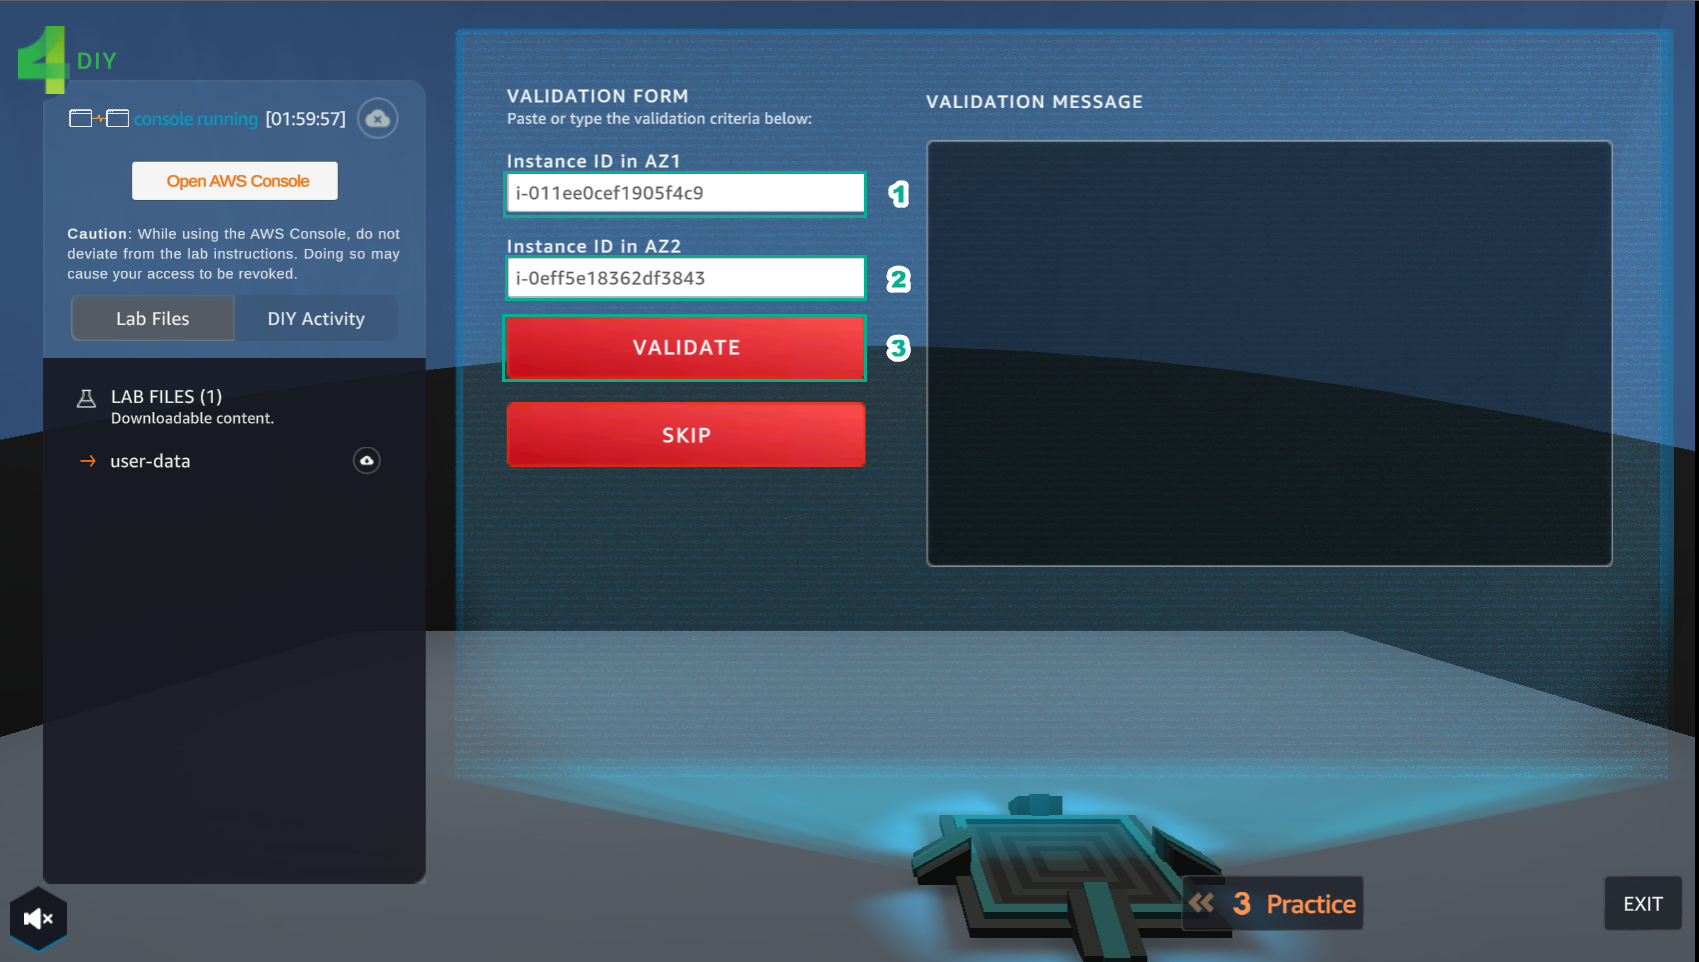
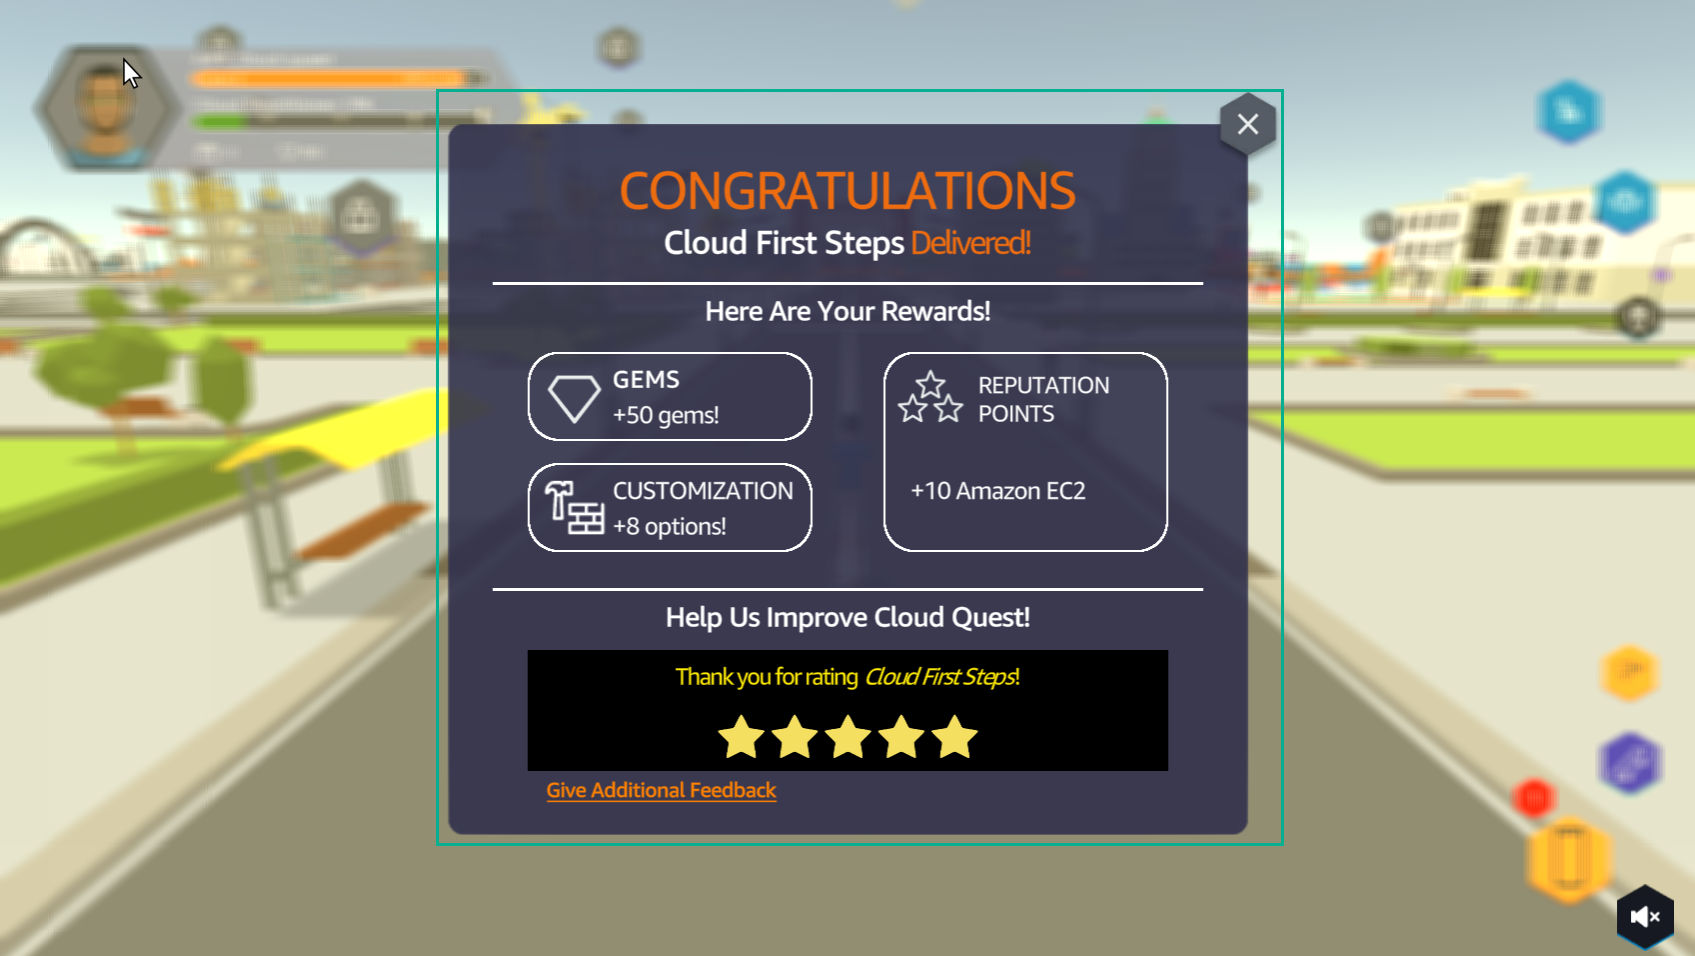
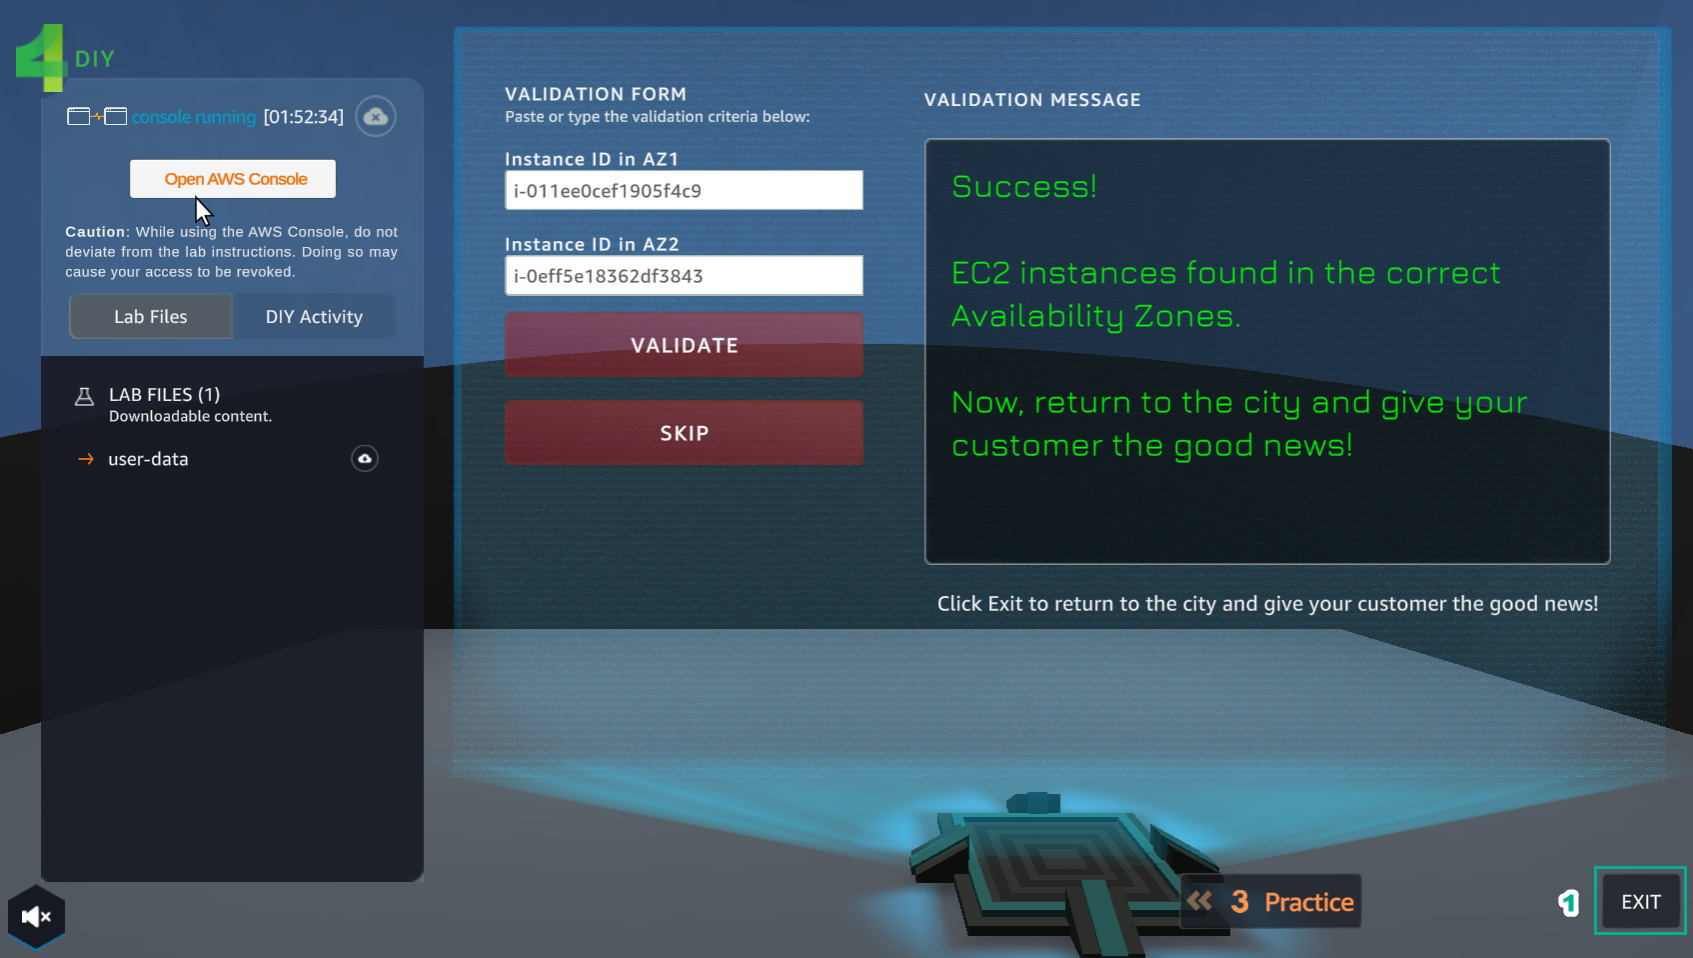
- After selecting VALIDATE, if VALIDATION MESSAGE contains Success! … is complete
- Select EXIT
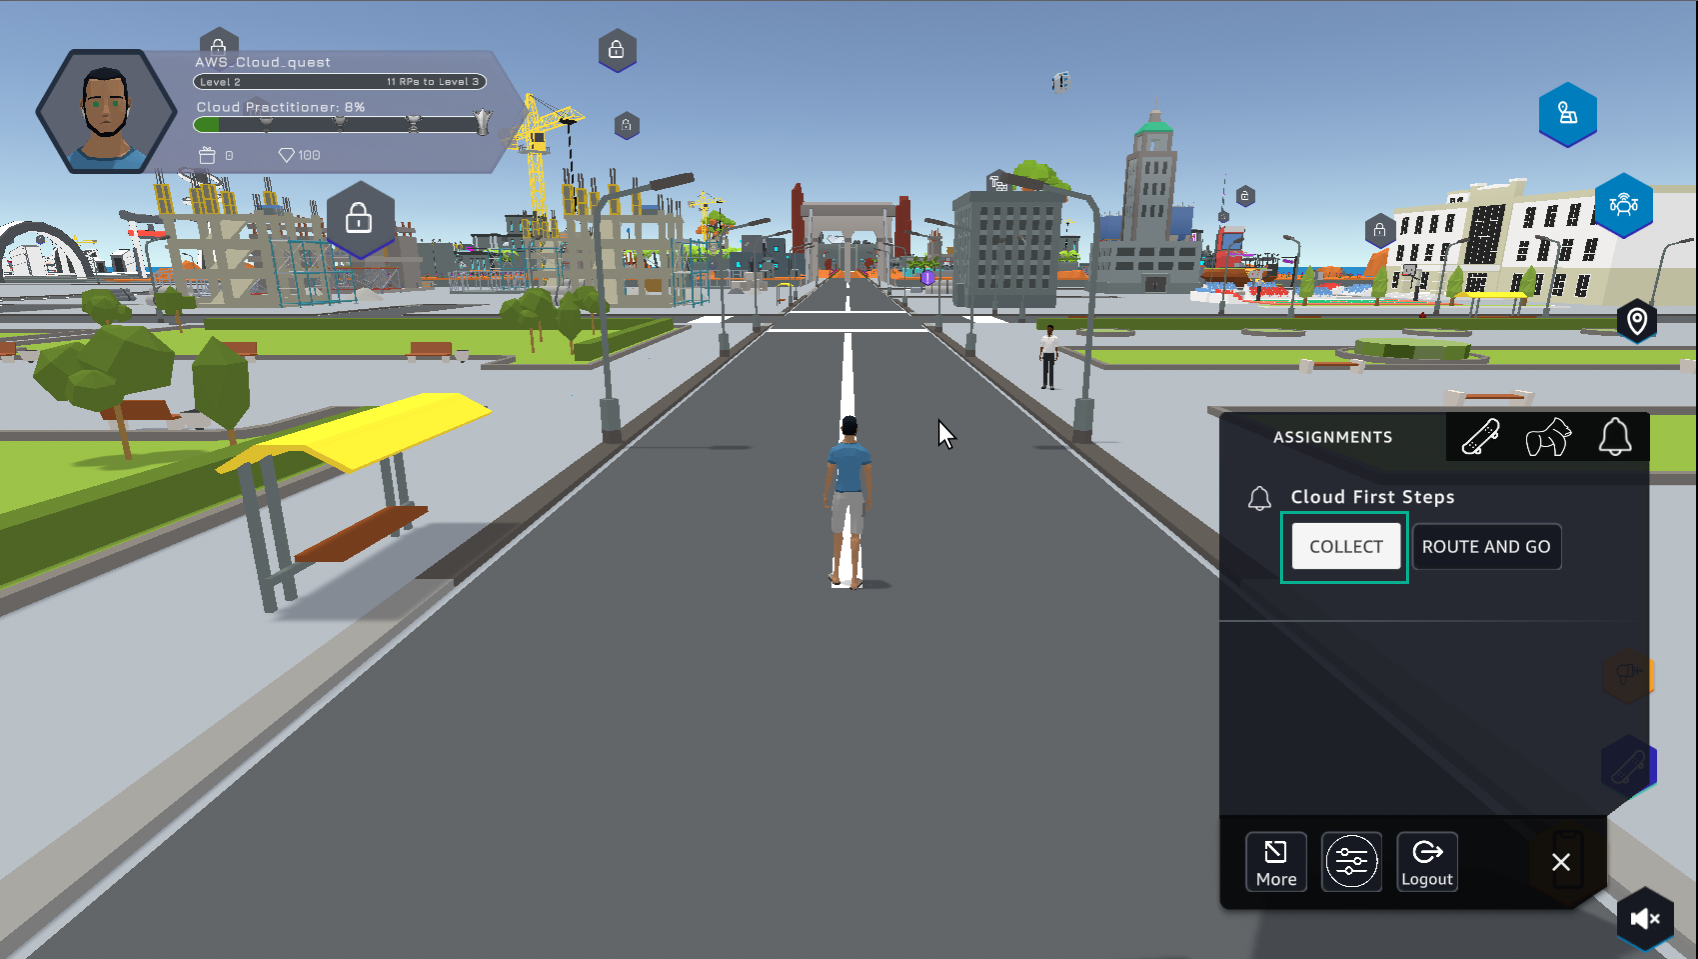
- In ASSIGNMENT select COLLECT
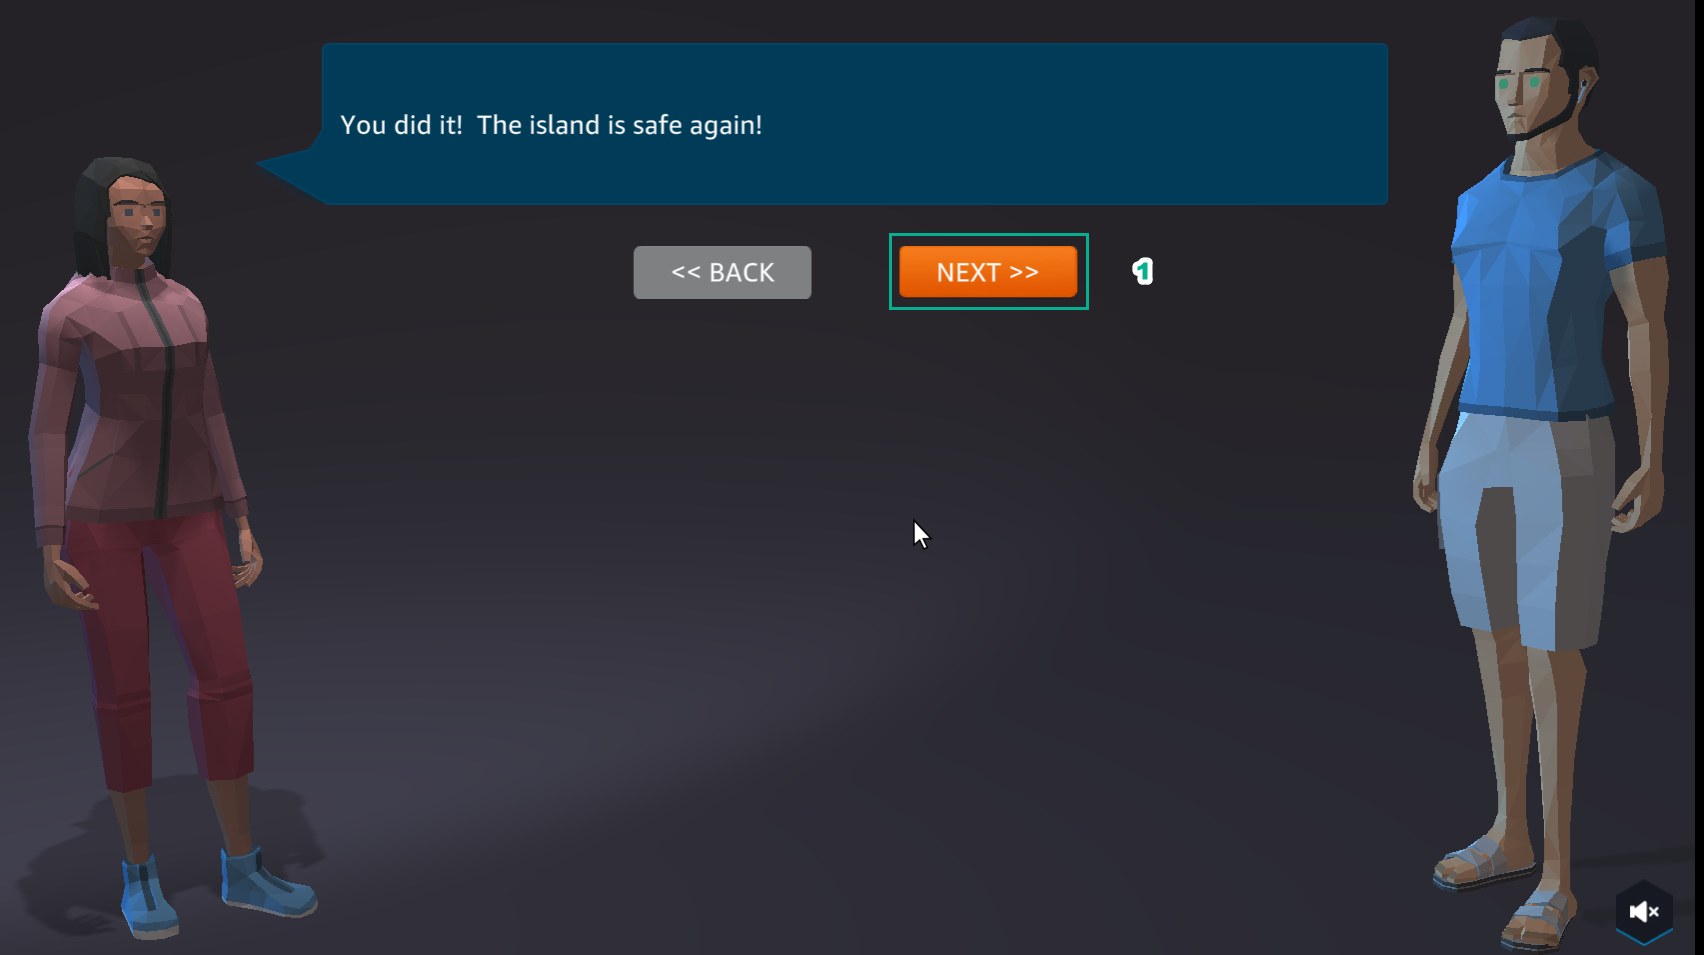
- Select NEXT
- Select COLLECT
- Get rewarded