DIY
After completing the lab, the player does DIY
- In the DIY interface
- Read DIY ACTIVITIES
- Read SOLUTION VALIDATION METHOD
- Select Open AWS Console

- In the AWS Console interface
- Find EC2
- Select EC2

- In EC2 interface
- Select Instances
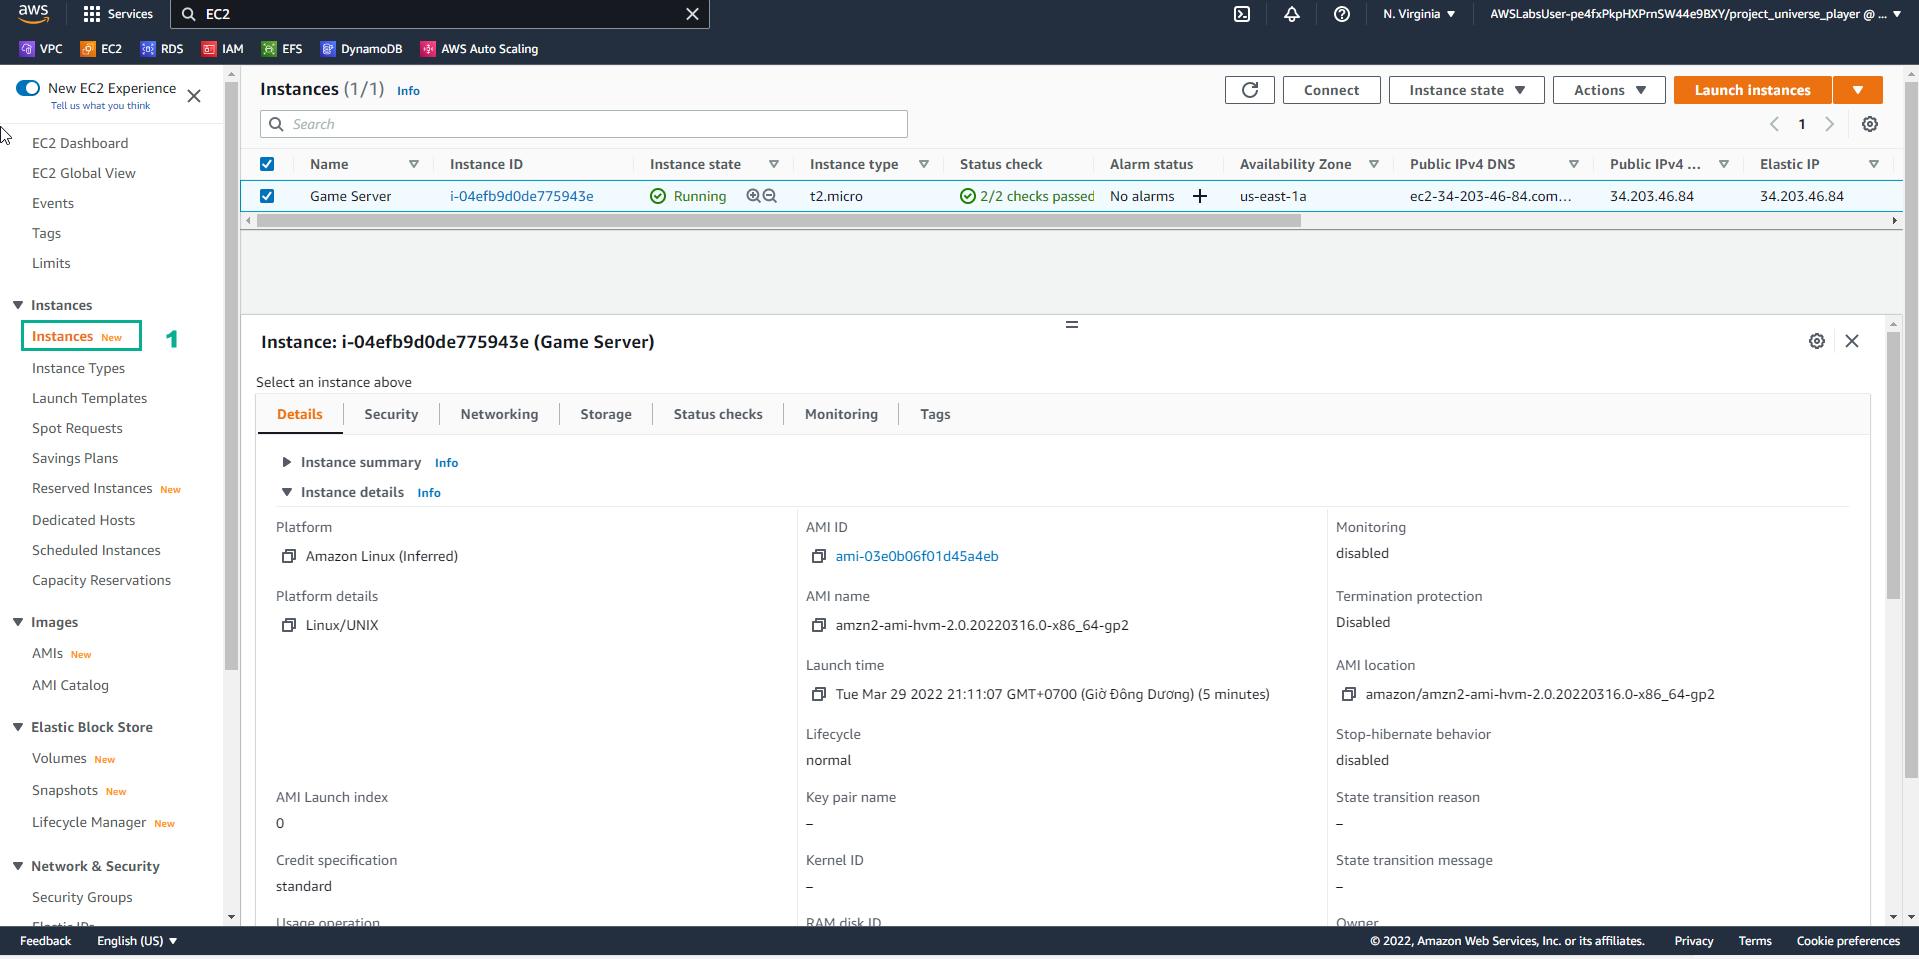
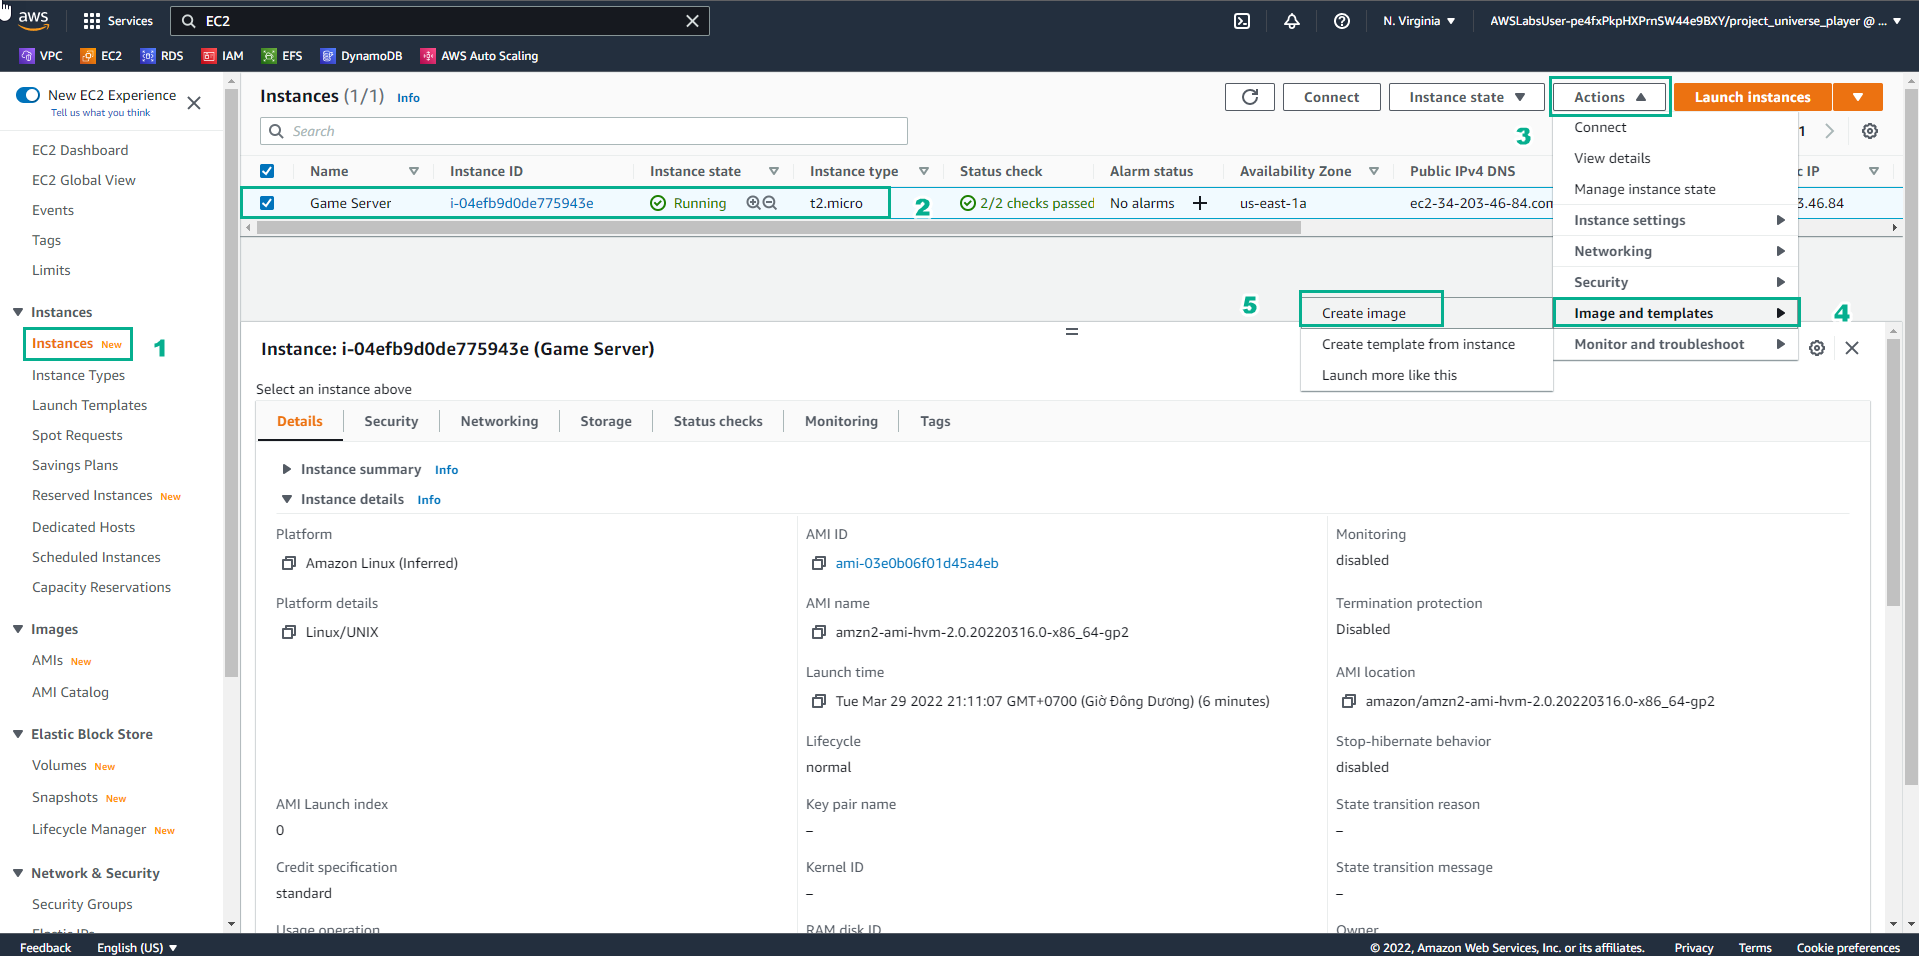
- In the EC2 interface
- Select Game Server
- Select Actions
- Select Image and templates
- Select Create image
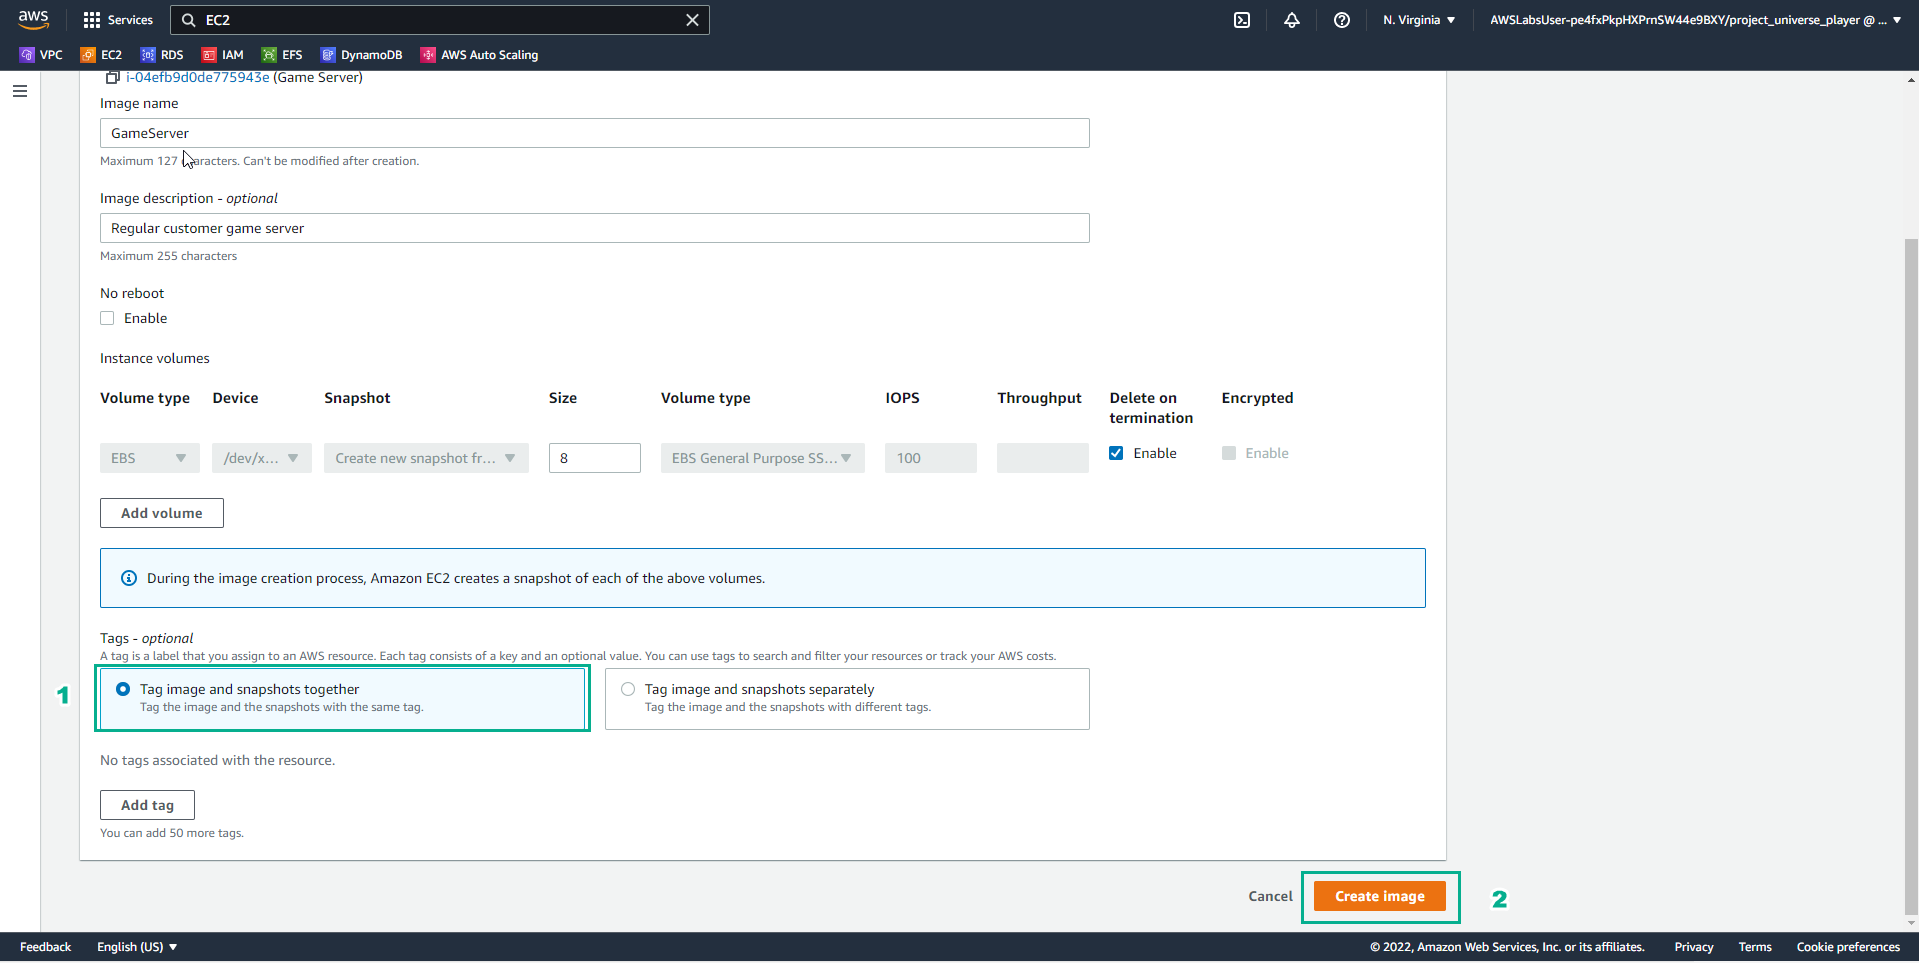
- In the Create image interface
- Image name, enter ```GameServer````
- Image description, enter
Regular customer game server

- In the EC2 interface
- Tags, select tag image and snapshots together
- Select Create image
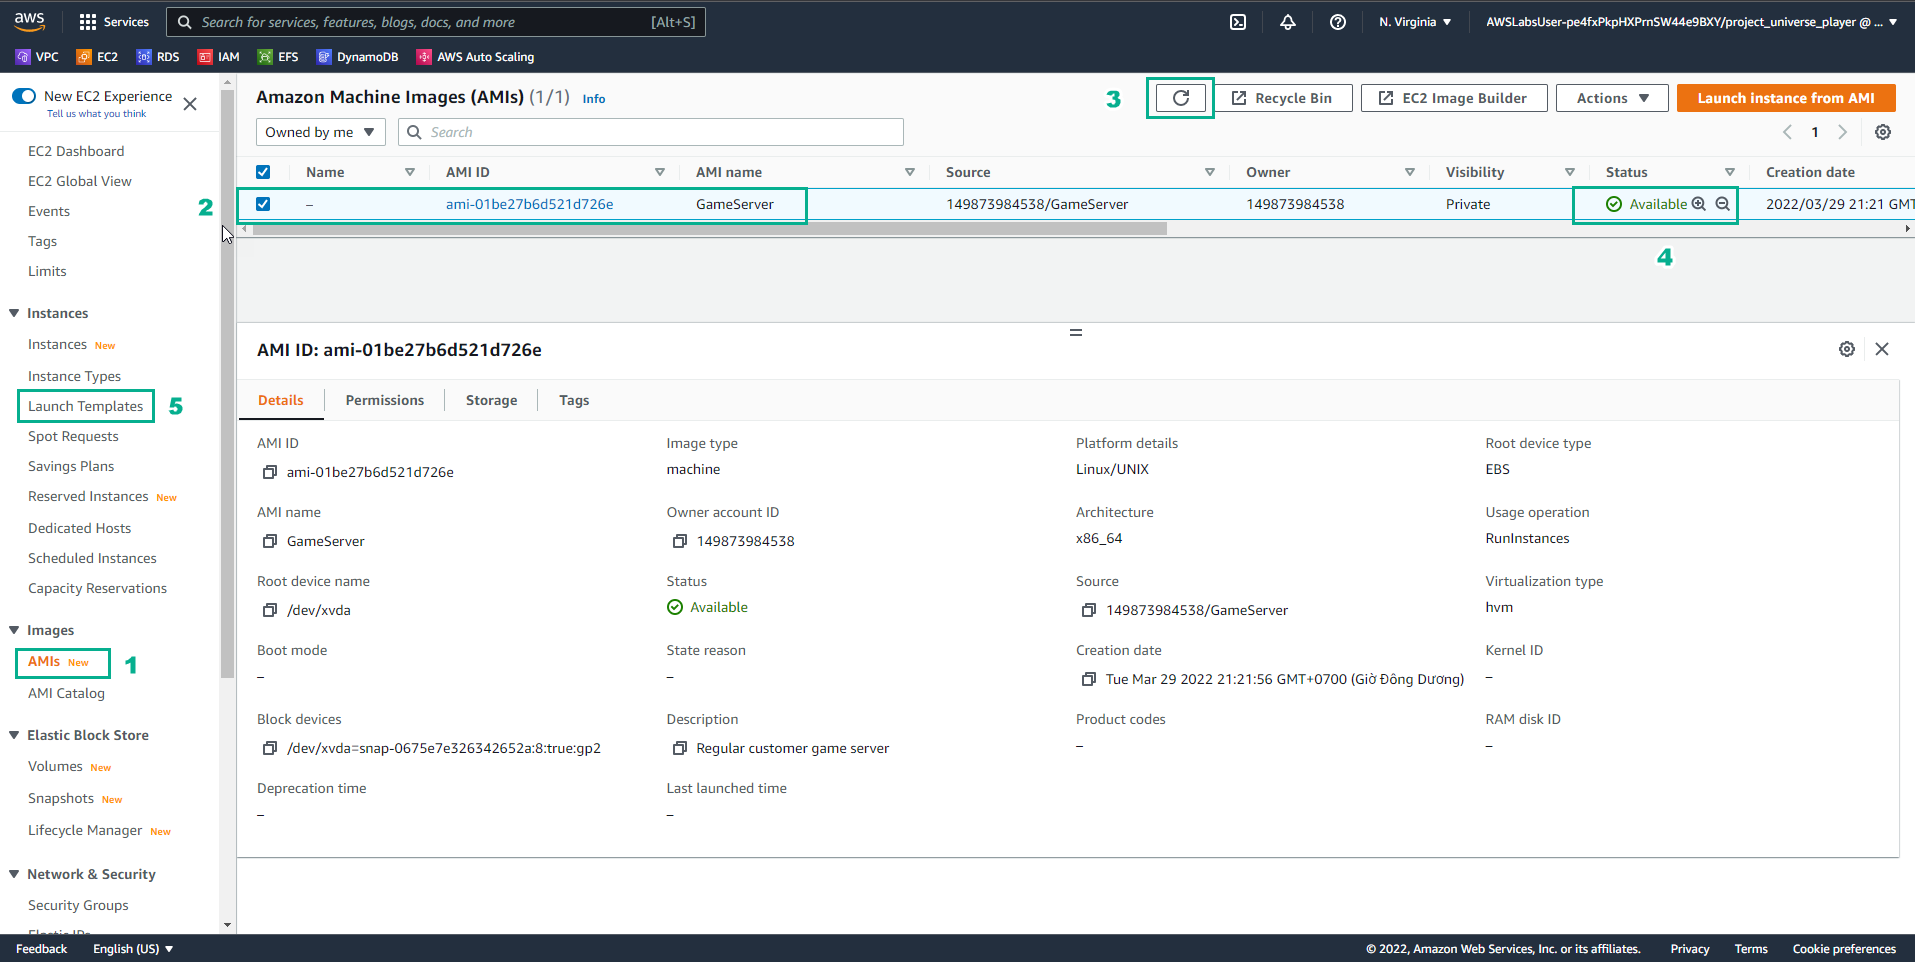
- In the EC2 interface
- Select AMIs
- Select GameServer
- Select Refresh
- View Status
- Select Launch Templates
- In the EC2 launch templates interface
- Select Create launch templates

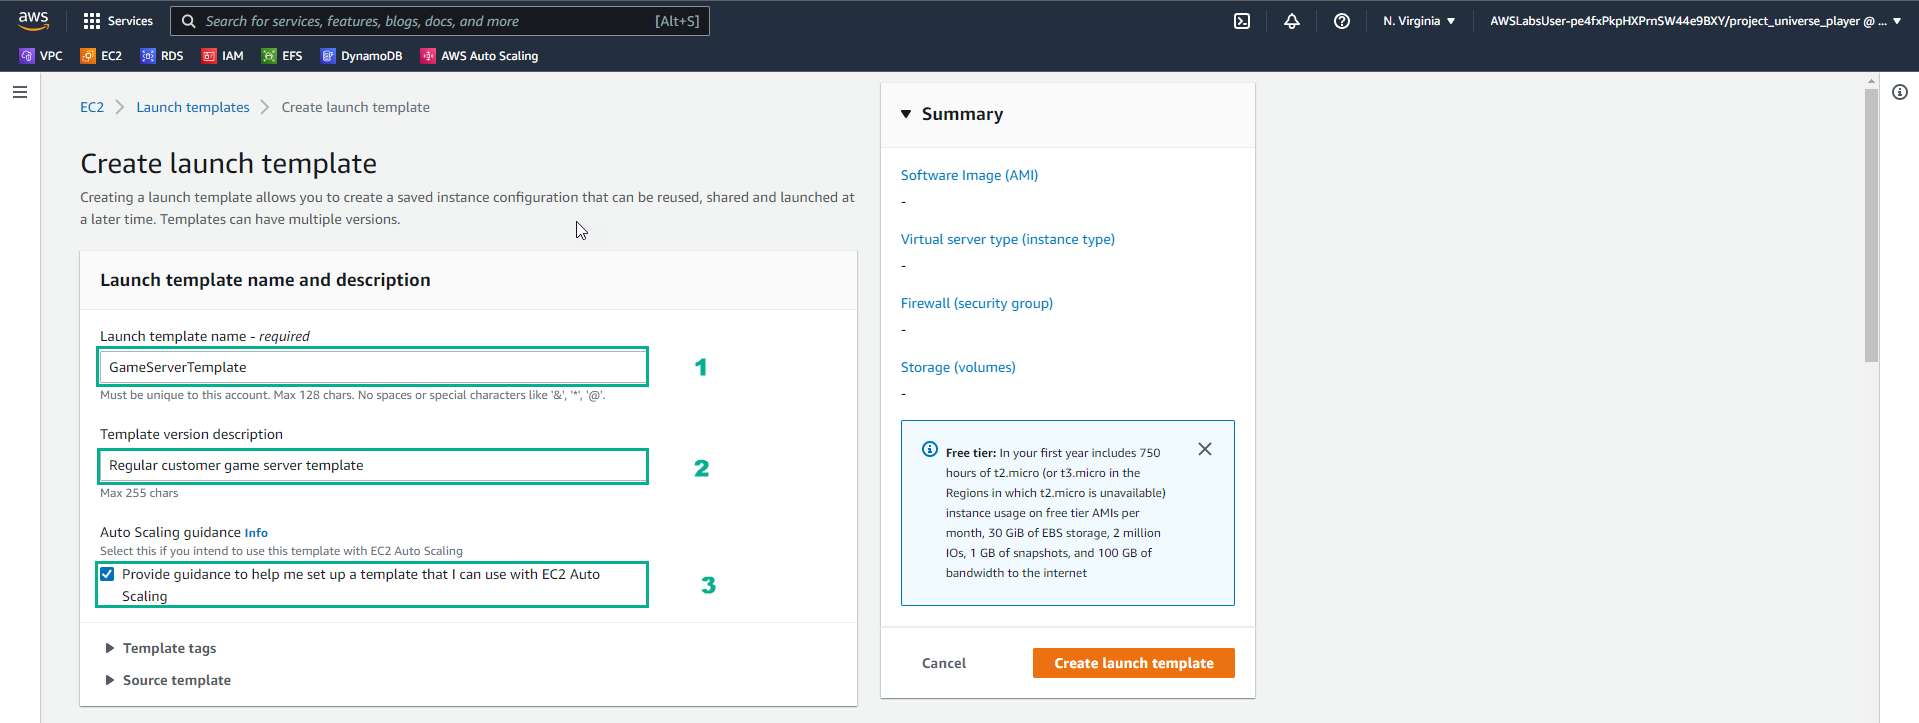
- In the Create launch template interface
- Lauch template name, enter
GameServerTemplate - Template version description, enter
Regular customer game server template
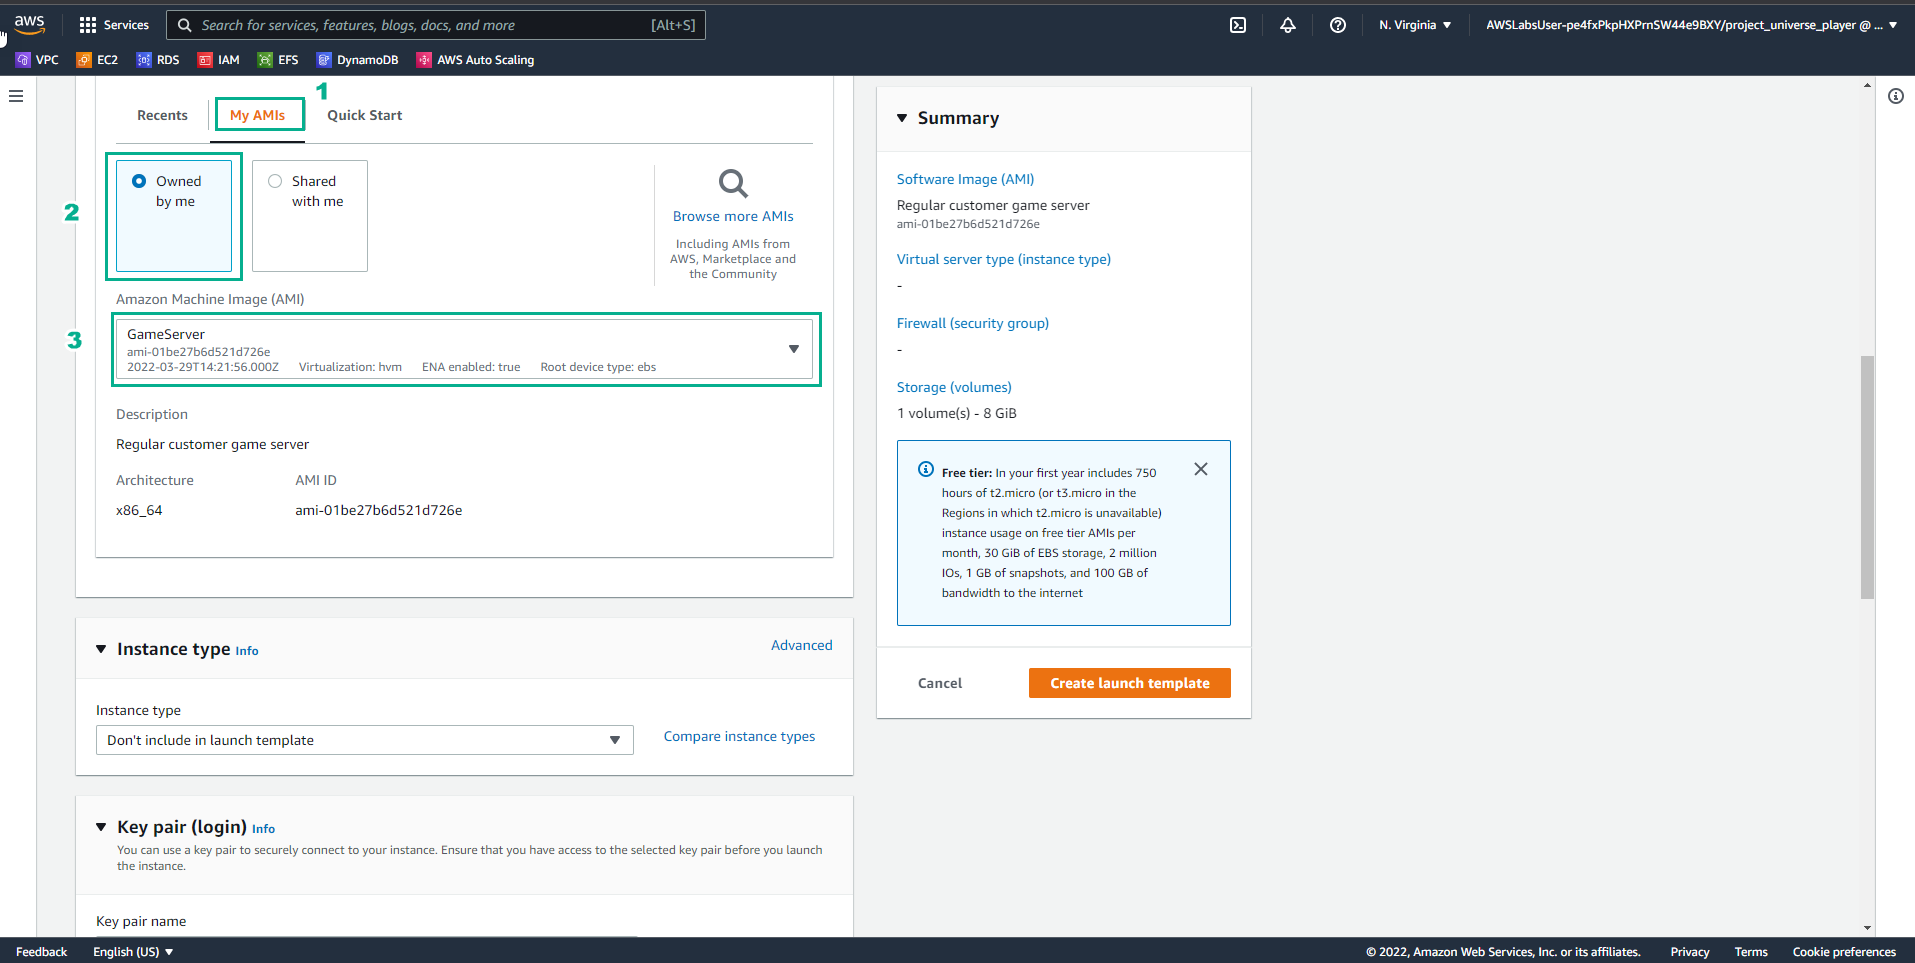
- In the EC2 launch template interface
- Select My AMIs
- Select Owned by me
- Amazon Machine Image (AMI), select GameServer
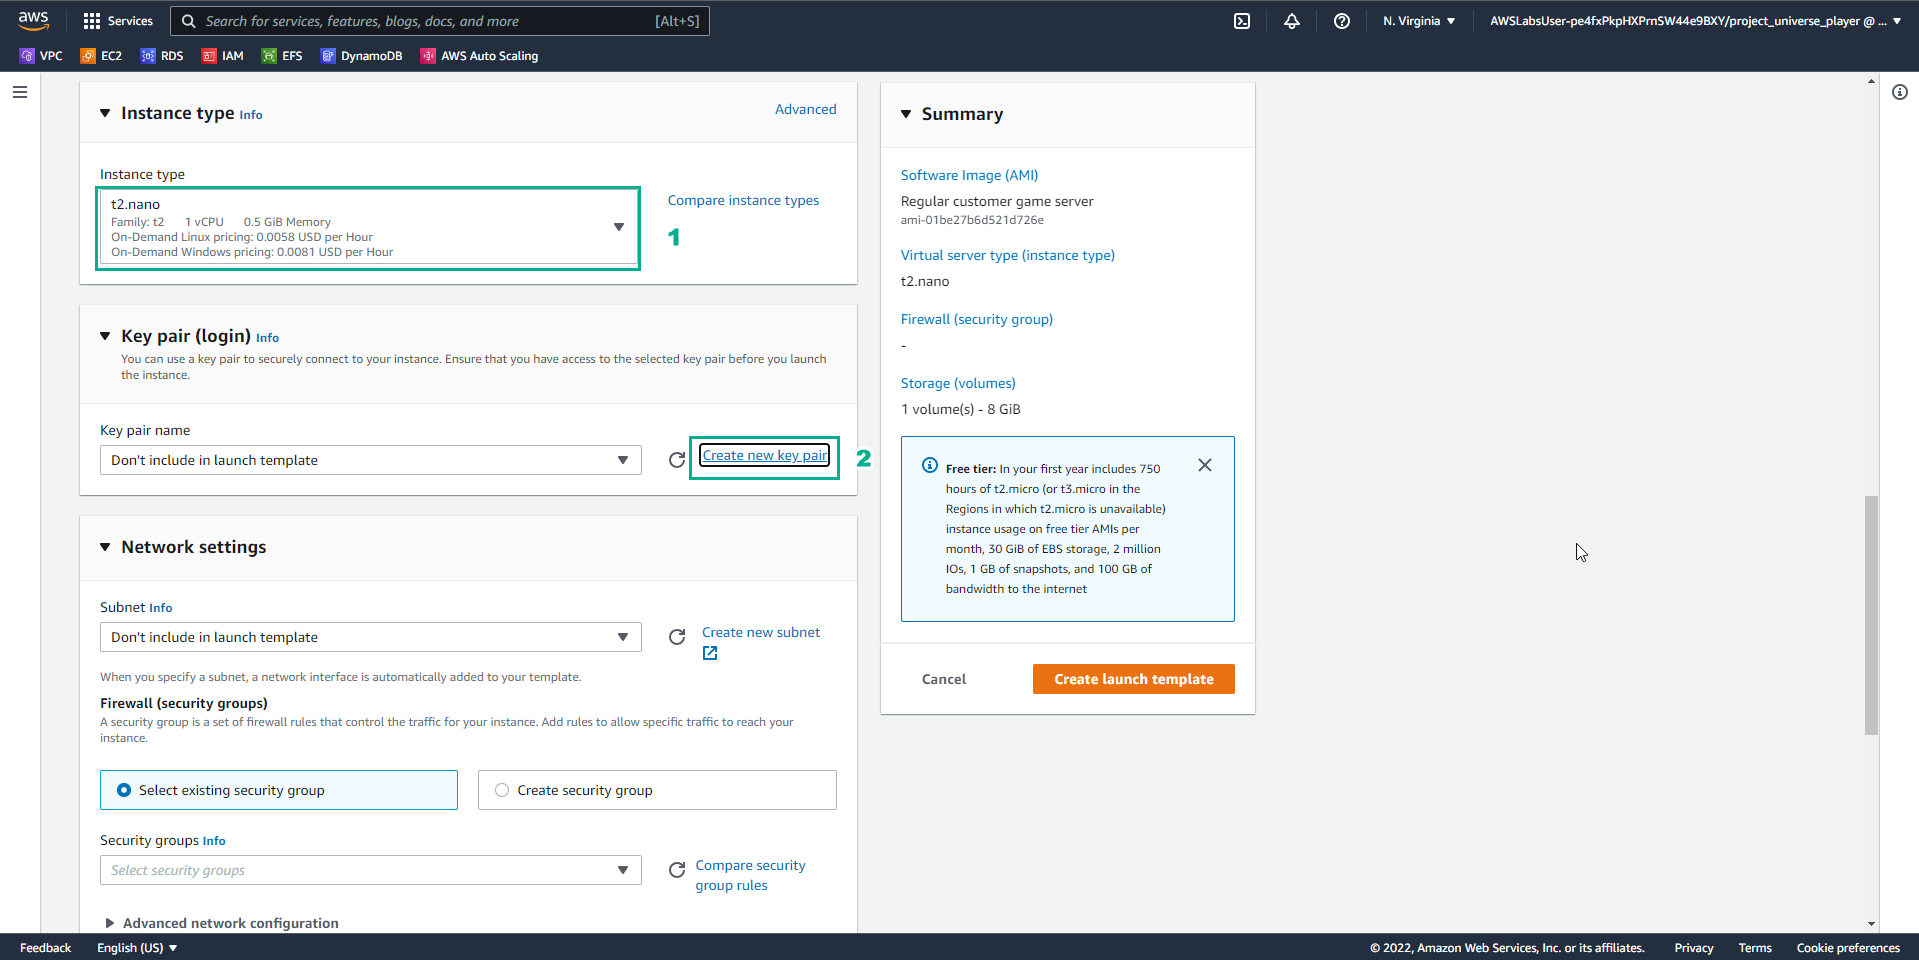
- In the EC2 launch template interface
- In Instance type, select t2.nano
- Select Create new key pair
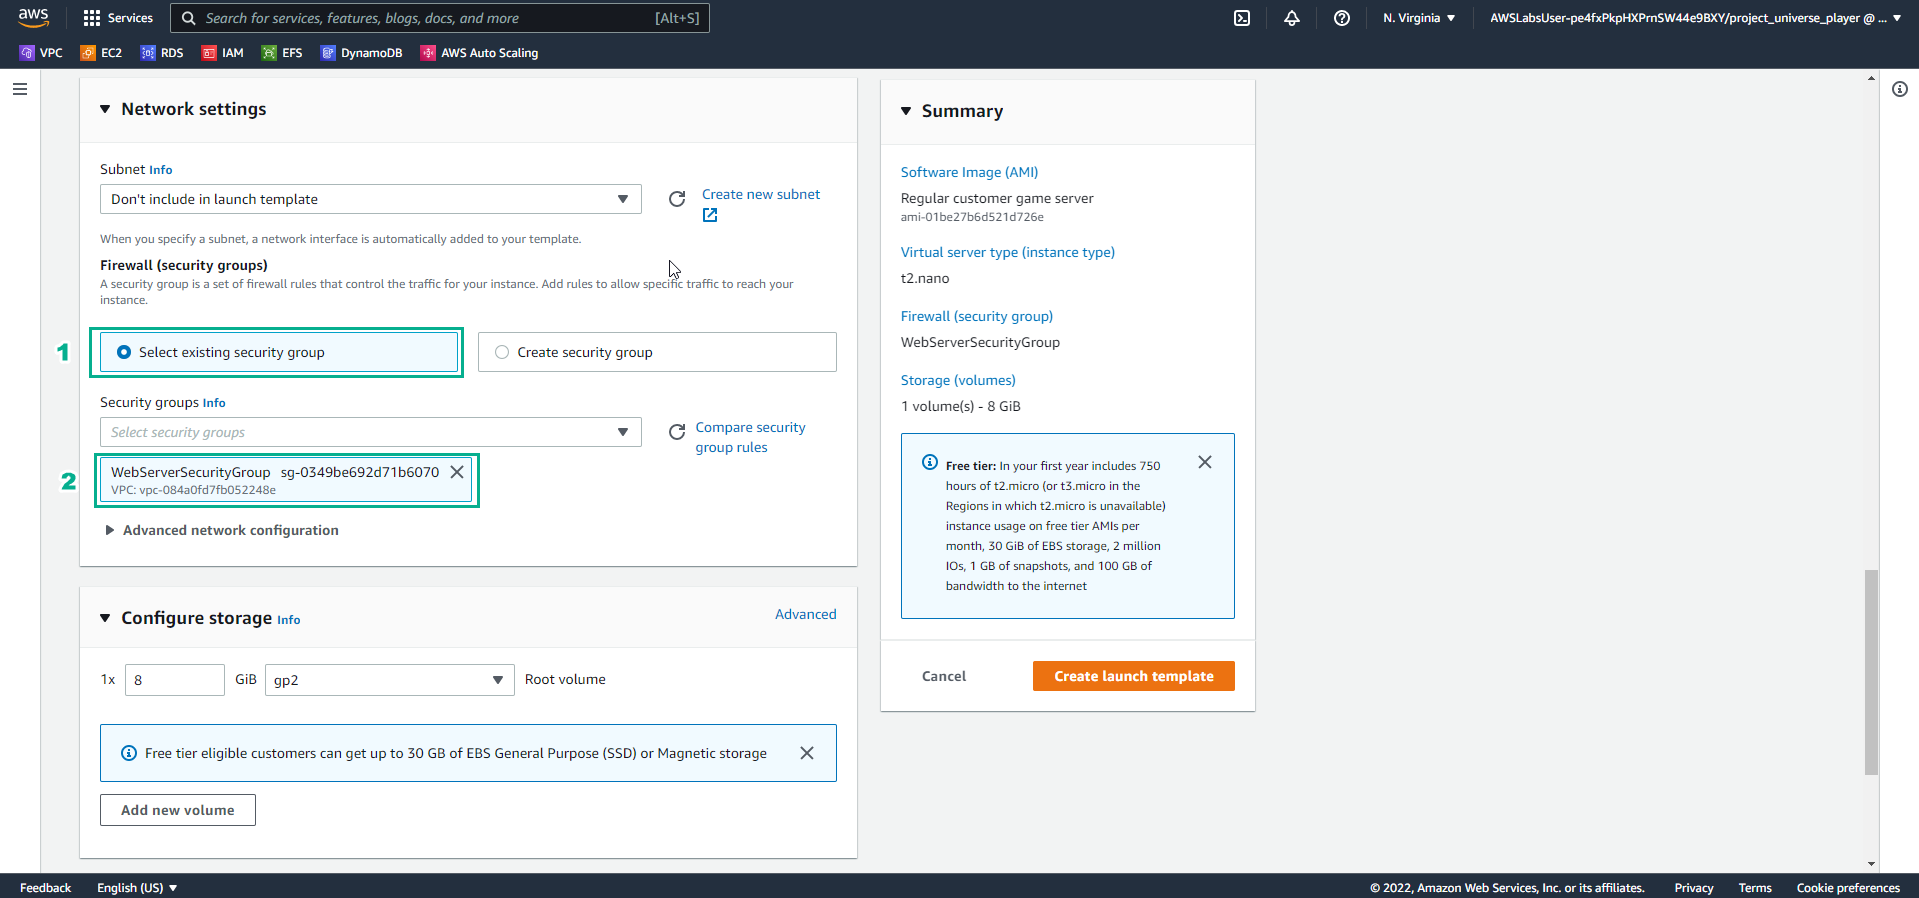
- Select Select existing security group
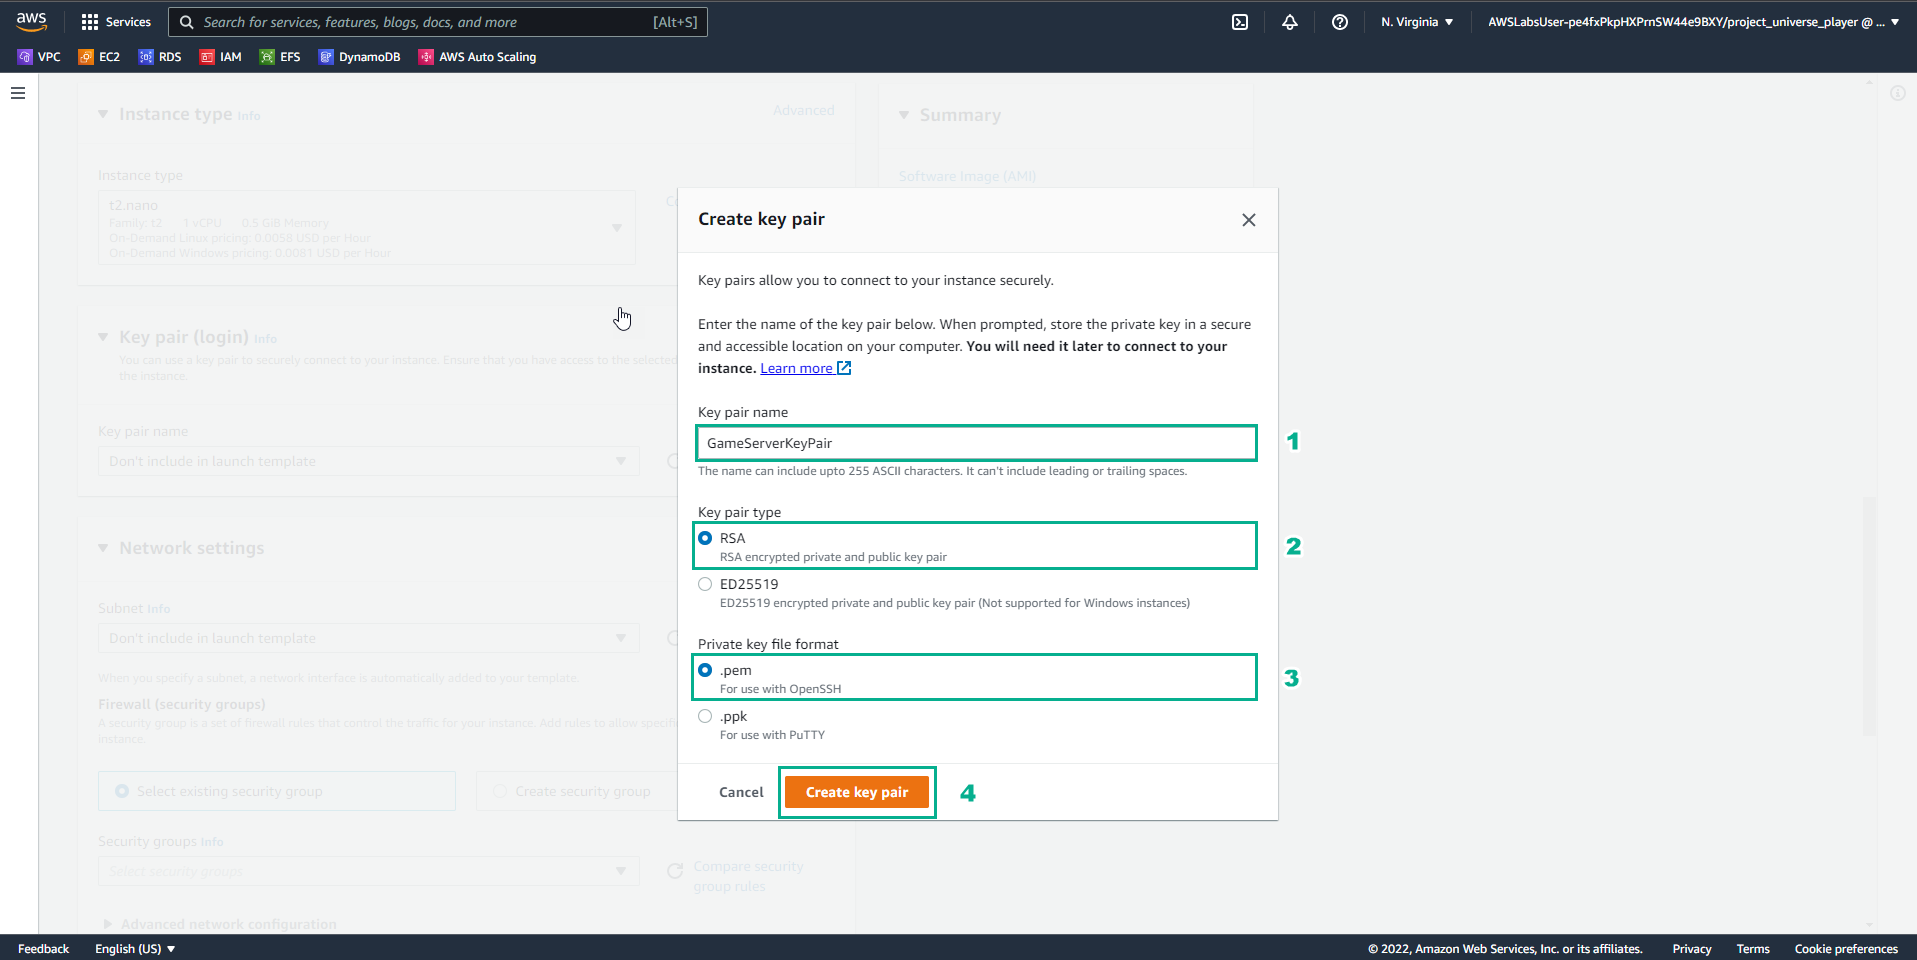
- In the Create key pair interface
- Key pair name, enter
GameServerKeyPair - Key pair type*, enter
RSA - Private key file format, select .pem
- Select Create key pair
- In the EC2 launch template interface
- In Network settings, select Select existing security group
- Security group, select WebServerSecurityGroup
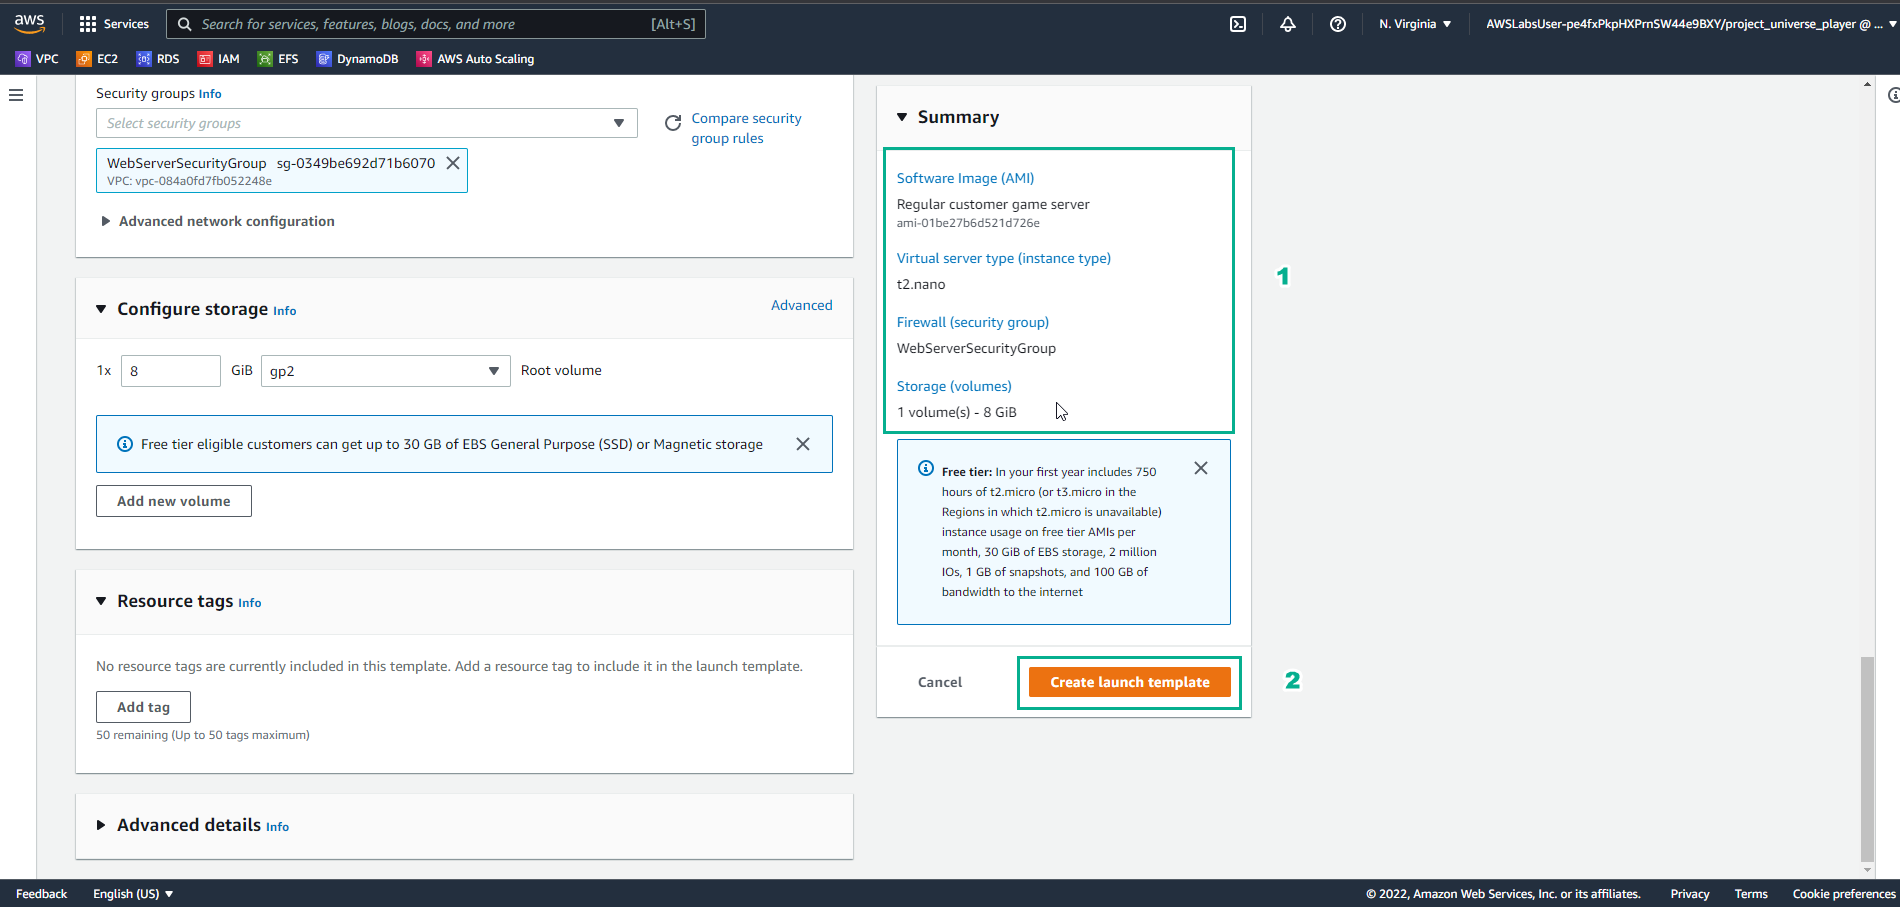
- In the EC2 Launch Template interface
- Watch Sumary
- Select Create launch template
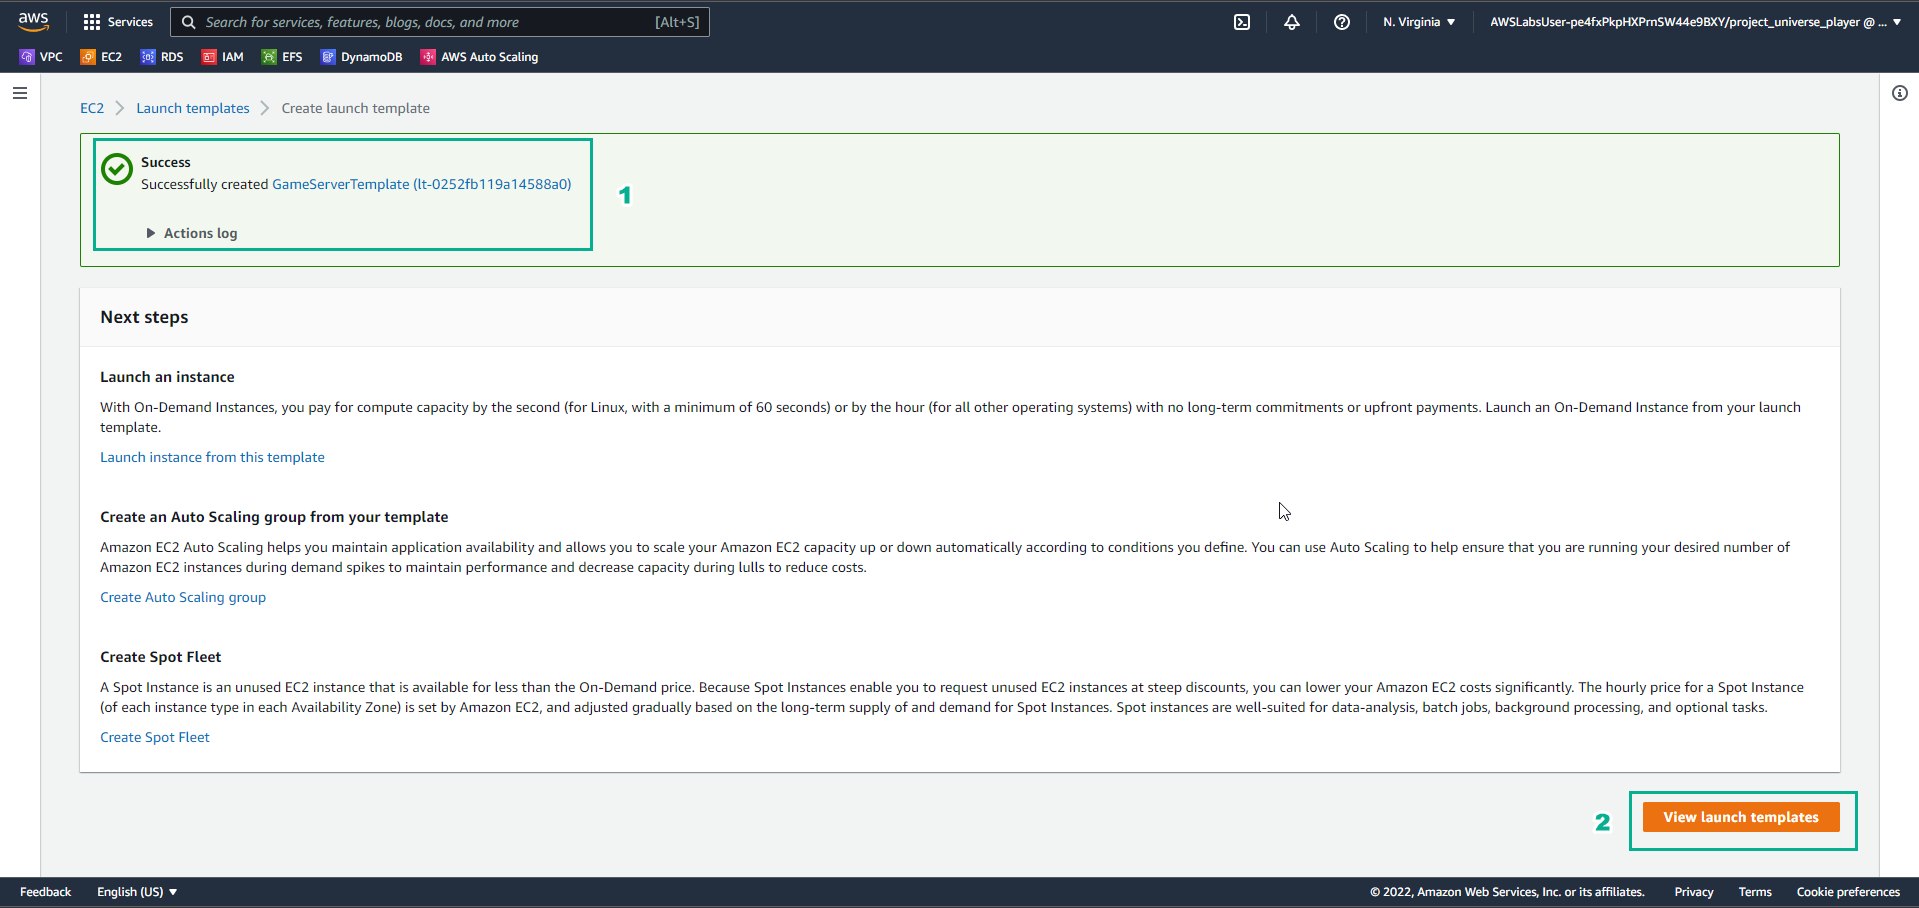
- In the Create launch template interface
- See the successful template initialization
- Select View launch templates
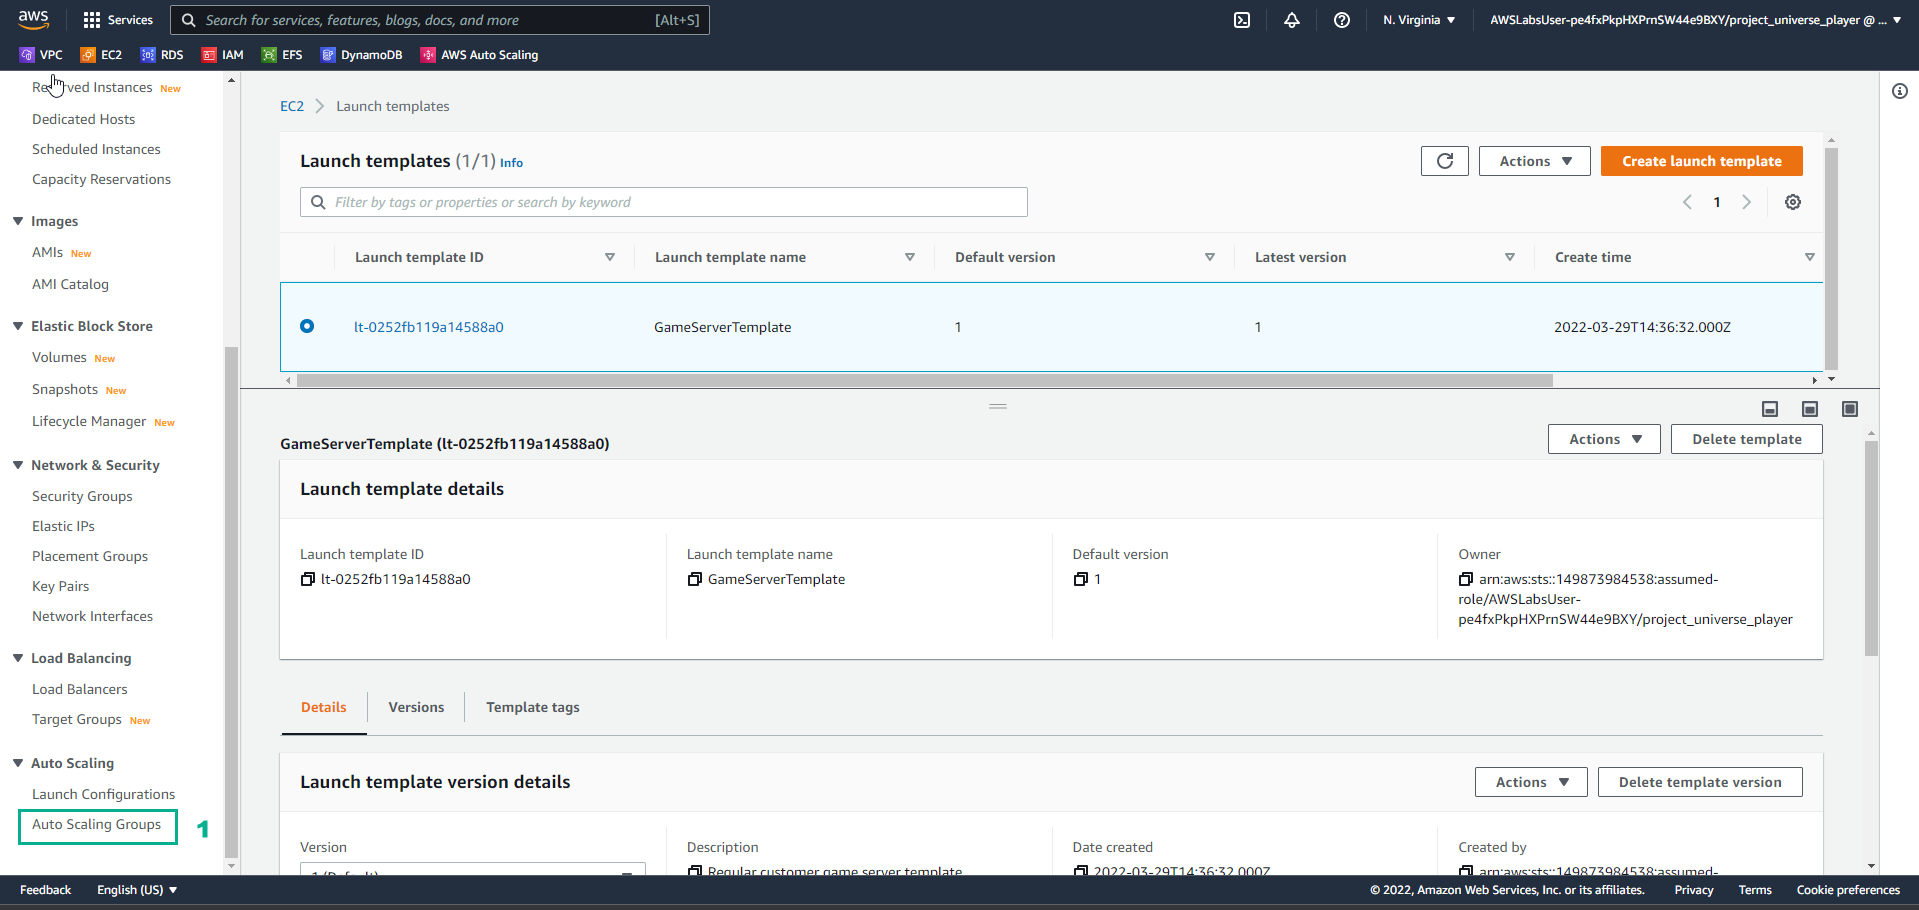
- In the Launch templates interface
- Select** Auto Scaling Groups**
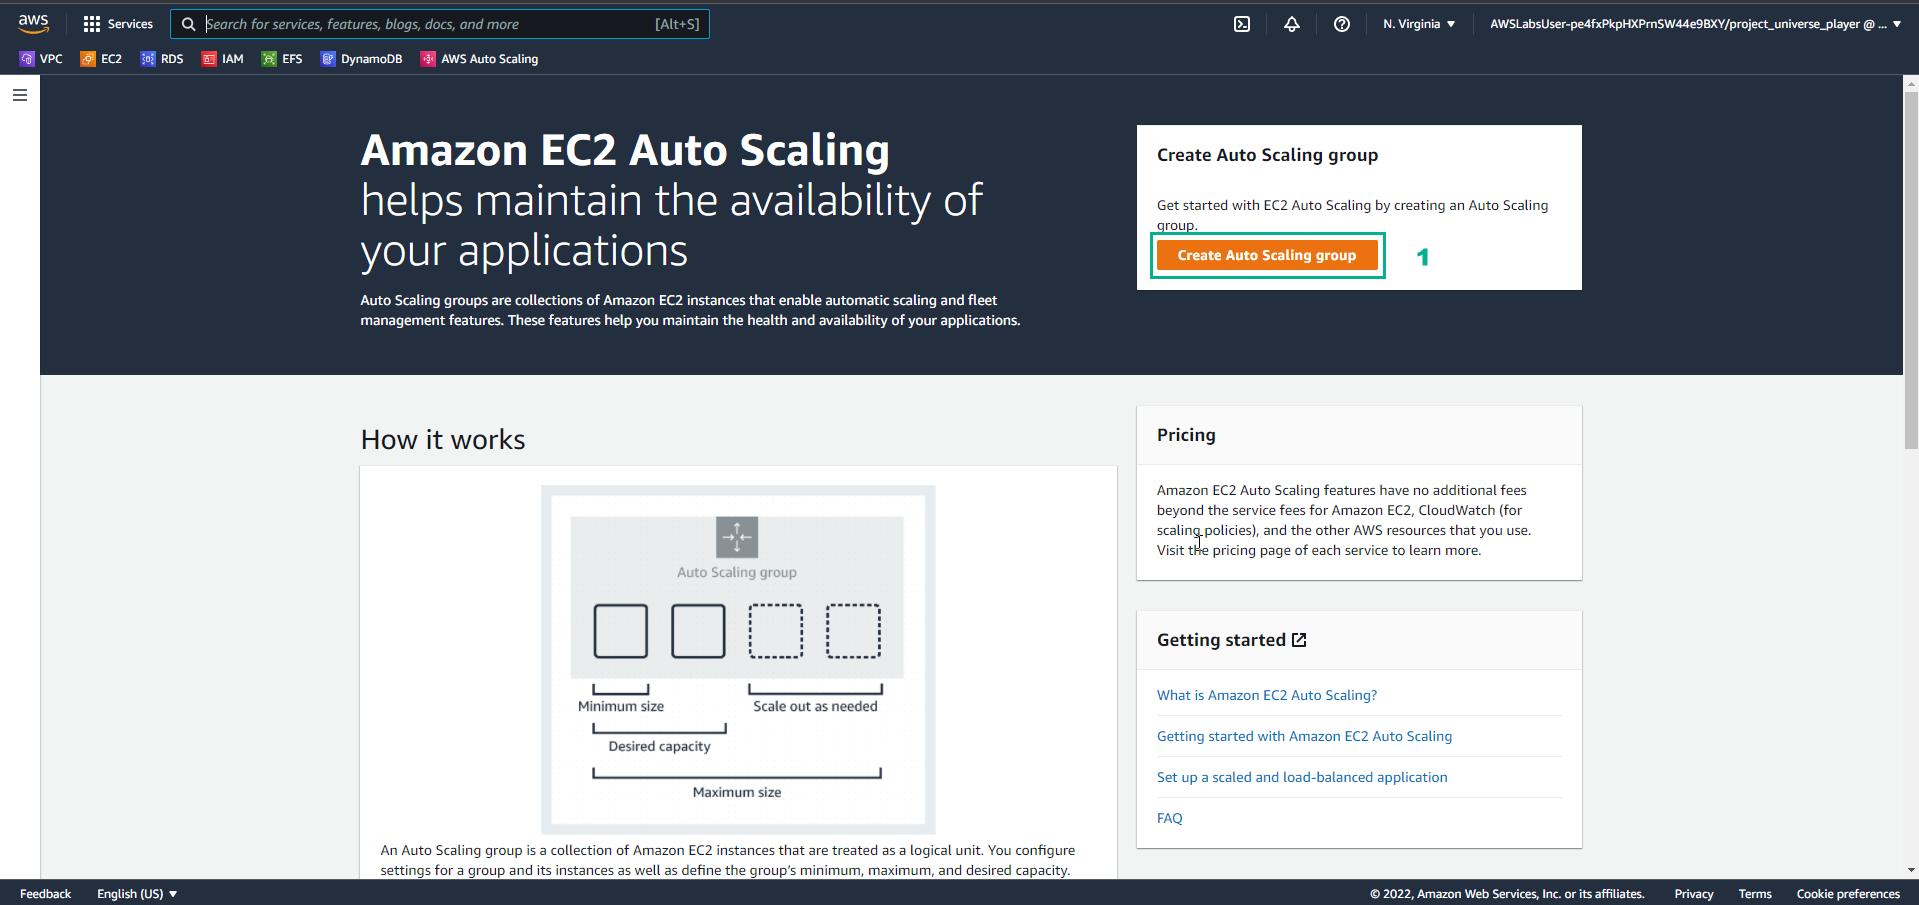
- In the Amazon EC2 Auto Scaling interface
- Select Create Auto Scaling group
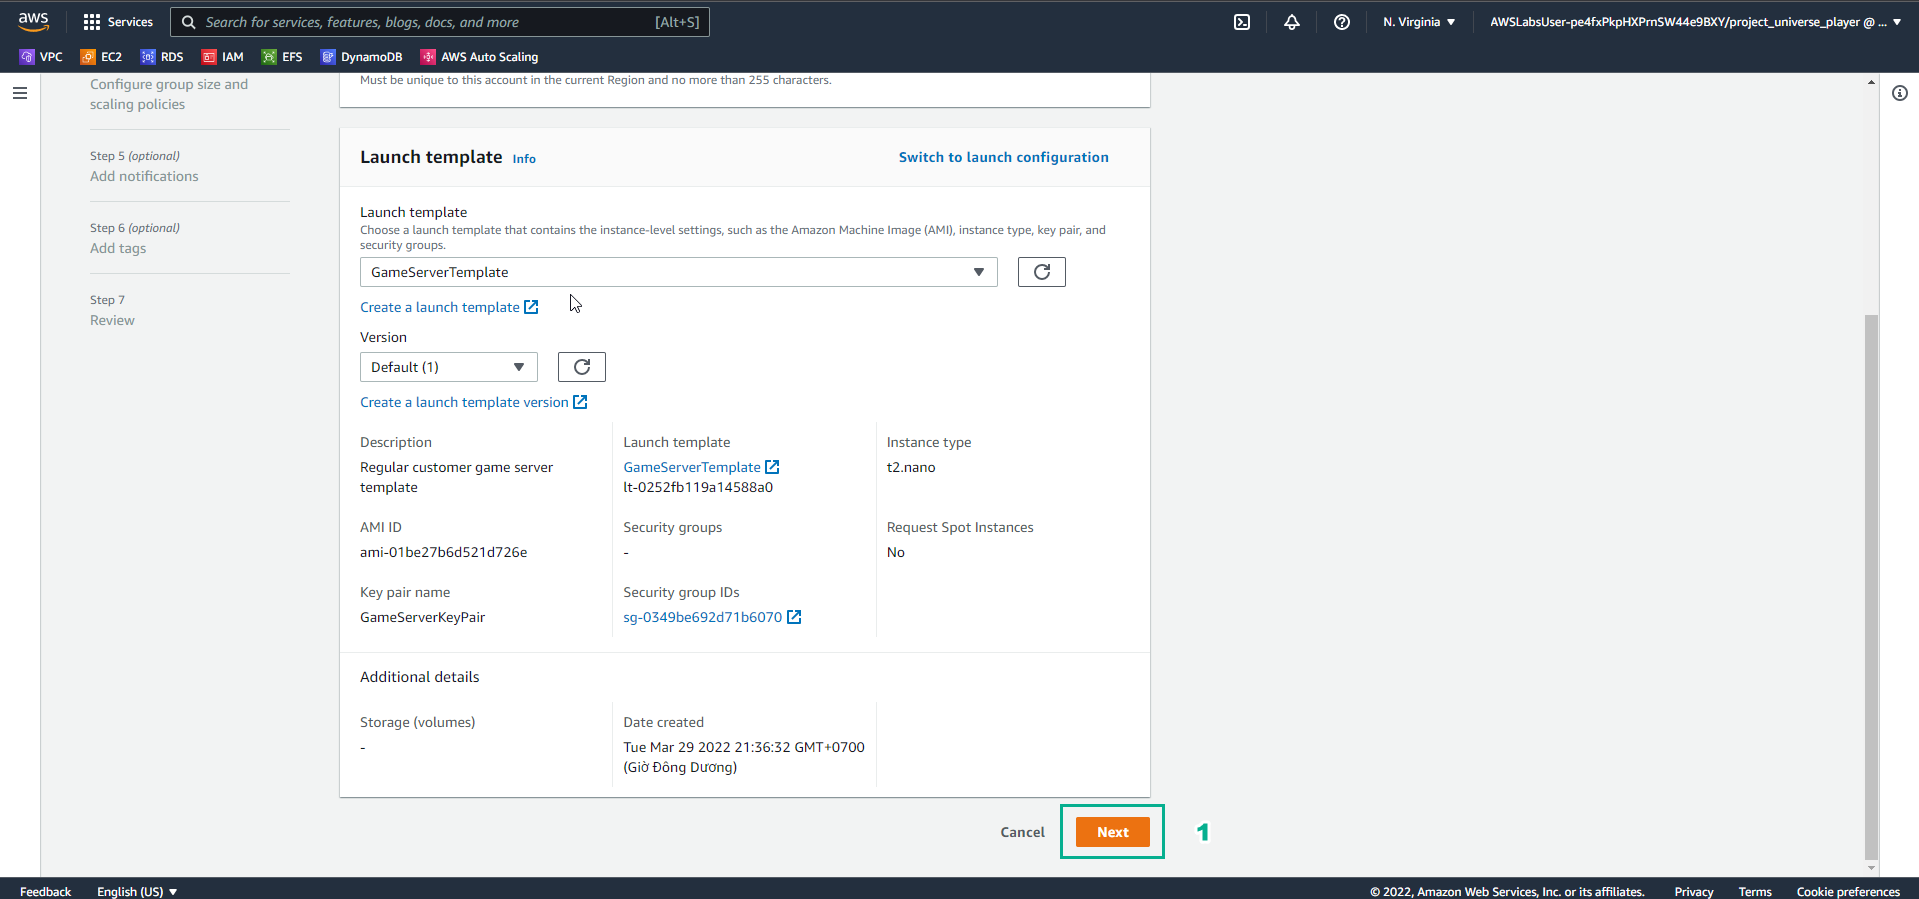
- In the Create Auto Scaling group interface
- Auto Scaling group name, enter
RegularCustomerGameServer - Launch template, enter
GameServerTemplate

- In the Create Auto Scaling group interface
- Select Next
- In the Create Auto Scaling group interface
- Select VPC
- Select **Availability Zone and subnet
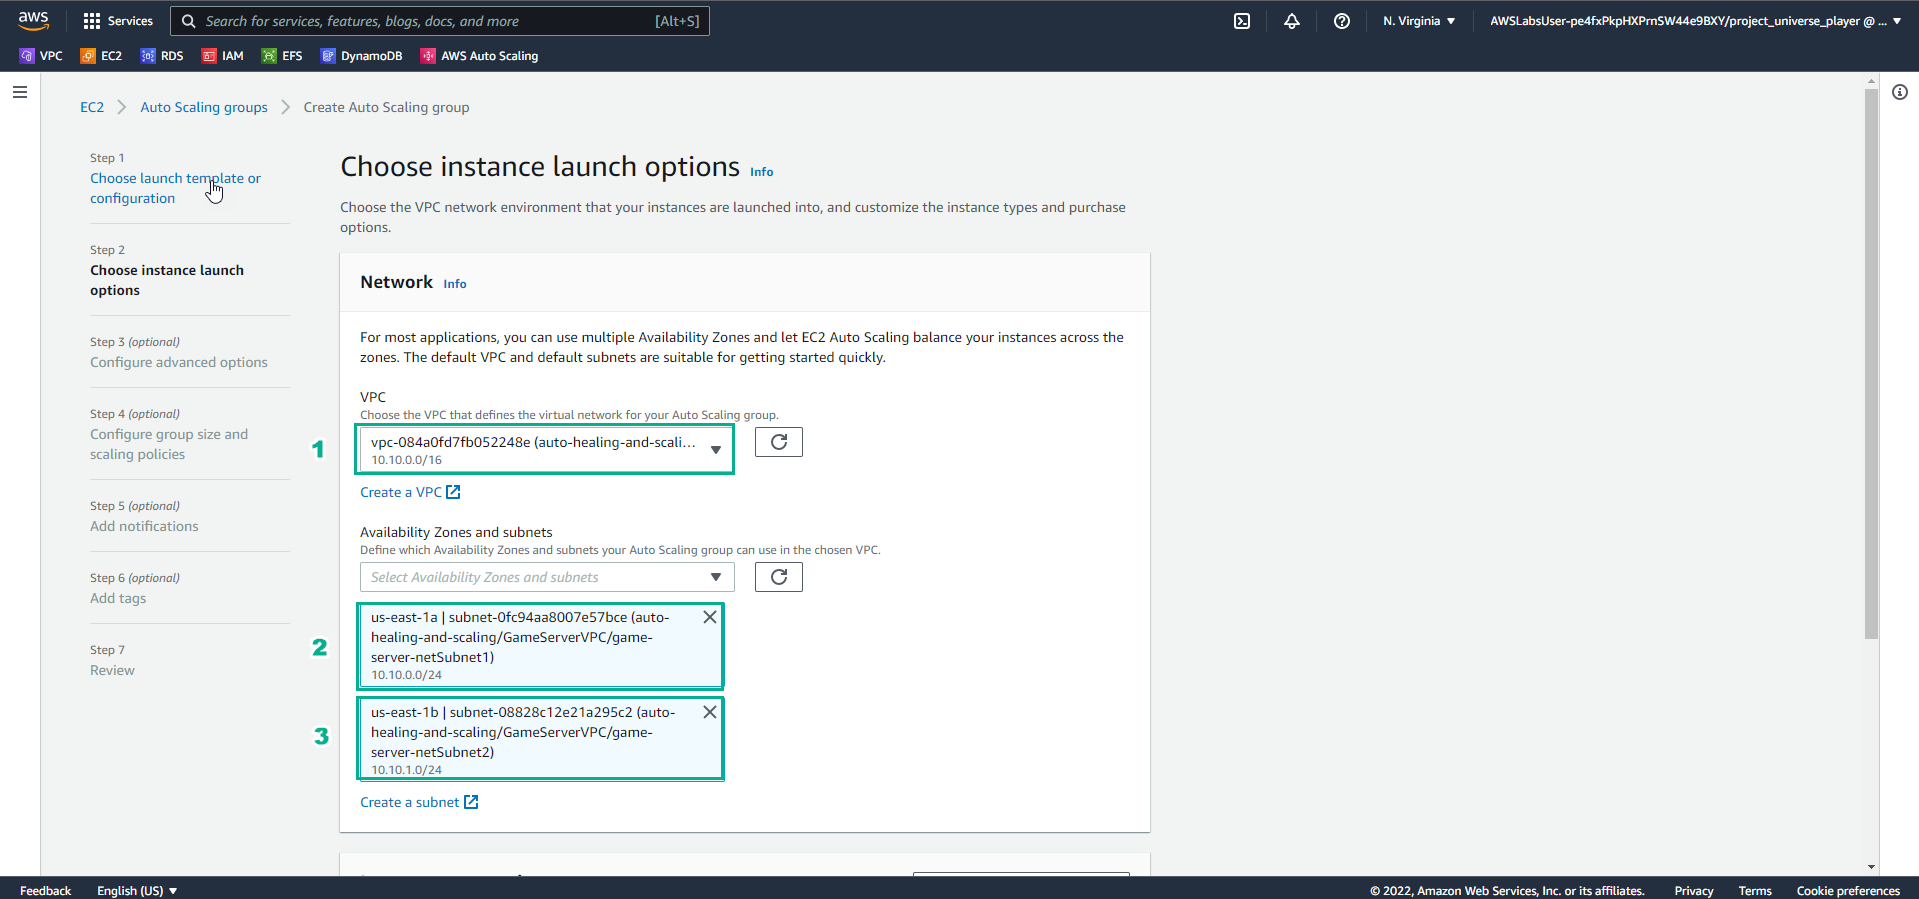
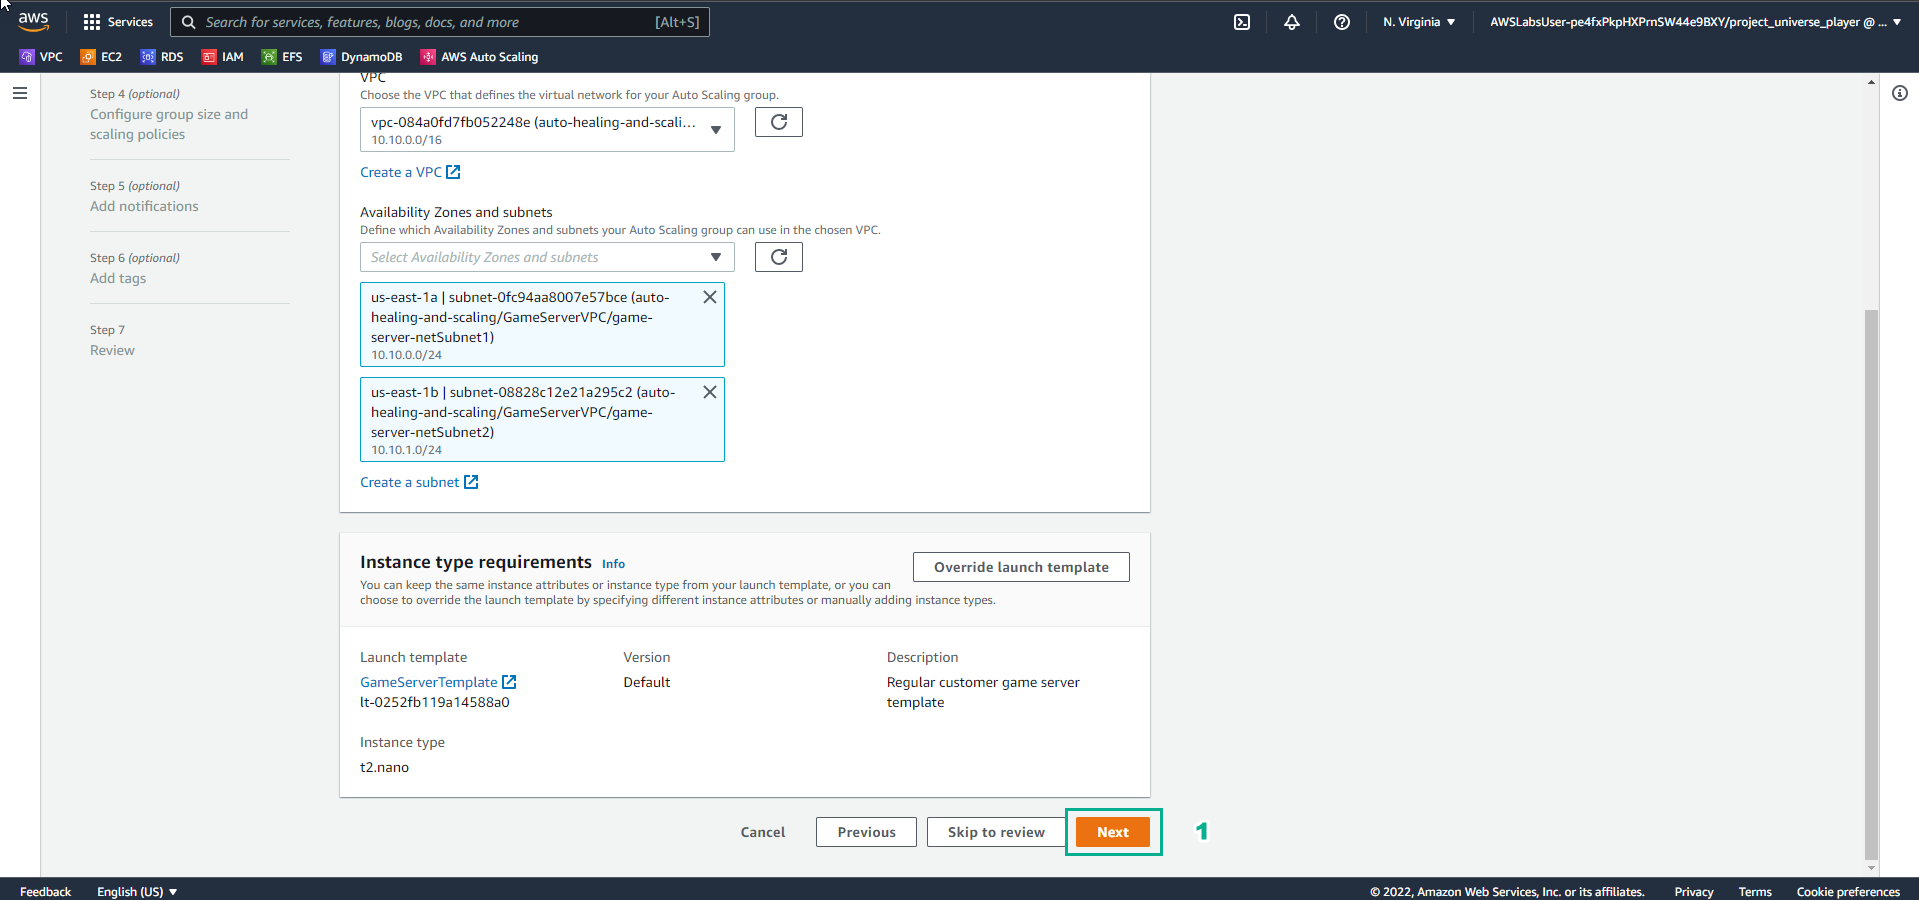
- In the Create Auto Scaling group interface
- Select Next
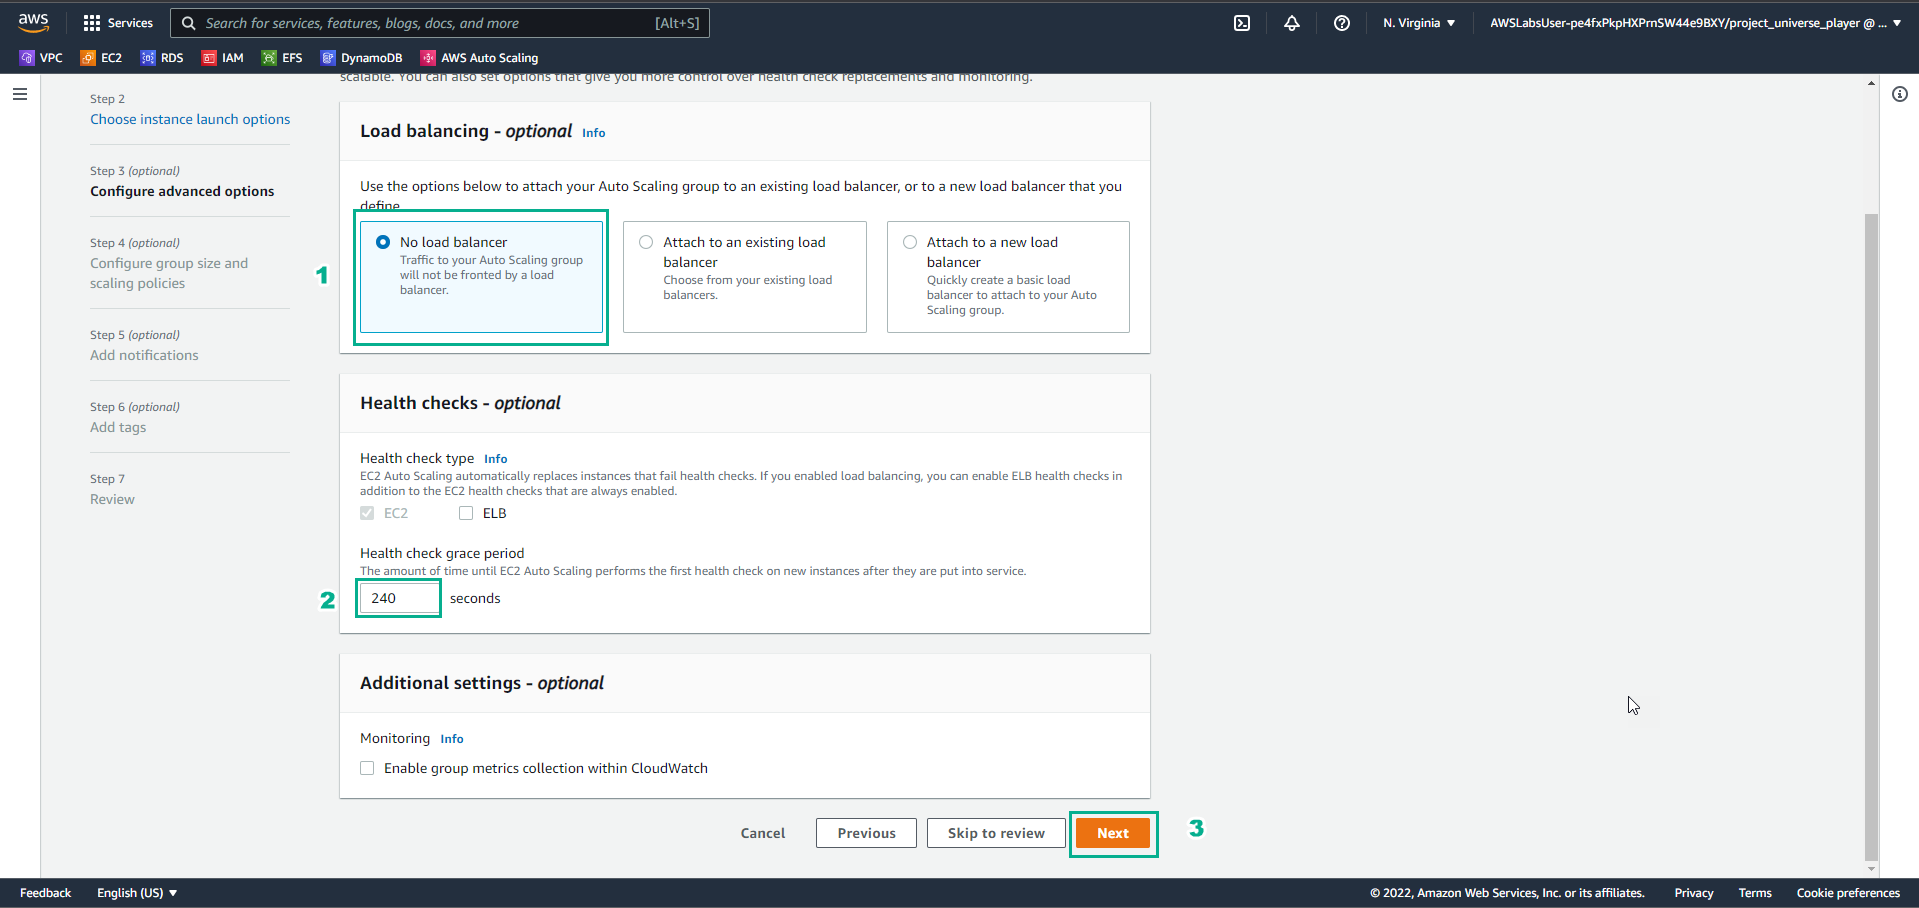
- In the Create Auto Scaling group interface
- In Load balancing, select No load balancer
- Health check grace period, enter ```240````
- Select Next
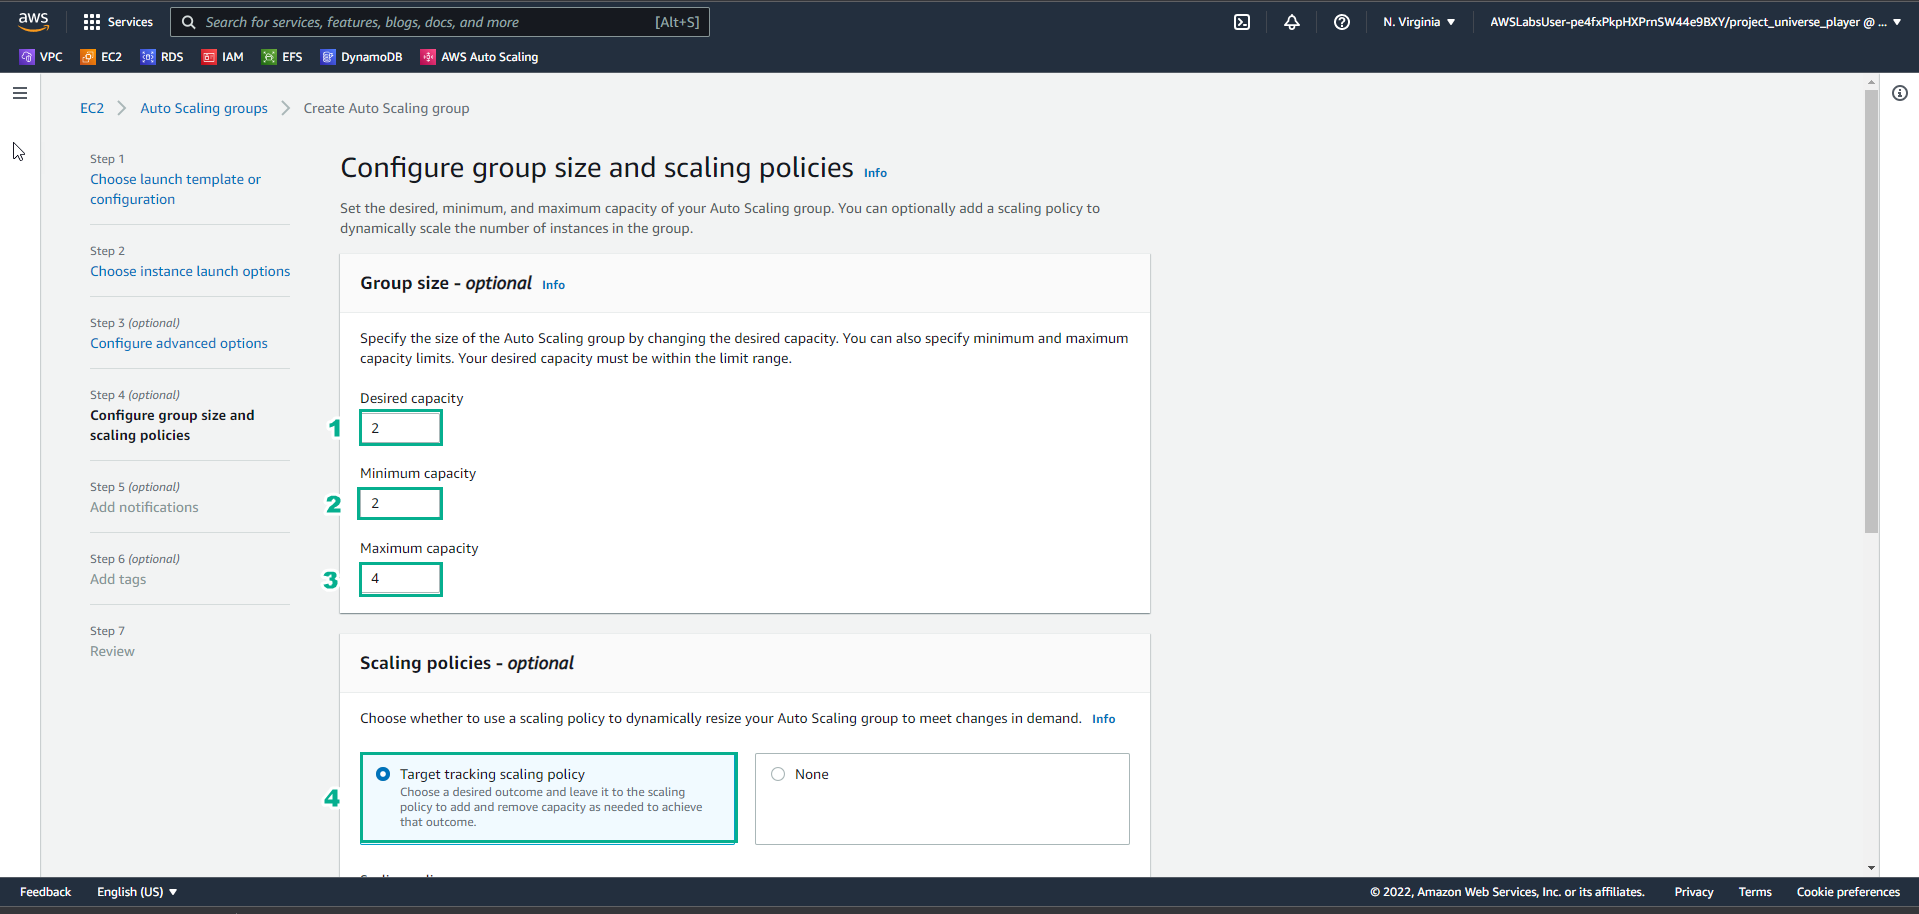
- In the Create Auto Scaling group interface
- Desired capacity, enter
2 - Minimum capacity, enter
2 - Maximum capacity, enter
4 - Select Target tracking scaling policy
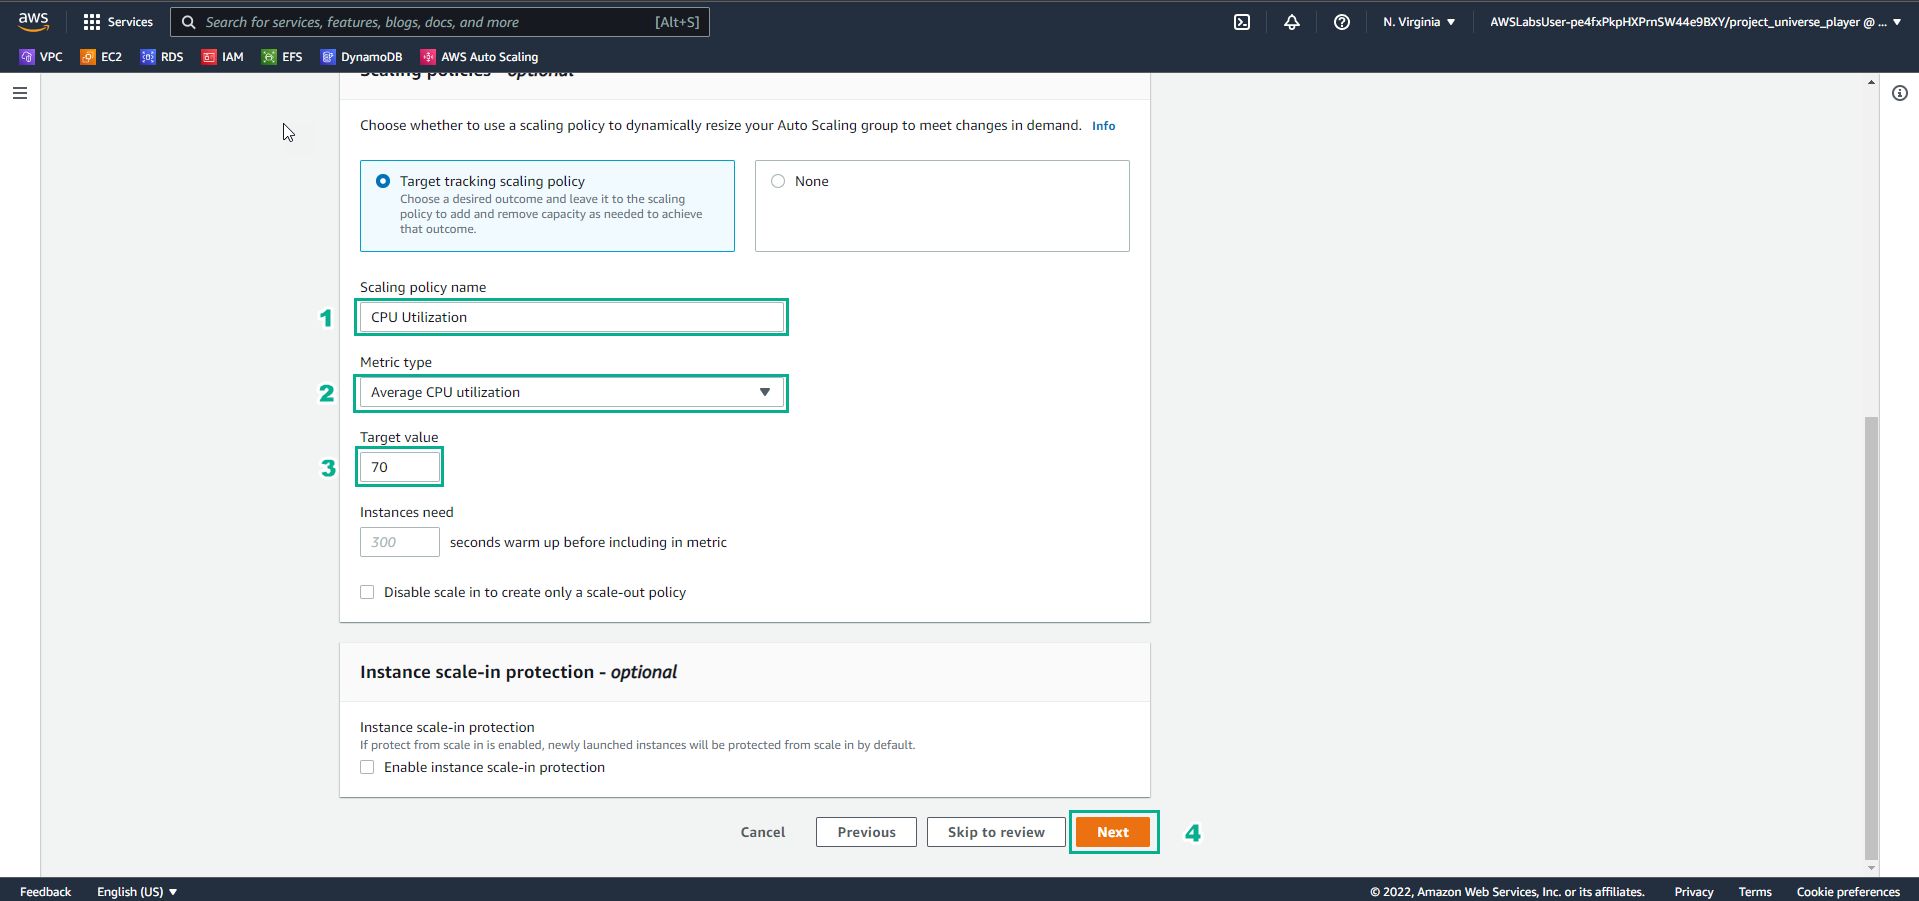
- In the Create Auto Scaling group interface
- Scaling policy name, enter
CPU Utilization - Tager value, enter ```70````
- Select Next
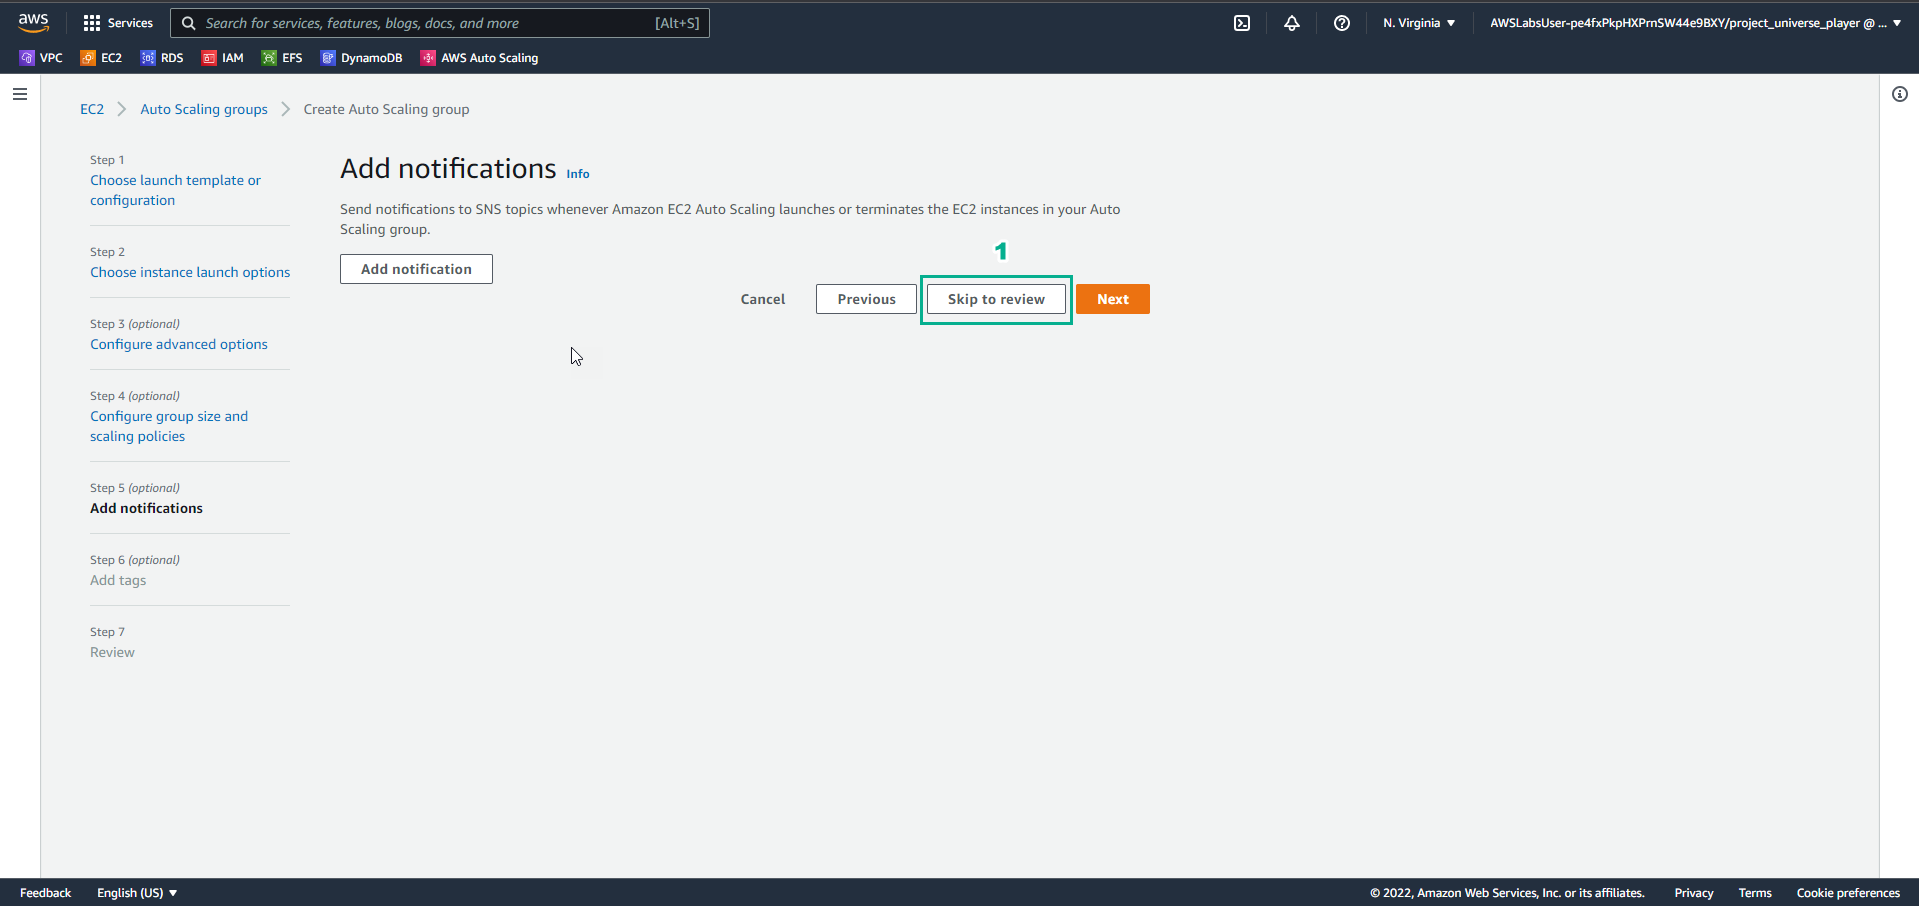
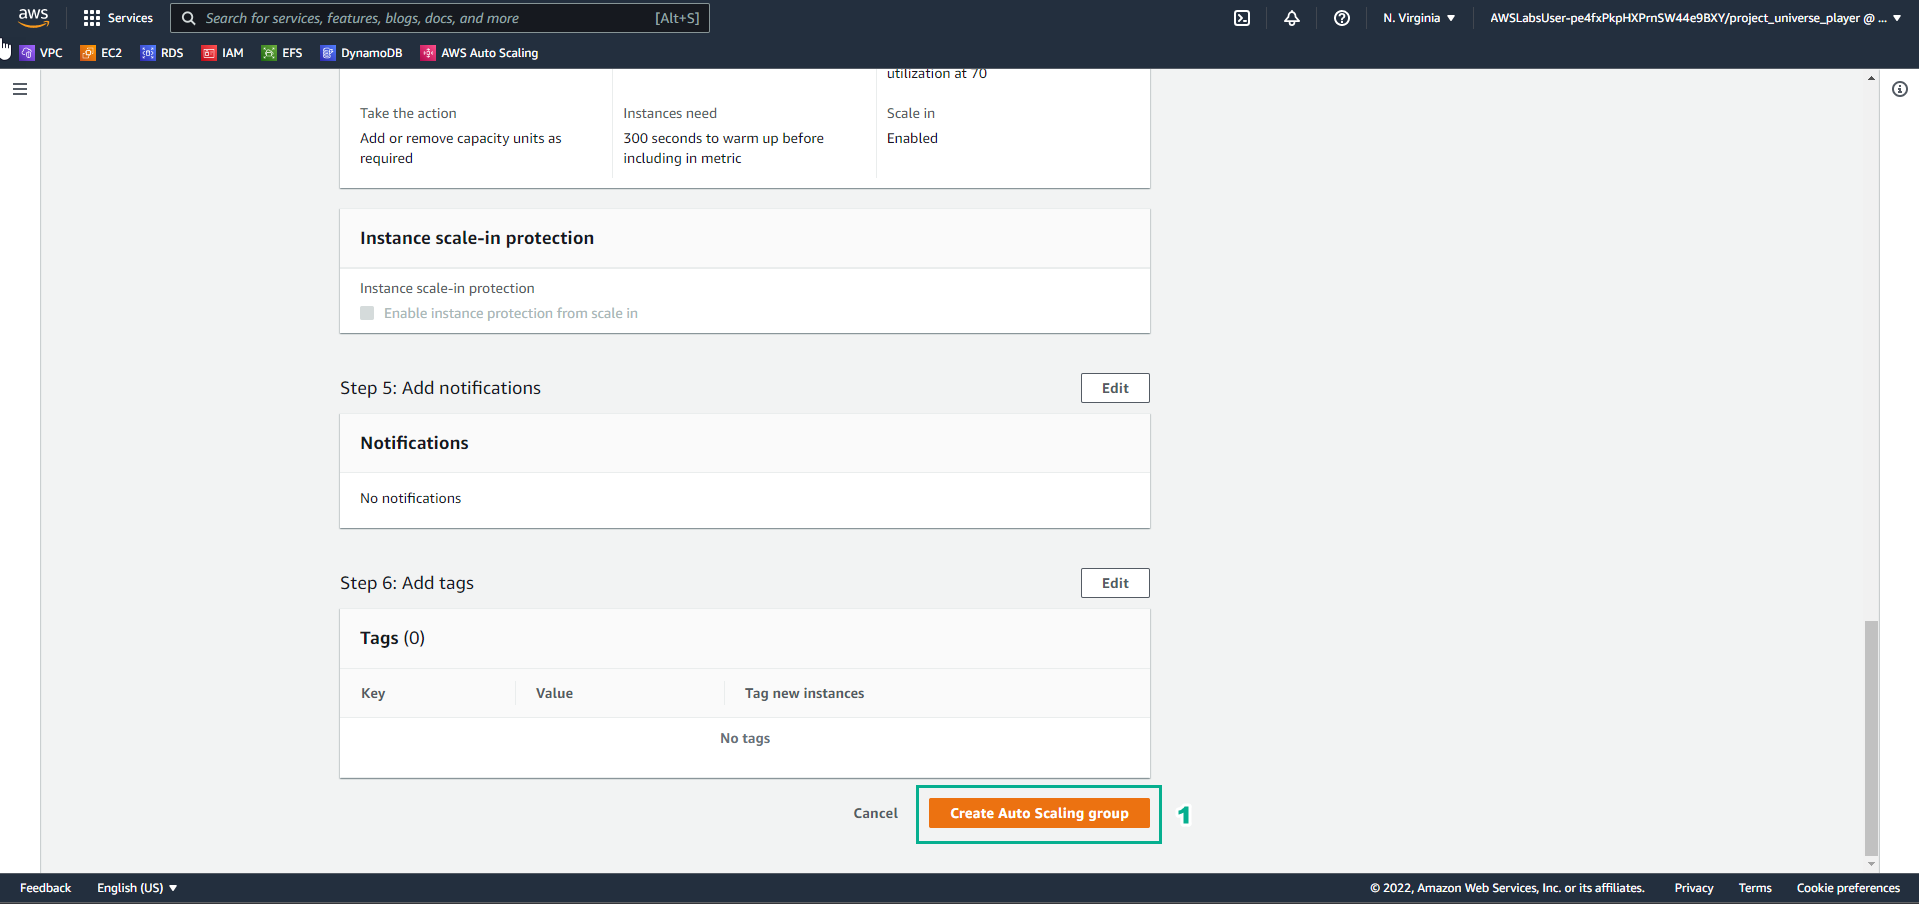
- In the interface *Create Auto Scaling group
- Select Skip to review
- In the Create Auto Scaling group interface
- Select Create Auto Scaling group
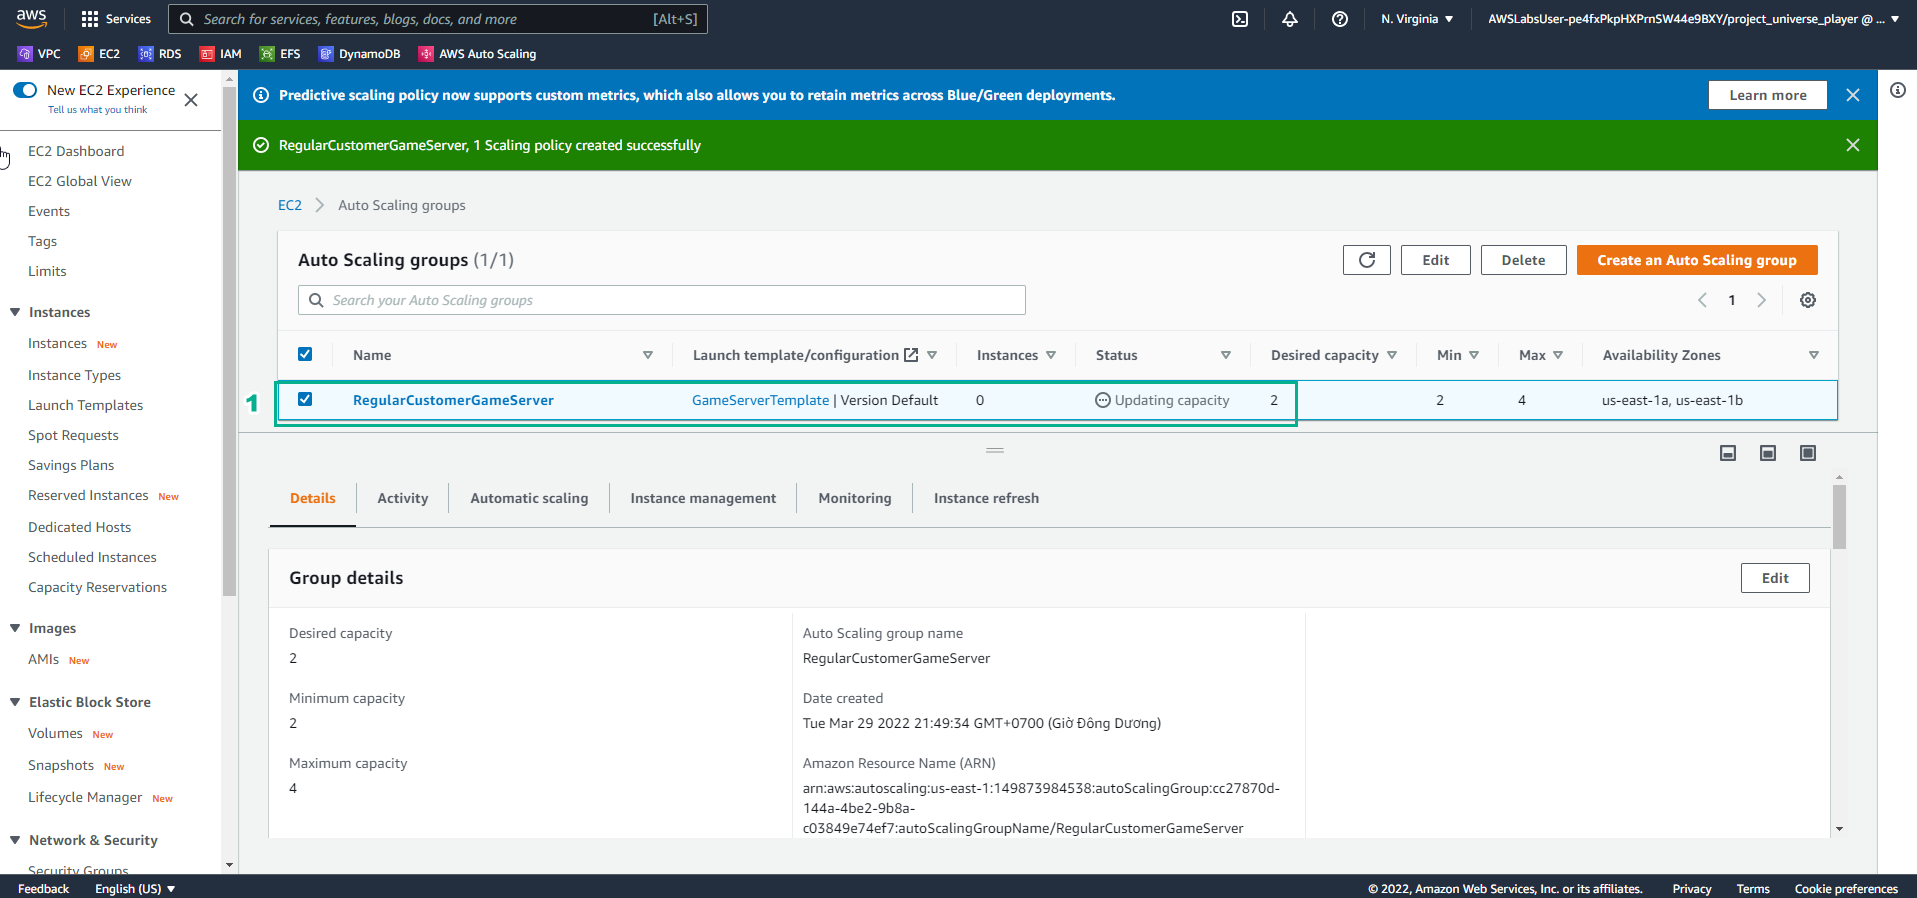
- In the EC2 interface
- View initialization results Auto Scaling group
- Select RegularCustomerGameServer
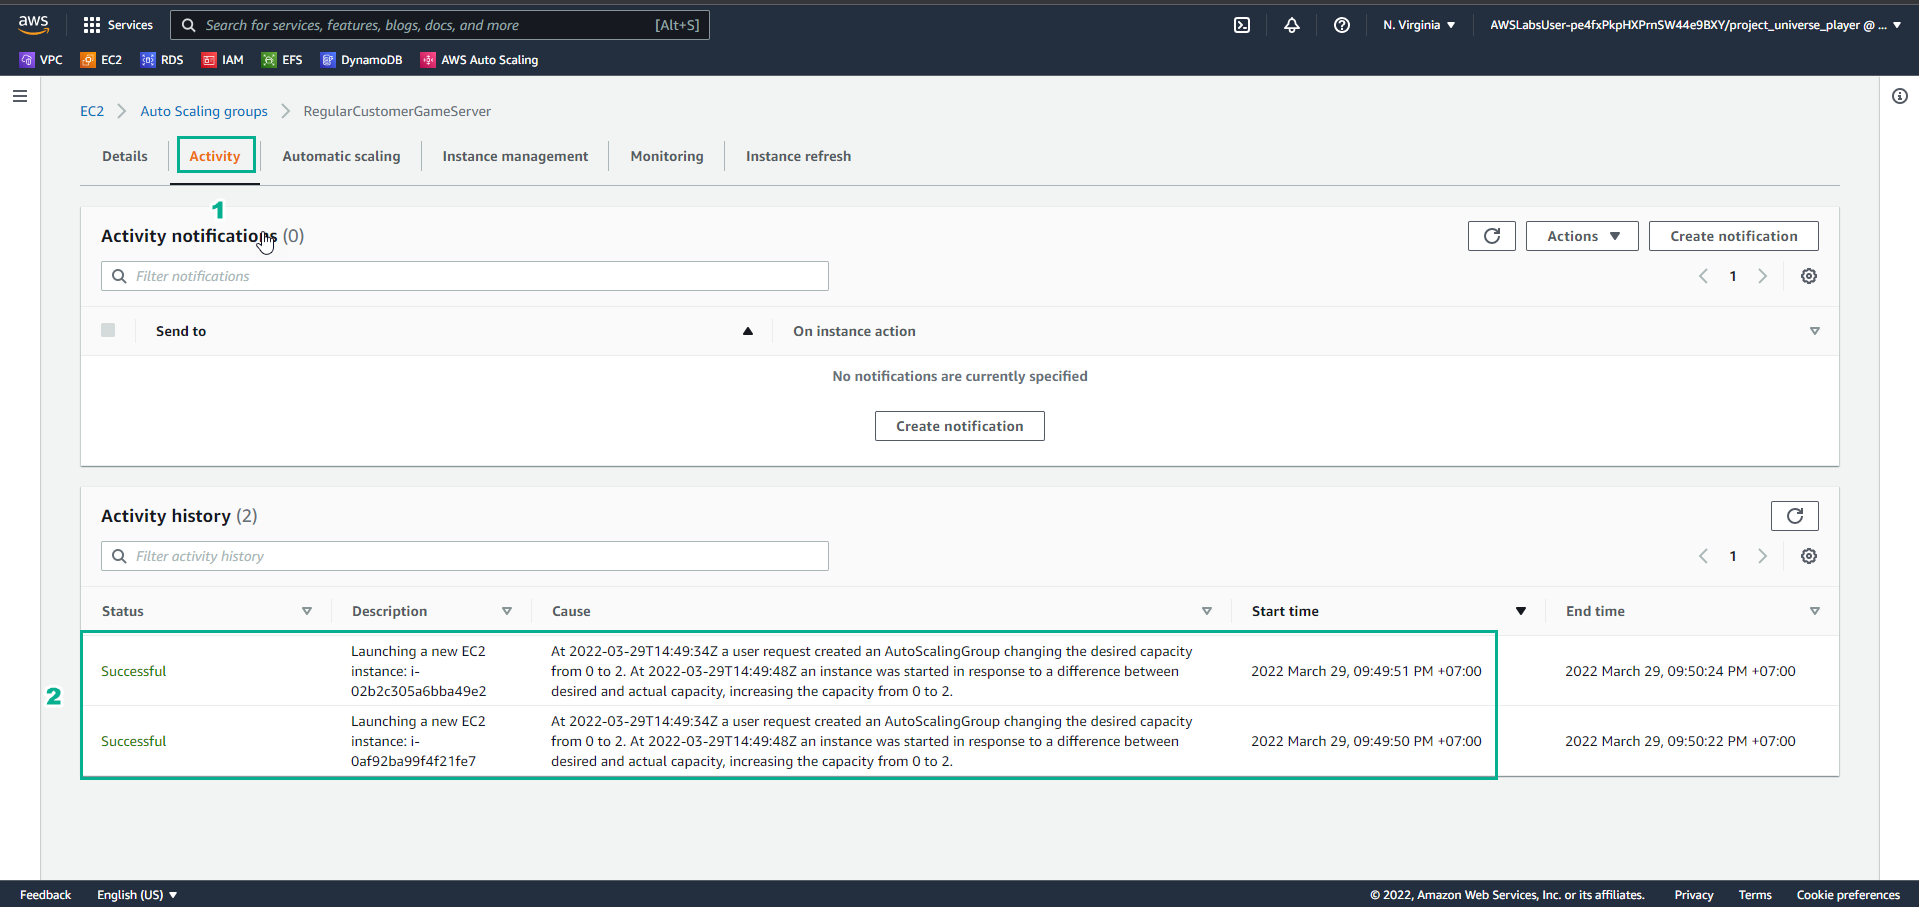
- In the RegularCustomerGameServer interface
- Select Activity
- View Activity history
- In the RegularCustomerGameSer interface
- Select Automatic scaling
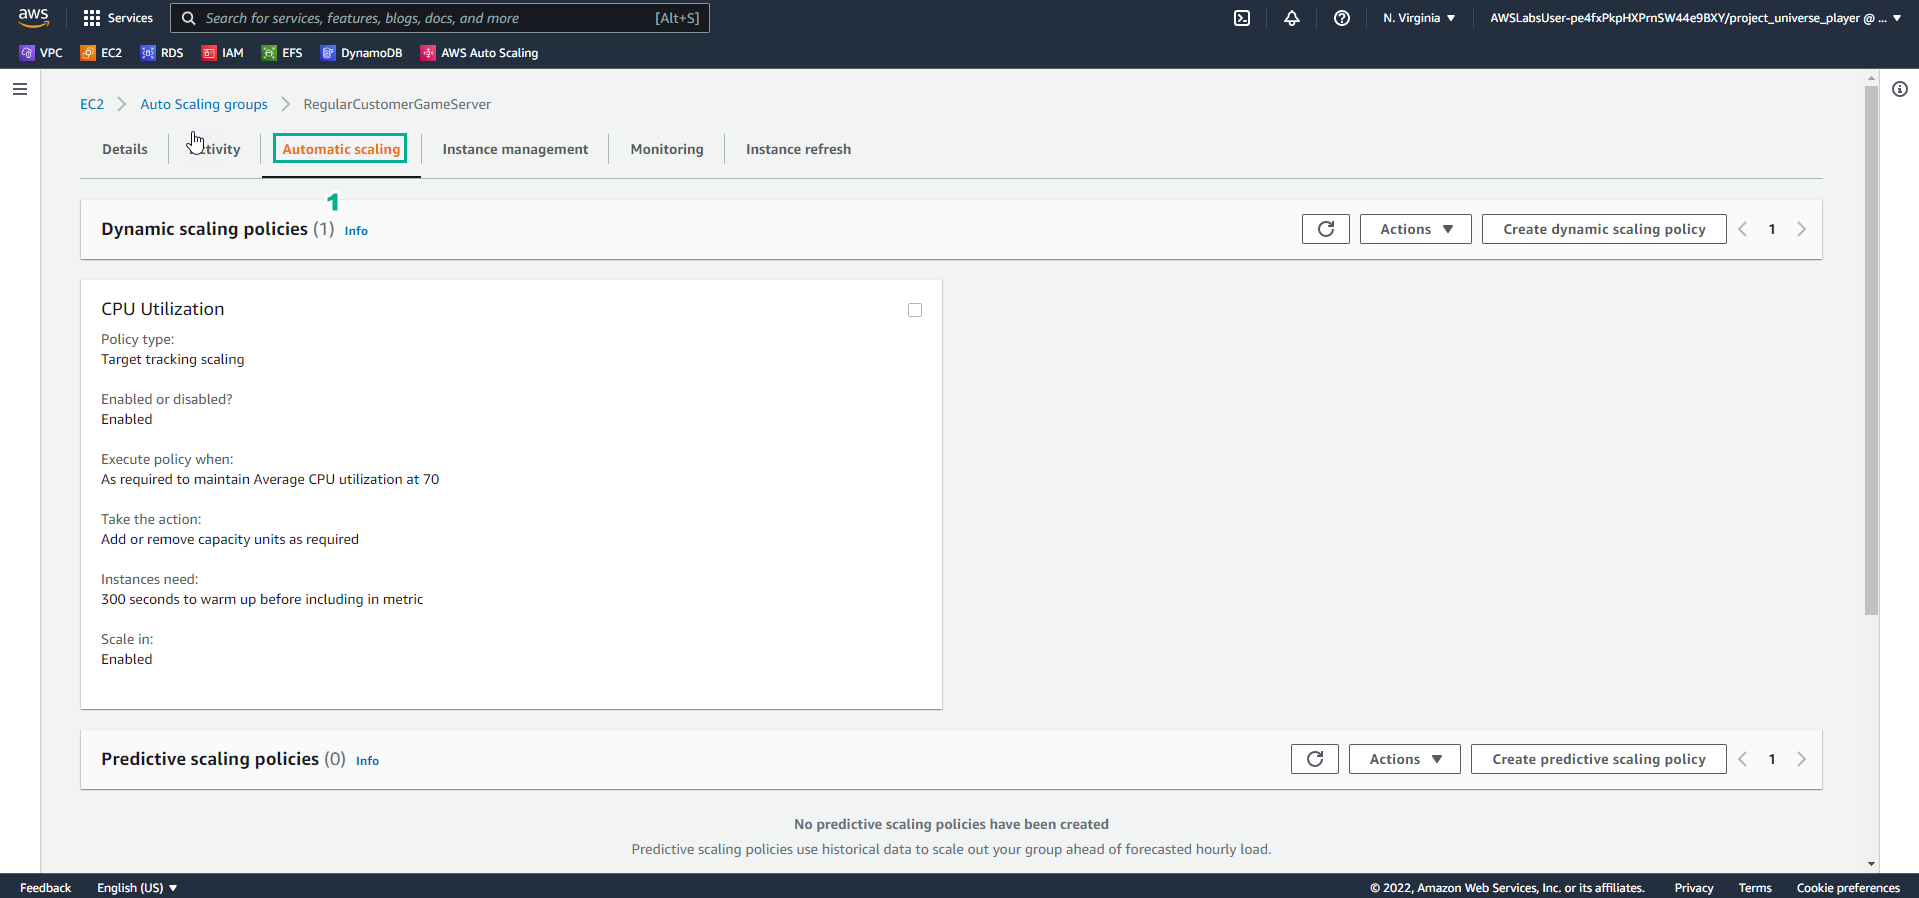
- In the RegularCustomerGameServer interface
- Select Create scheduled action
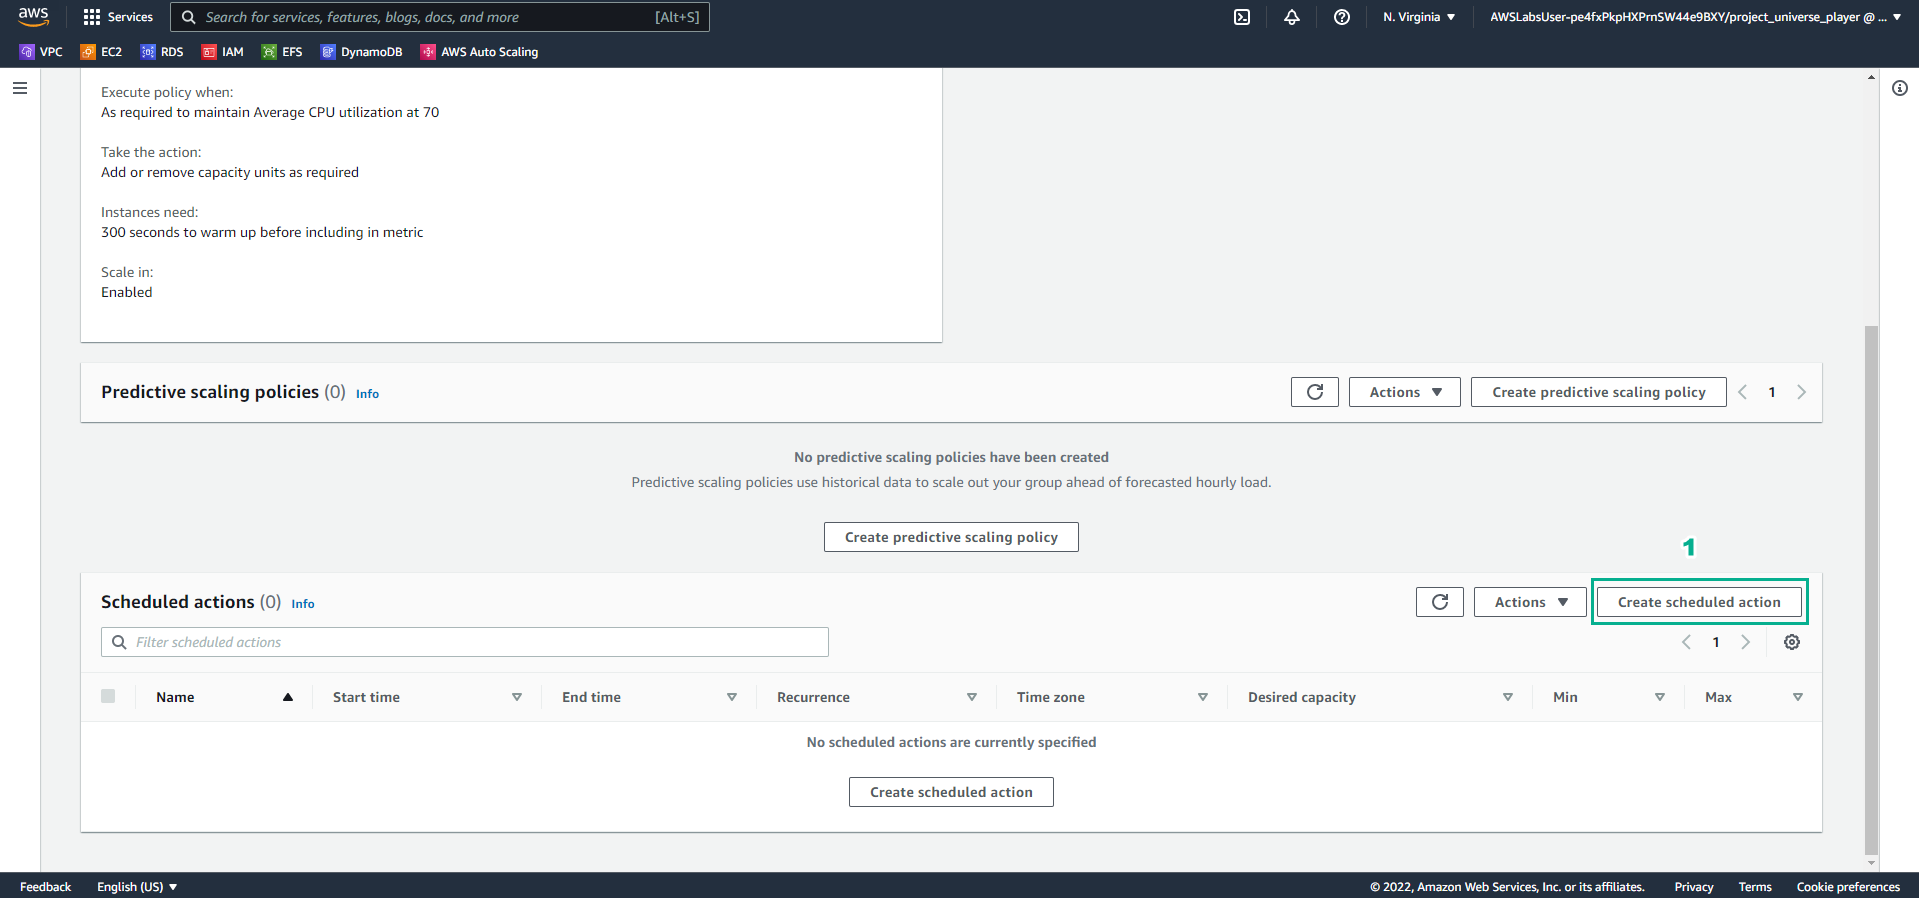
- In the Create scheduled action interface
- Name, enter
SecondWaveOfRegulars - Desired capacity, enter
0 - Min, enter
0 - Max, enter
0 - Recurrence, select Every day
- Specific start time, select date and year and select 01:00
- Select Create
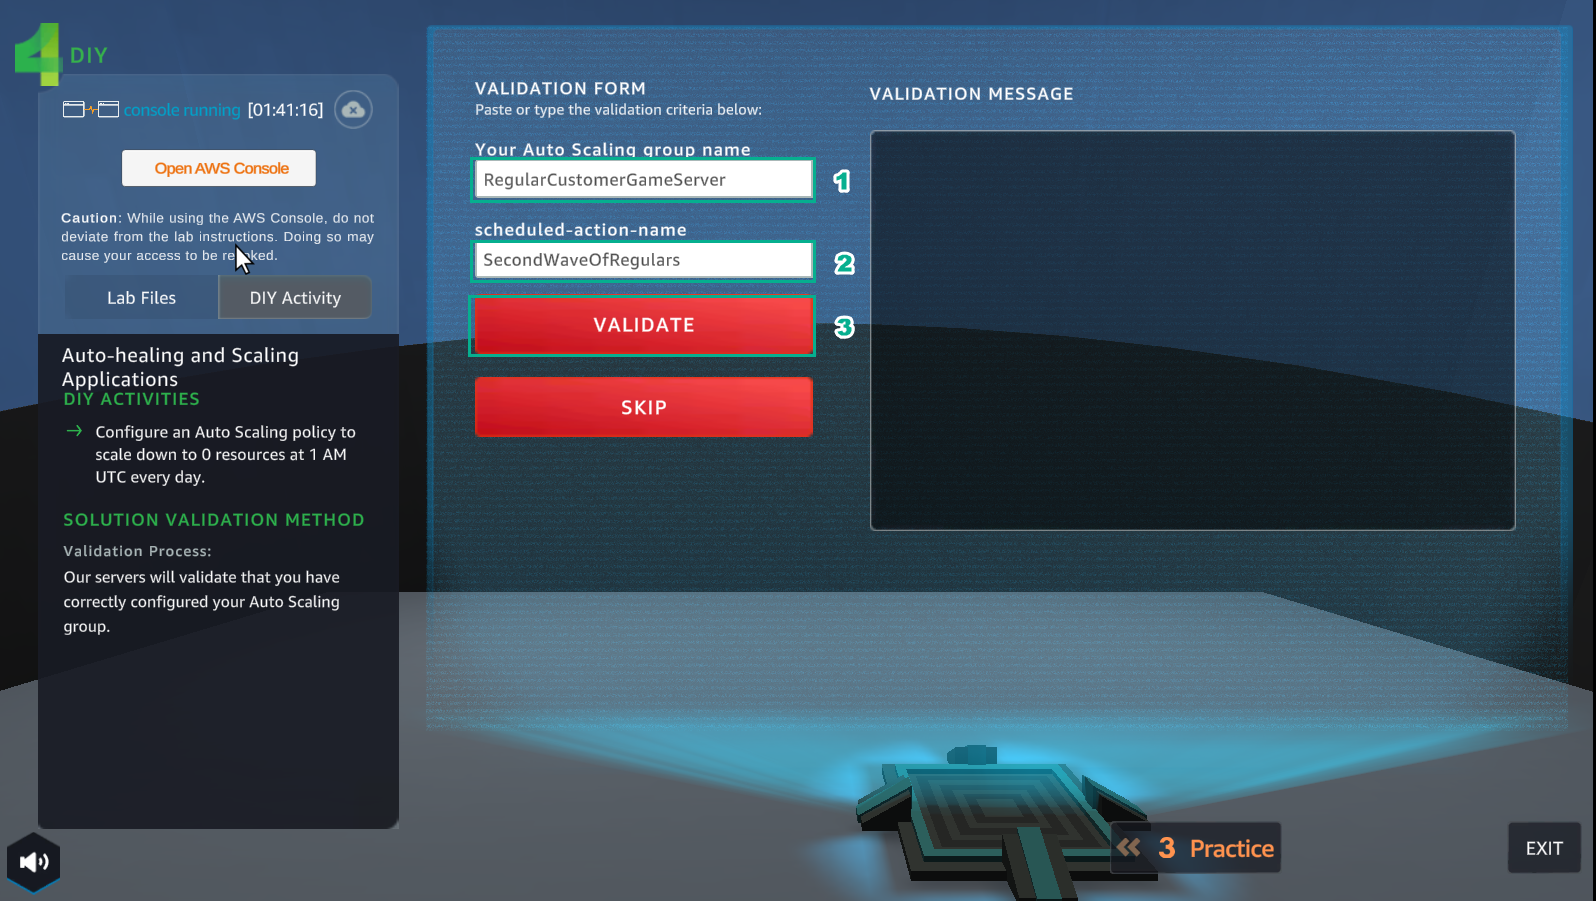
- In the DIY interface
- Your Auto Scaling group name, enter ```RegularCustomerGameServer````
- scheduled-action-name, enter
SecondWaveOfRegulars - Select VALIDATE
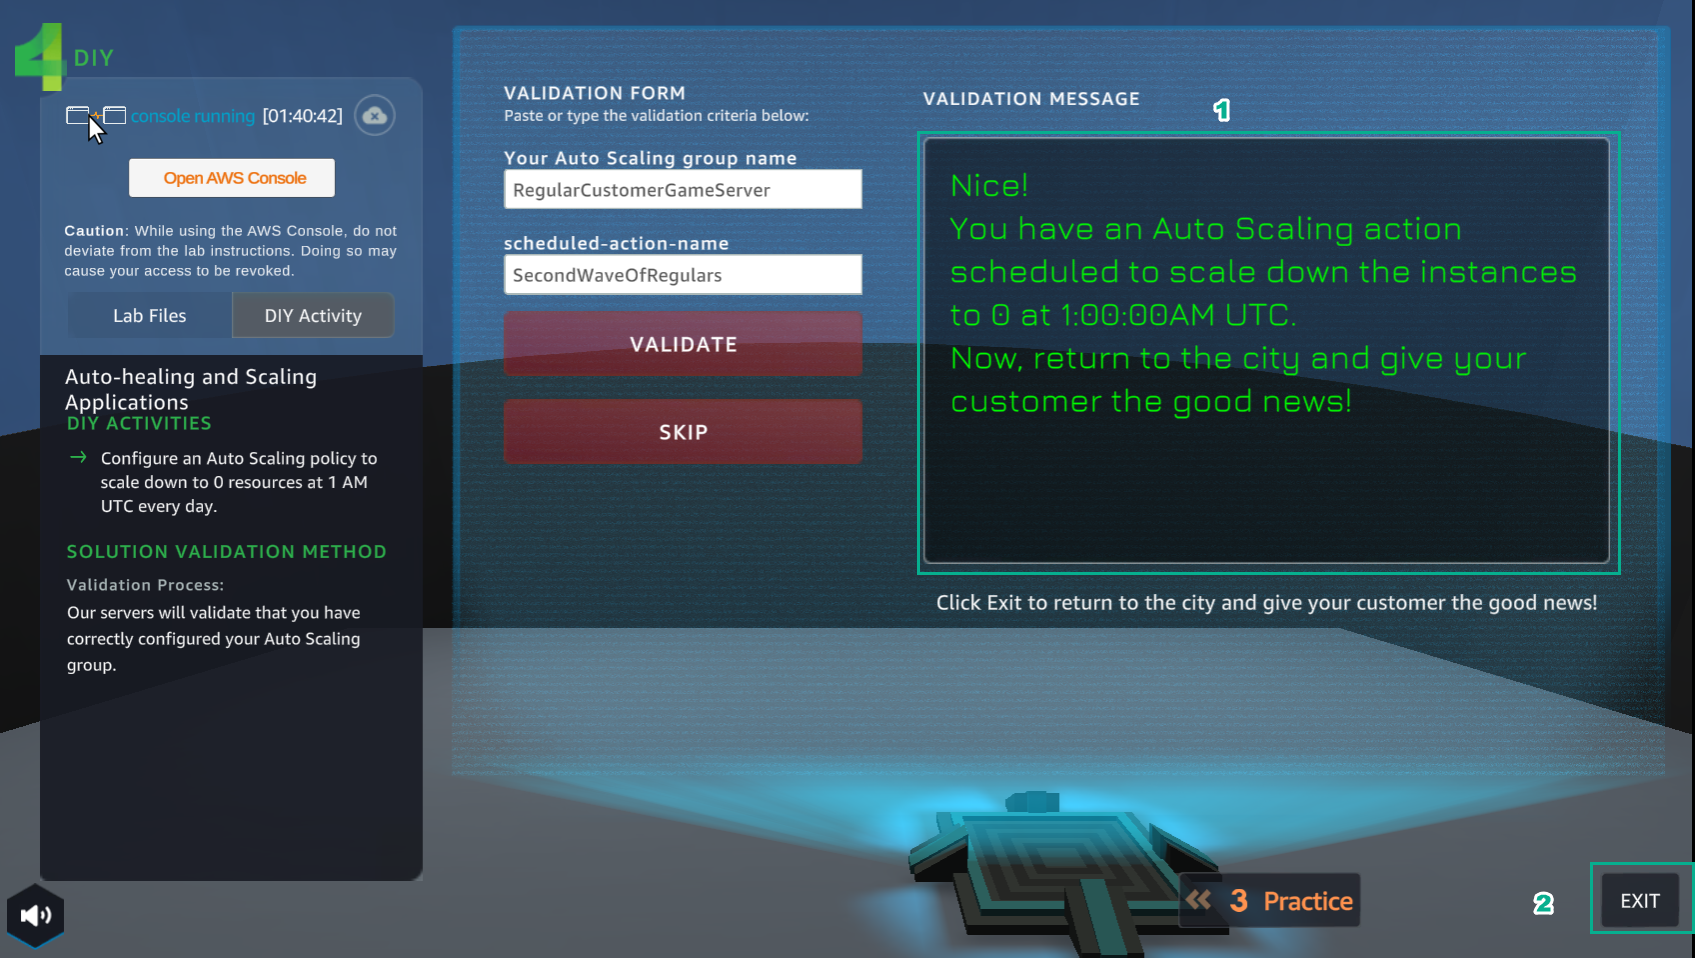
- After selecting VALIDATE
- VALIDATION MESSAGE Appears Nice!…
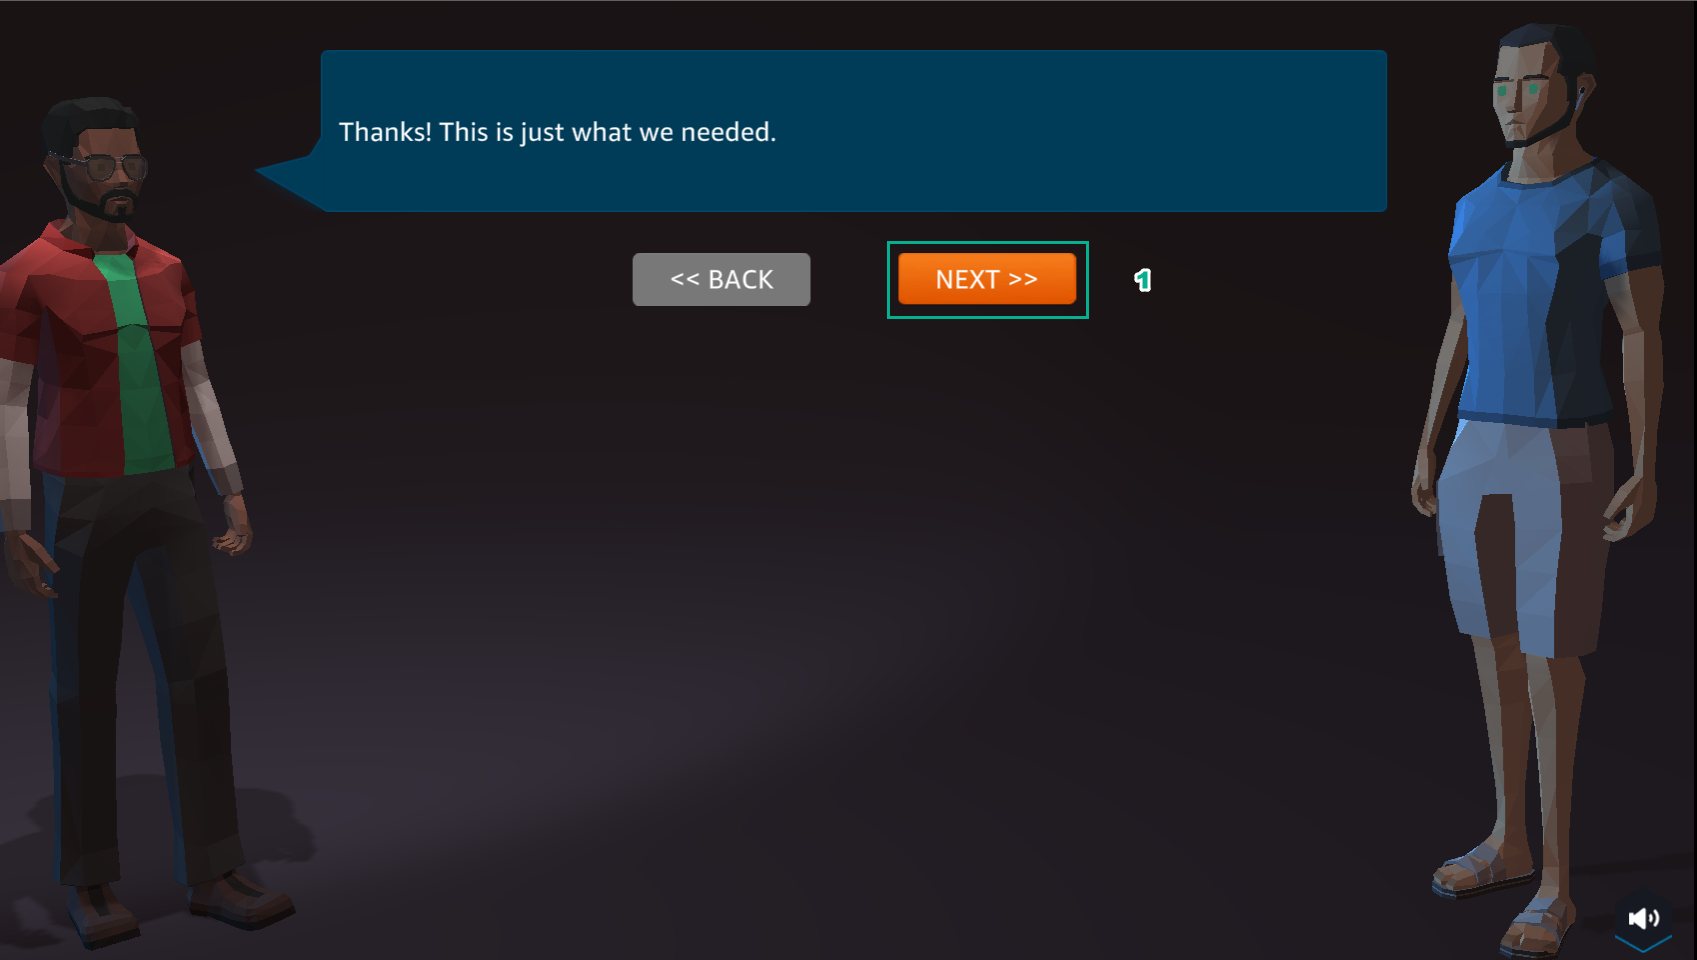
- Select EXIT to exit
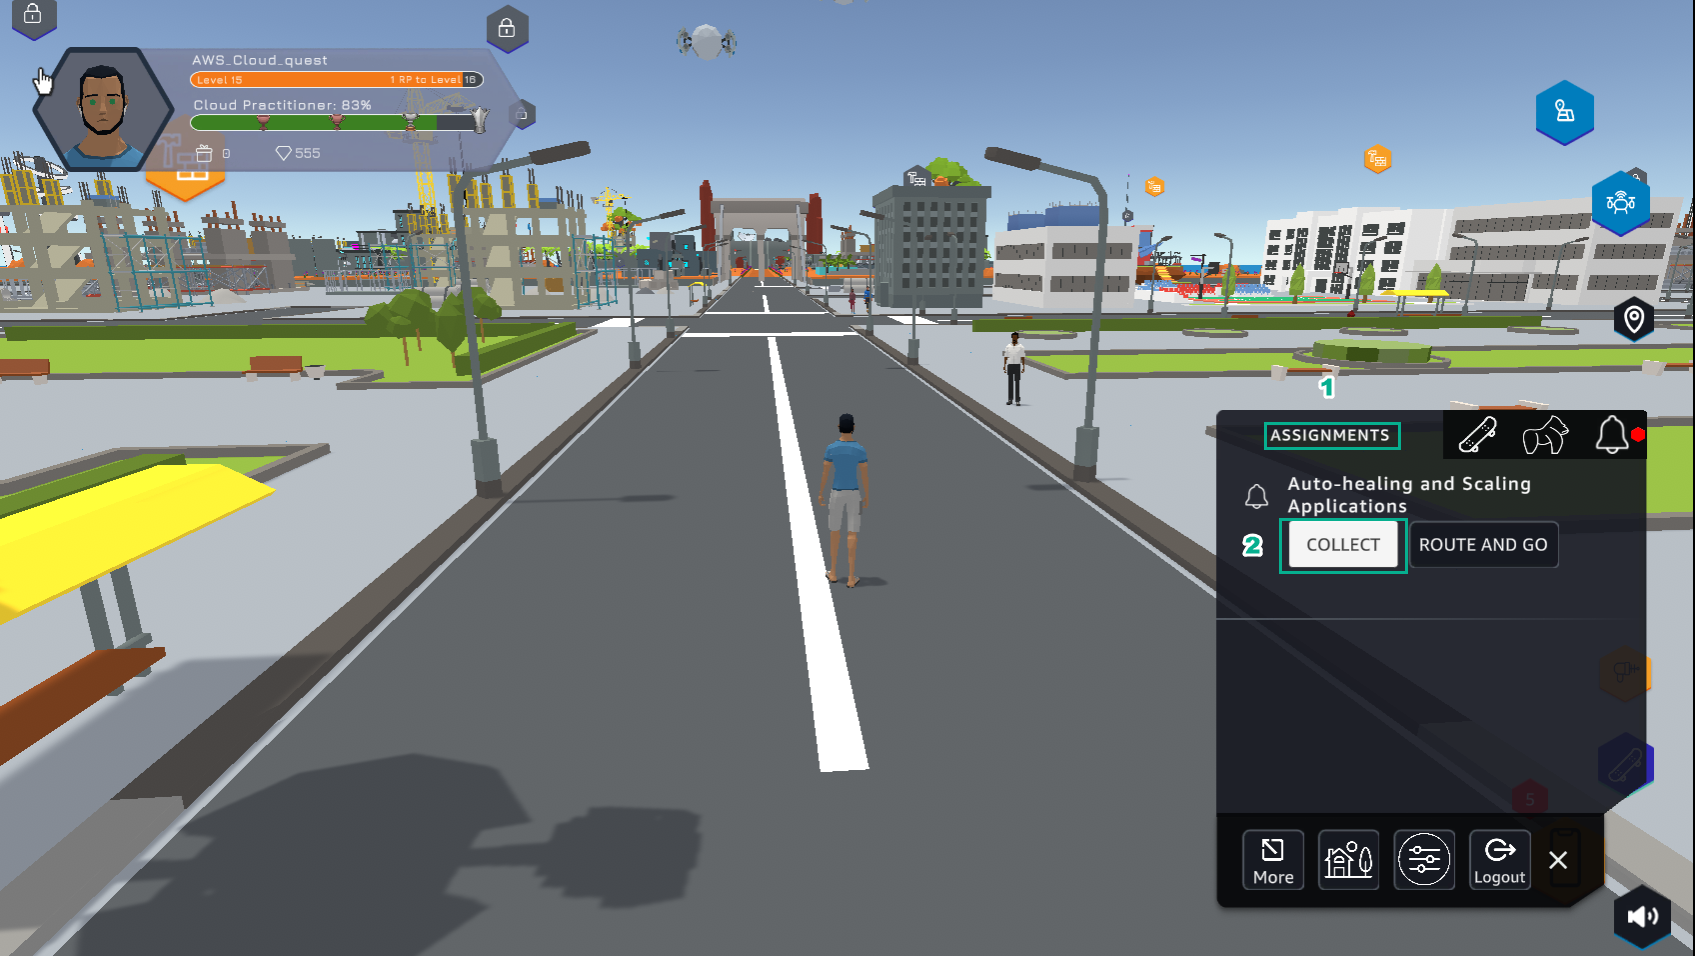
- In the city view
- Select ASSIGNMENTS
- Select COLLECT
- Select NEXT
- Select COLLECT
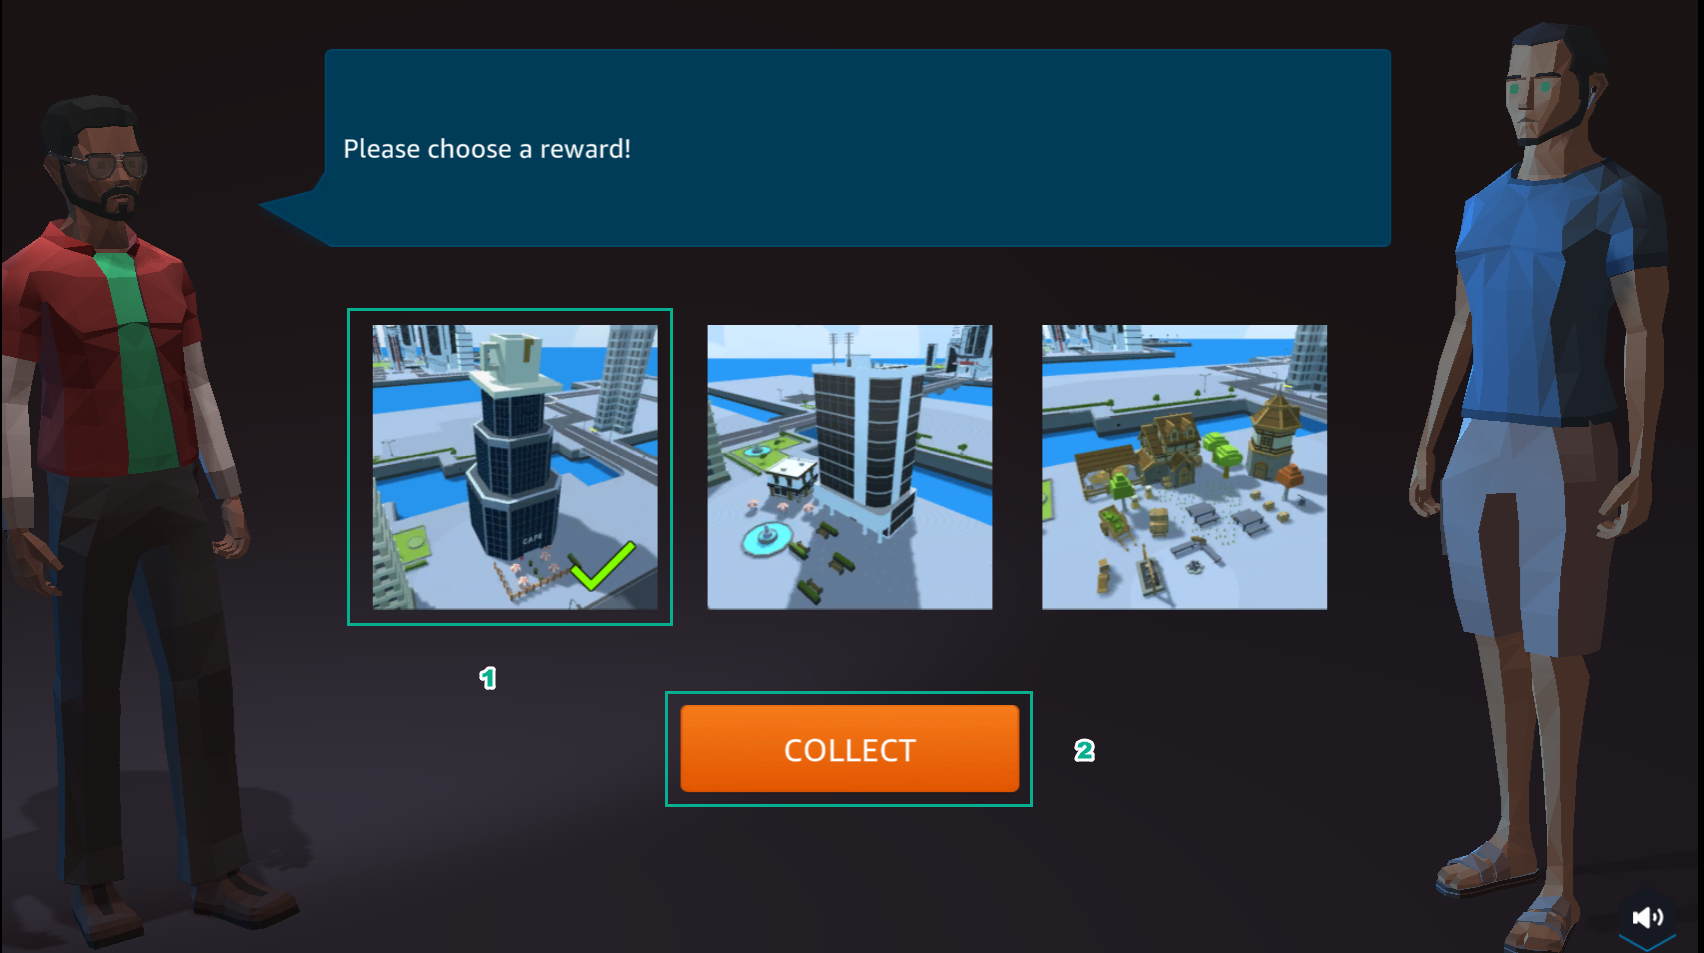
- Congratulations to the award-winning player