Practice
After watching Plan, the player prepares for Practice
- In the Practice interface
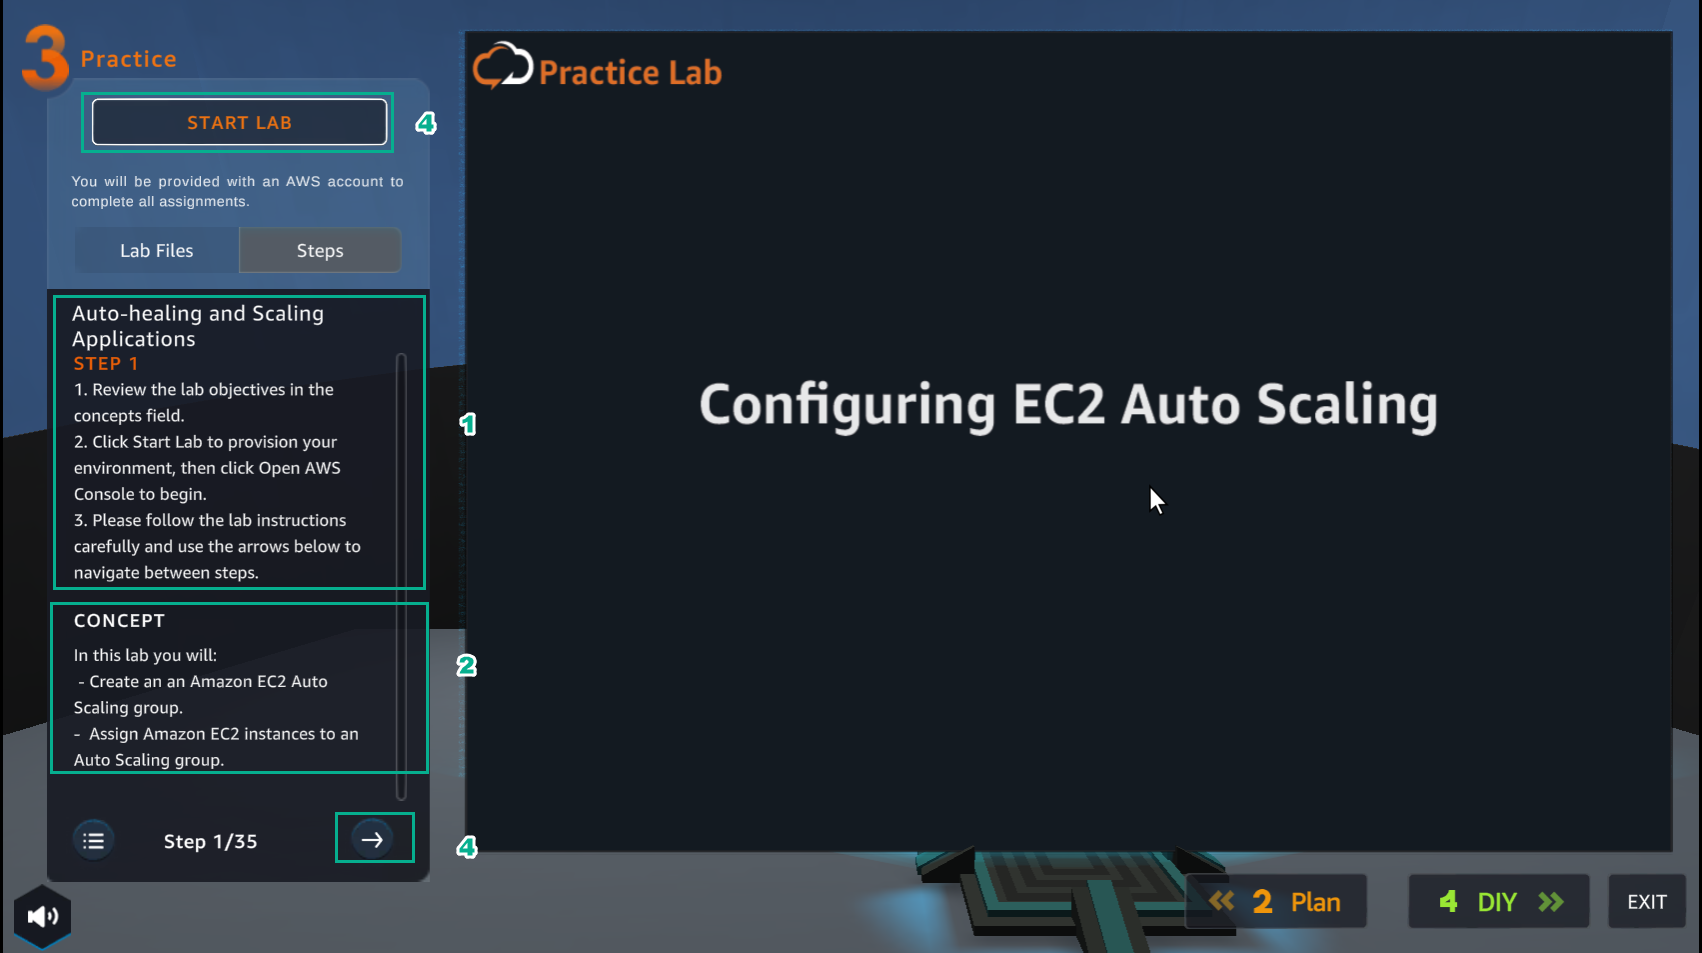
- Read step 1 of Auto-healing and Scaling Applications
- Read CONCEPT
- Select START LAB
- Select the arrow to the right to see the next steps
- In the Practice interface
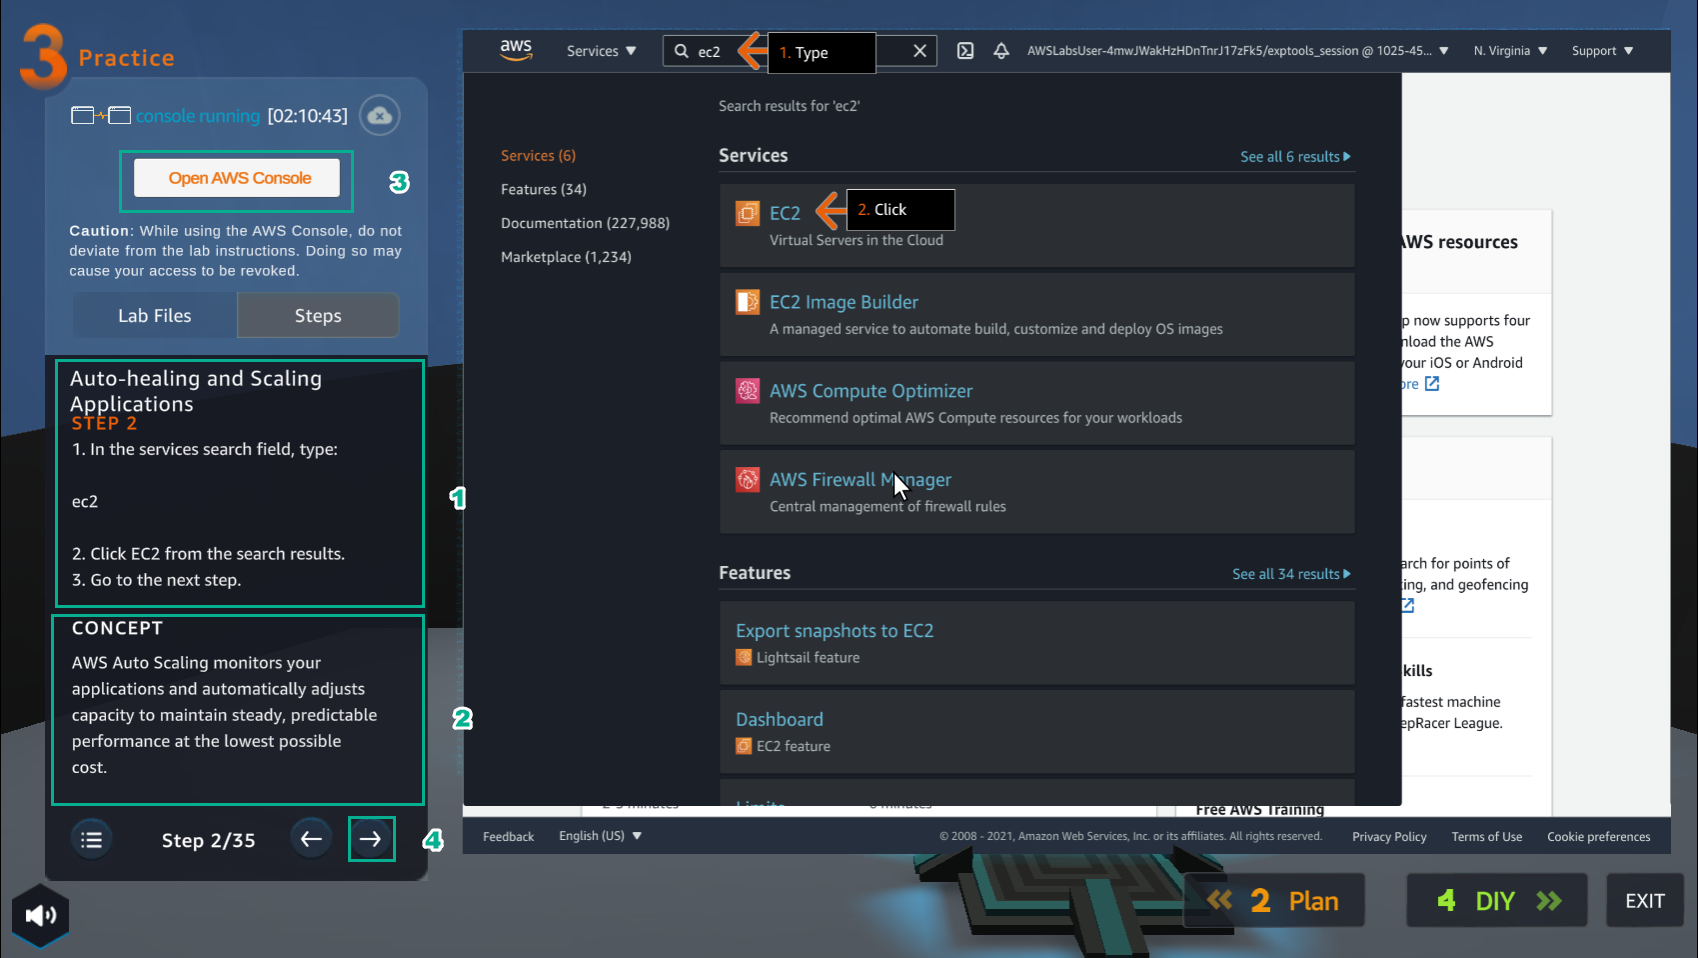
- Read step 2 of Auto-healing and Scaling Applications
- Read CONCEPT
- Select Open AWS Console
- Select the arrow to the right to see the next steps
- In the AWS Console interface
- Find EC2
- Select EC2
- In the Practice interface
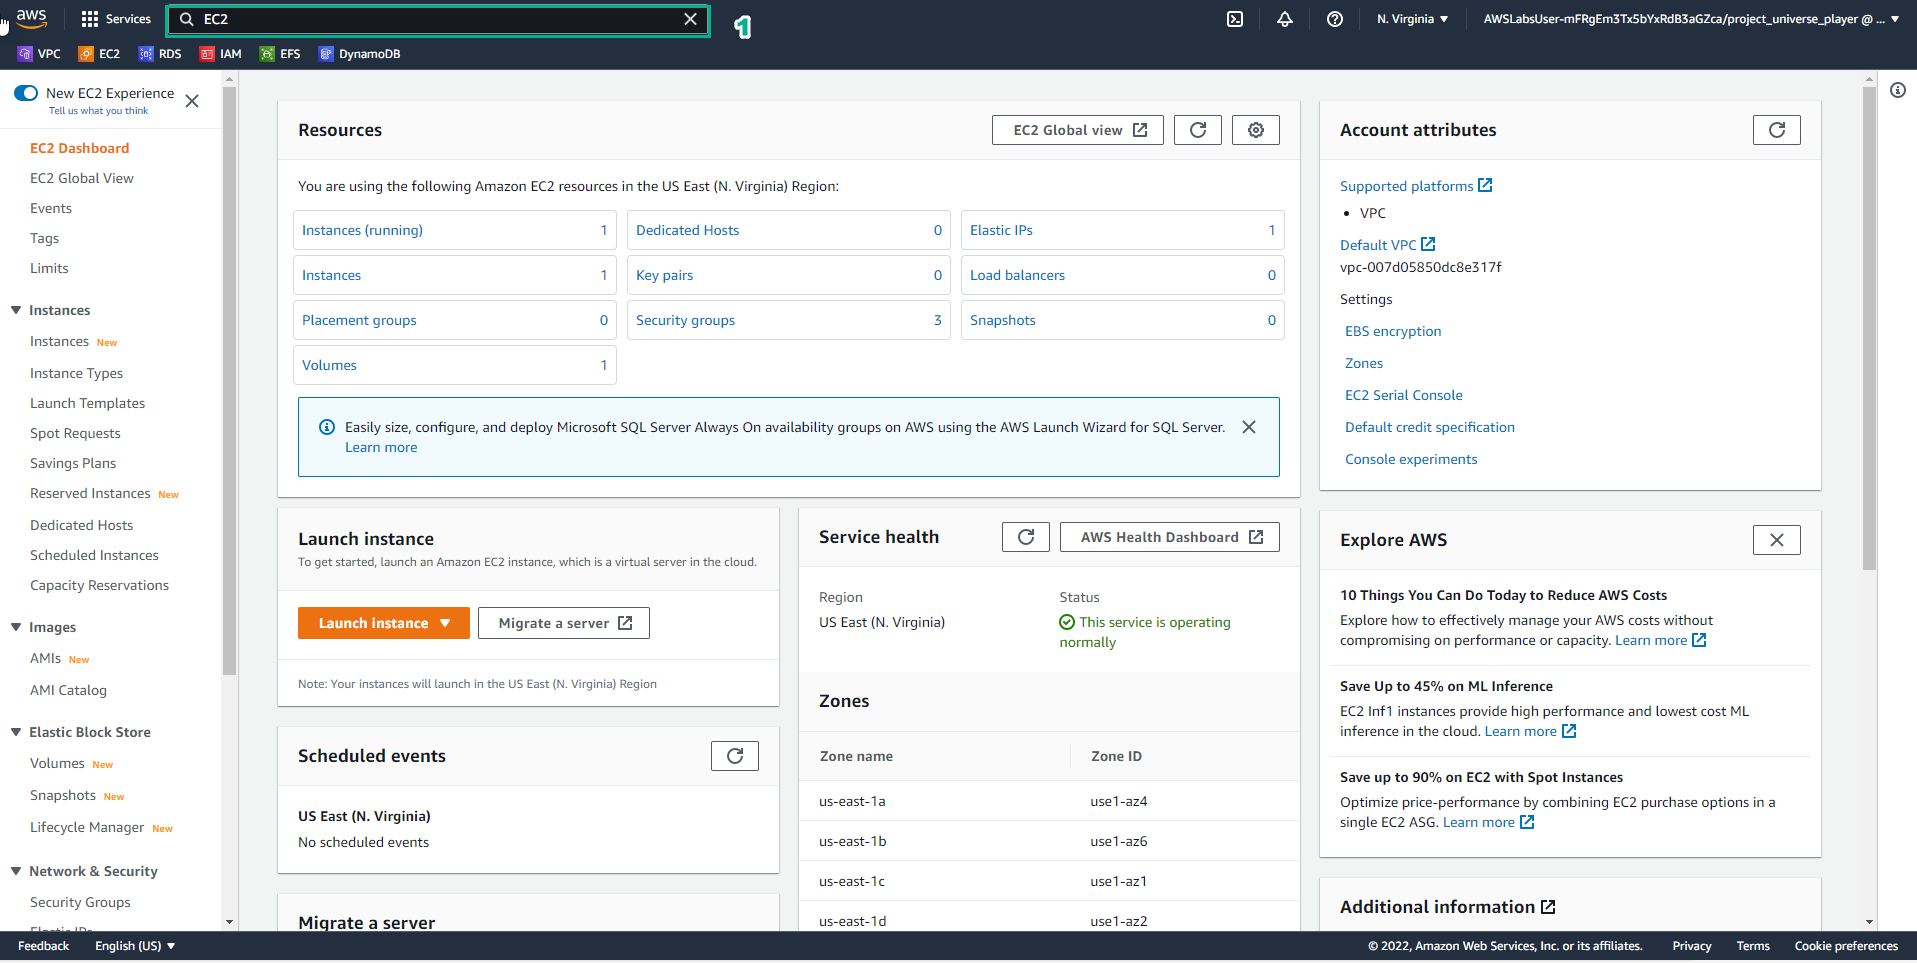
- Read step 3 of Auto-healing and Scaling Applications
- Read CONCEPT
- Select the arrow to the right to see the next steps
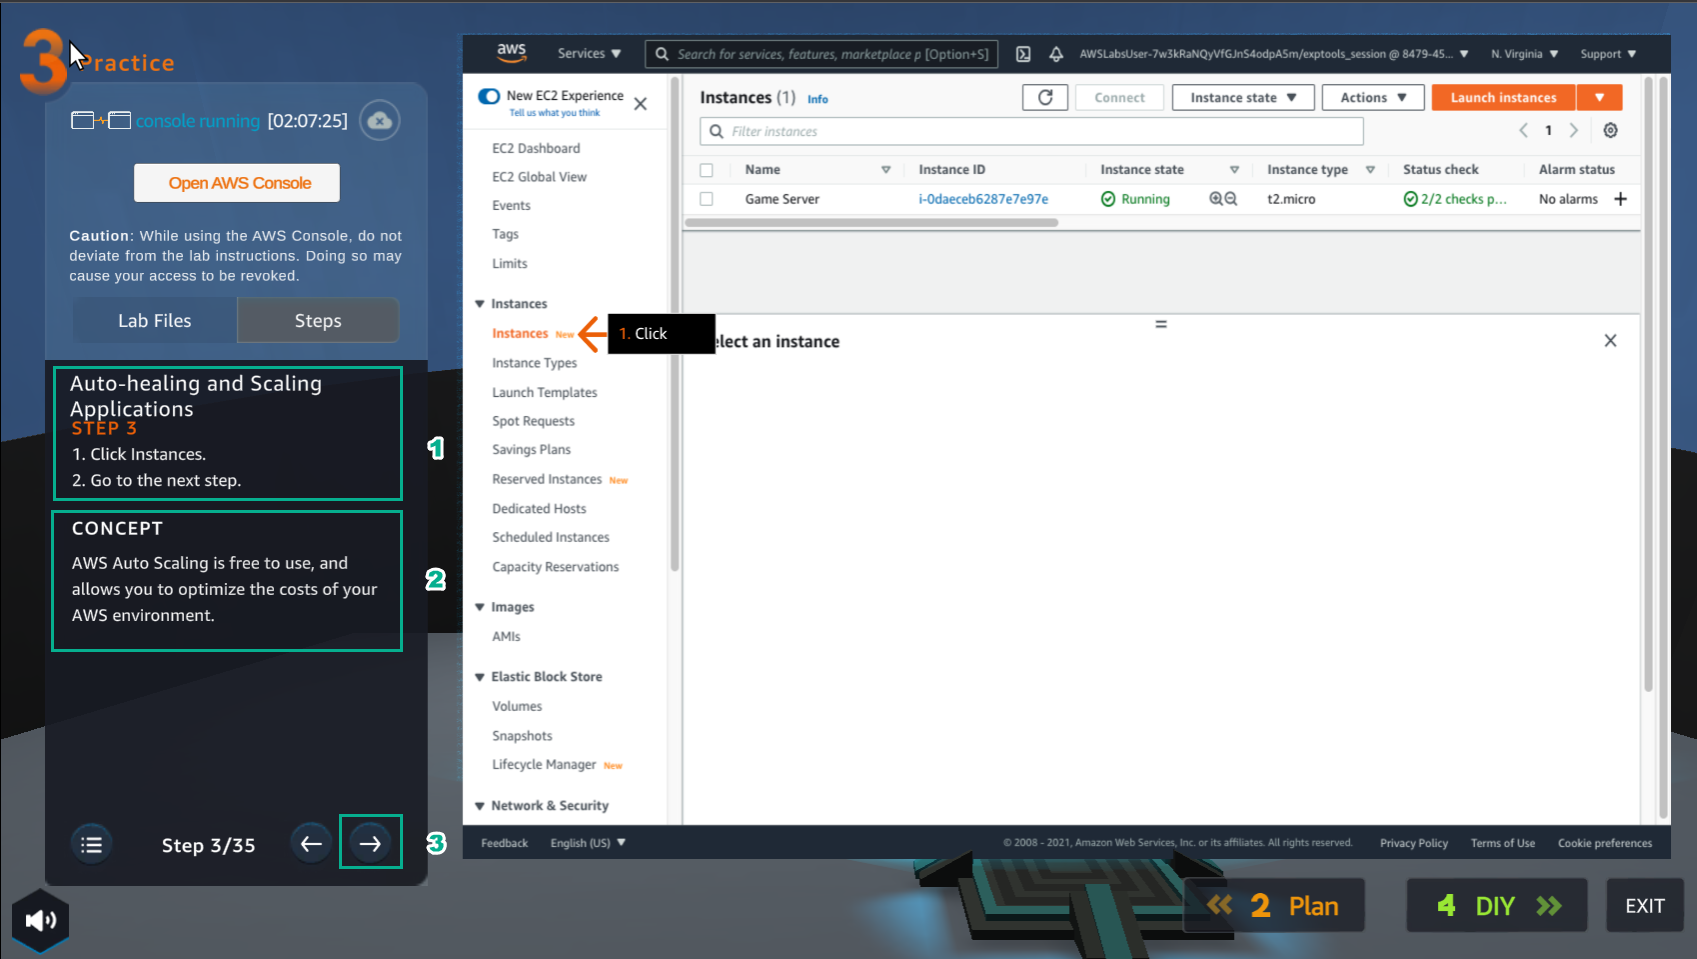
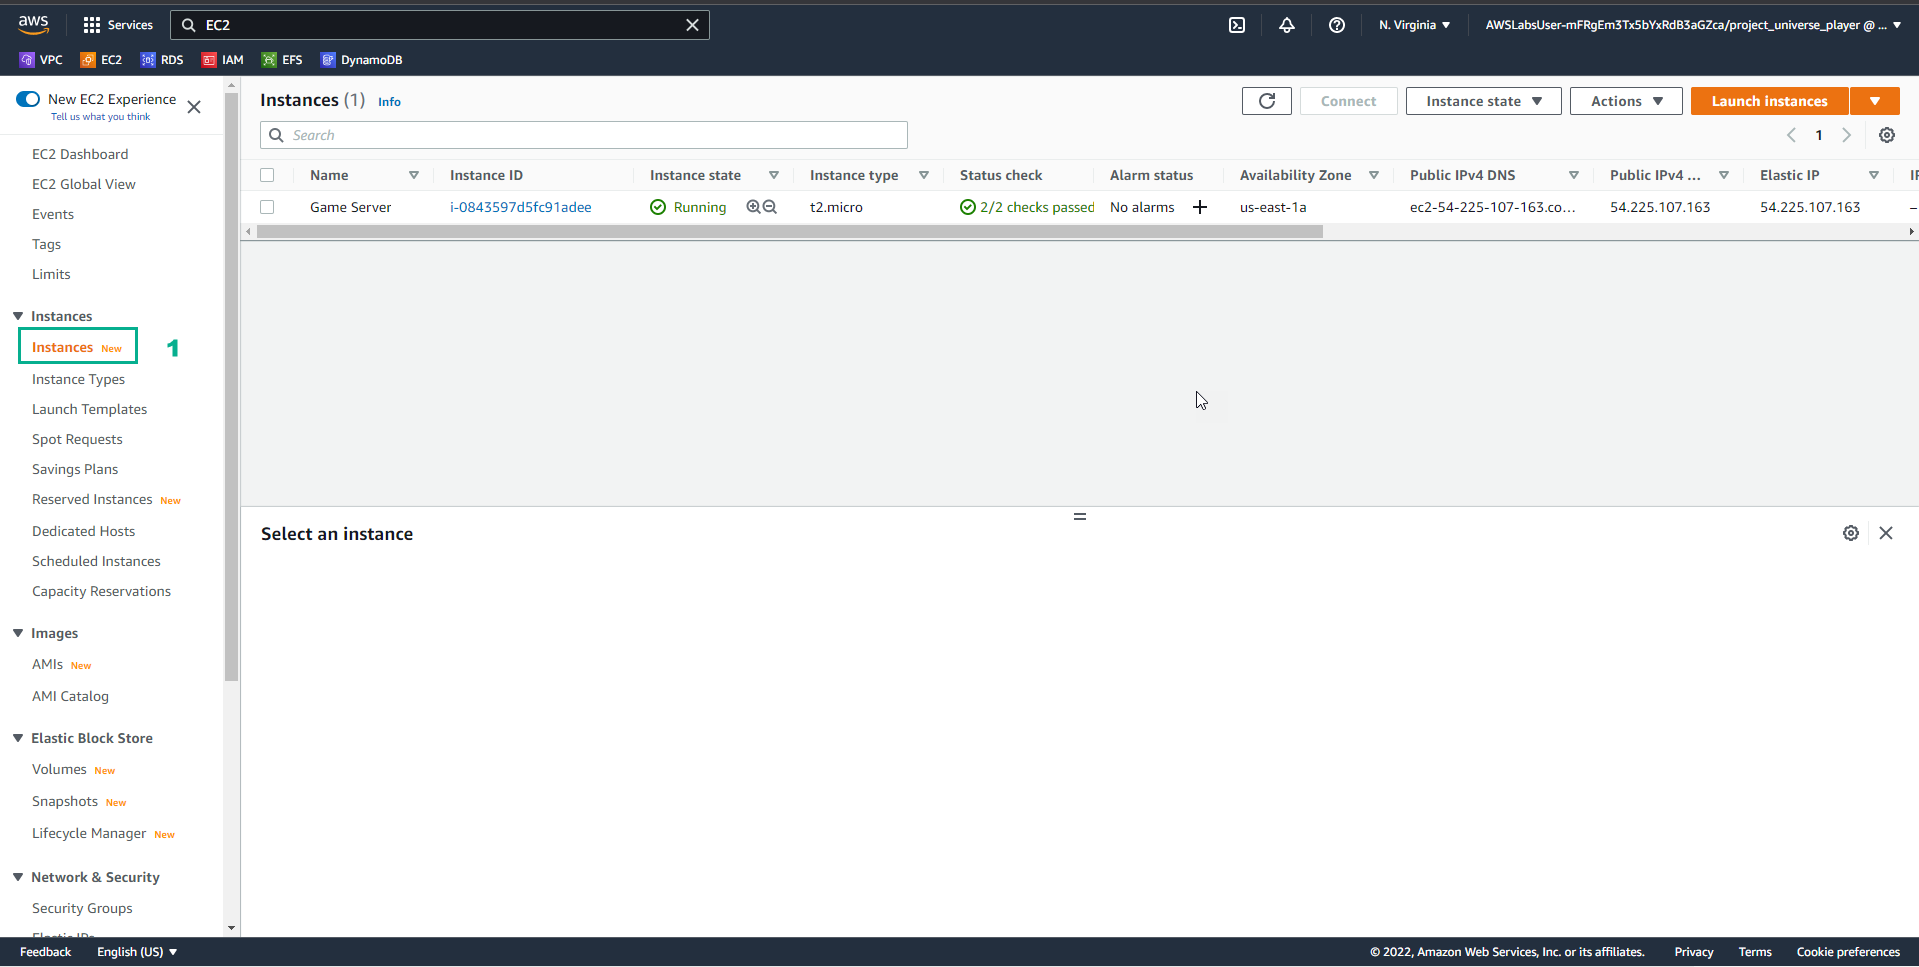
- In the EC2 interface
- Select Instances
- In the Practice interface
- Read step 4 of Auto-healing and Scaling Applications
- Read CONCEPT
- Select the arrow to the right to see the next steps
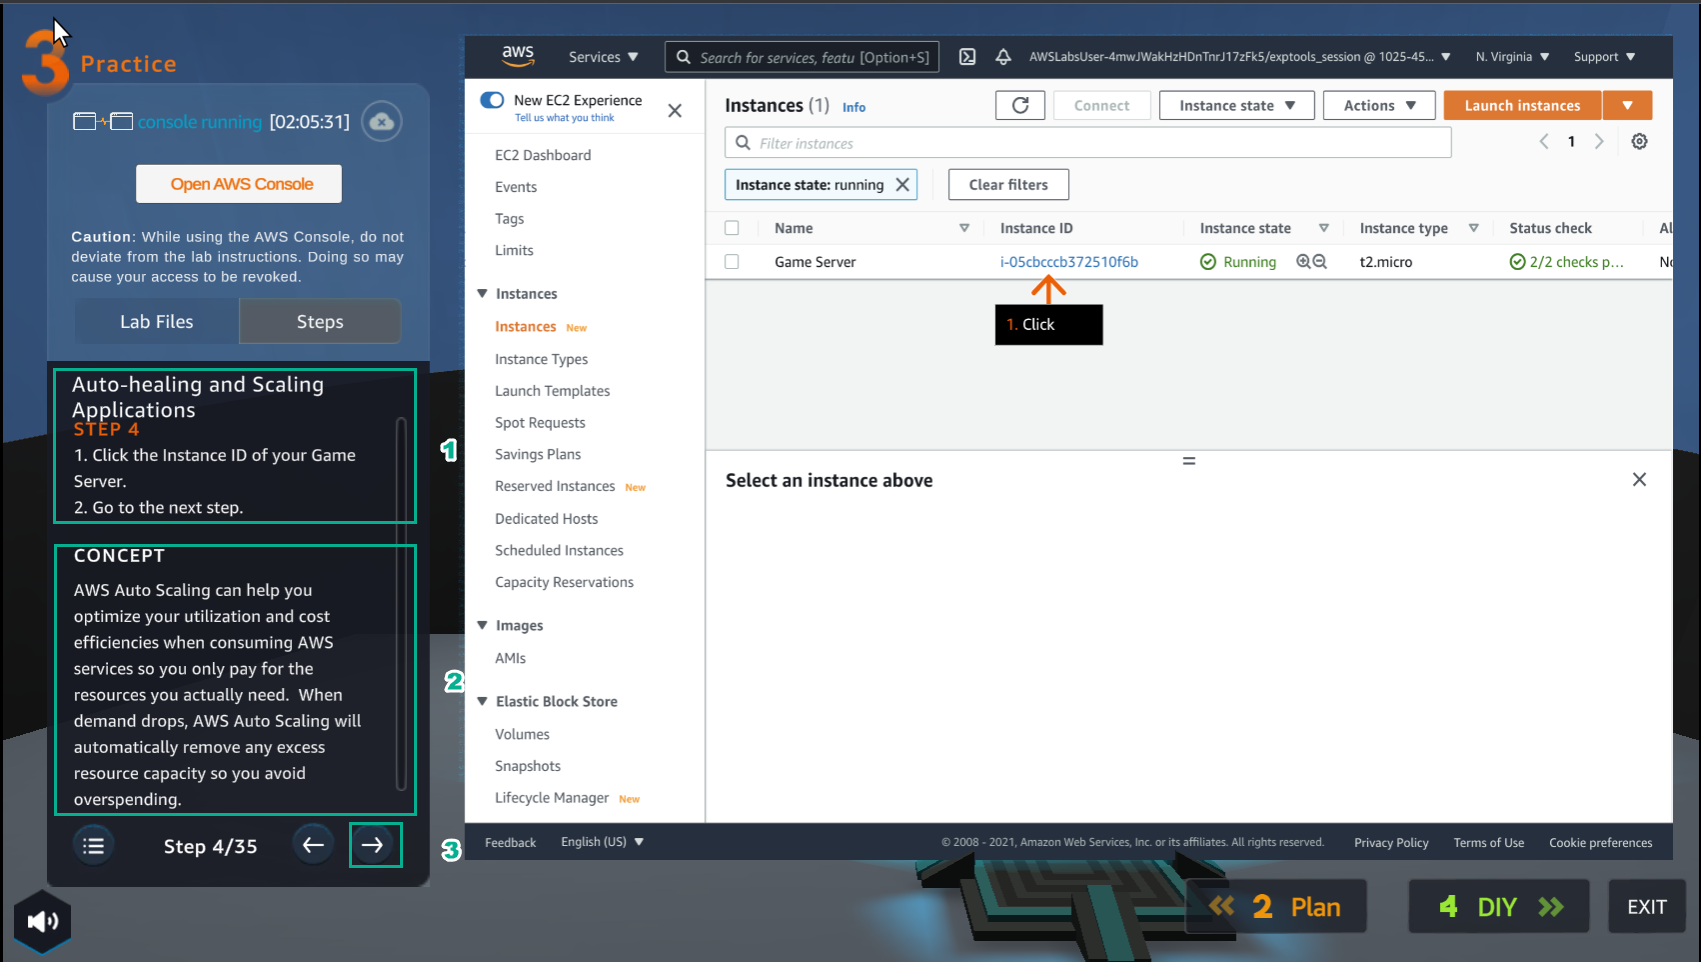
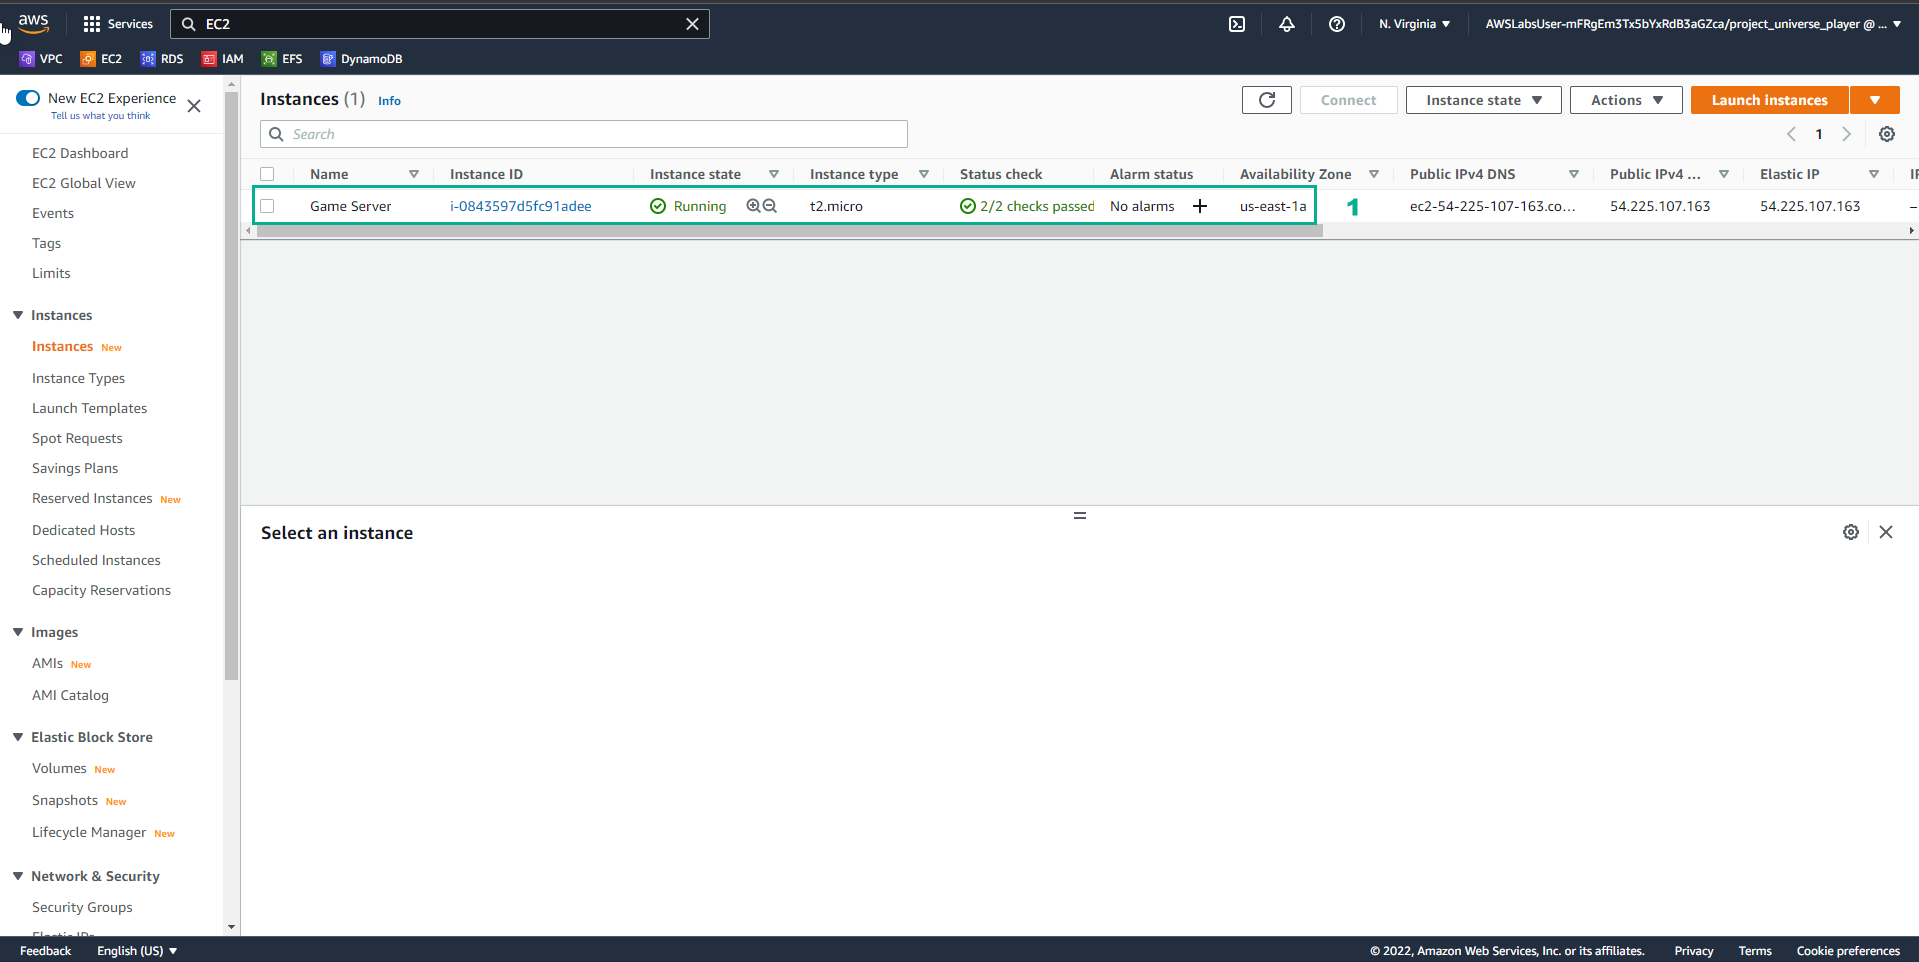
- In the Instances interface
- Select Game Server
- In the Practice interface
- Read step 5 of Auto-healing and Scaling Applications
- Read CONCEPT
- Select the arrow to the right to see the next steps
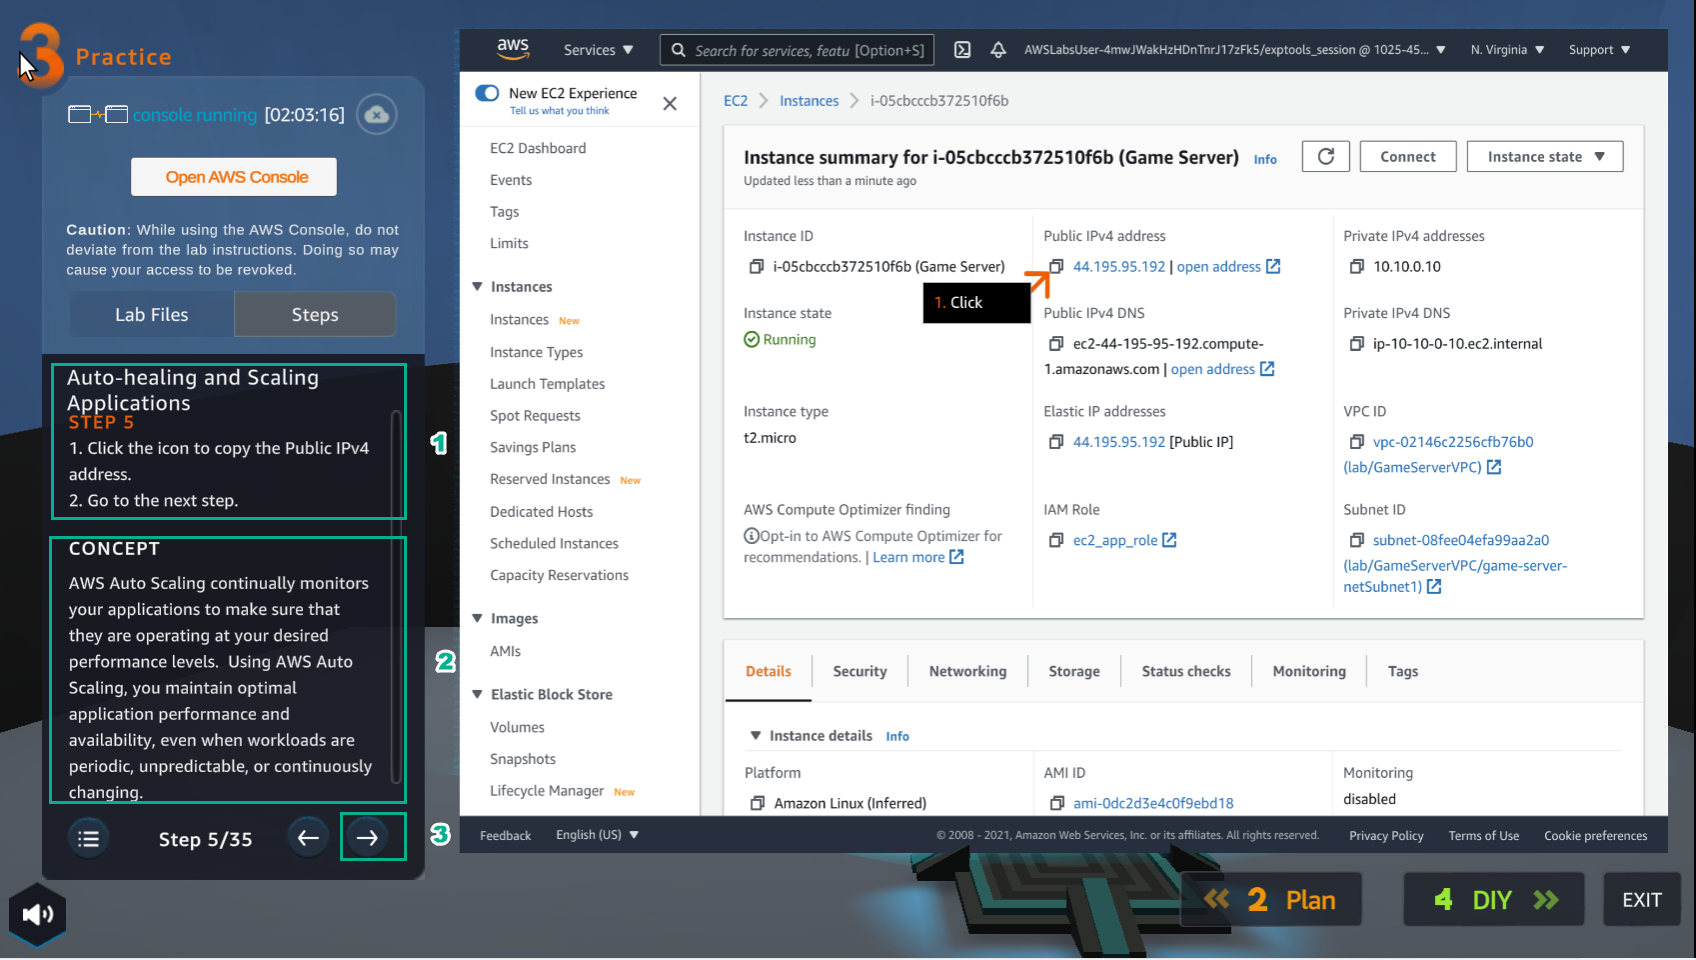
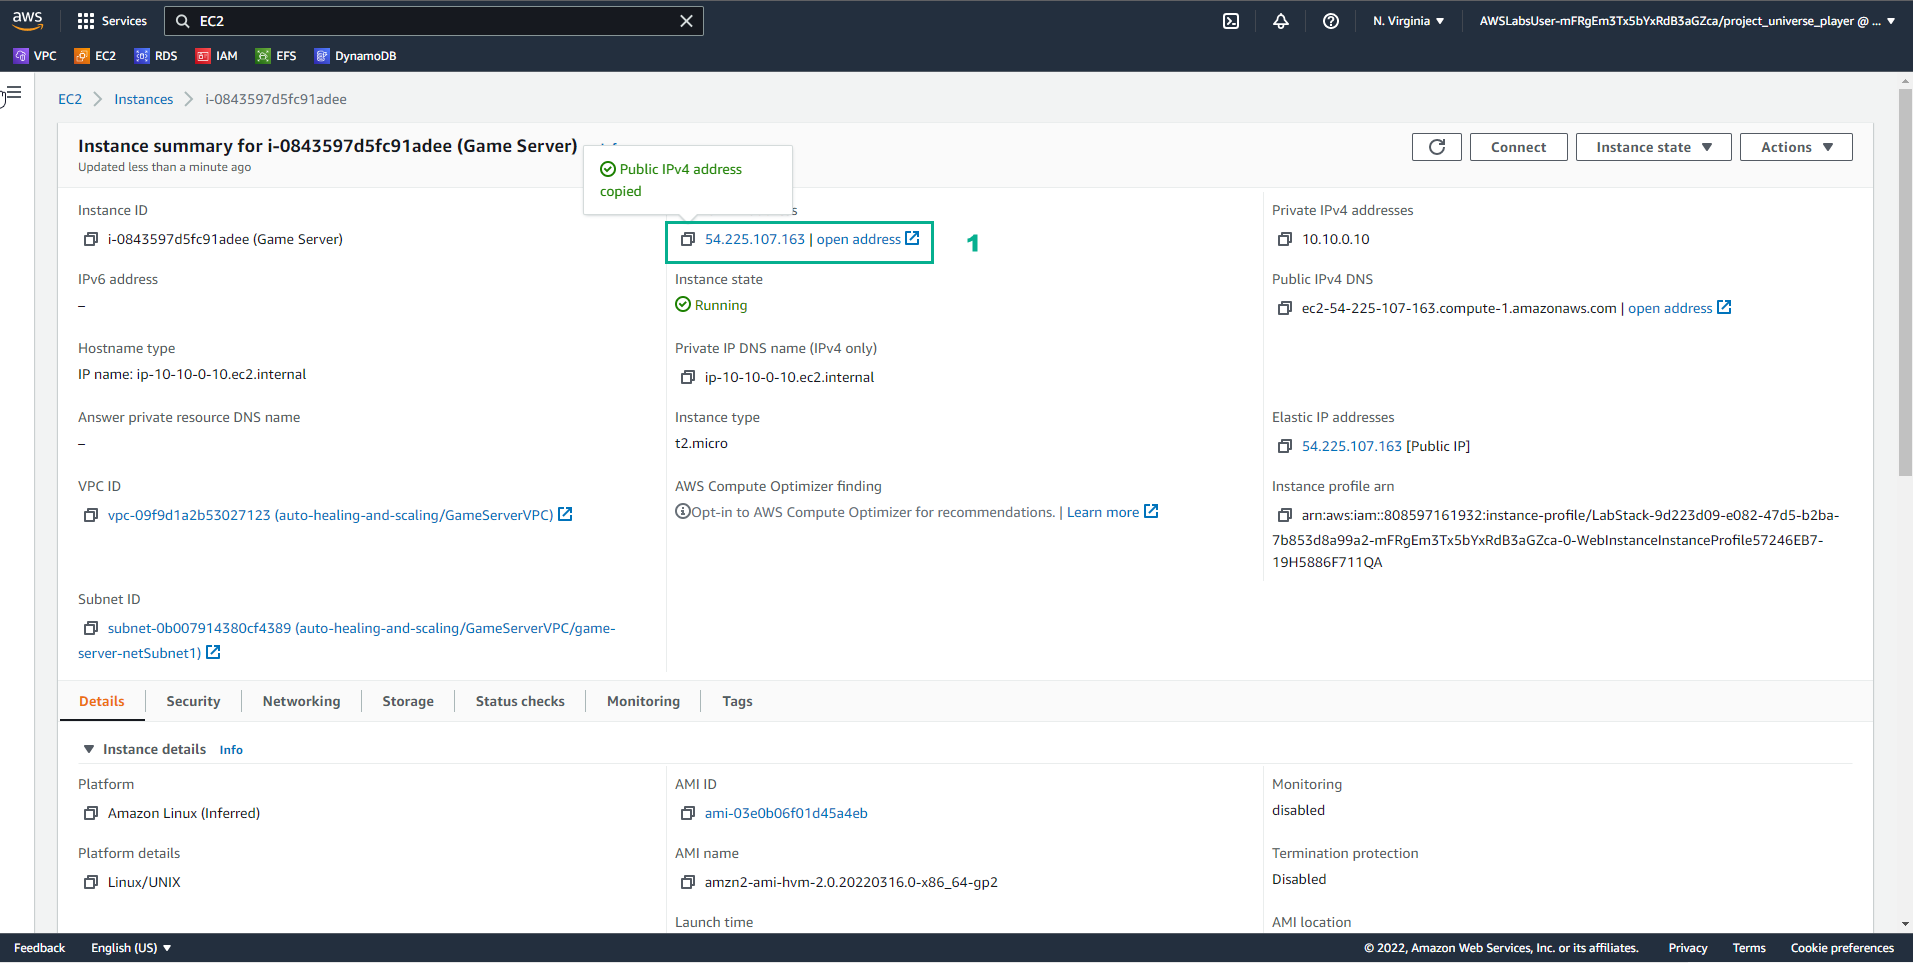
- In the Instances interface
- View details Game Server
- Copy Public IPv4 address
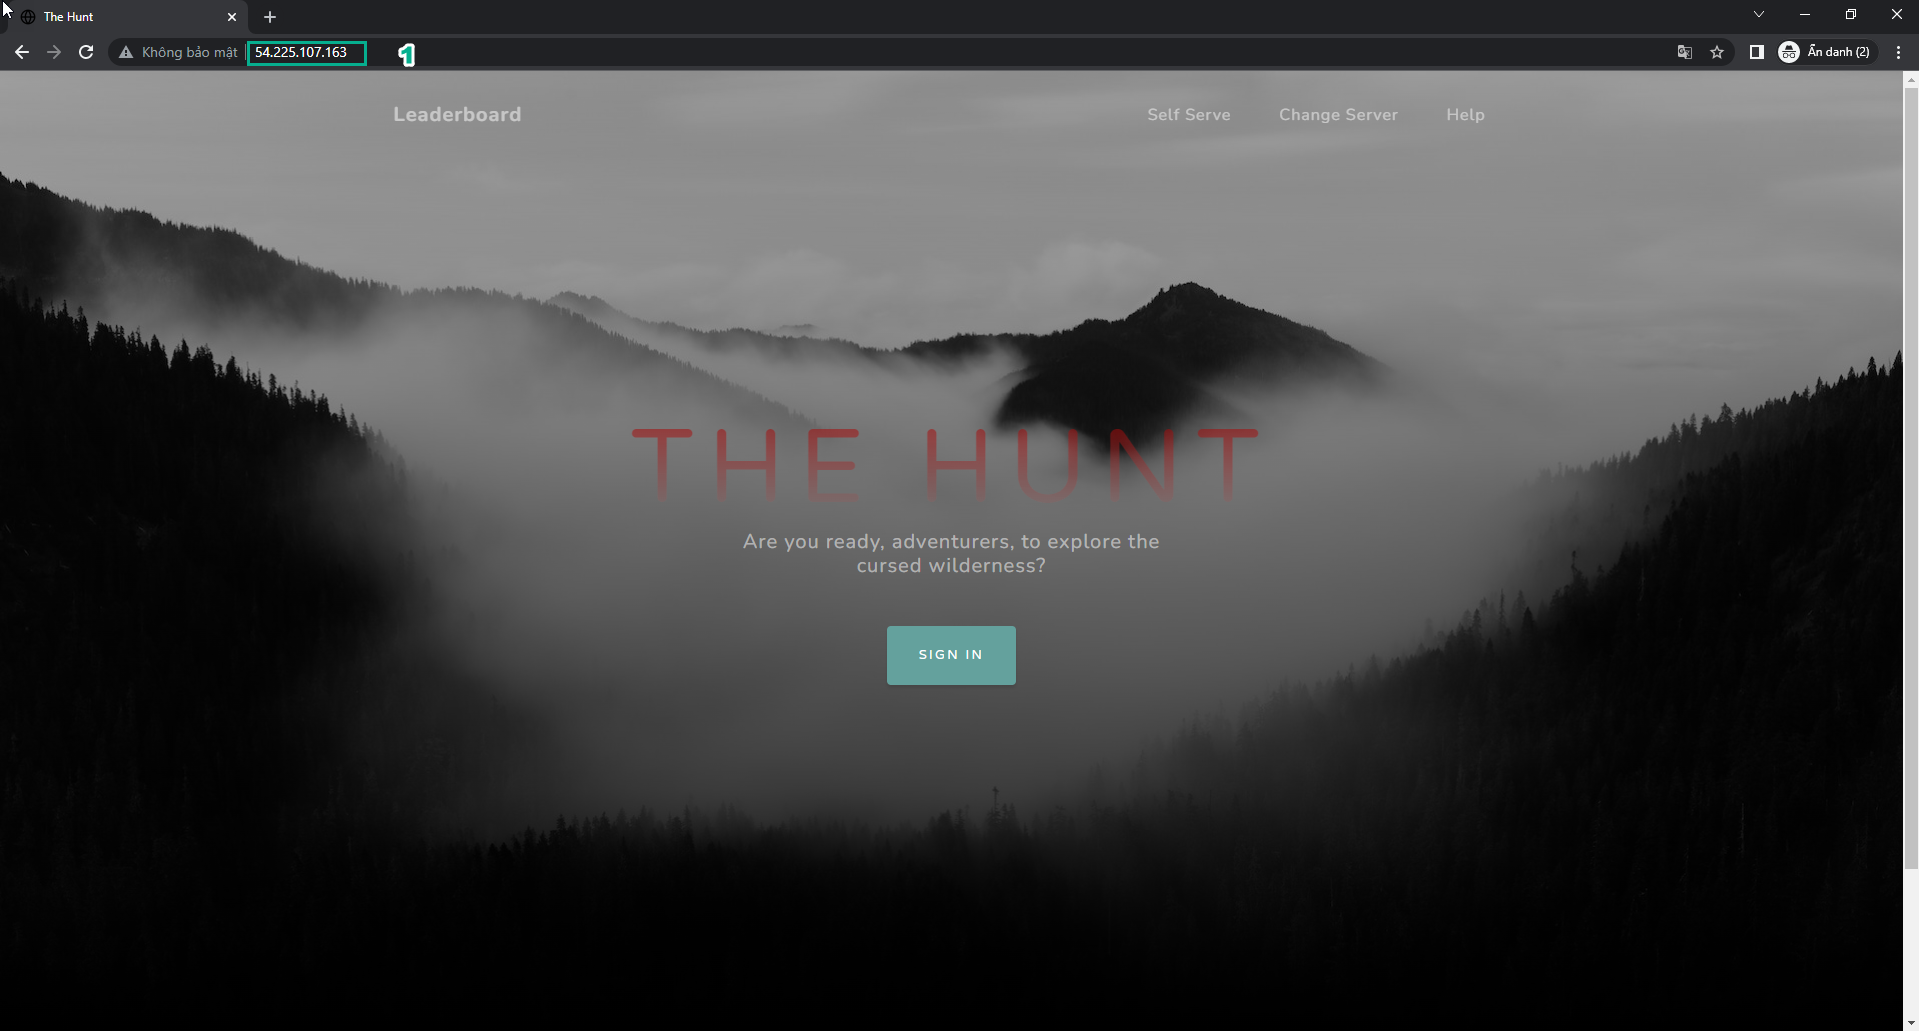
- Open the browser
- Paste Public IPv4 address
- Select Enter
- View results
- In the Practice interface
- Read step 7 of Auto-healing and Scaling Applications
- Read CONCEPT
- Select the arrow to the right to see the next steps
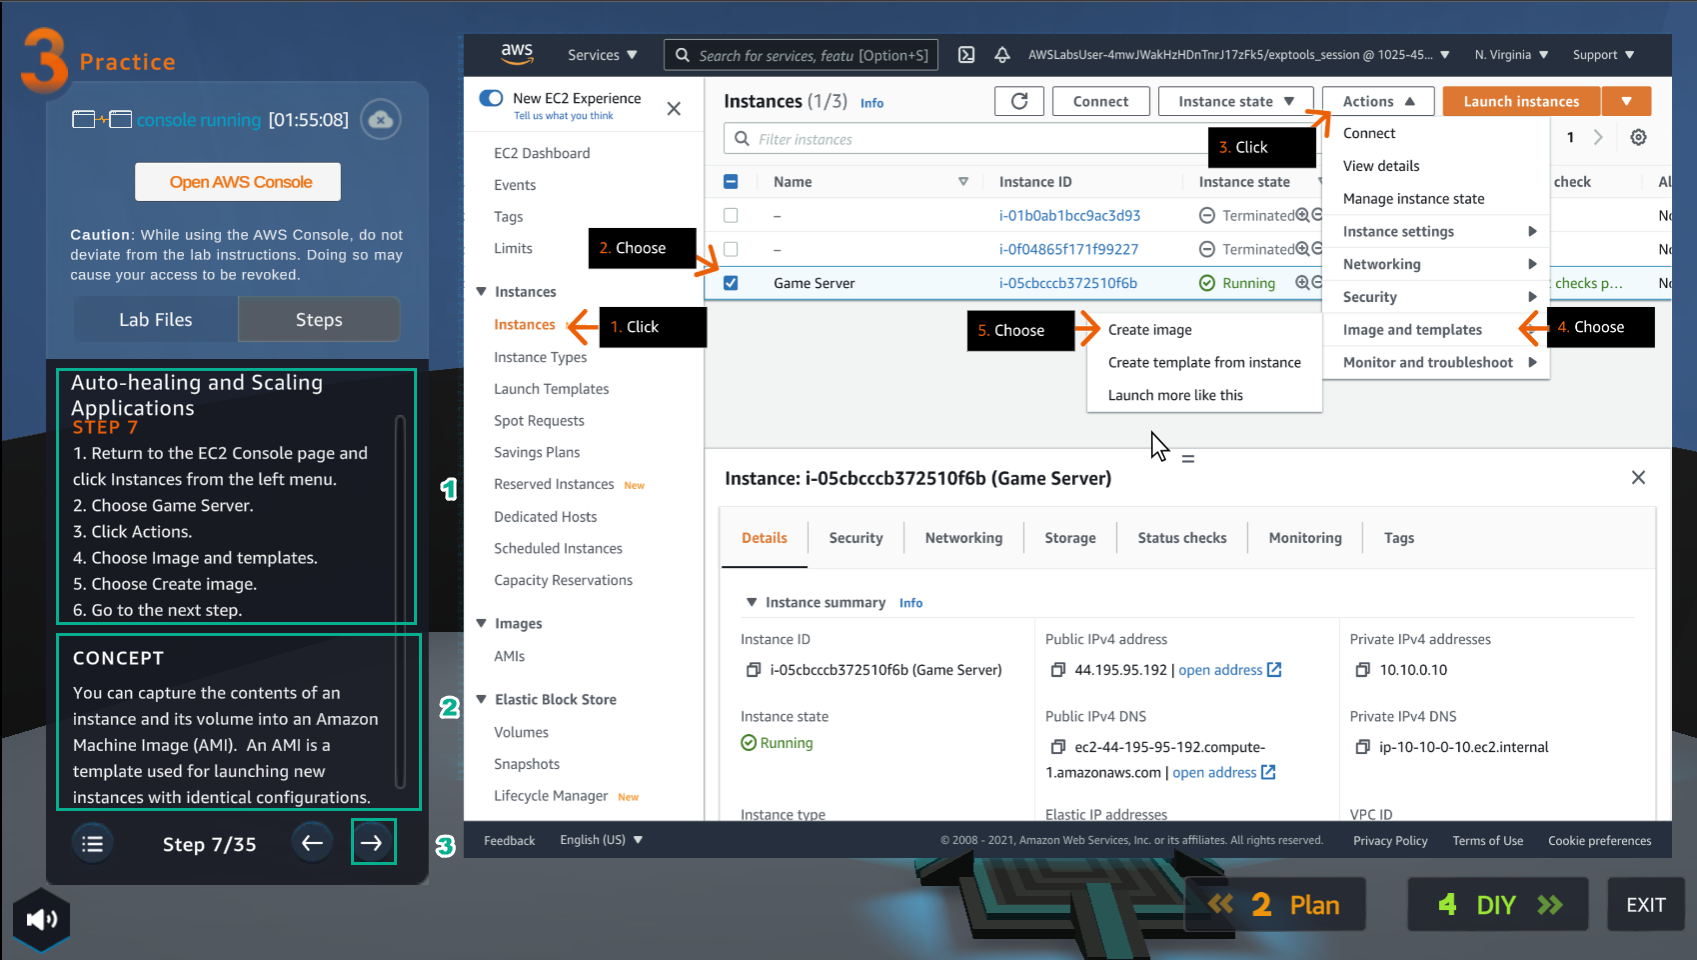
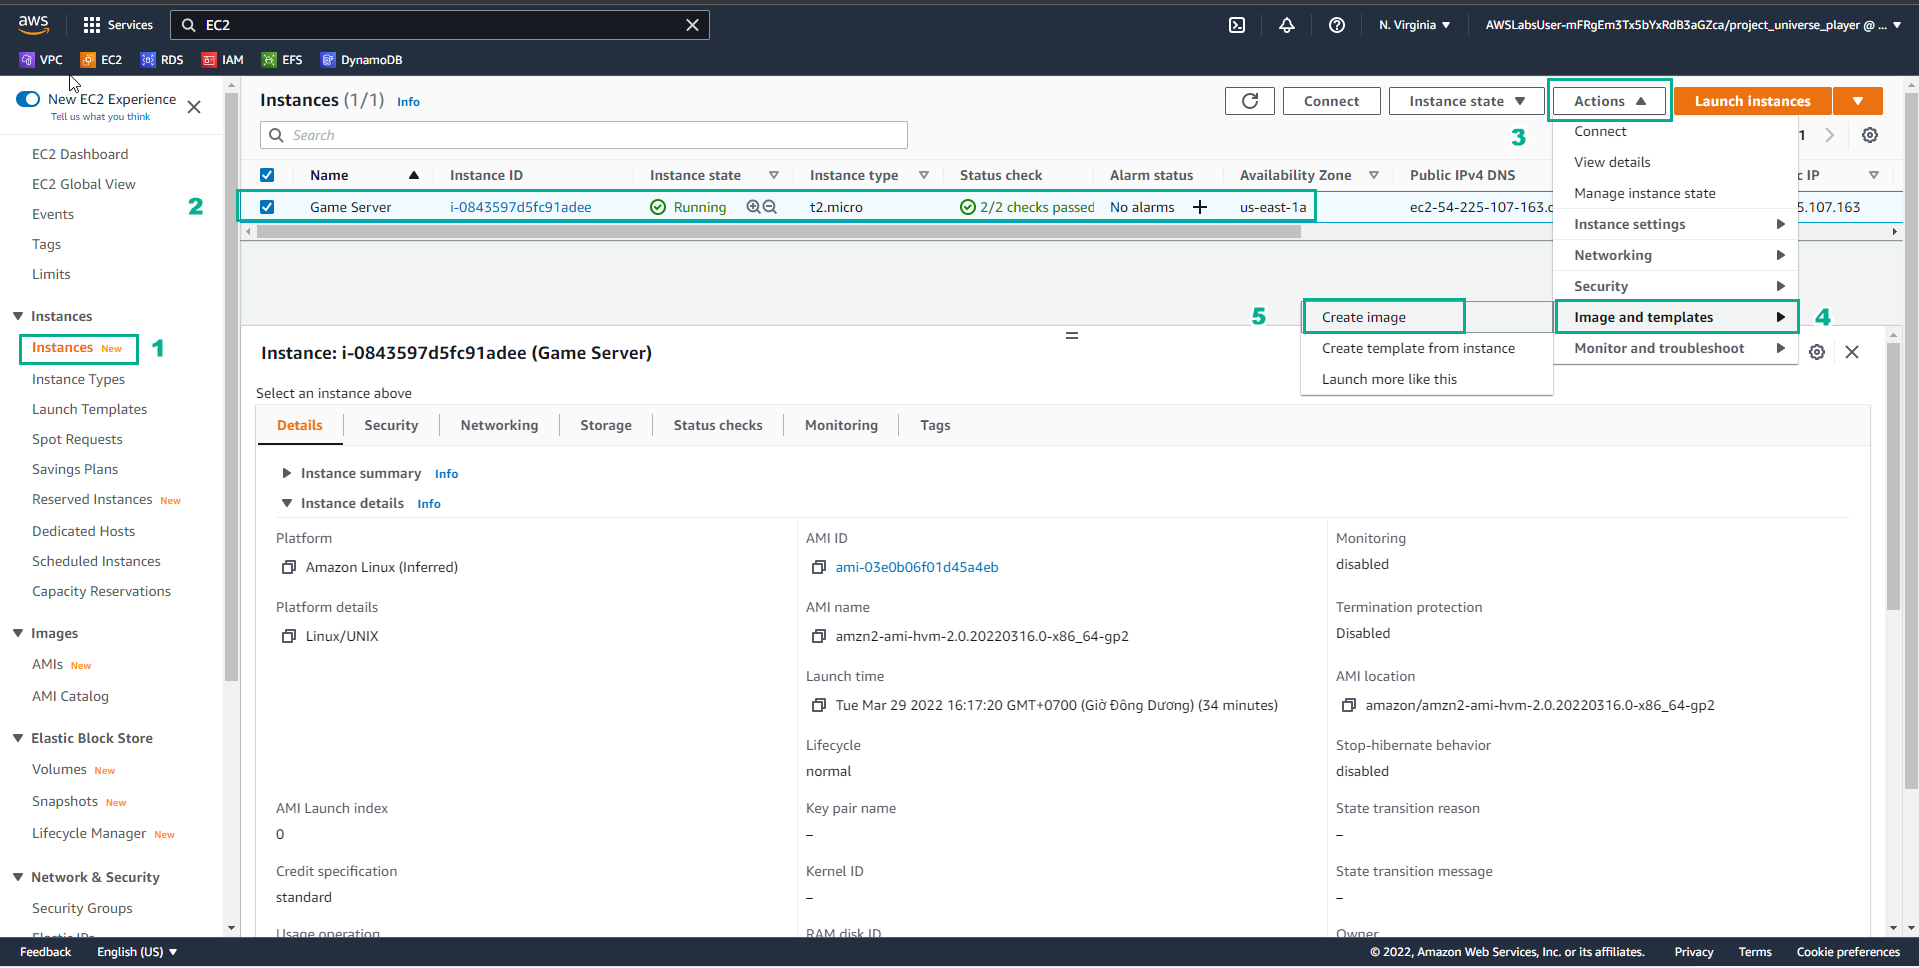
- In the EC2 interface
- Select Instances
- Select Game Server
- Select Actions
- Select Image and templates
- Select Create image
- In the Practice interface
- Read step 8 of Auto-healing and Scaling Applications
- Read CONCEPT
- Select the arrow to the right to see the next steps
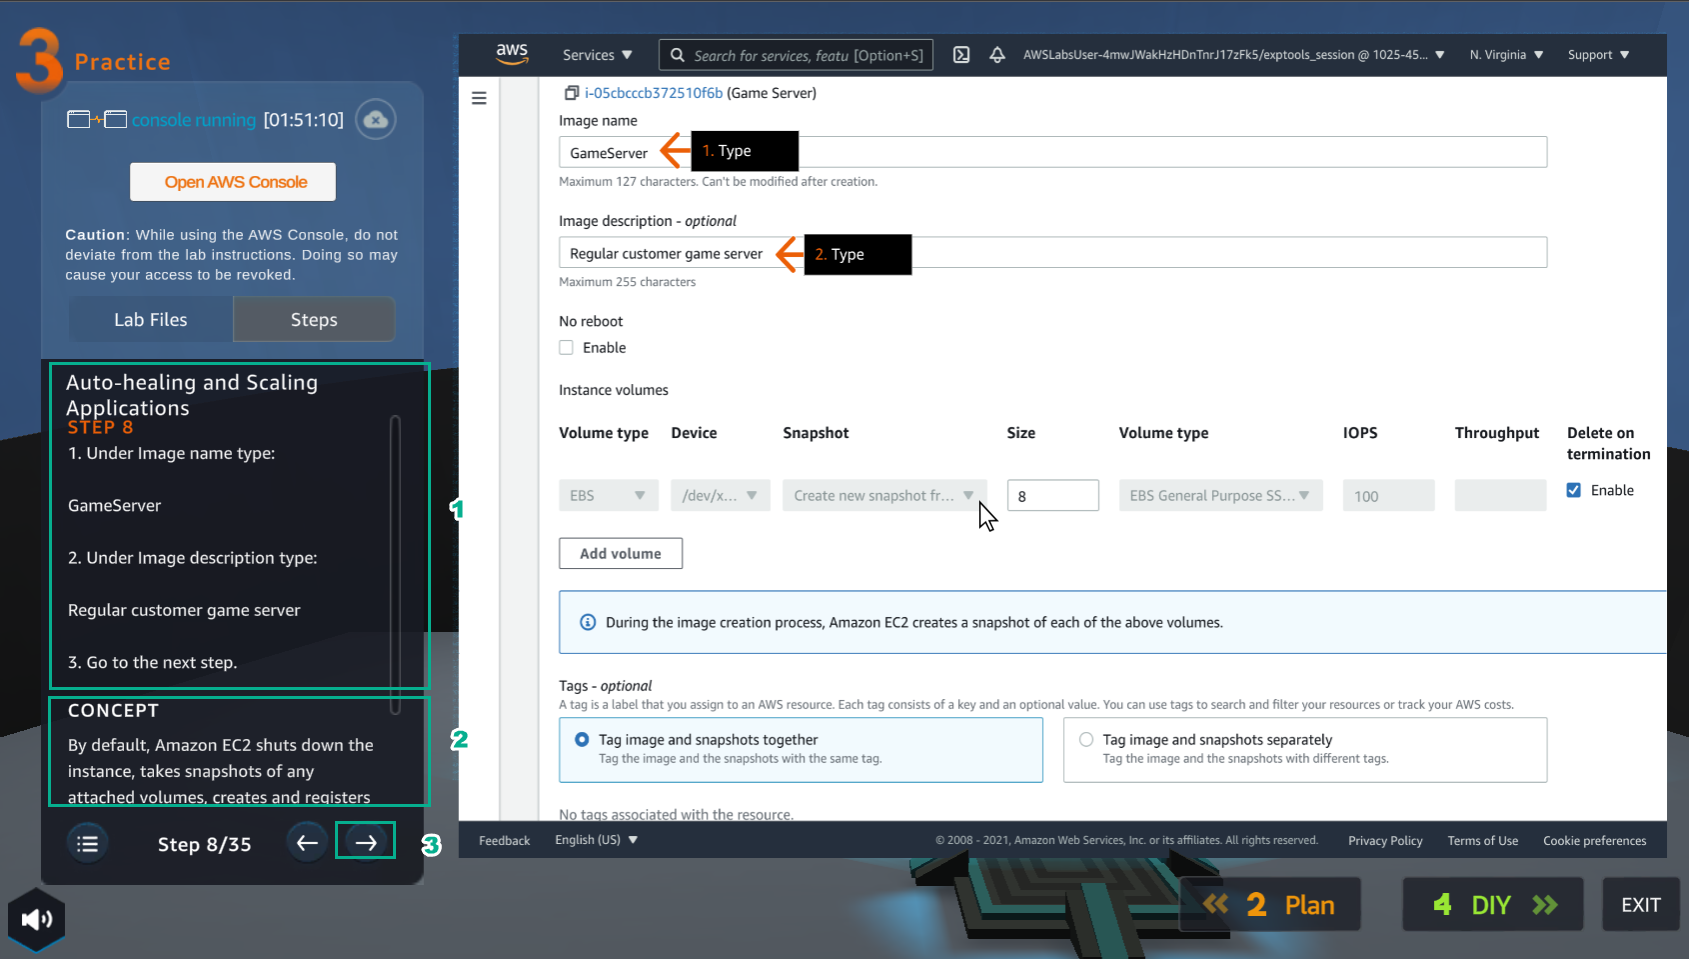
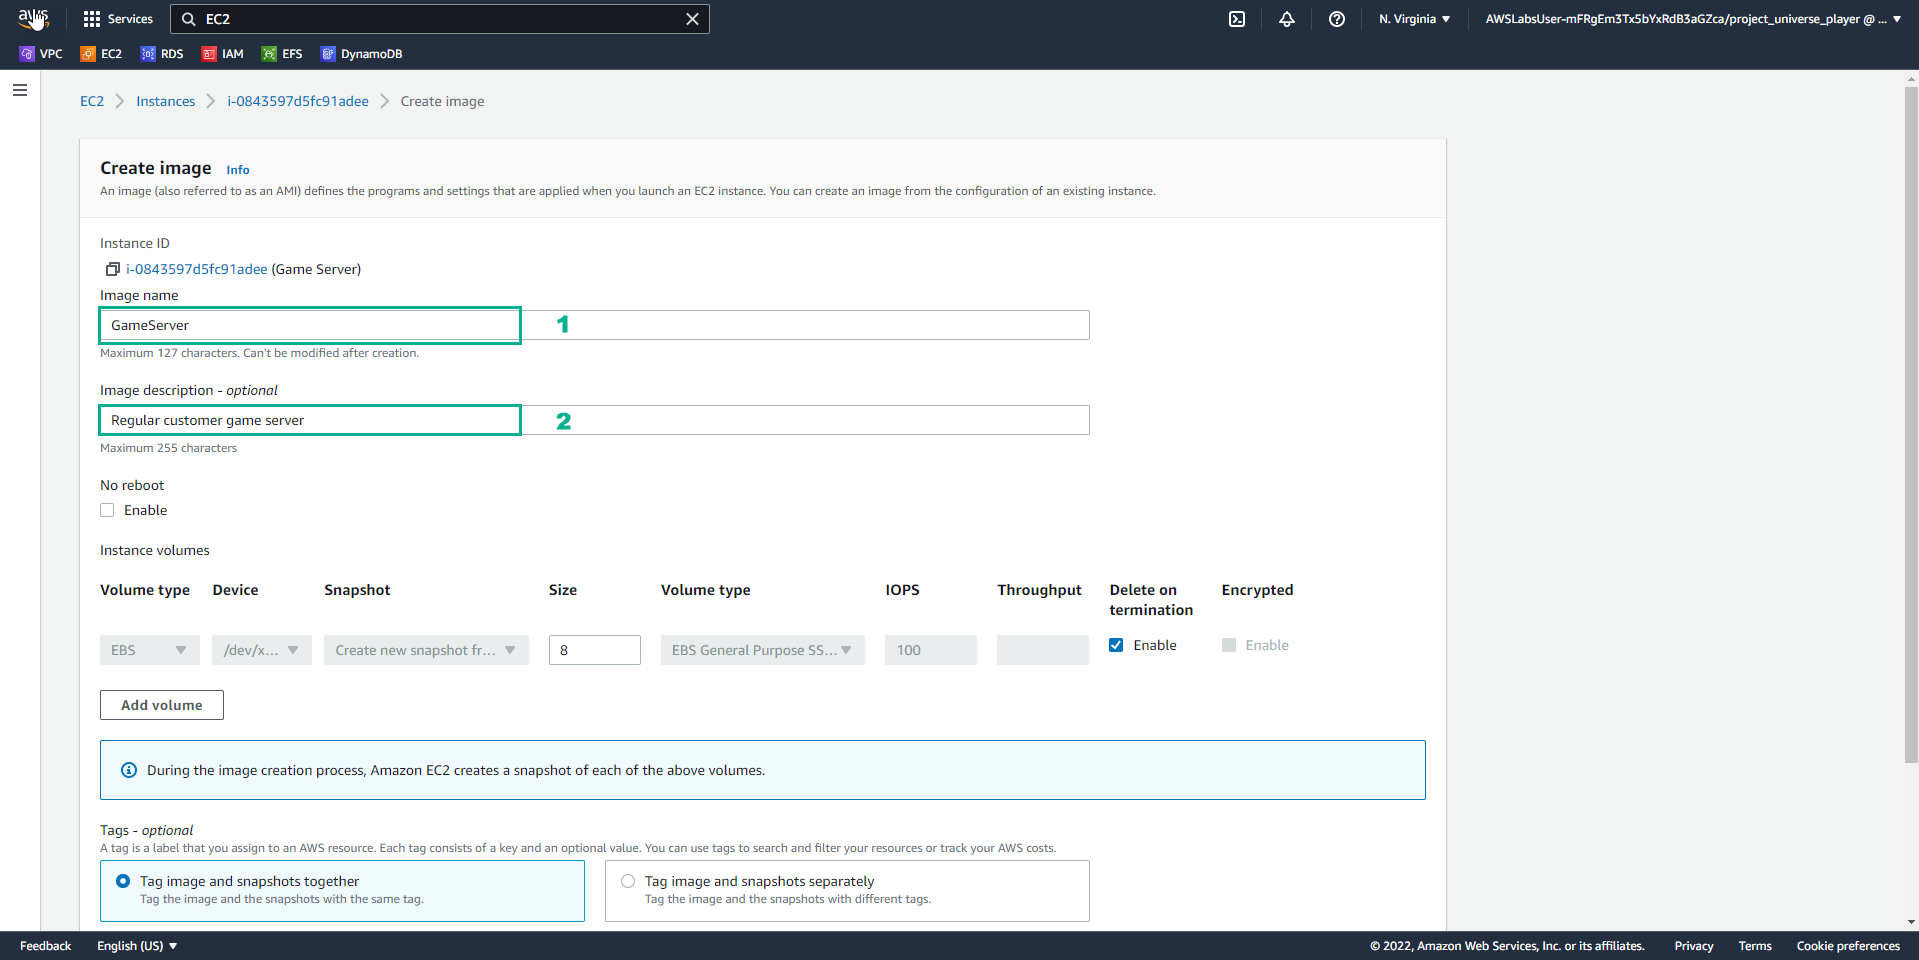
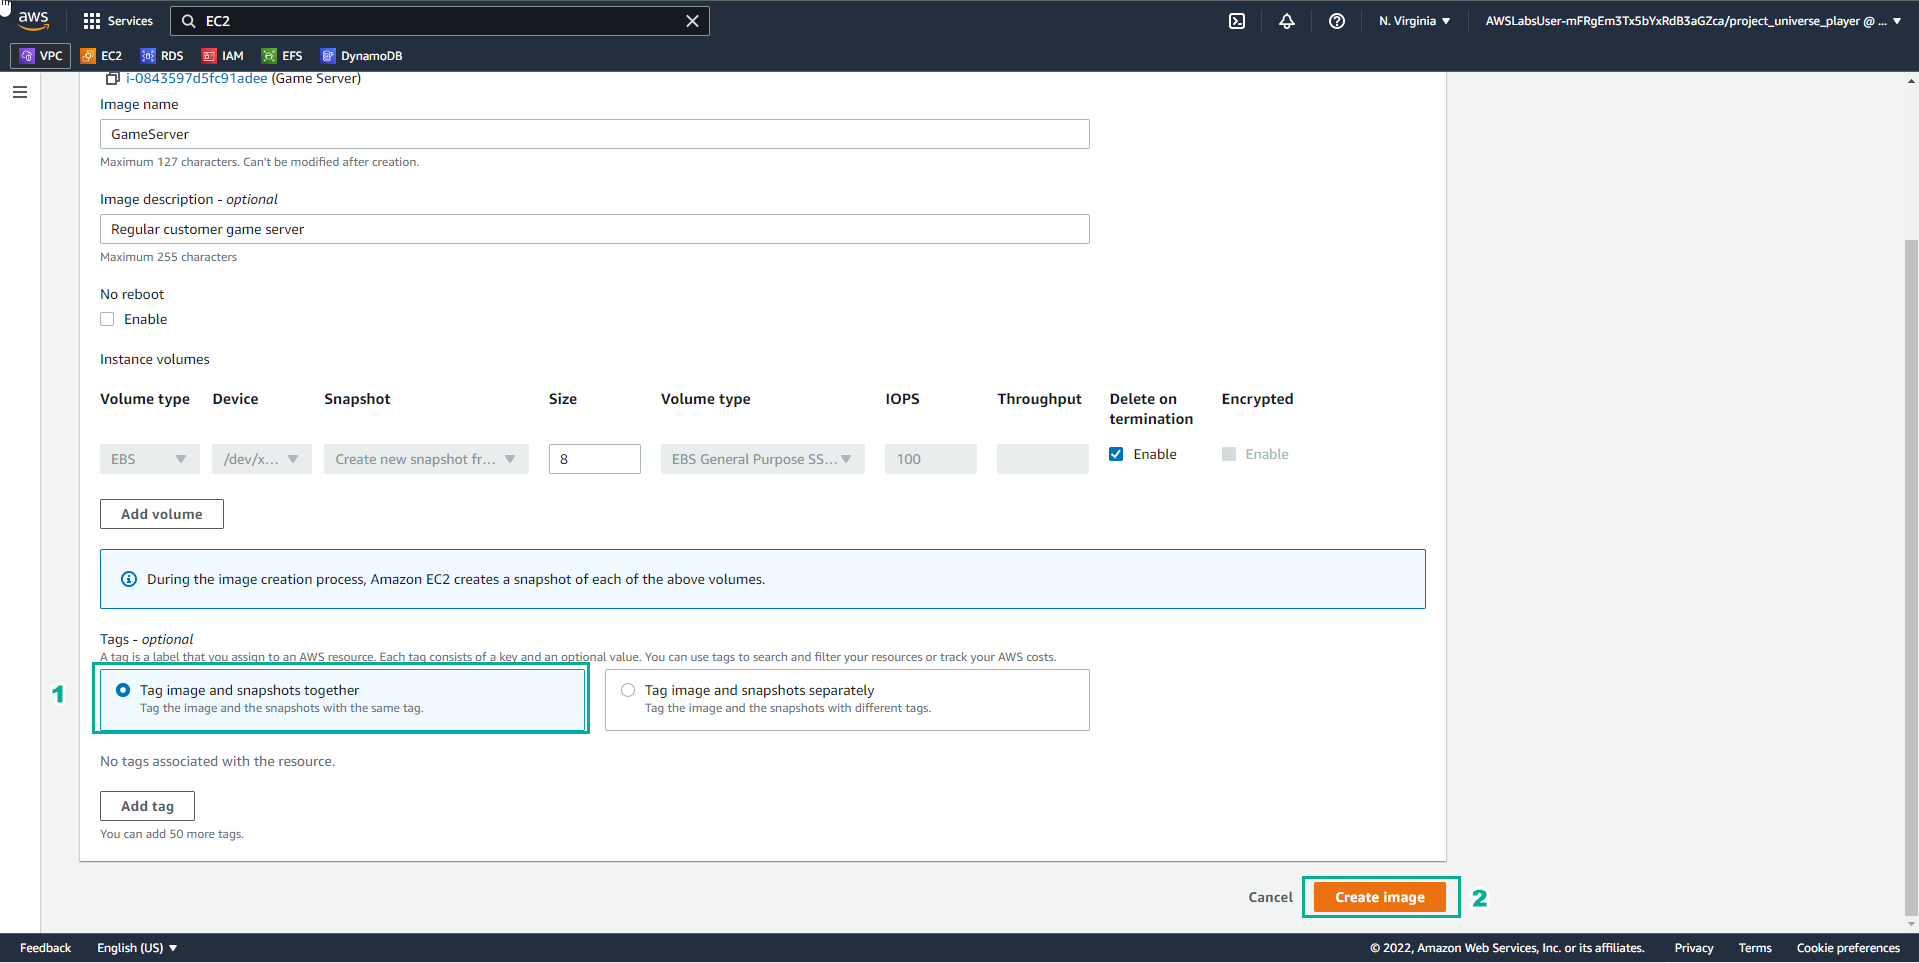
- In the Create image interface
- Image name, enter ```Game Server````
- Image description, enter
Regular customer game server
- In the Practice interface
- Read step 9 of Auto-healing and Scaling Applications
- Read CONCEPT
- Select the arrow to the right to see the next steps
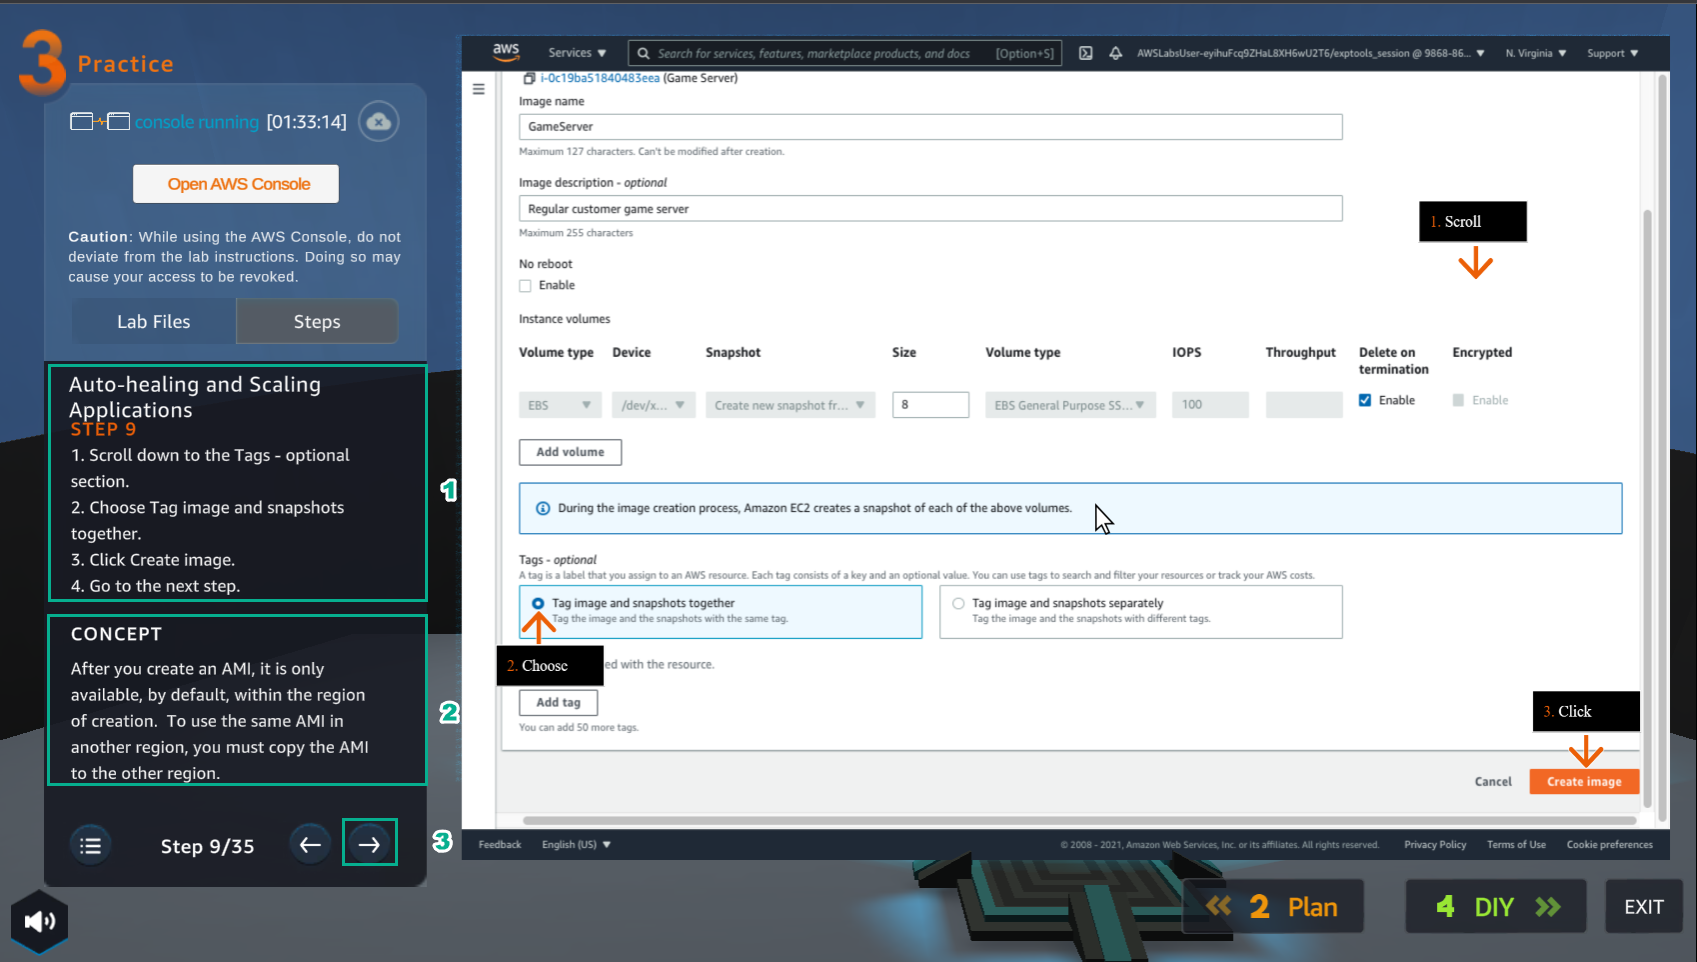
- In the Create image interface
- Tag, select Tag image and snapshots together
- Select Create image
- In the Practice interface
- Read step 10 of Auto-healing and Scaling Applications
- Select the arrow to the right to see the next steps
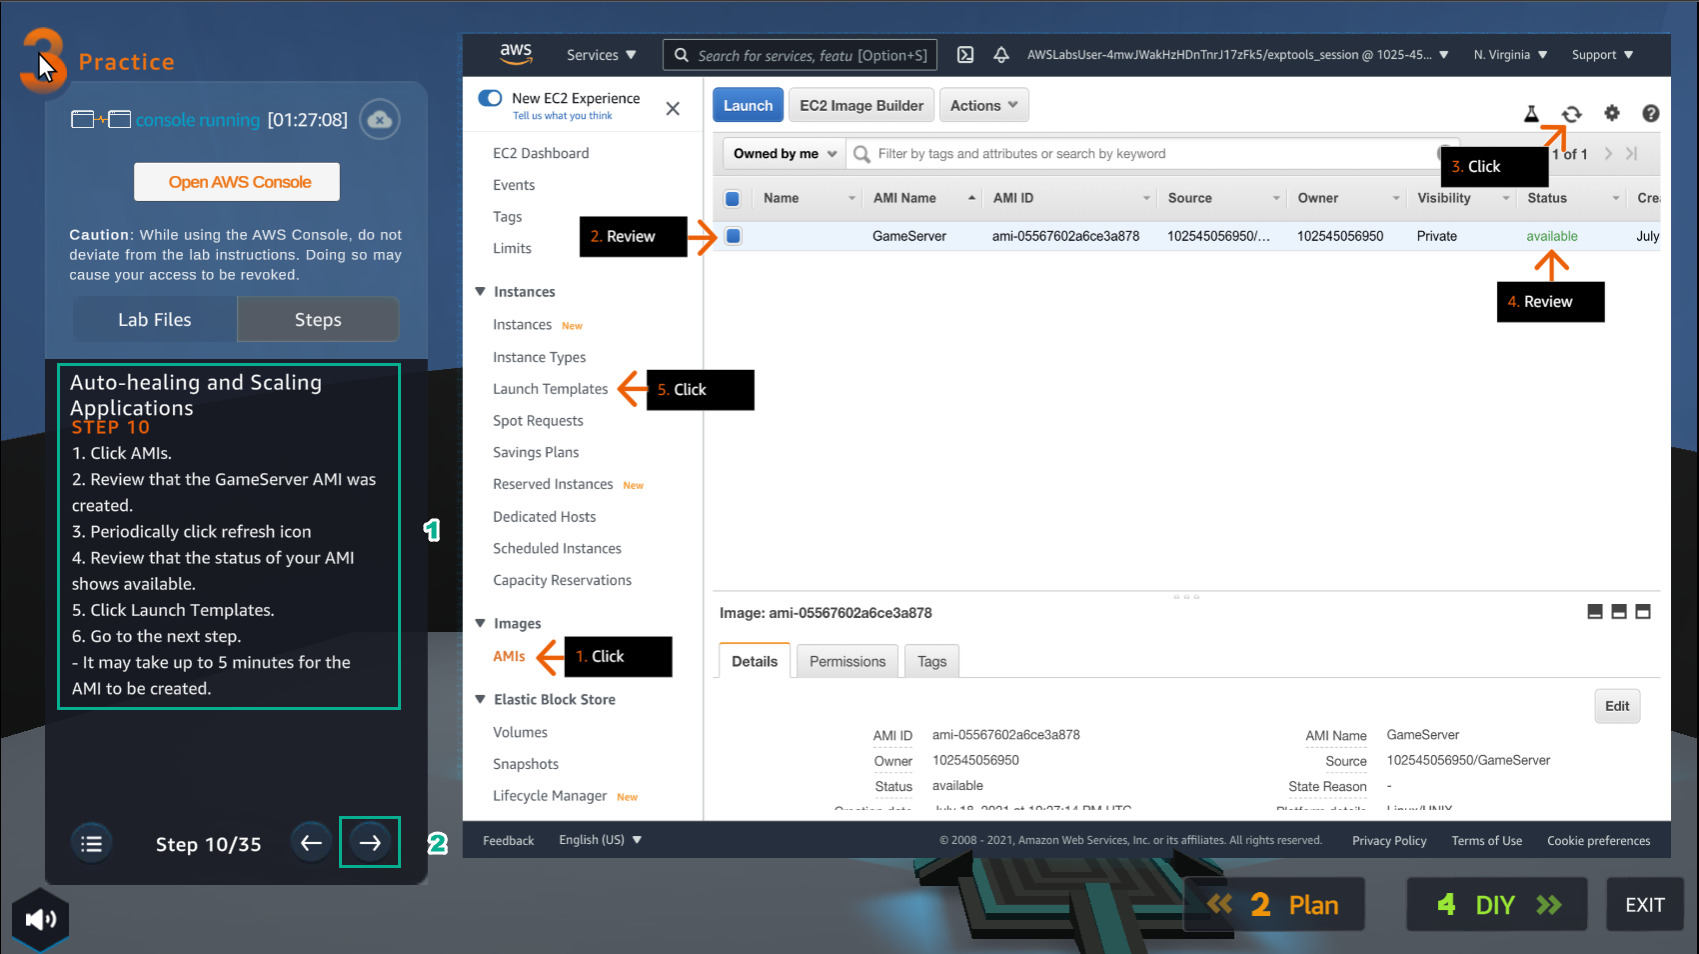
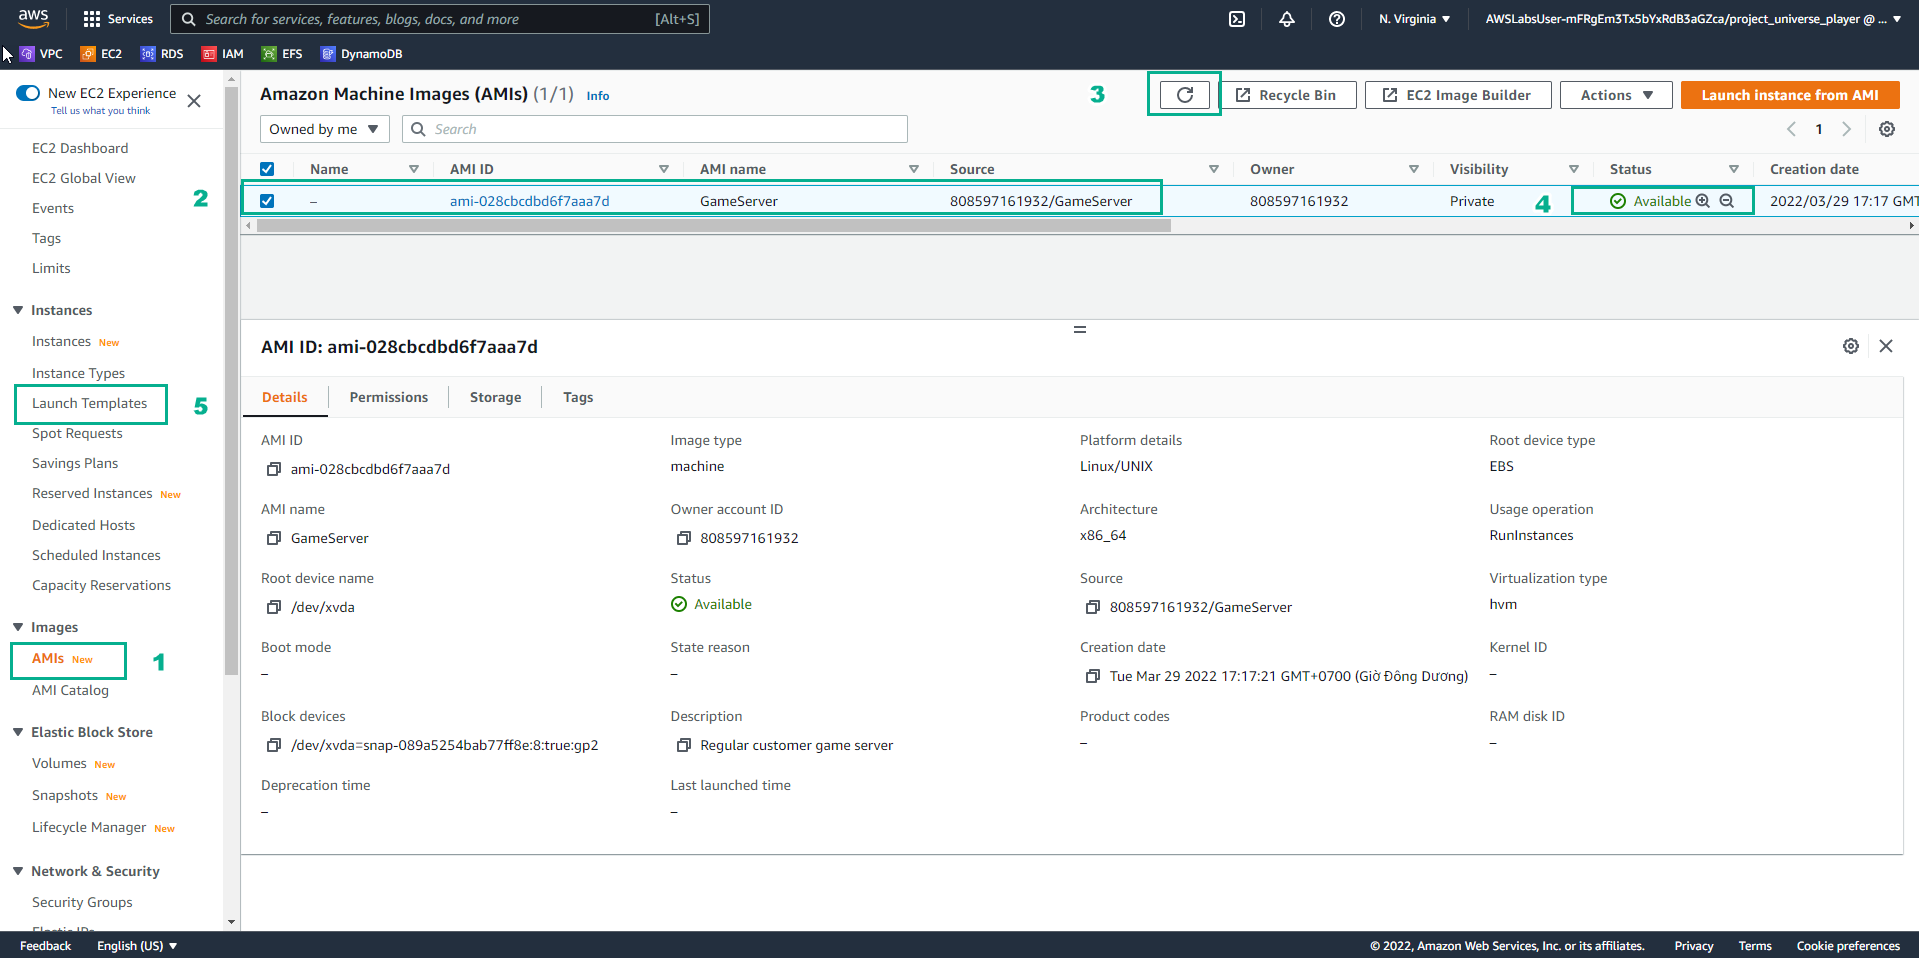
- In the EC2 interface
- Select AMIs*
- Select Game Server
- Select refresh
- View Status
- Select Launch Templates
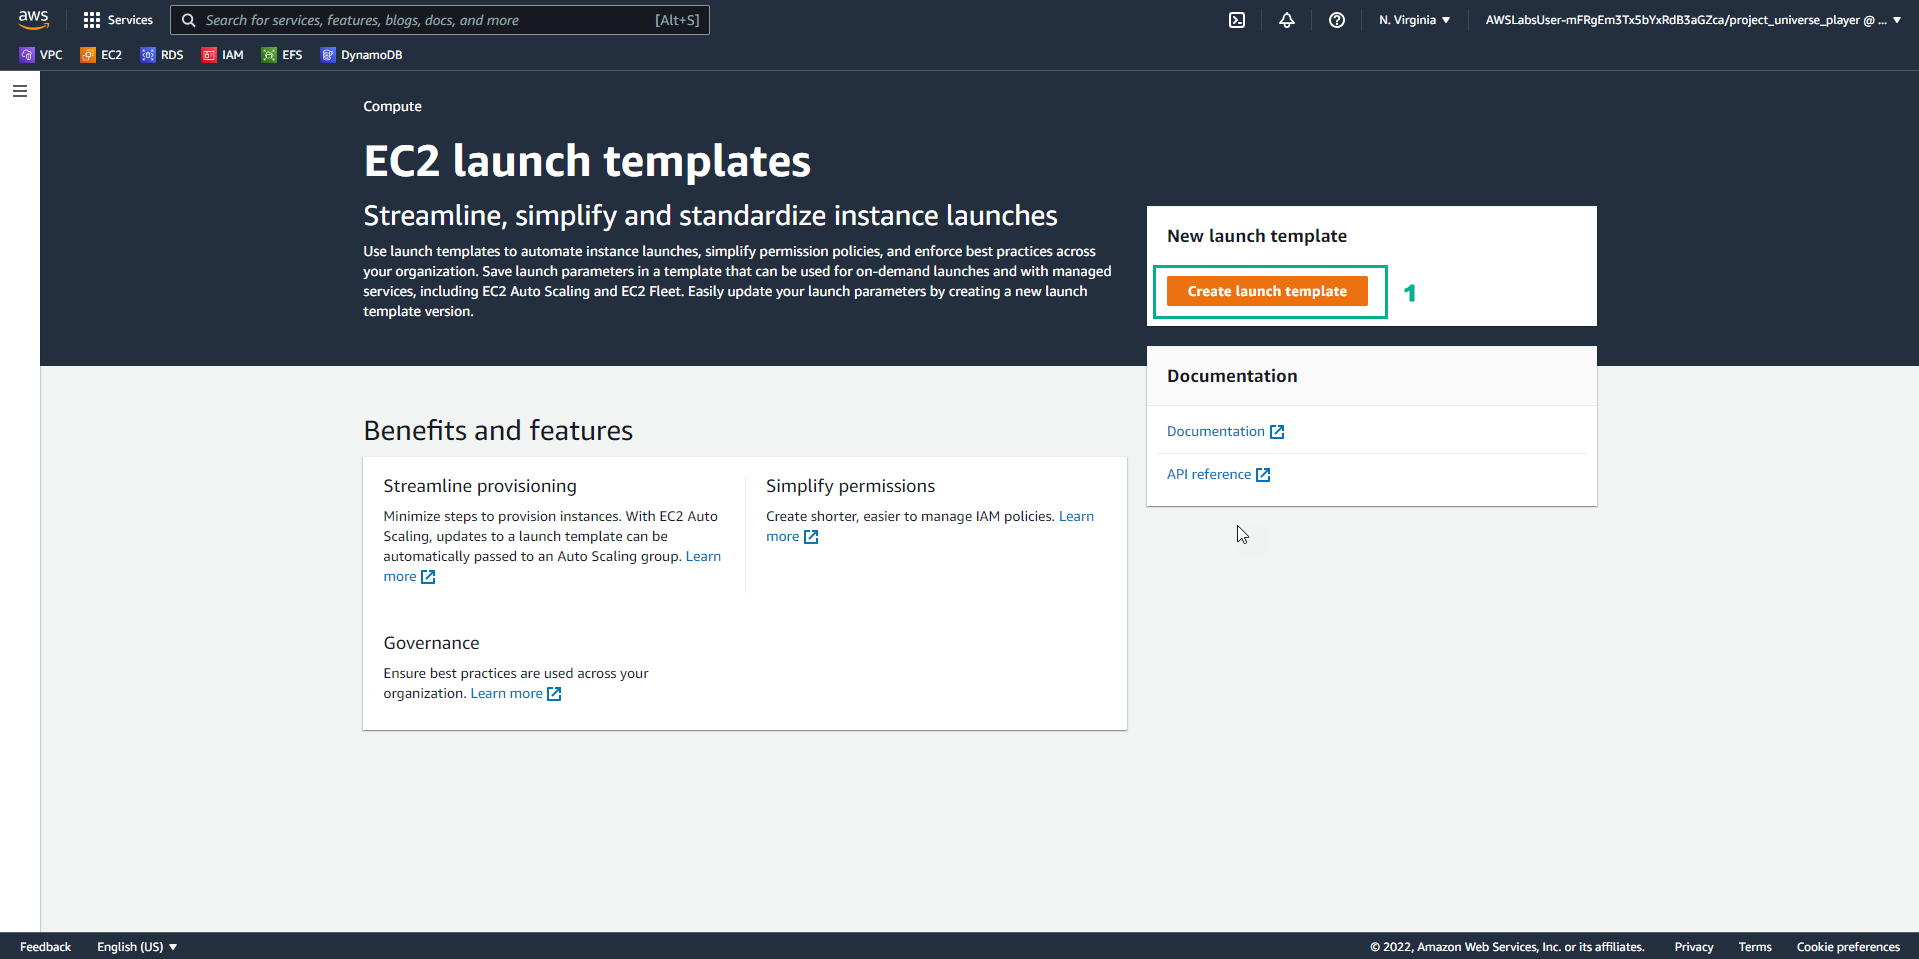
- In the Practice interface
- Read step 11 of Auto-healing and Scaling Applications
- Read CONCEPT
- Select the arrow to the right to see the next steps

- In the EC2 launch templates interface
- Select Create launch templates
- In the Practice interface
- Read step 12 of Auto-healing and Scaling Applications
- Read CONCEPT
- Select the arrow to the right to see the next steps
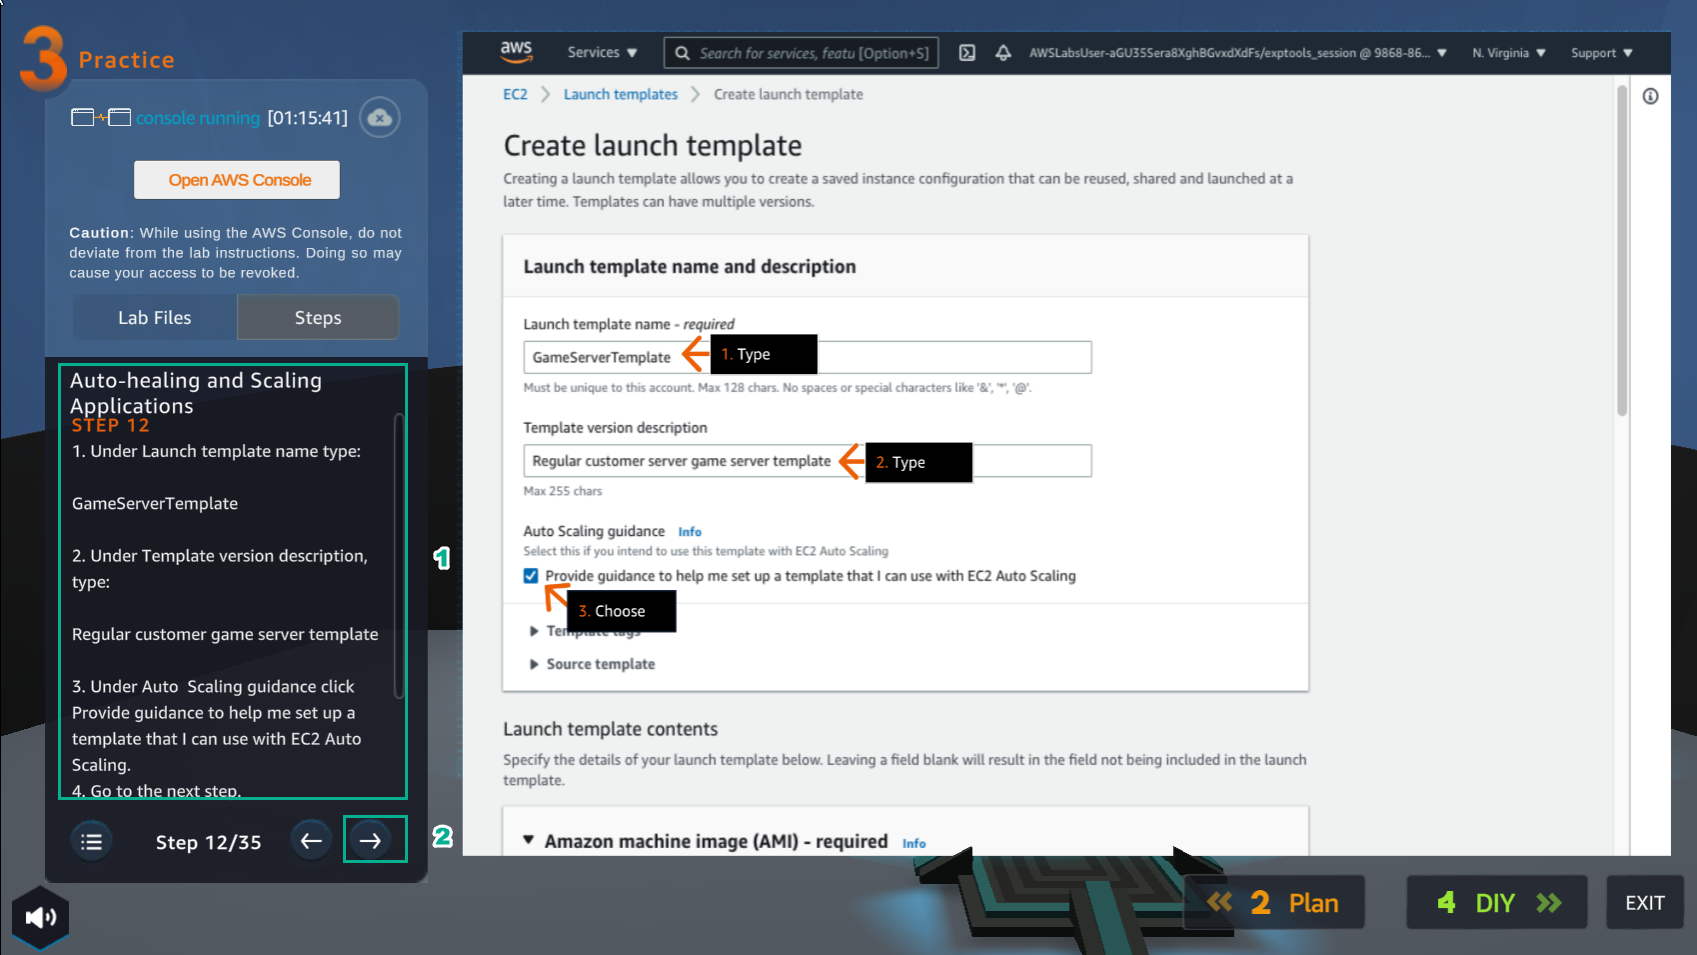
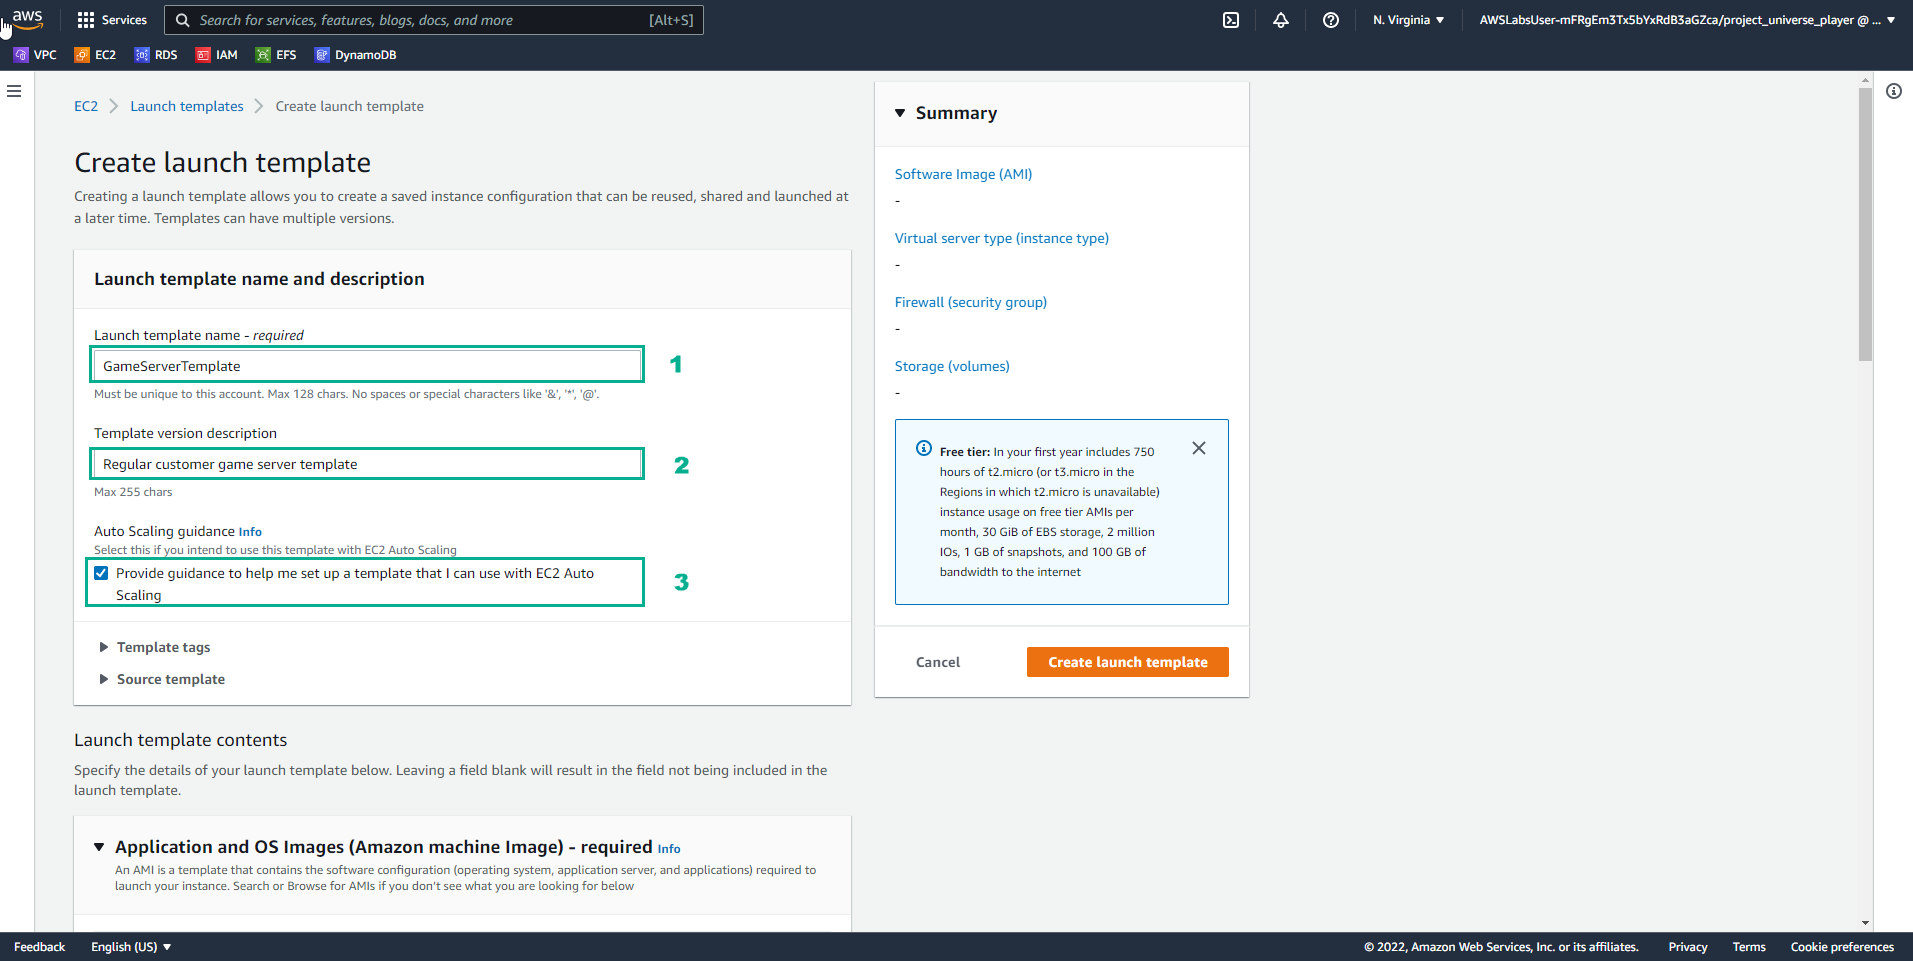
- In the interface Create lauch template
- Launch template name, enter
GameServerTemplate - Template version description, enter
Regular customer game server template - Uncheck Provide guidance to help me set up a template tht I can use with EC2 Auto Scaling
- In the Practice interface
- Read step 13 of Auto-healing and Scaling Applications
- Read CONCEPT
- Select the arrow to the right to see the next steps
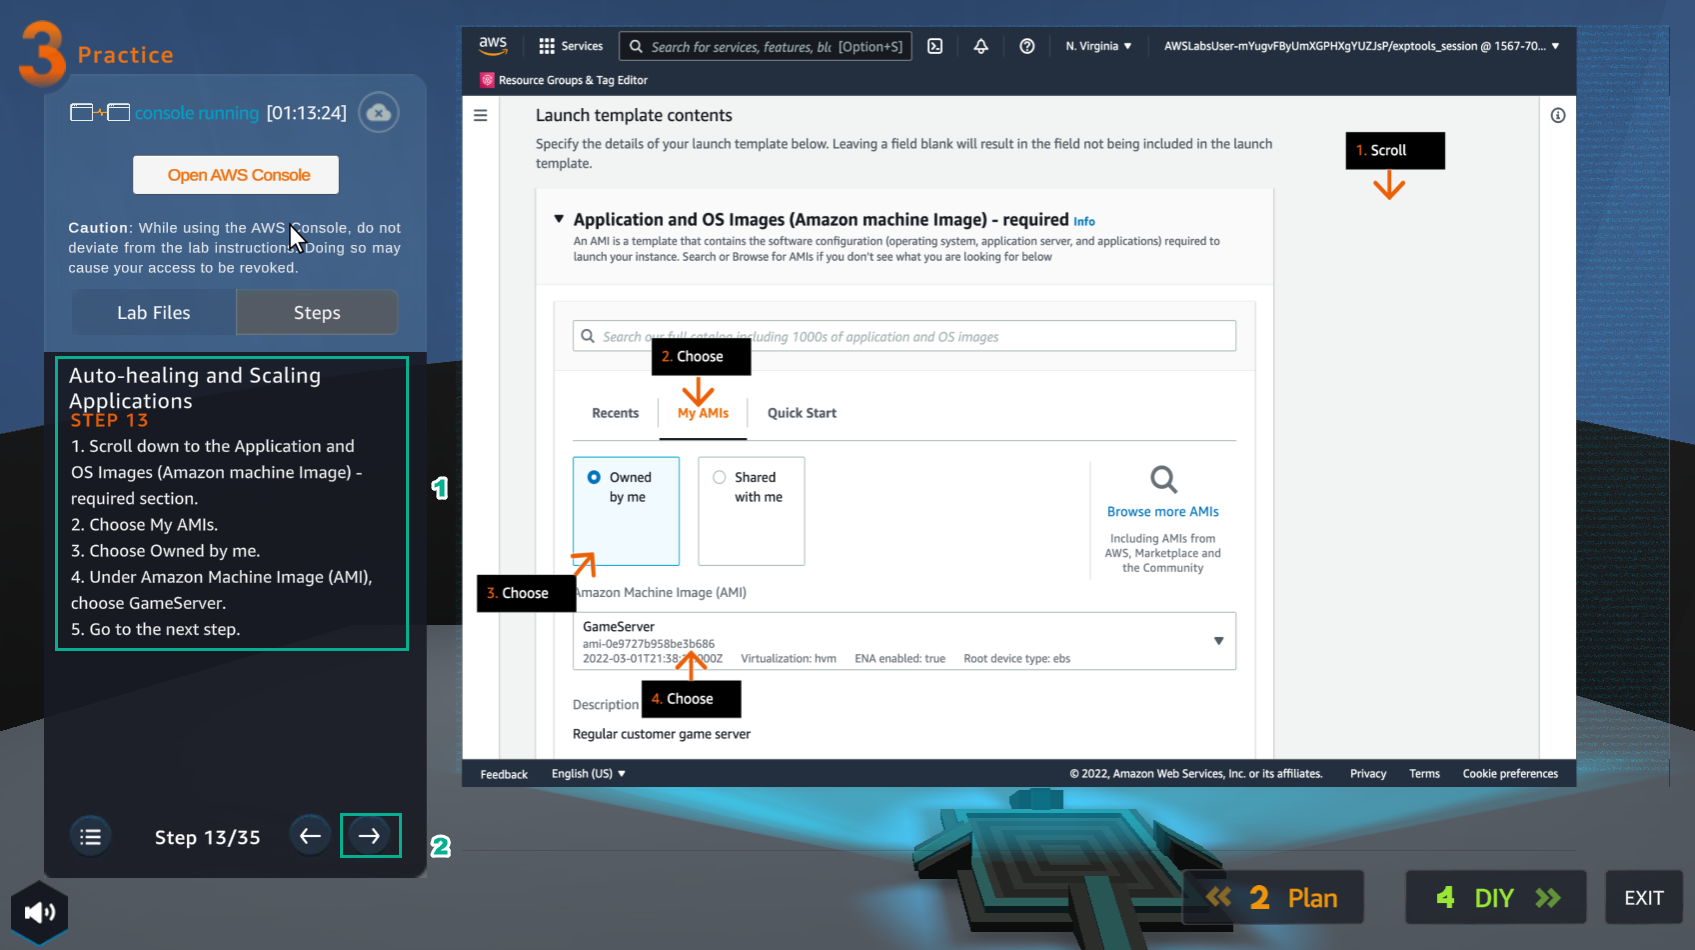
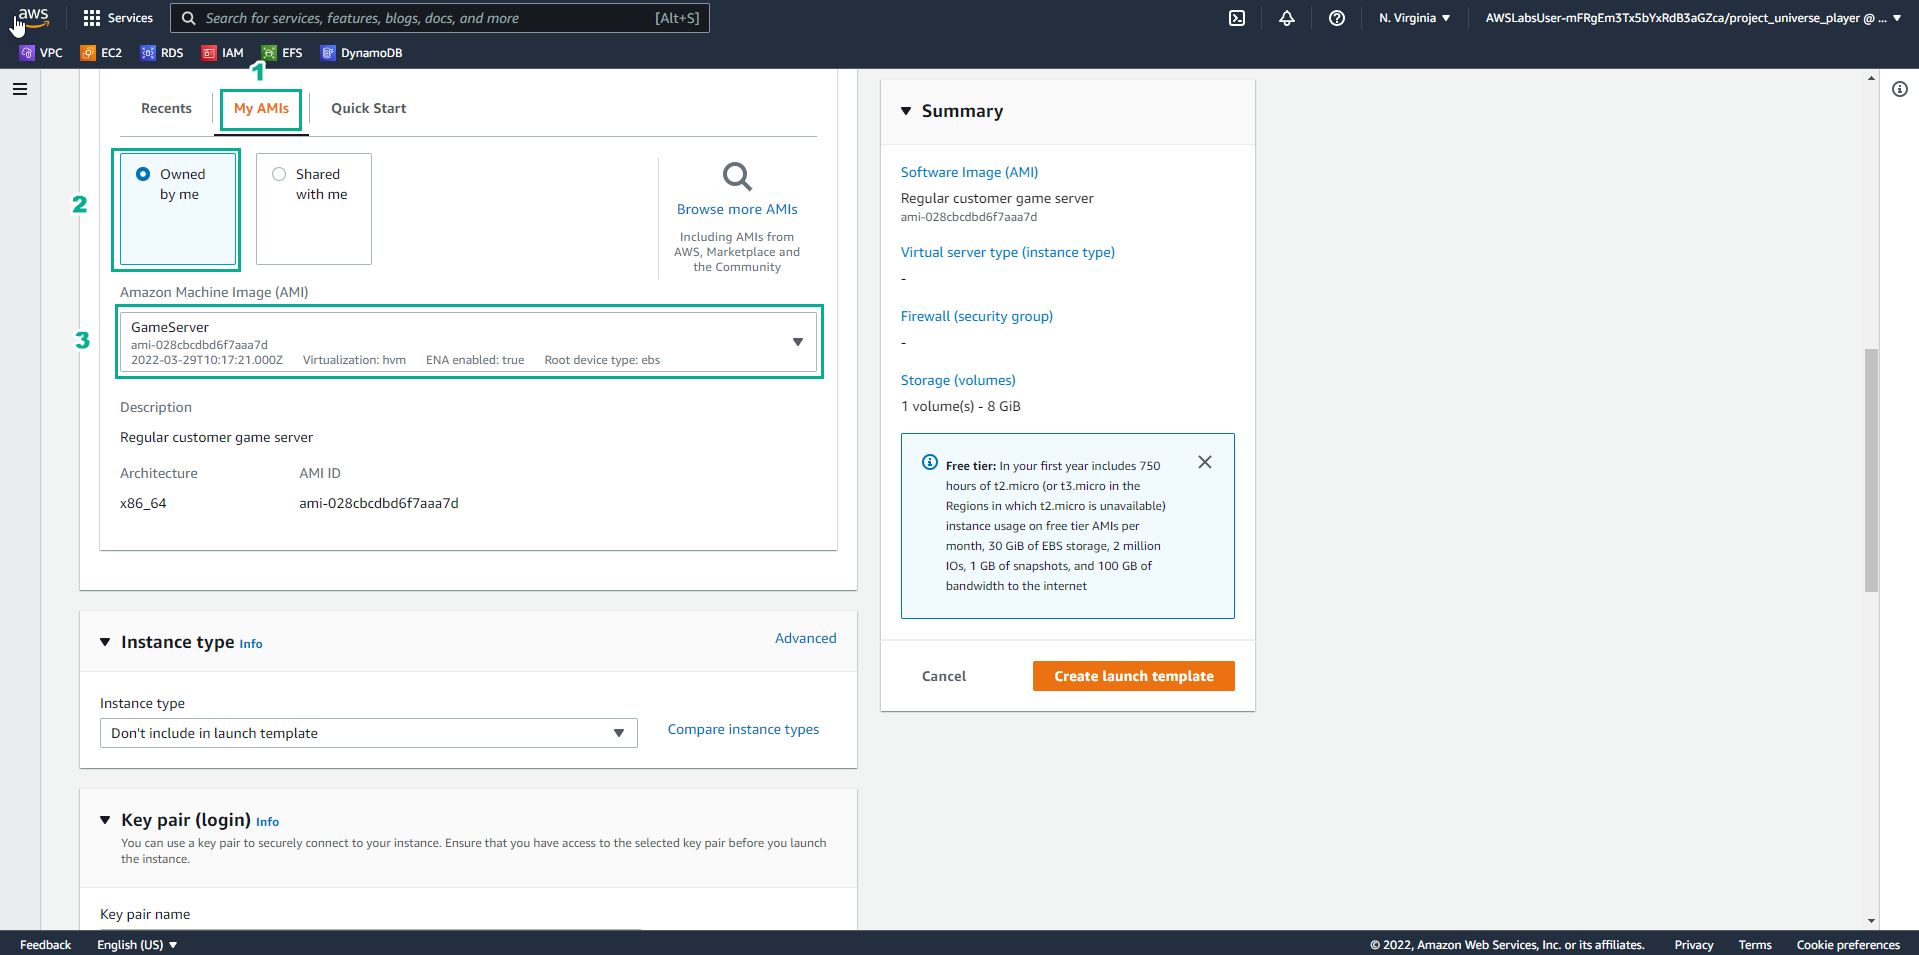
- In the Create launch template interface
- Select AMIs
- Select Owned by me
- In **Amazon Machine Image (AMI), select GameServer
- In the Practice interface
- Read step 14 of Auto-healing and Scaling Applications
- Read CONCEPT
- Select the arrow to the right to see the next steps
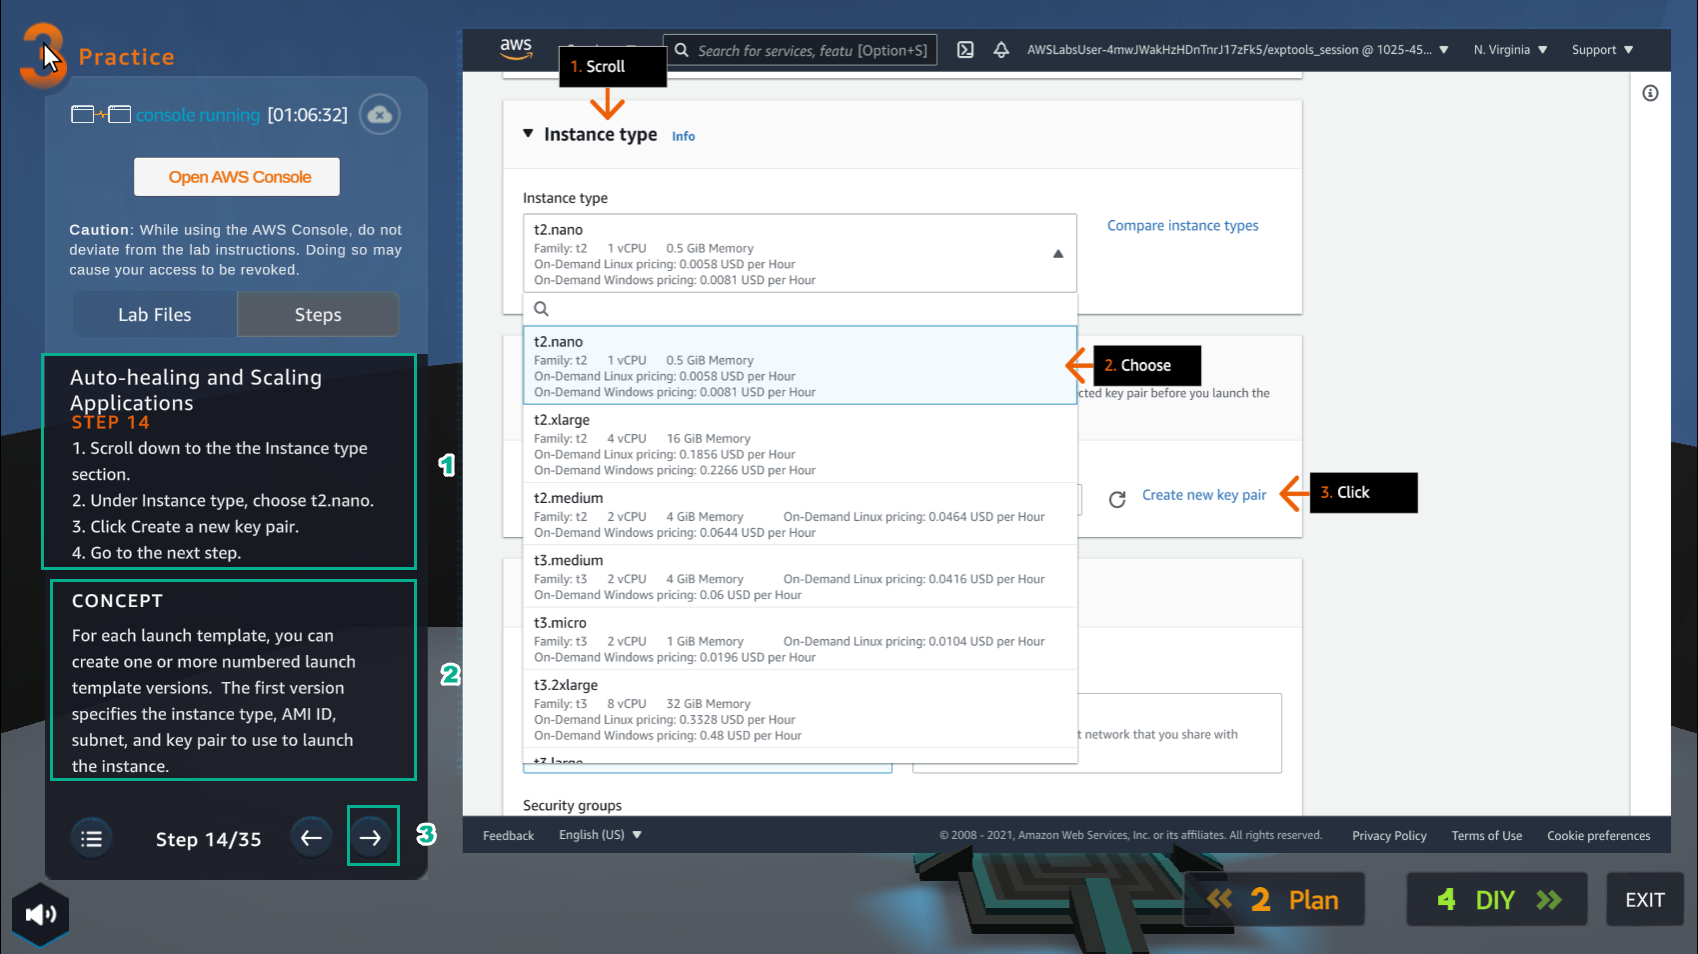
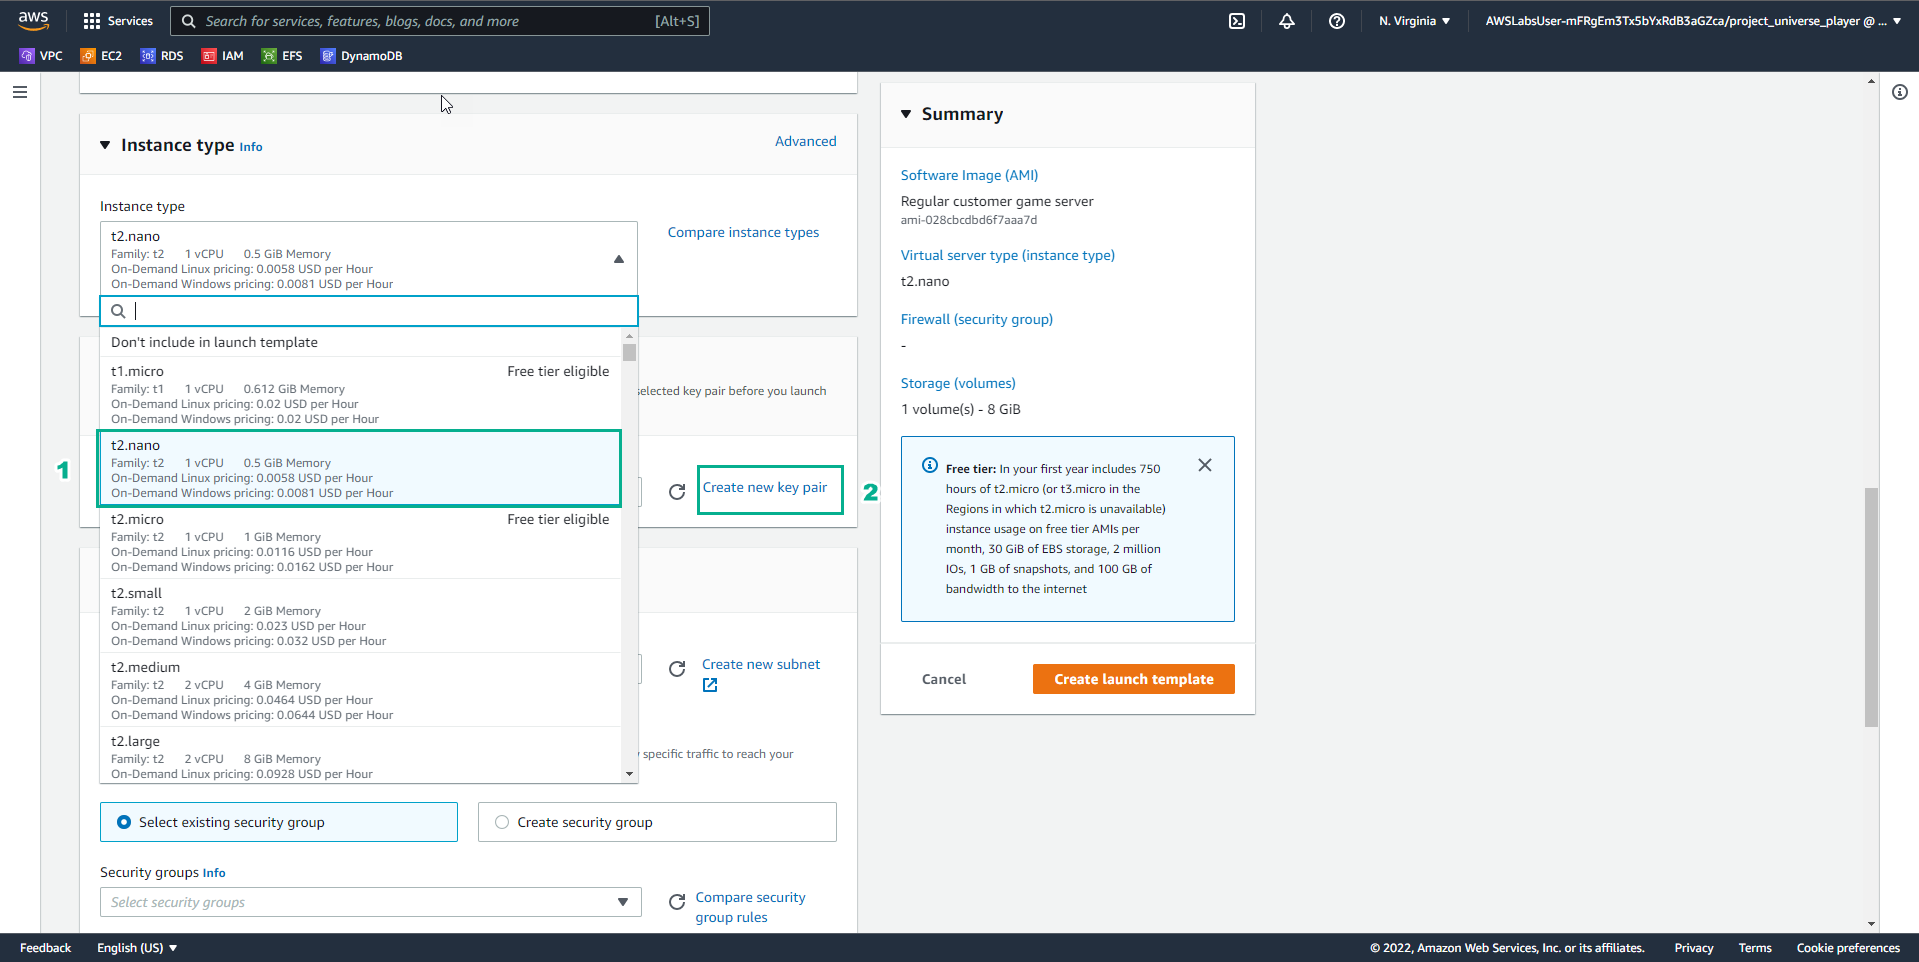
- In the Create launch template interface
- In Instance type*, select t2.nano
- Select Create new key pair
- In the Practice interface
- Read step 15 of Auto-healing and Scaling Applications
- Read CONCEPT
- Select the arrow to the right to see the next steps
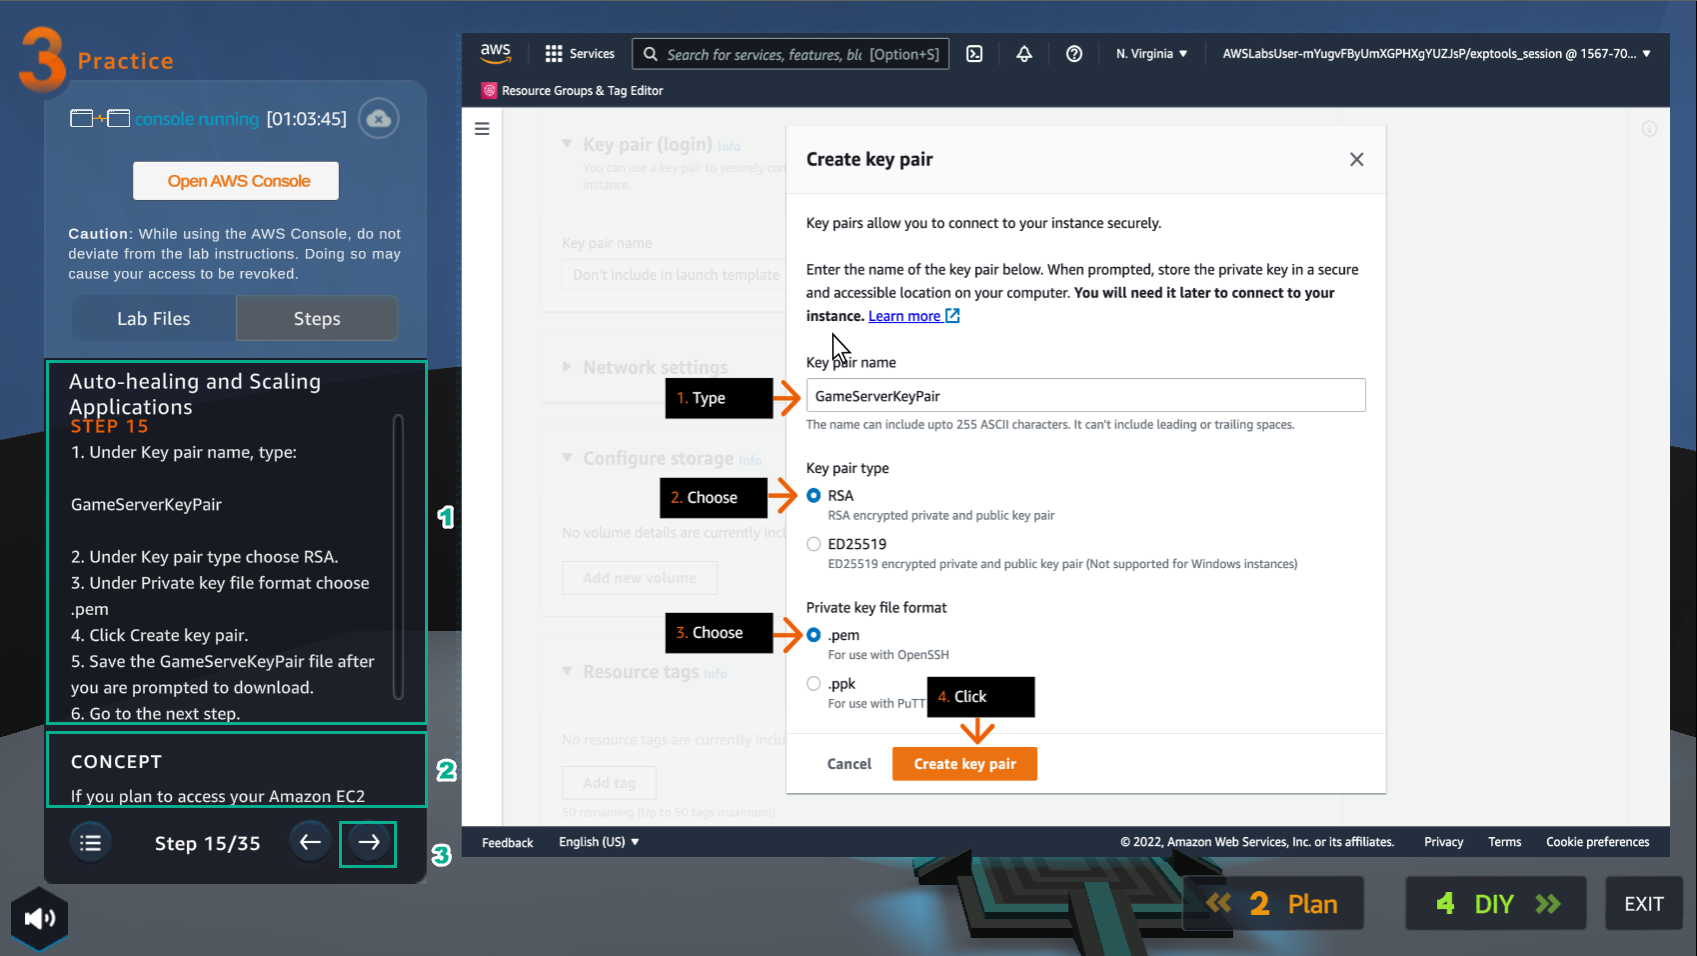
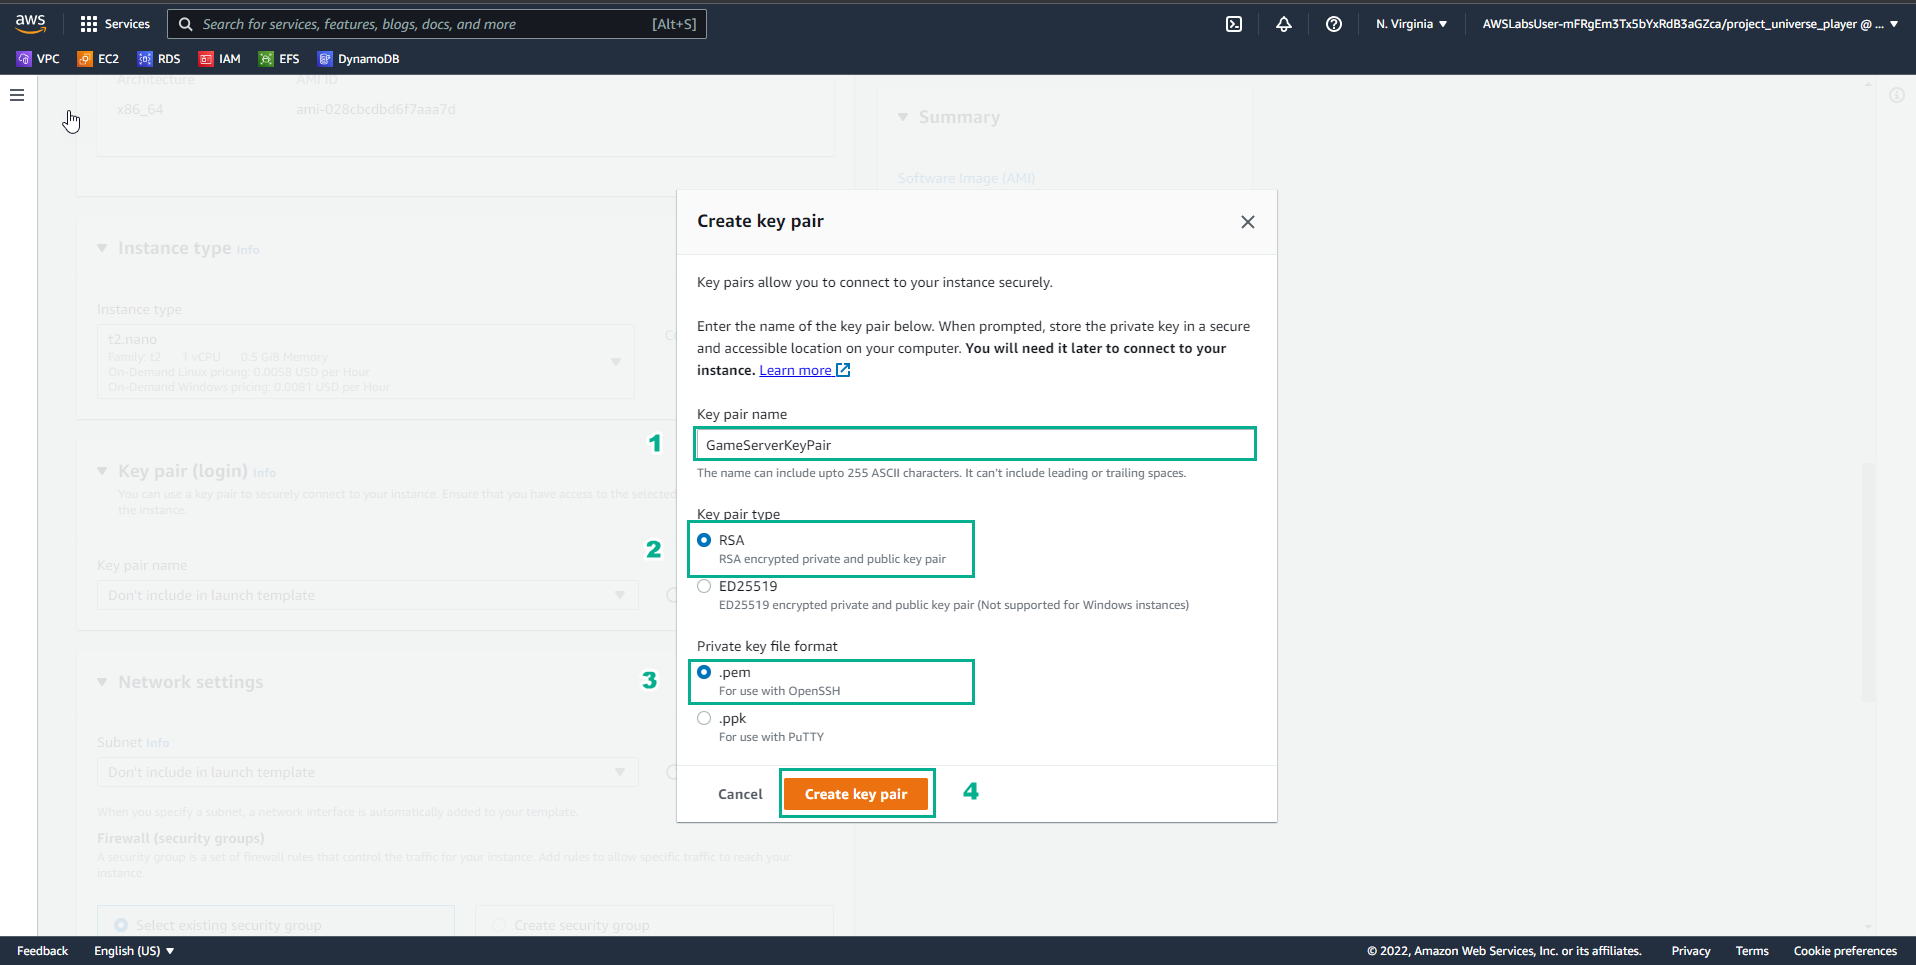
- In the Create key pair interface
- Key pair name, enter
GameServerKeyPair - Key pair type, select RSA
- Private key file format, select .pem
- Select Create key pair
- In the Practice interface
- Read step 16 of Auto-healing and Scaling Applications
- Read CONCEPT
- Select the arrow to the right to see the next steps
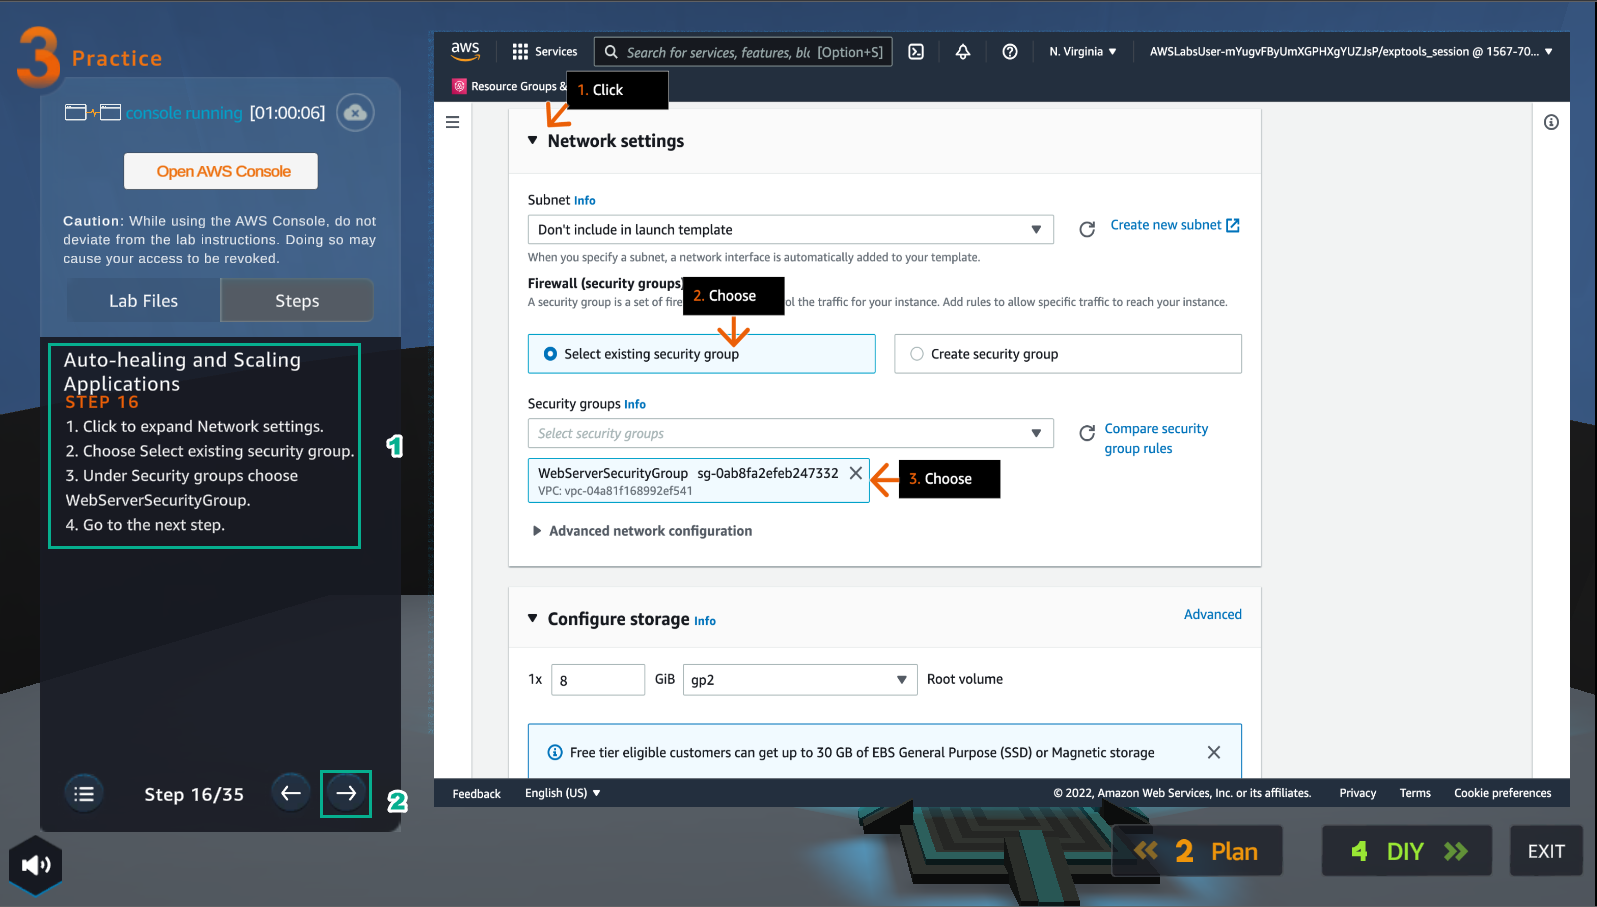
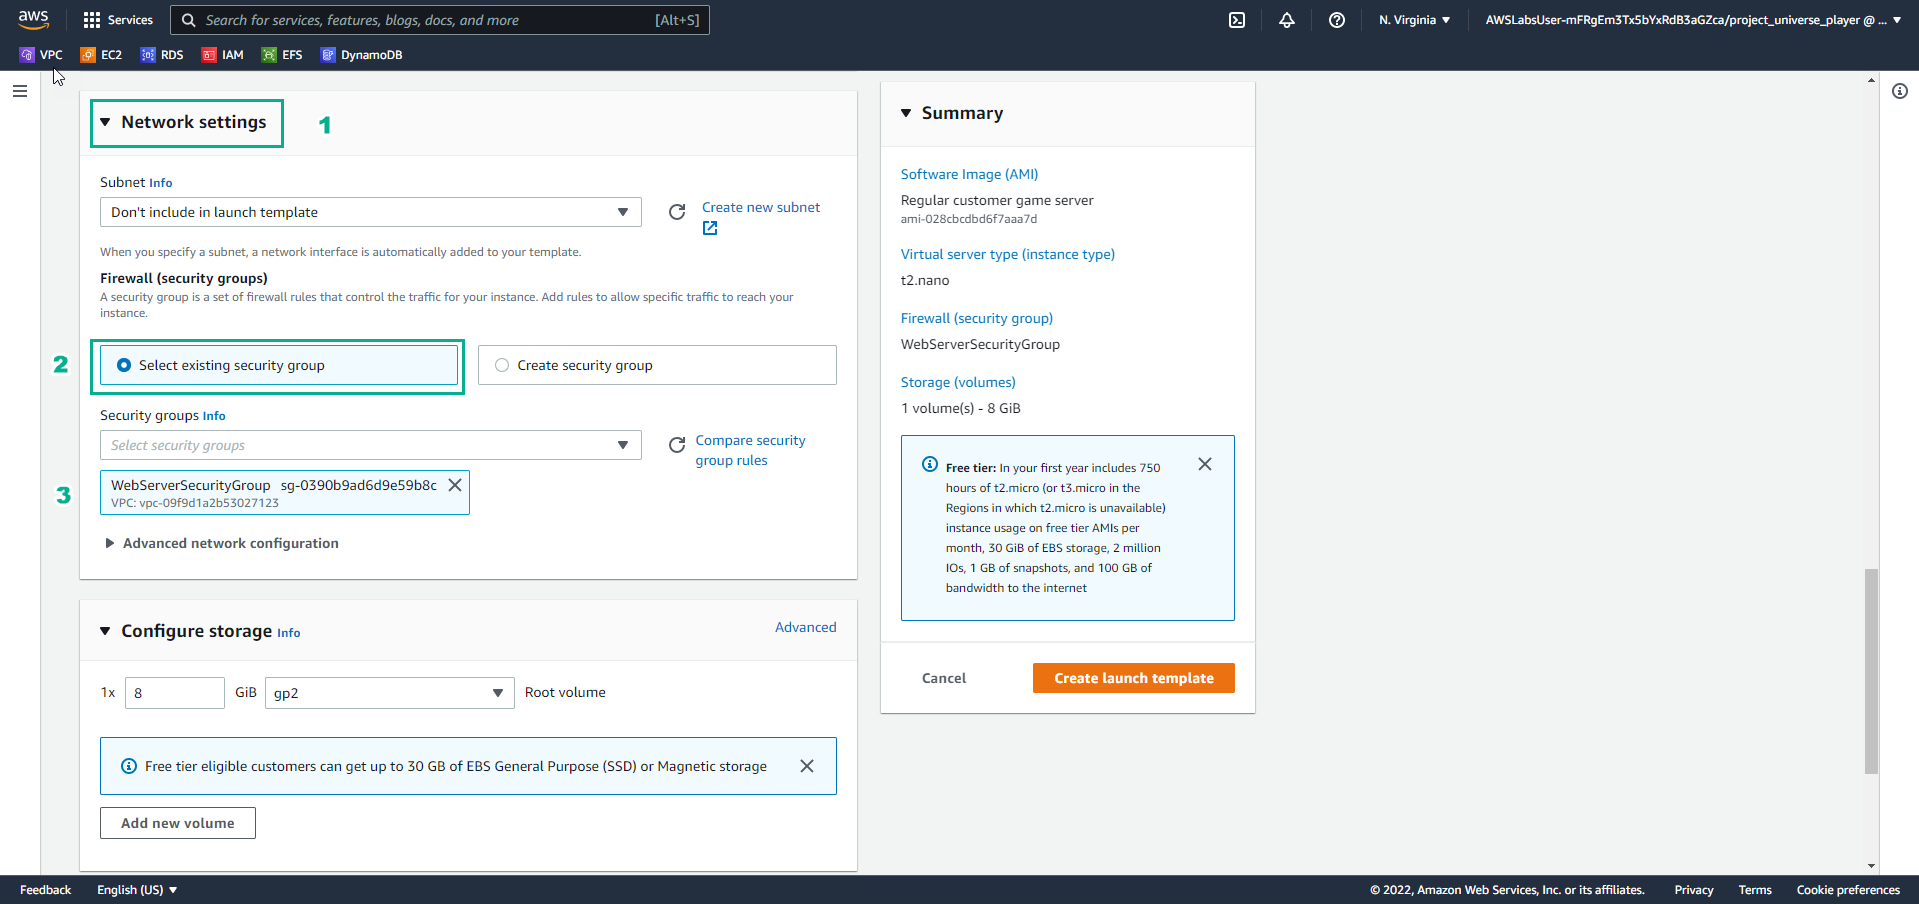
- In the Create launch template interface
- In Network settings, select Select existing security group
- Select WebServerSecurityGroup
- In the Practice interface
- Read step 17 of Auto-healing and Scaling Applications
- Read CONCEPT
- Select the arrow to the right to see the next steps
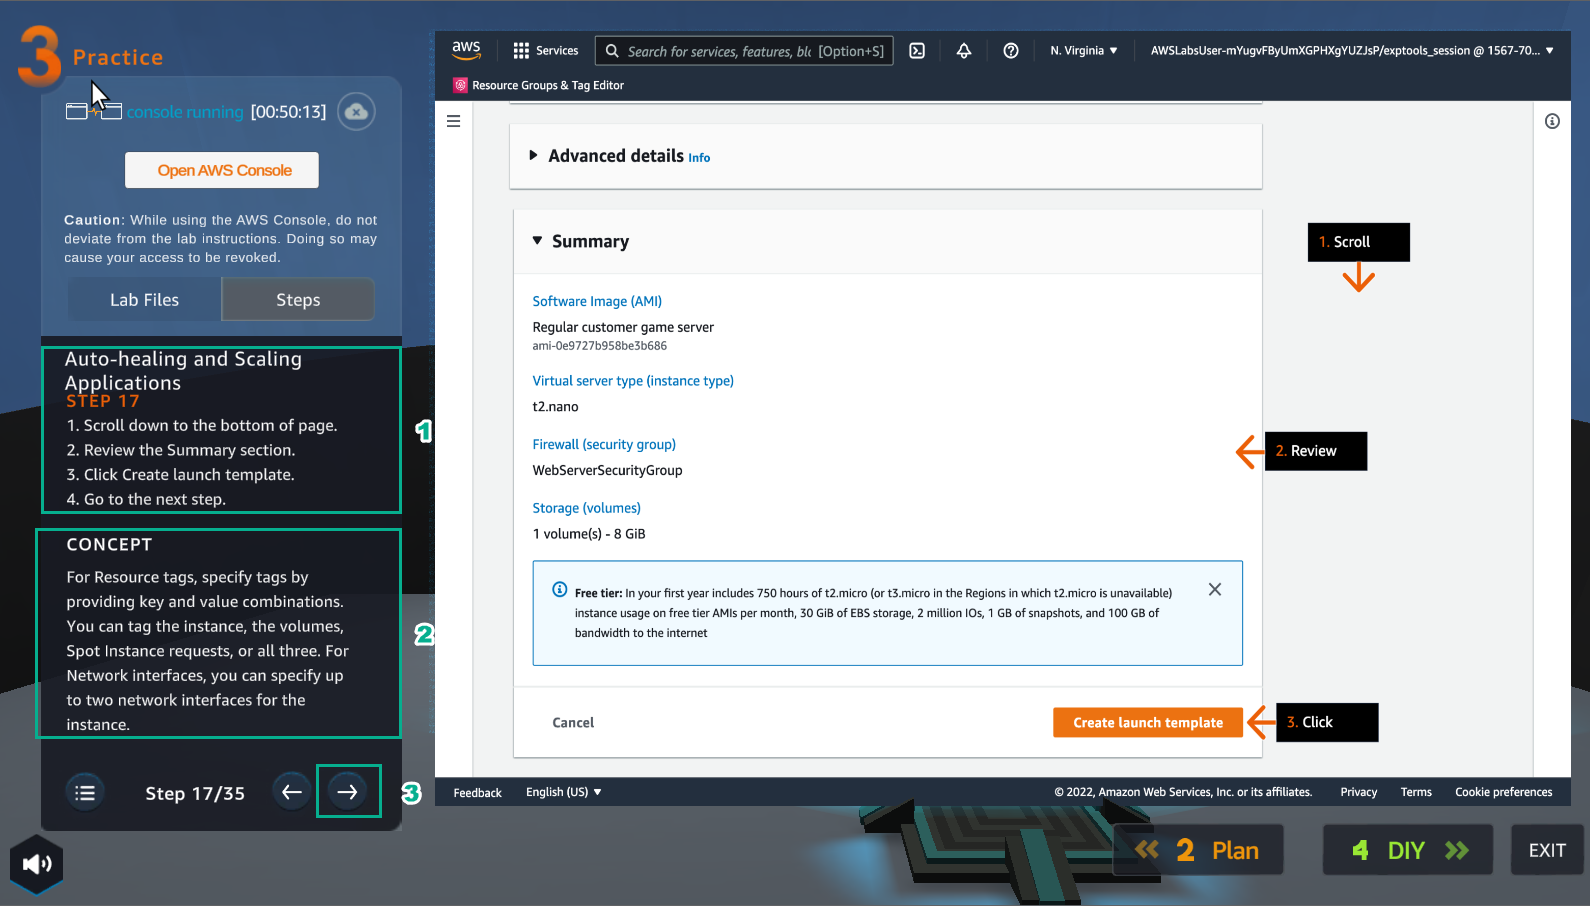
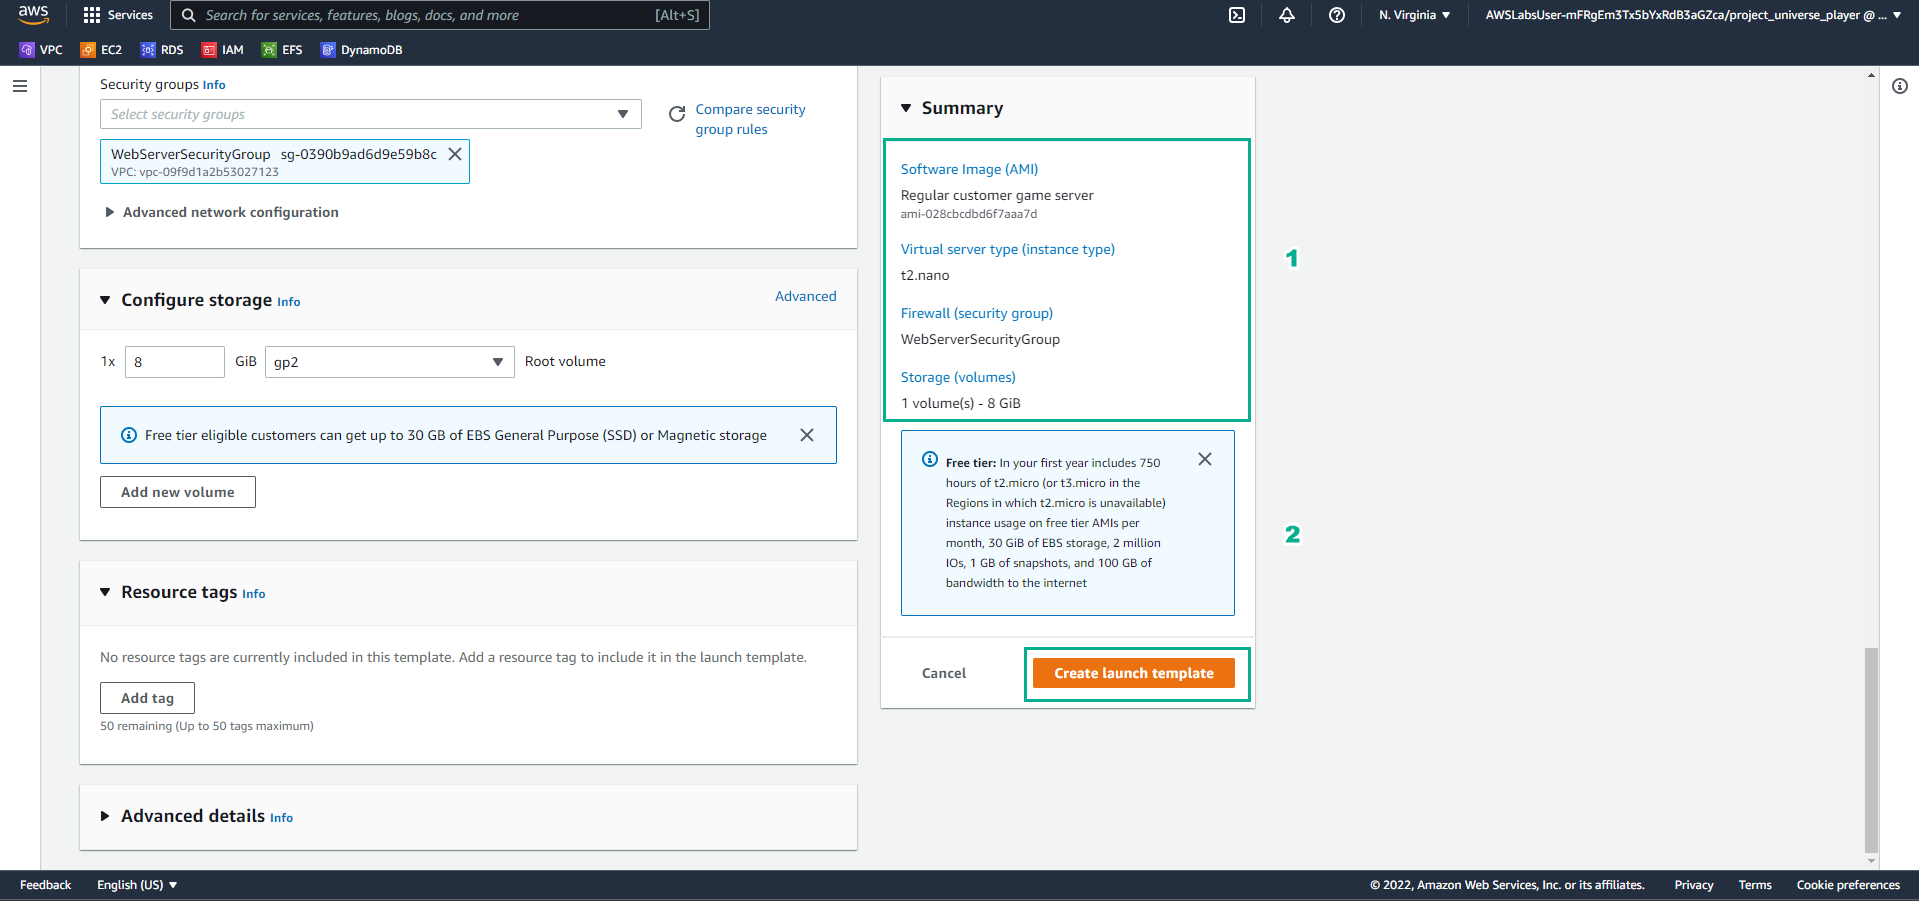
- In the Create launch template interface
- Watch Sumary
- Select Create launch template
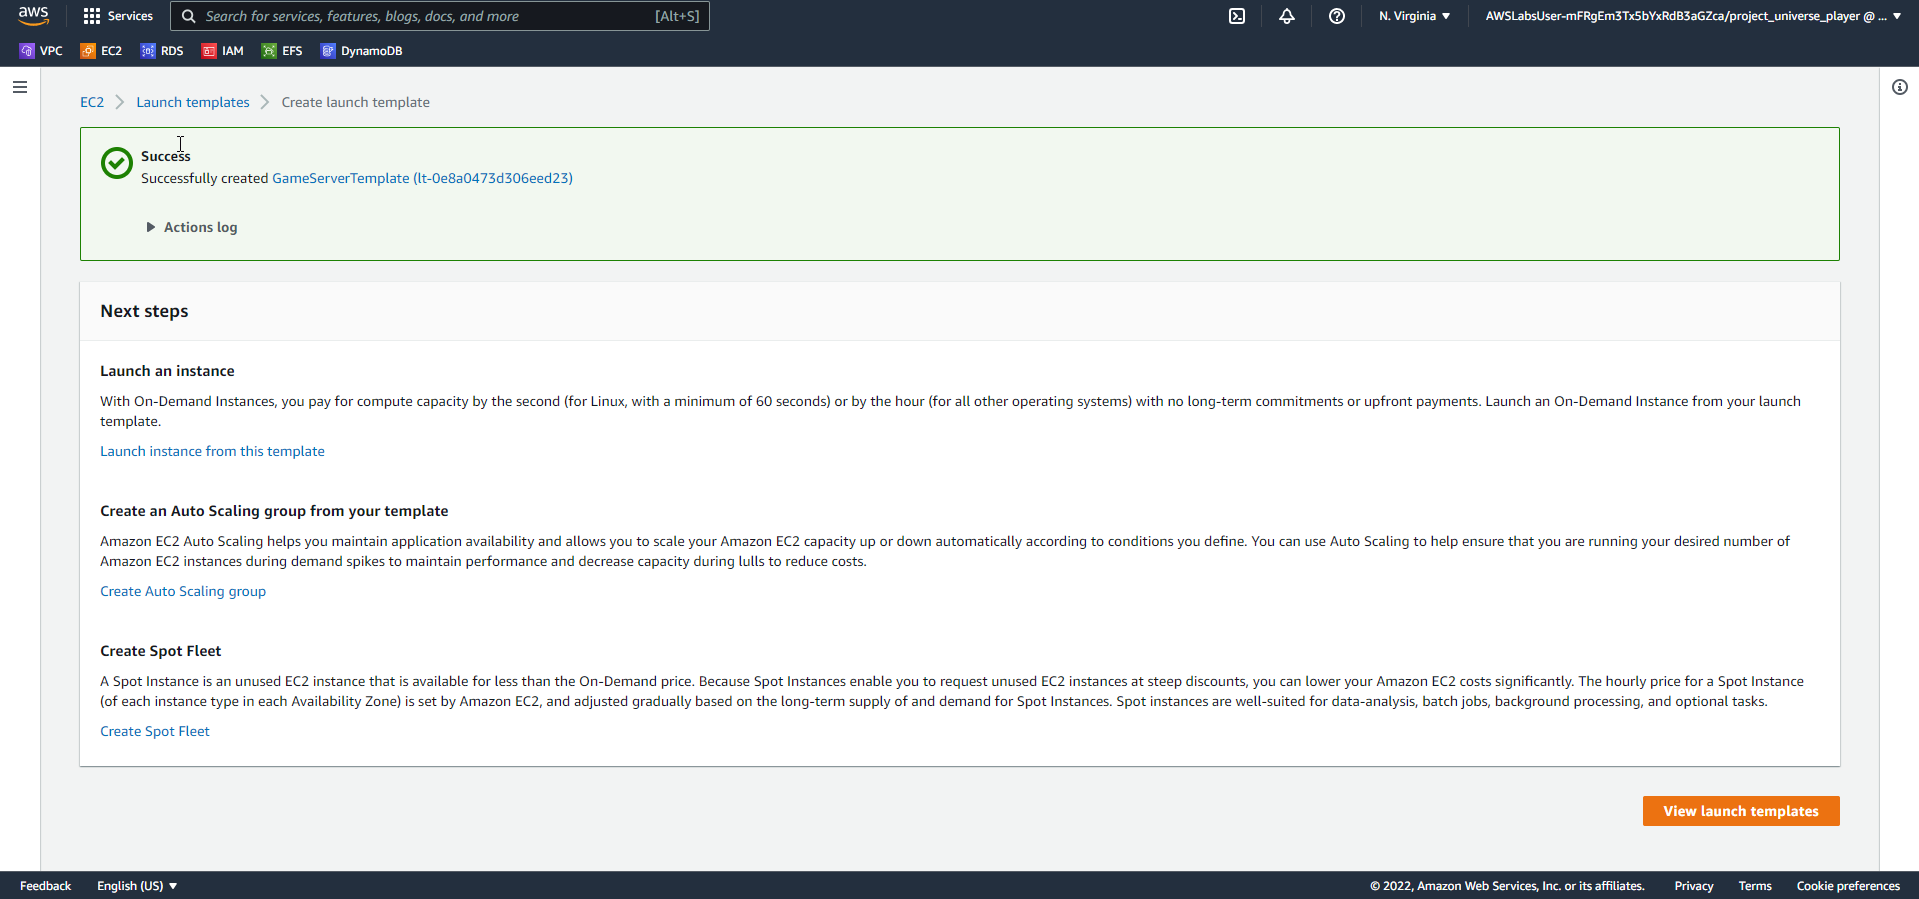
- Successful template initialization interface
- Select View launch templates
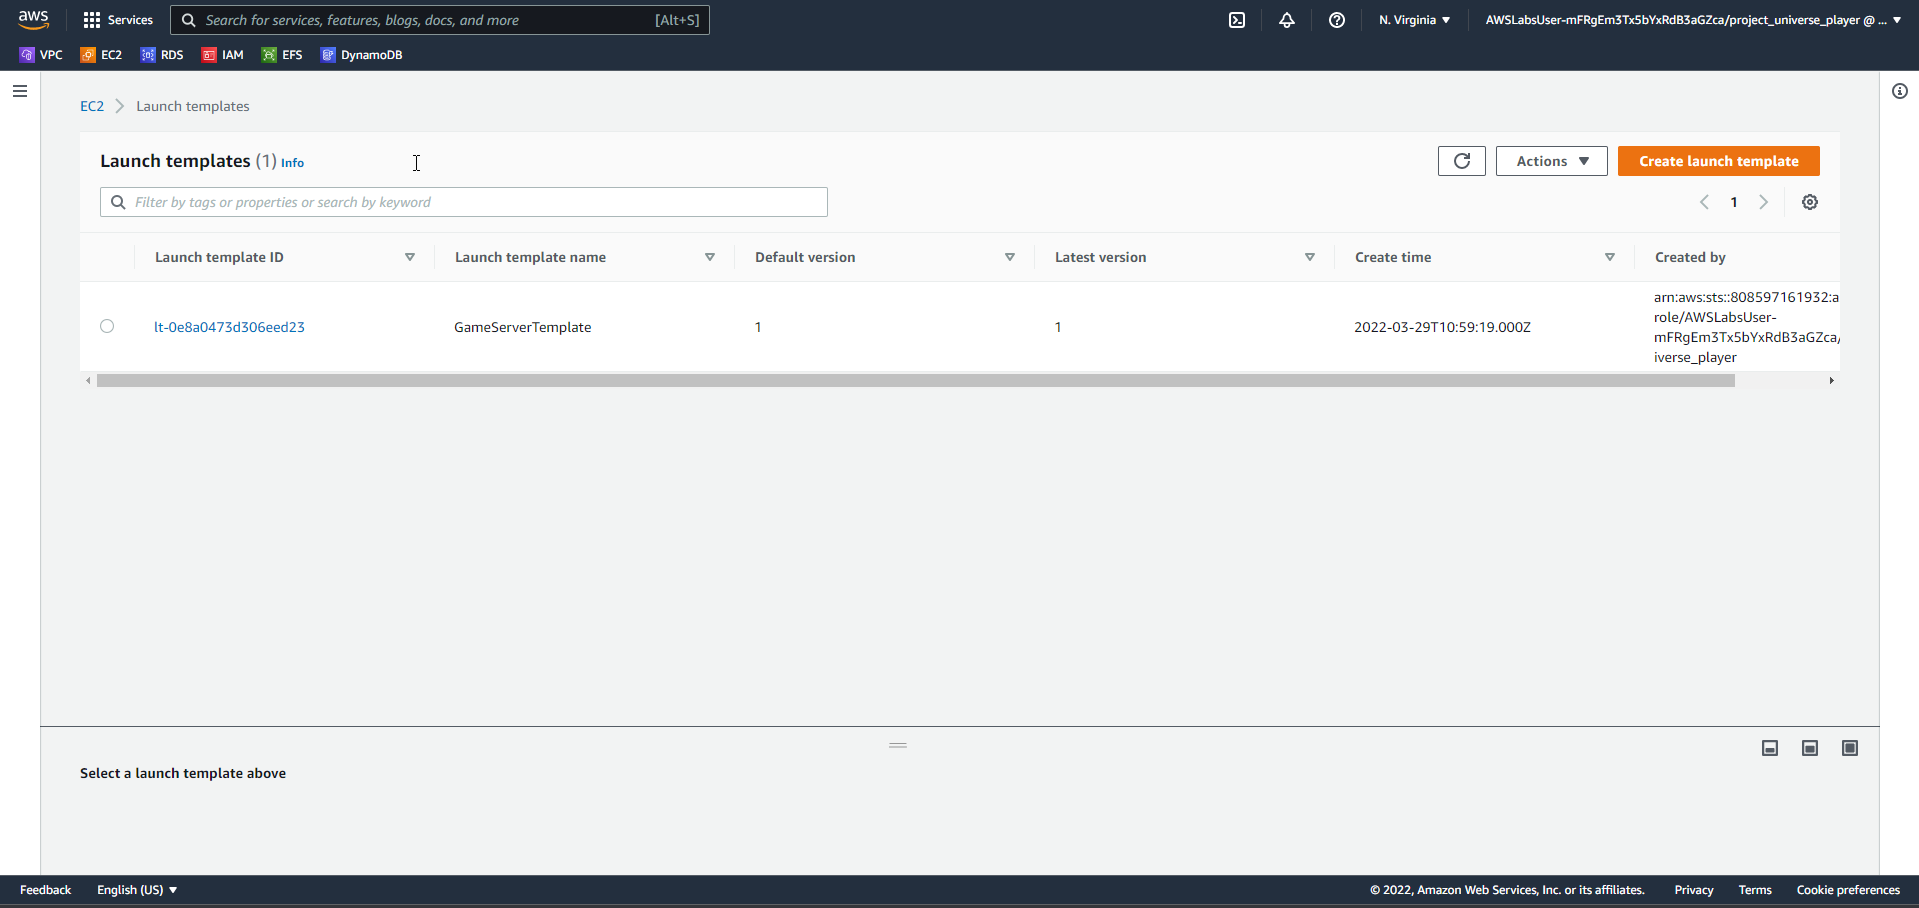
- In the Launch templates interface
- View the template just created
- In the Pracitce interface
- Read step 19 of Auto-healing and Scaling Applications
- Read CONCEPT
- Select the arrow to the right to see the next steps
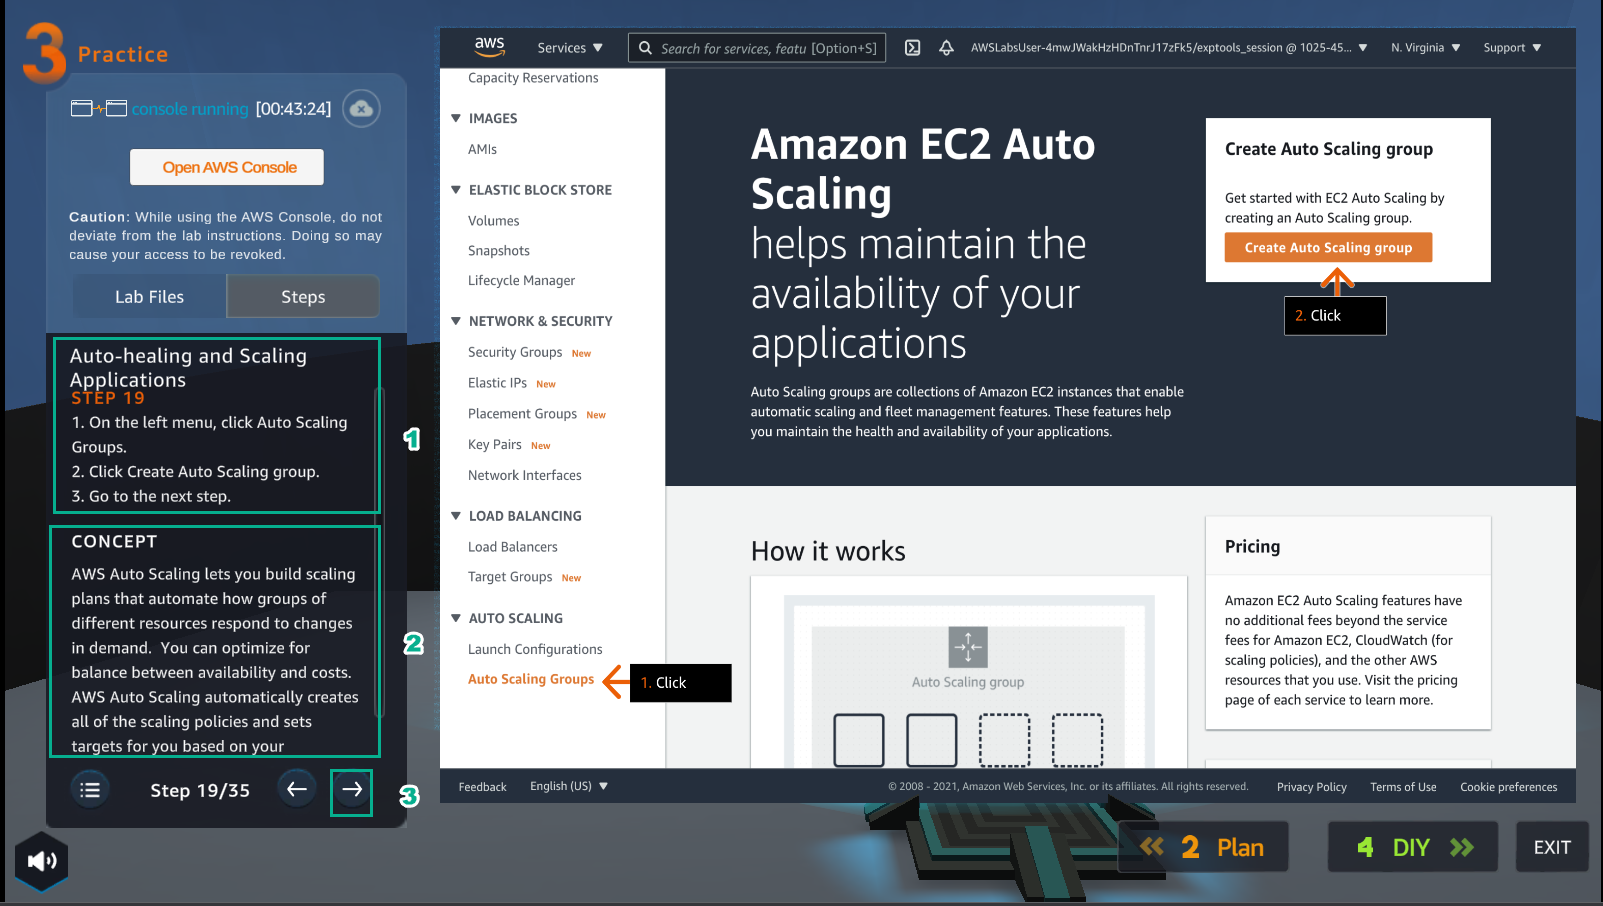
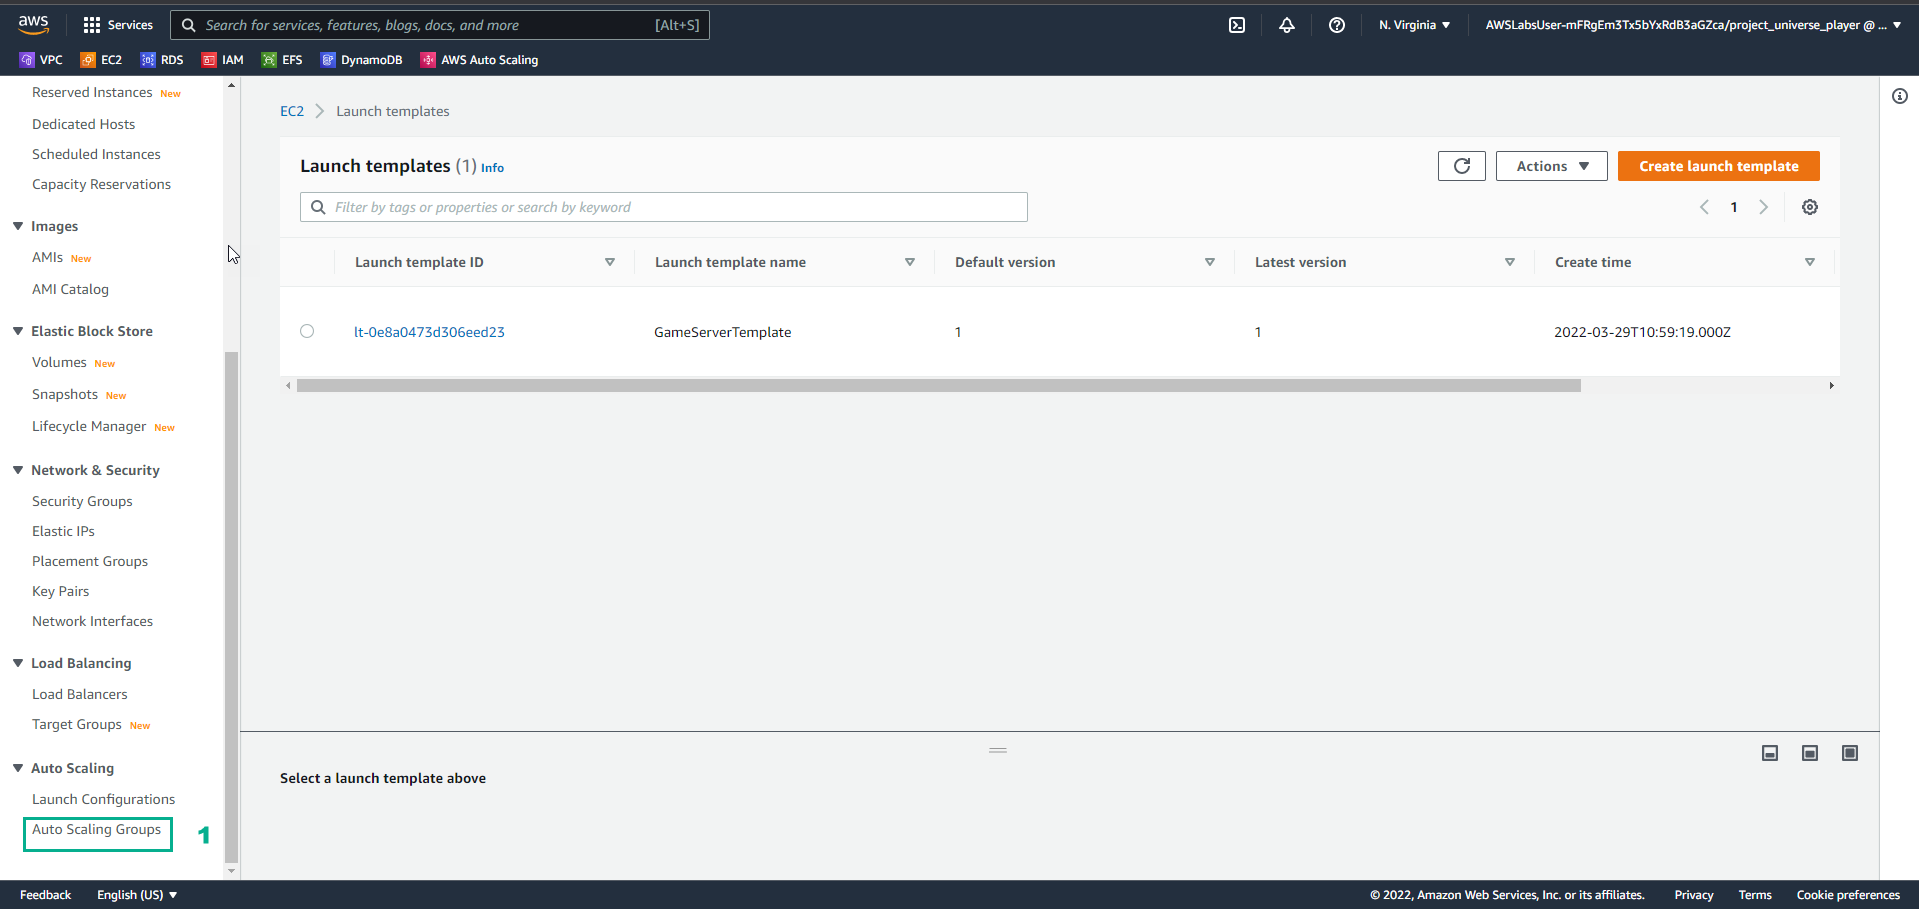
- In the Launch templates interface
- Select Auto Scaling Groups
- In the Practice interface
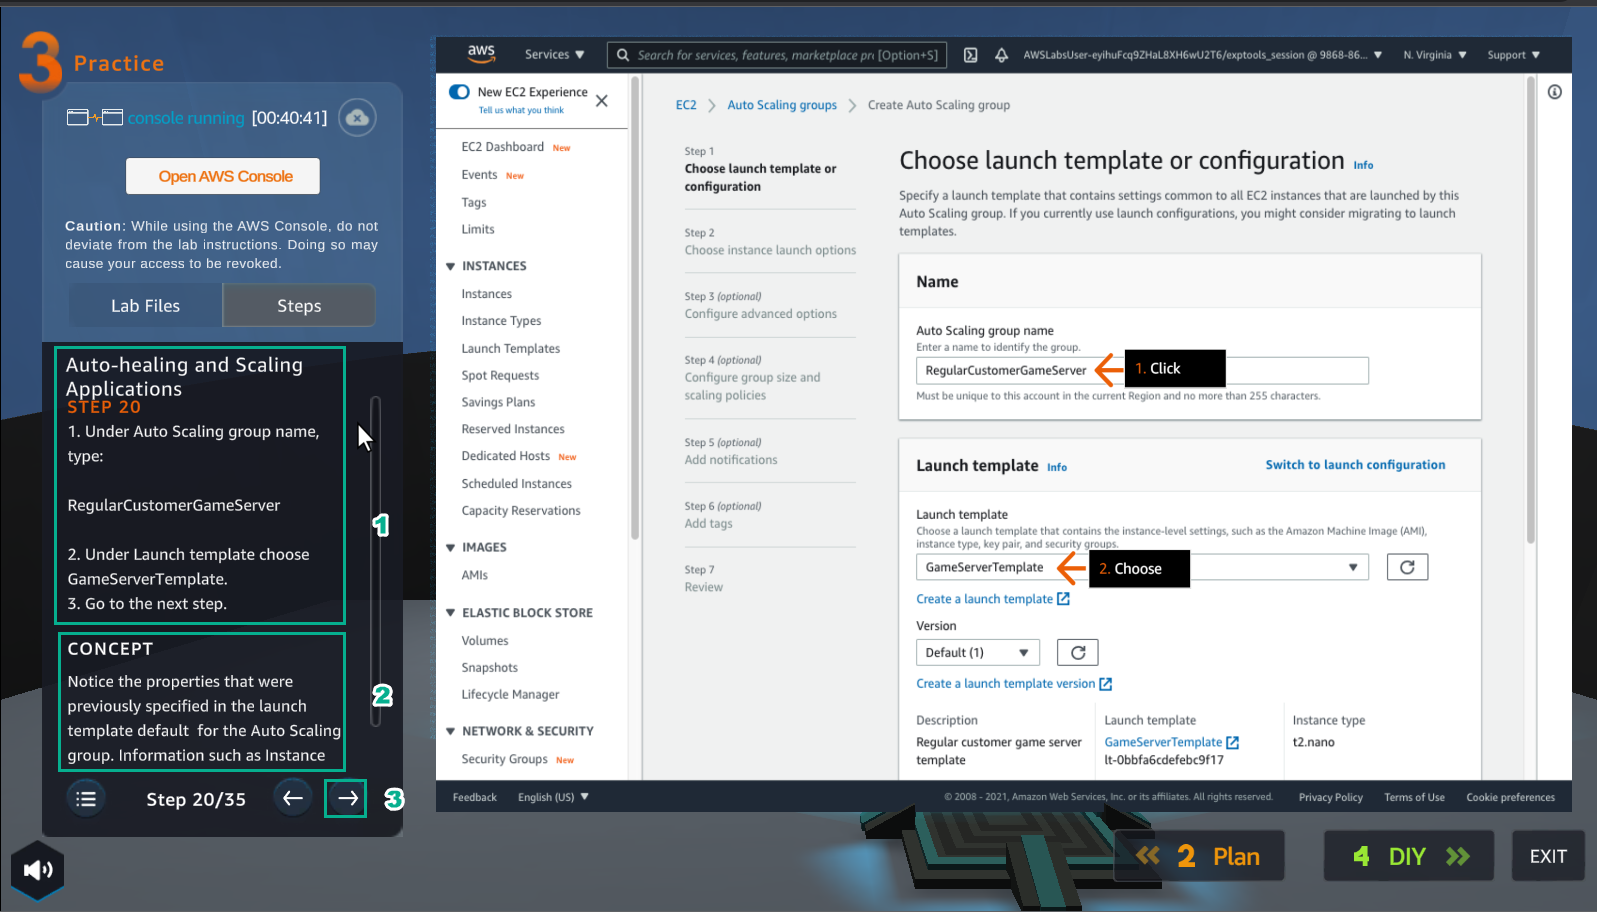
- Read step 20 of Auto-healing and Scaling Applications
- Read CONCEPT
- Select the arrow to the right to see the next steps
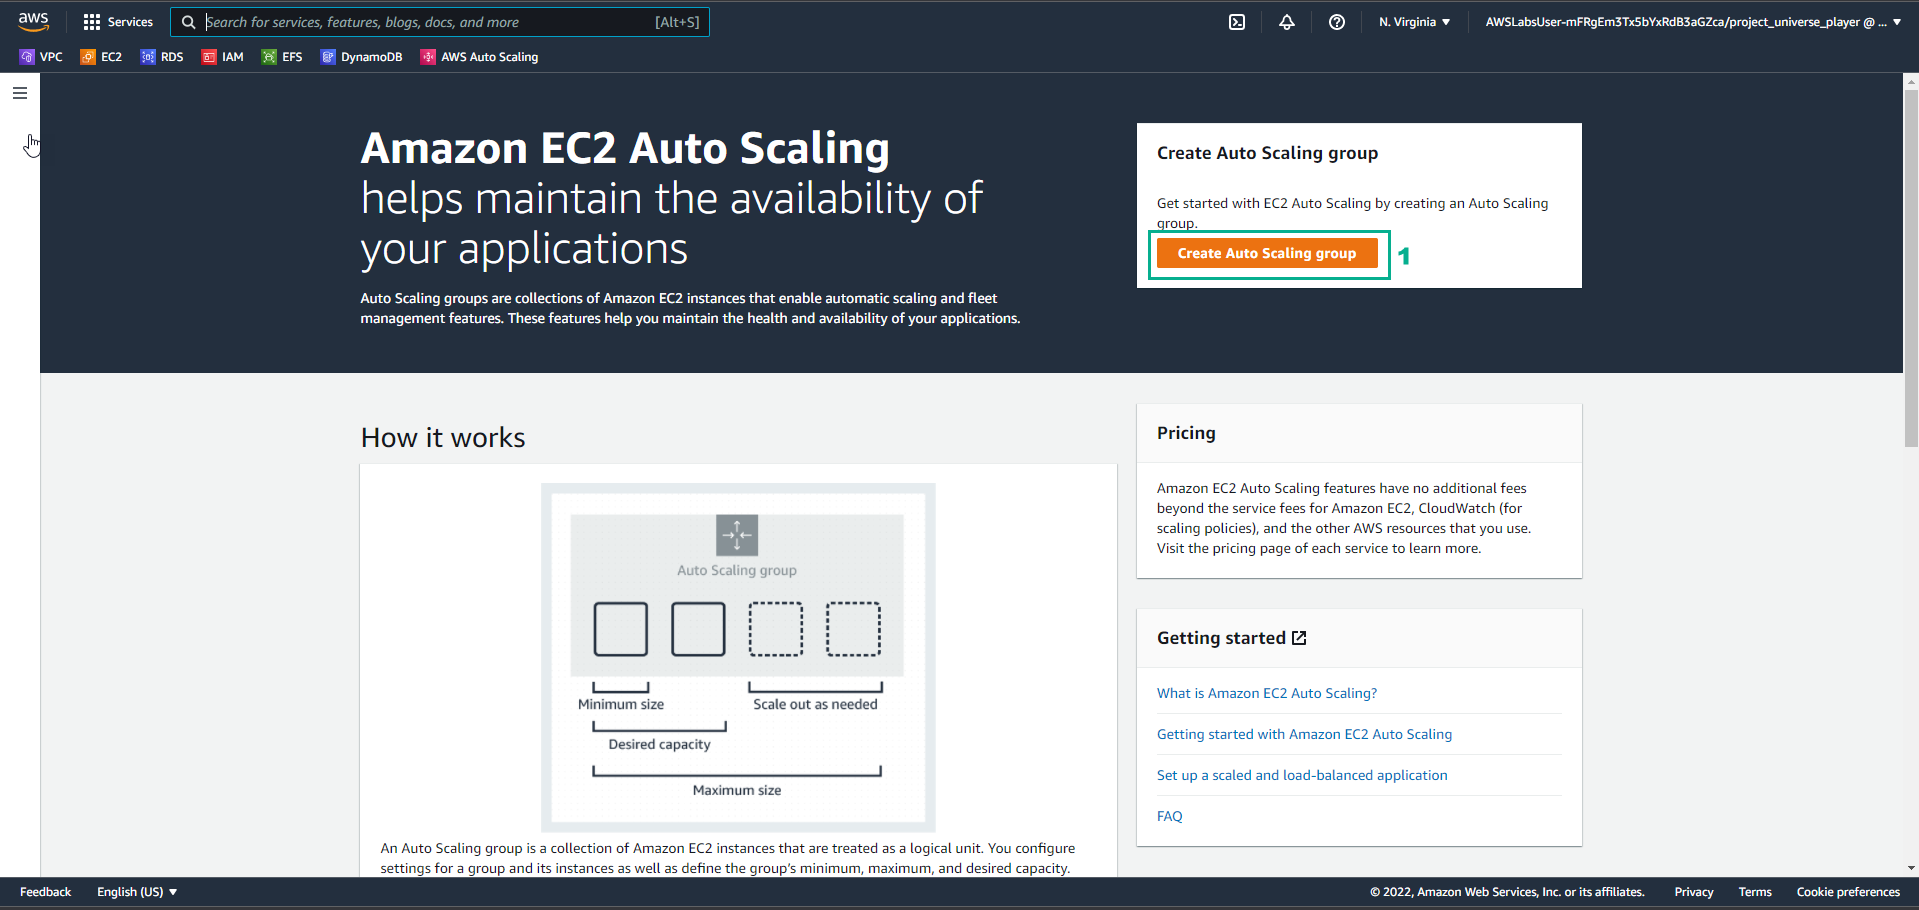
- In the Amazon EC2 Auto Scaling interface
- Select Create Auto Scaling group
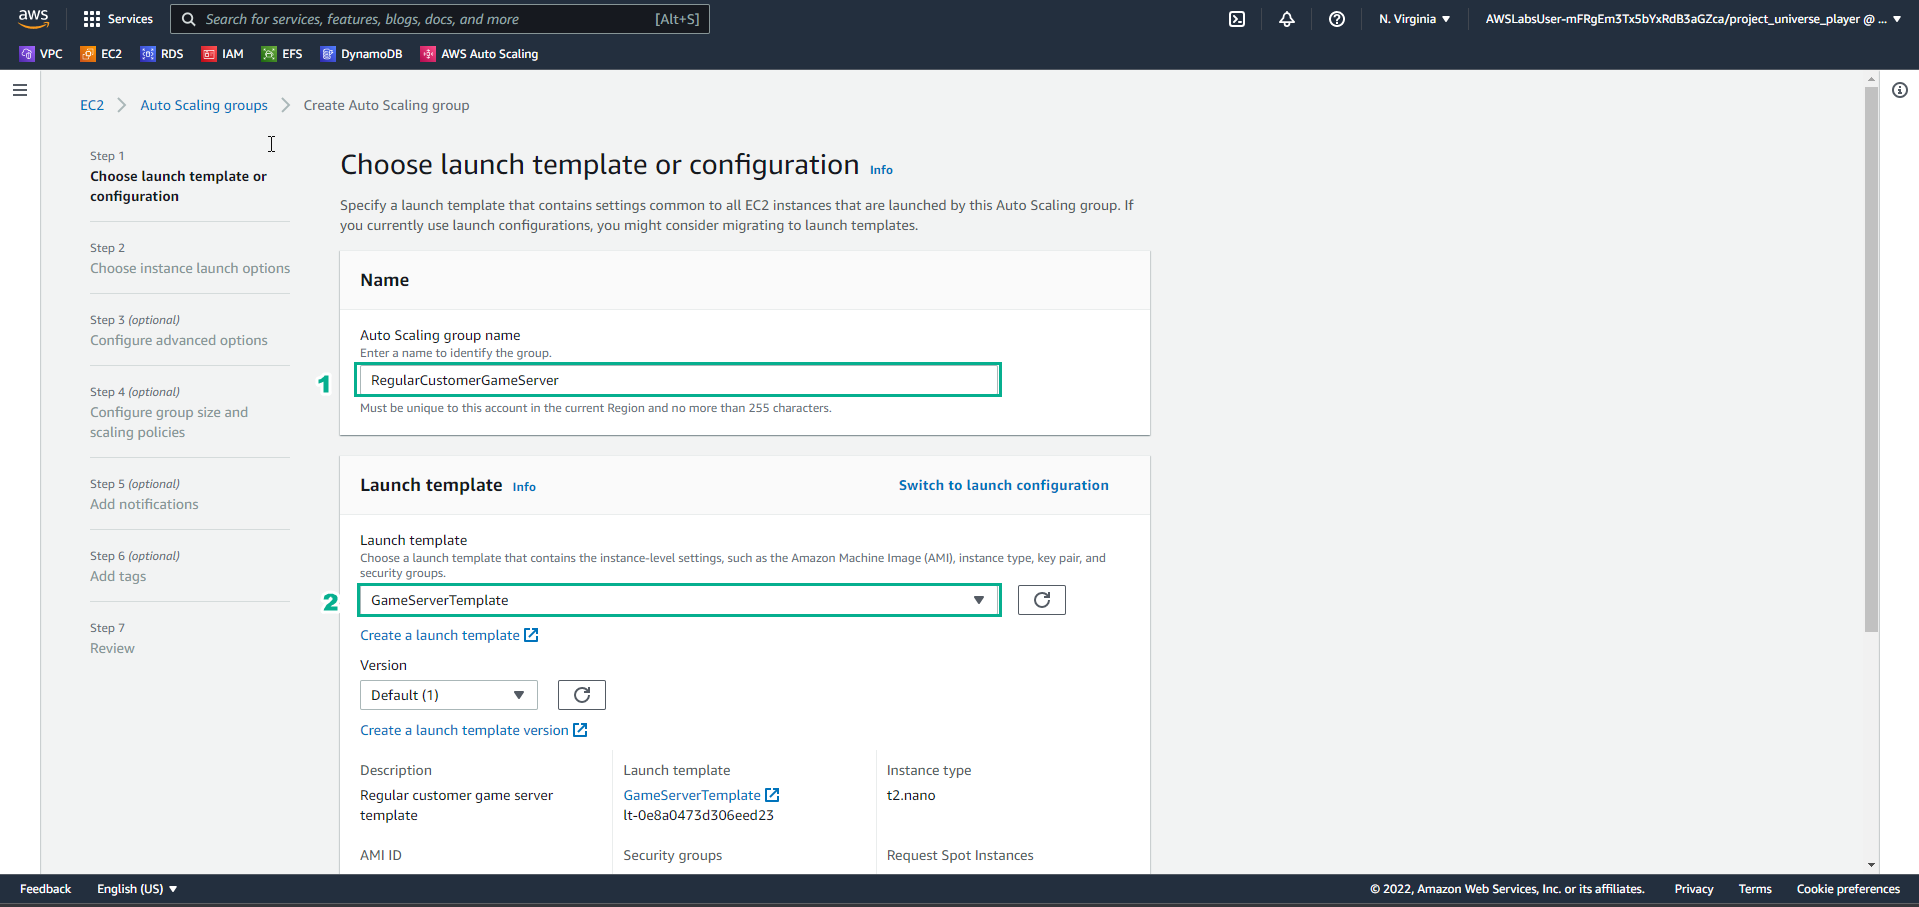
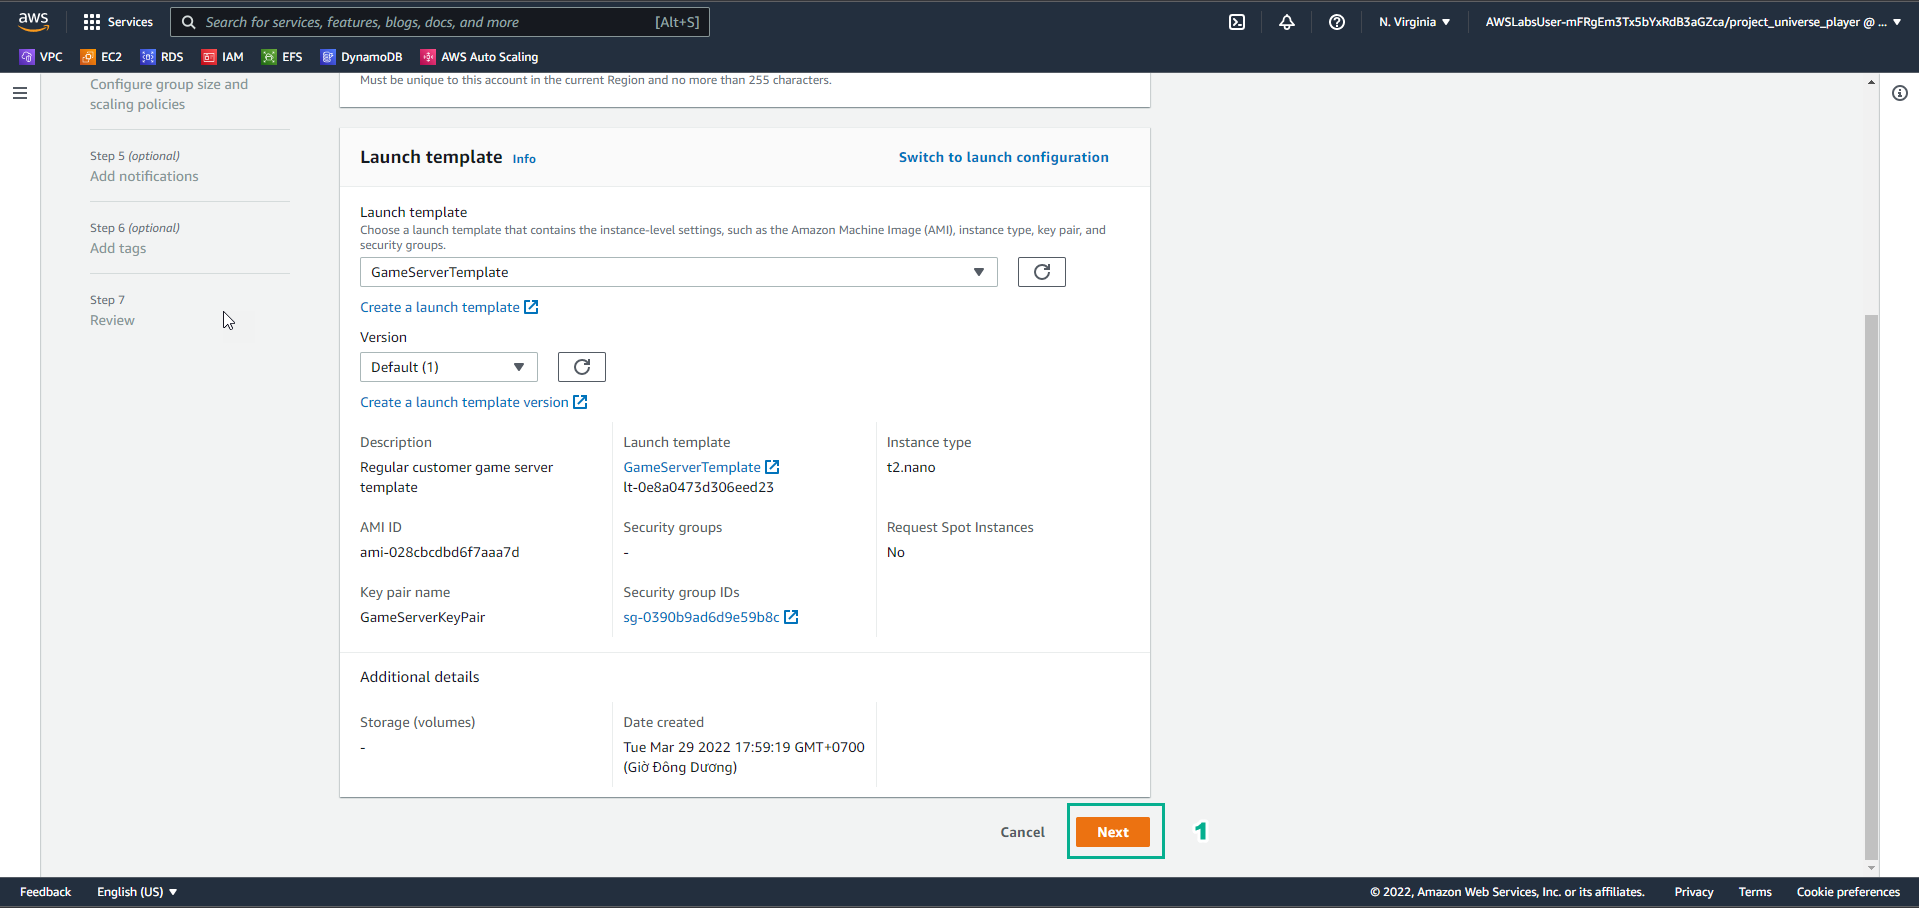
- In the Auto Scaling groups interface
- In Choose launch template or conriguration
- Auto Scaling group name, enter
RegularCustomerGameServer - Launch template, enter
GameServerTemplate
- In the Practice interface
- Read step 21 of Auto-healing and Scaling Applications
- Read CONCEPT
- Select the arrow to the right to see the next steps
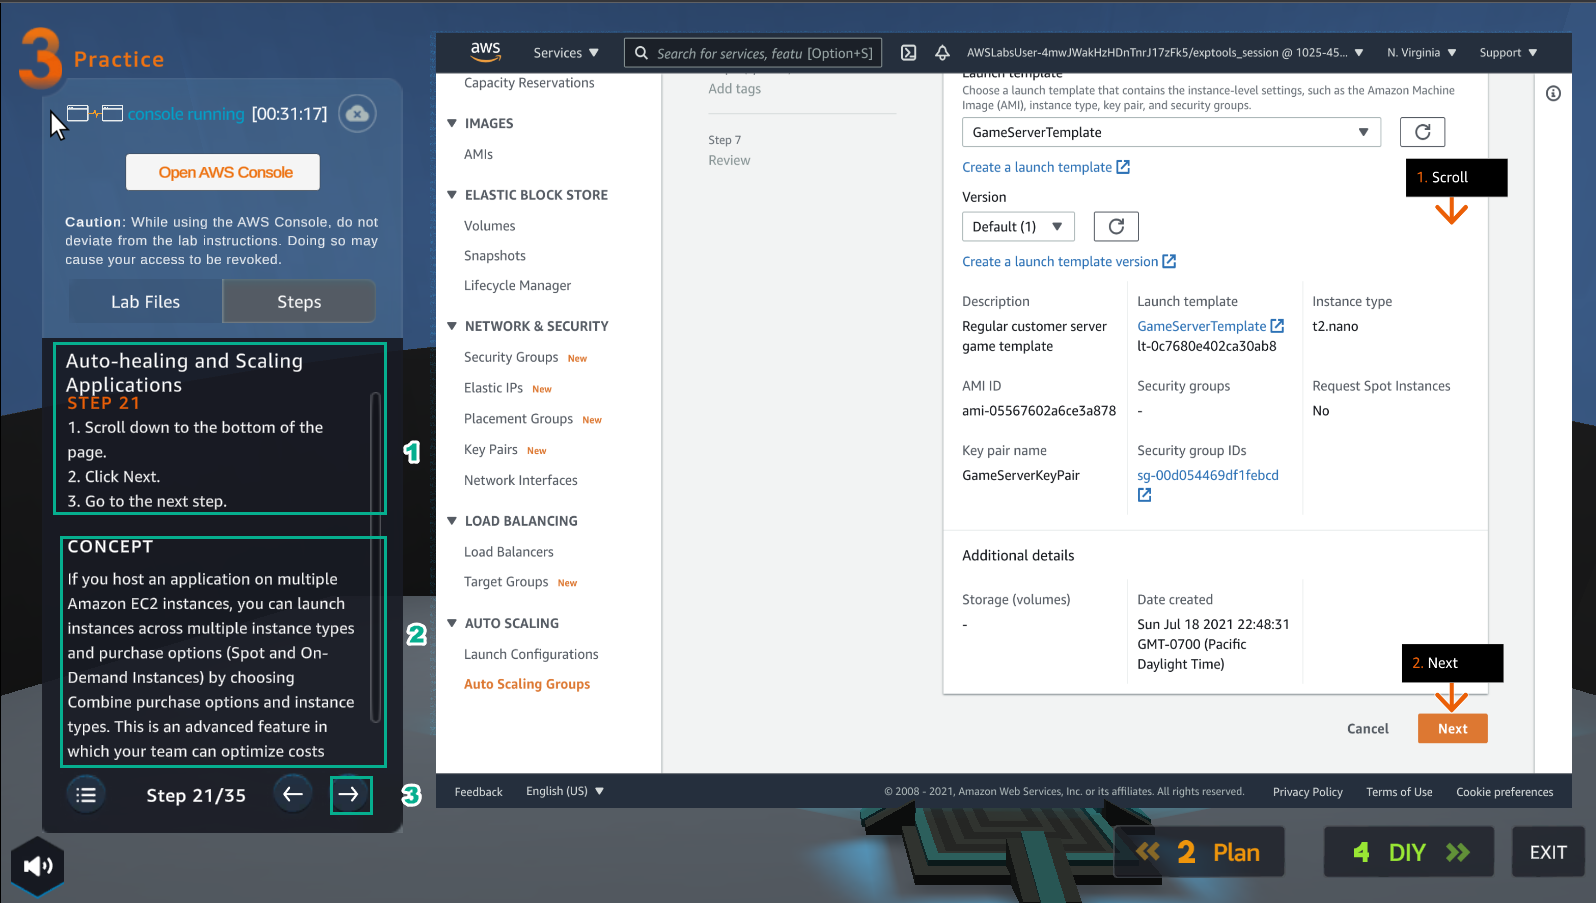
- In the Auto Scaling interface
- Select Next
- In the Practice interface
- Read step 22 of Auto-healing and Scaling Applications
- Read CONCEPT
- Select the arrow to the right to see the next steps
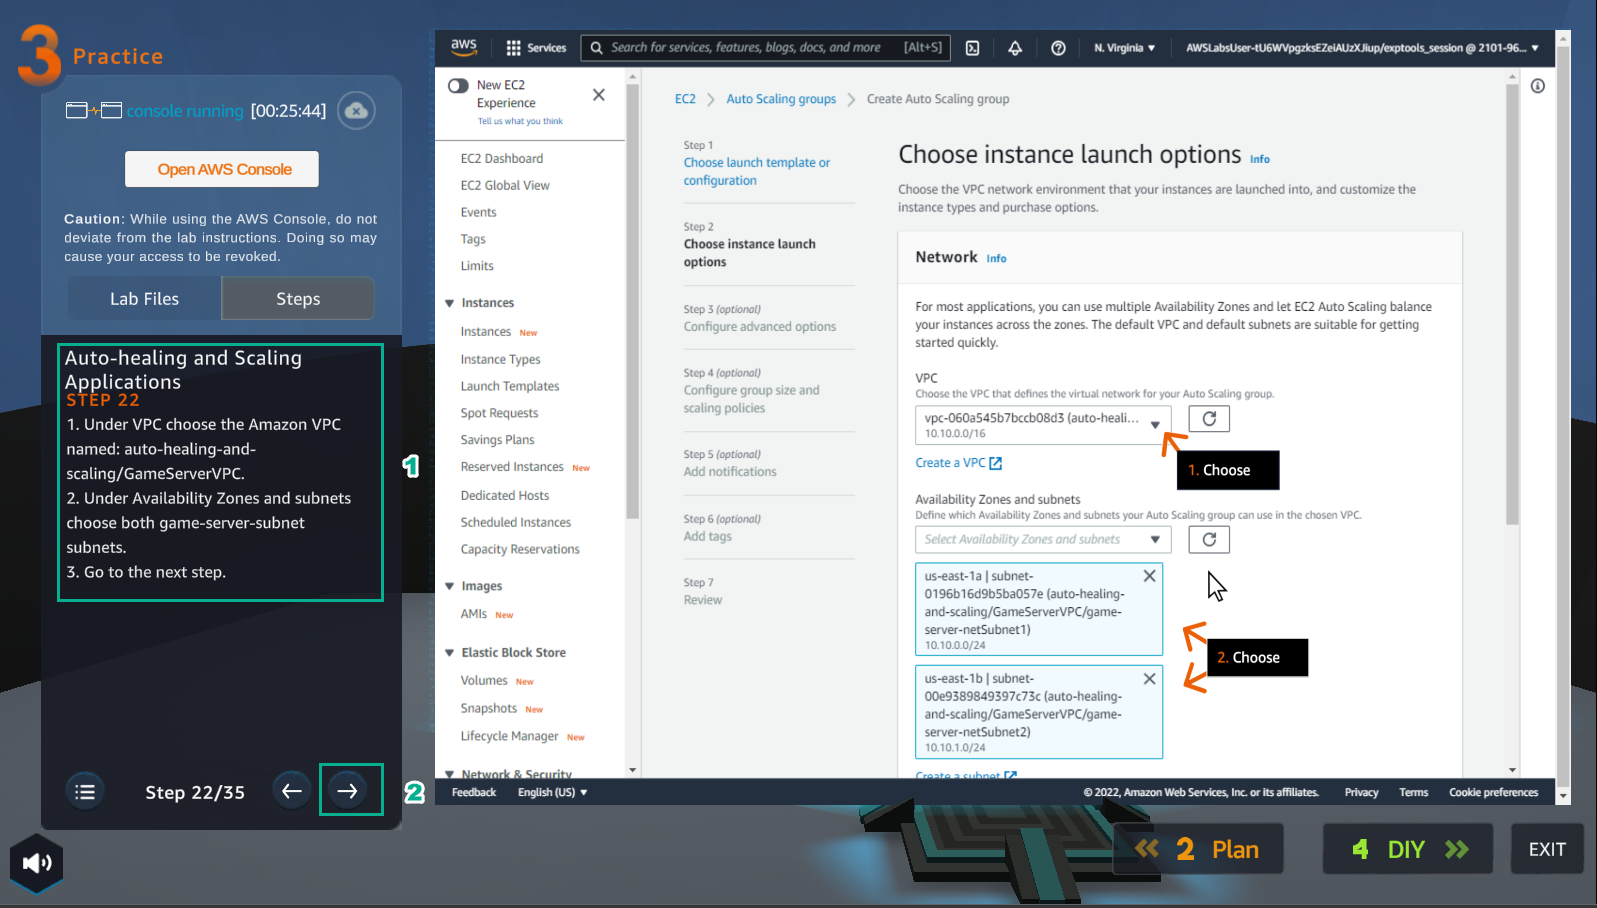
- In the EC2 Auto Scaling Group interface
- In Choose instance launch options
- In Network, Select VPC
- Select **Availability Zones and subnets
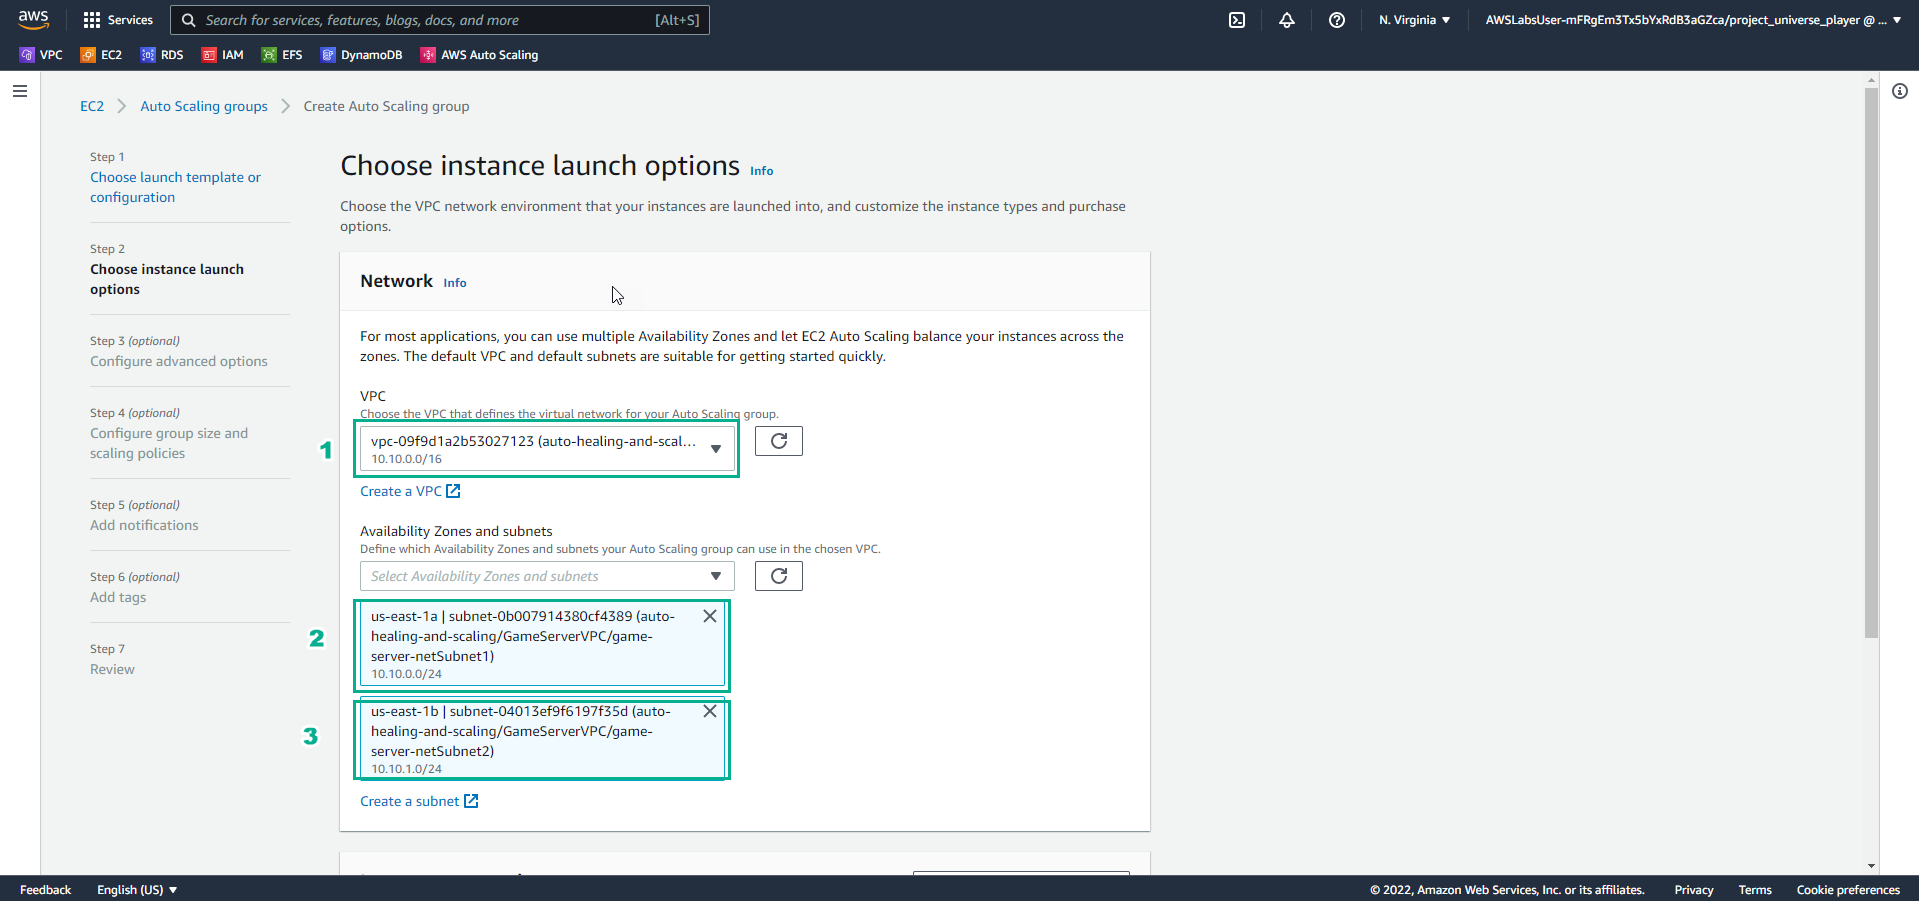
- In the Practice interface
- Read step 23 of Auto-healing and Scaling Applications
- Select the arrow to the right to see the next steps
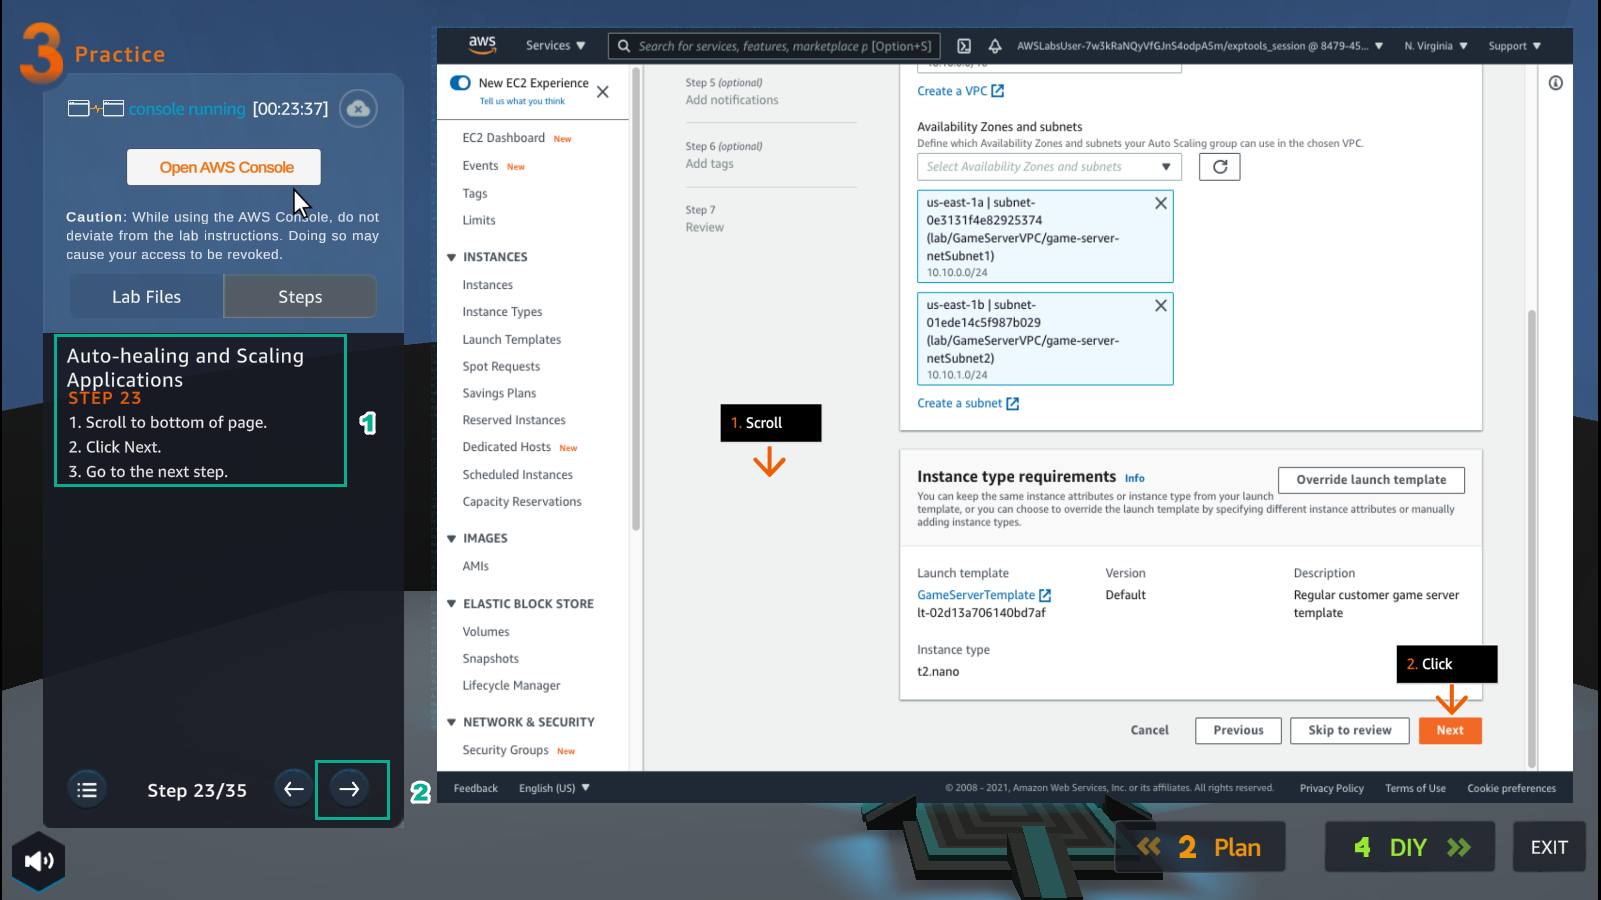
- In the EC2 Auto Scaling Group interface
- Select Next
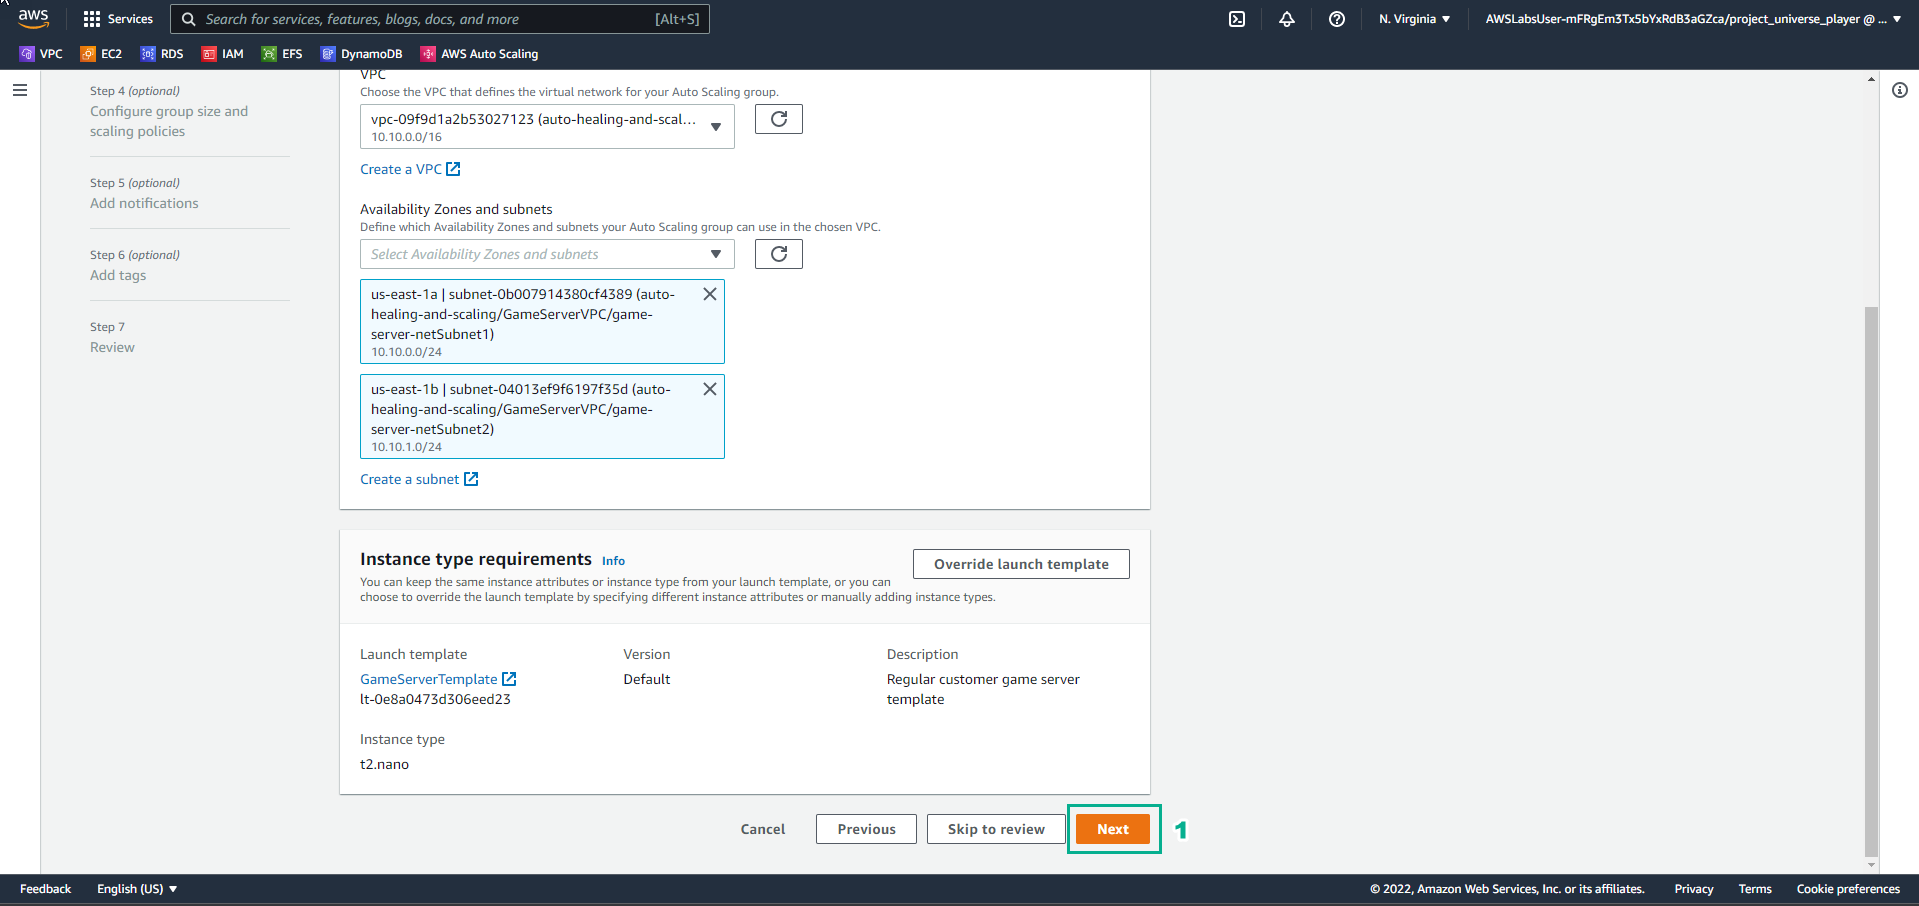
- In the Practice interface
- Read step 24 of Auto-healing and Scaling Applications
- Read CONCEPT
- Select the arrow to the right to see the next steps
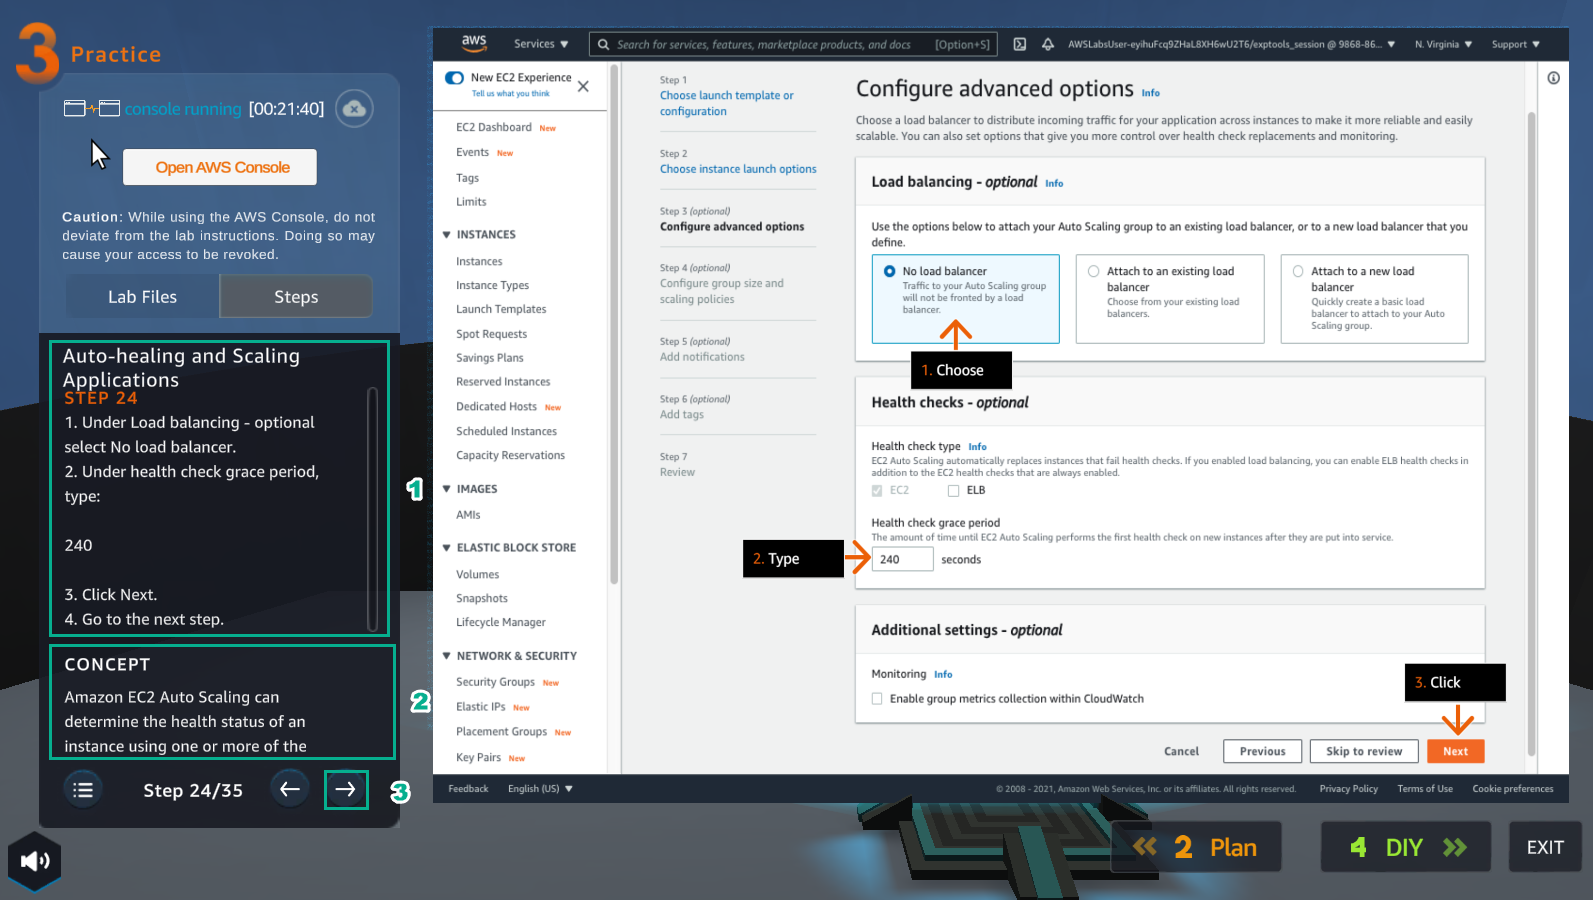
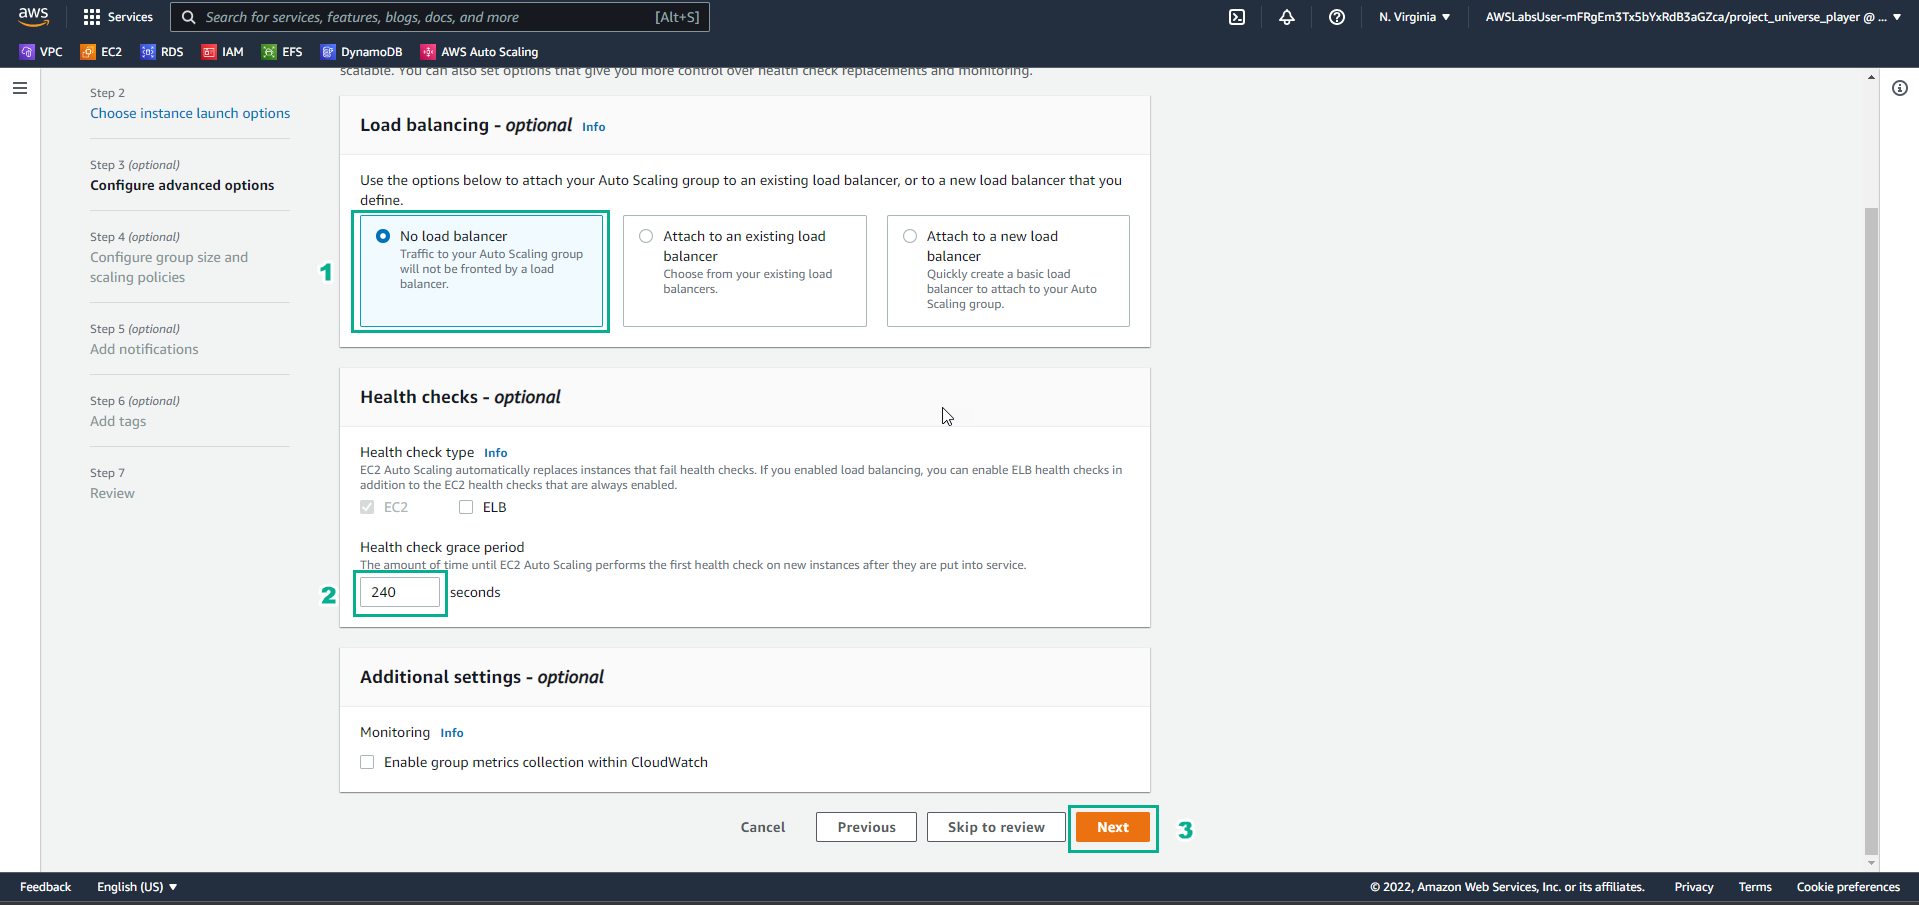
- In the EC2 Auto Scaling Group interface
- In Load balancing, select No load balancer
- In health check grace period, enter
240seconds - Select Next
- In the Practice interface
- Read step 25 of Auto-healing and Scaling Applications
- Select the arrow to the right to see the next steps
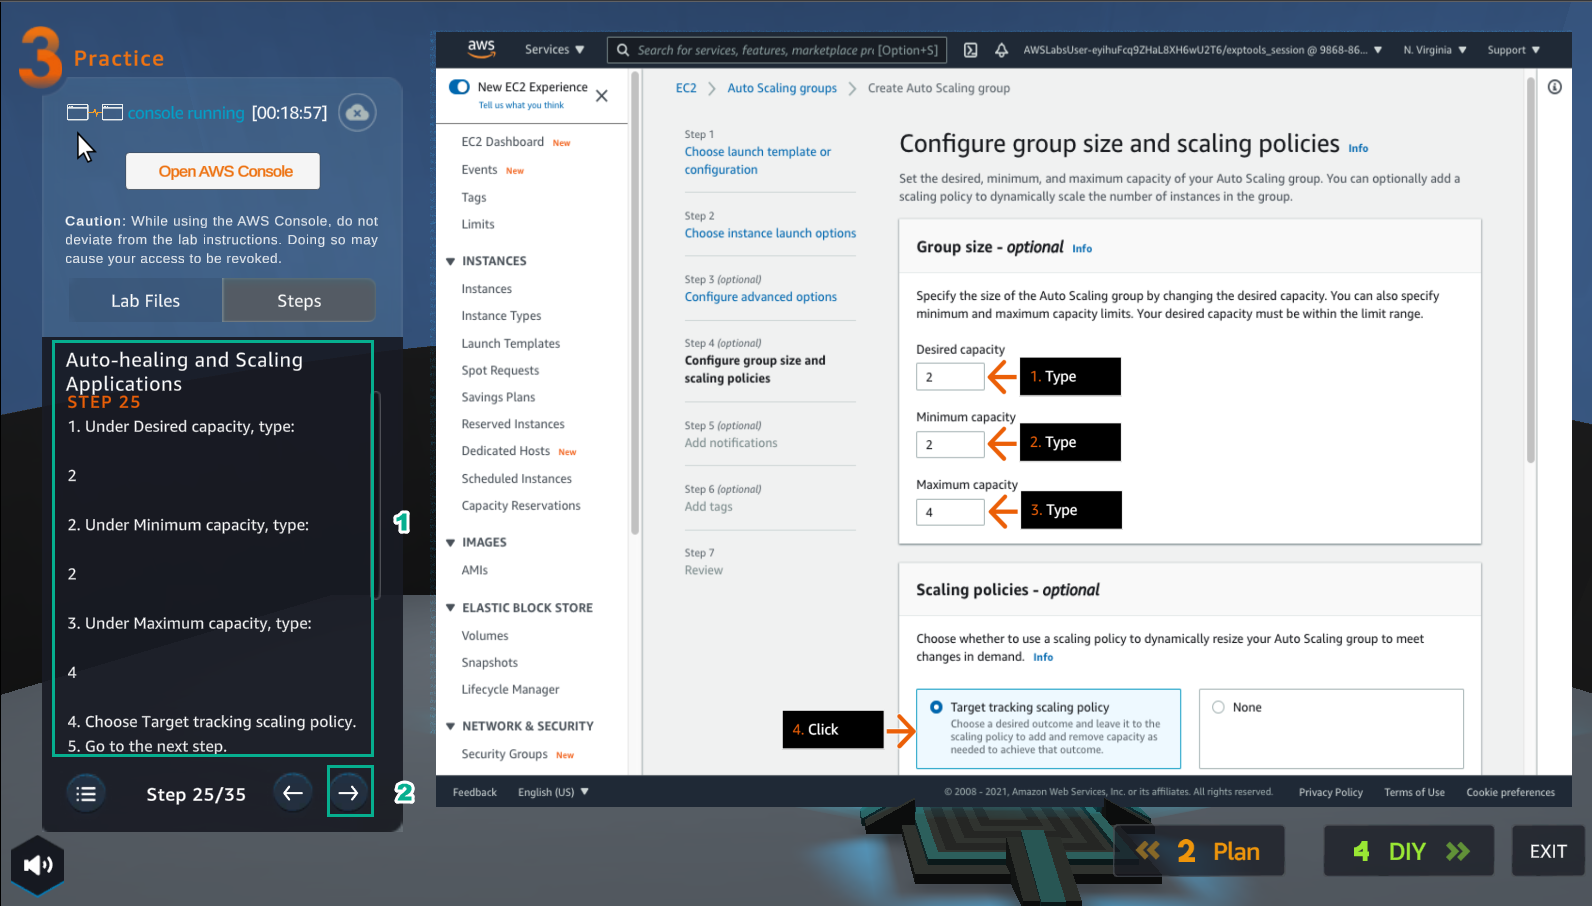
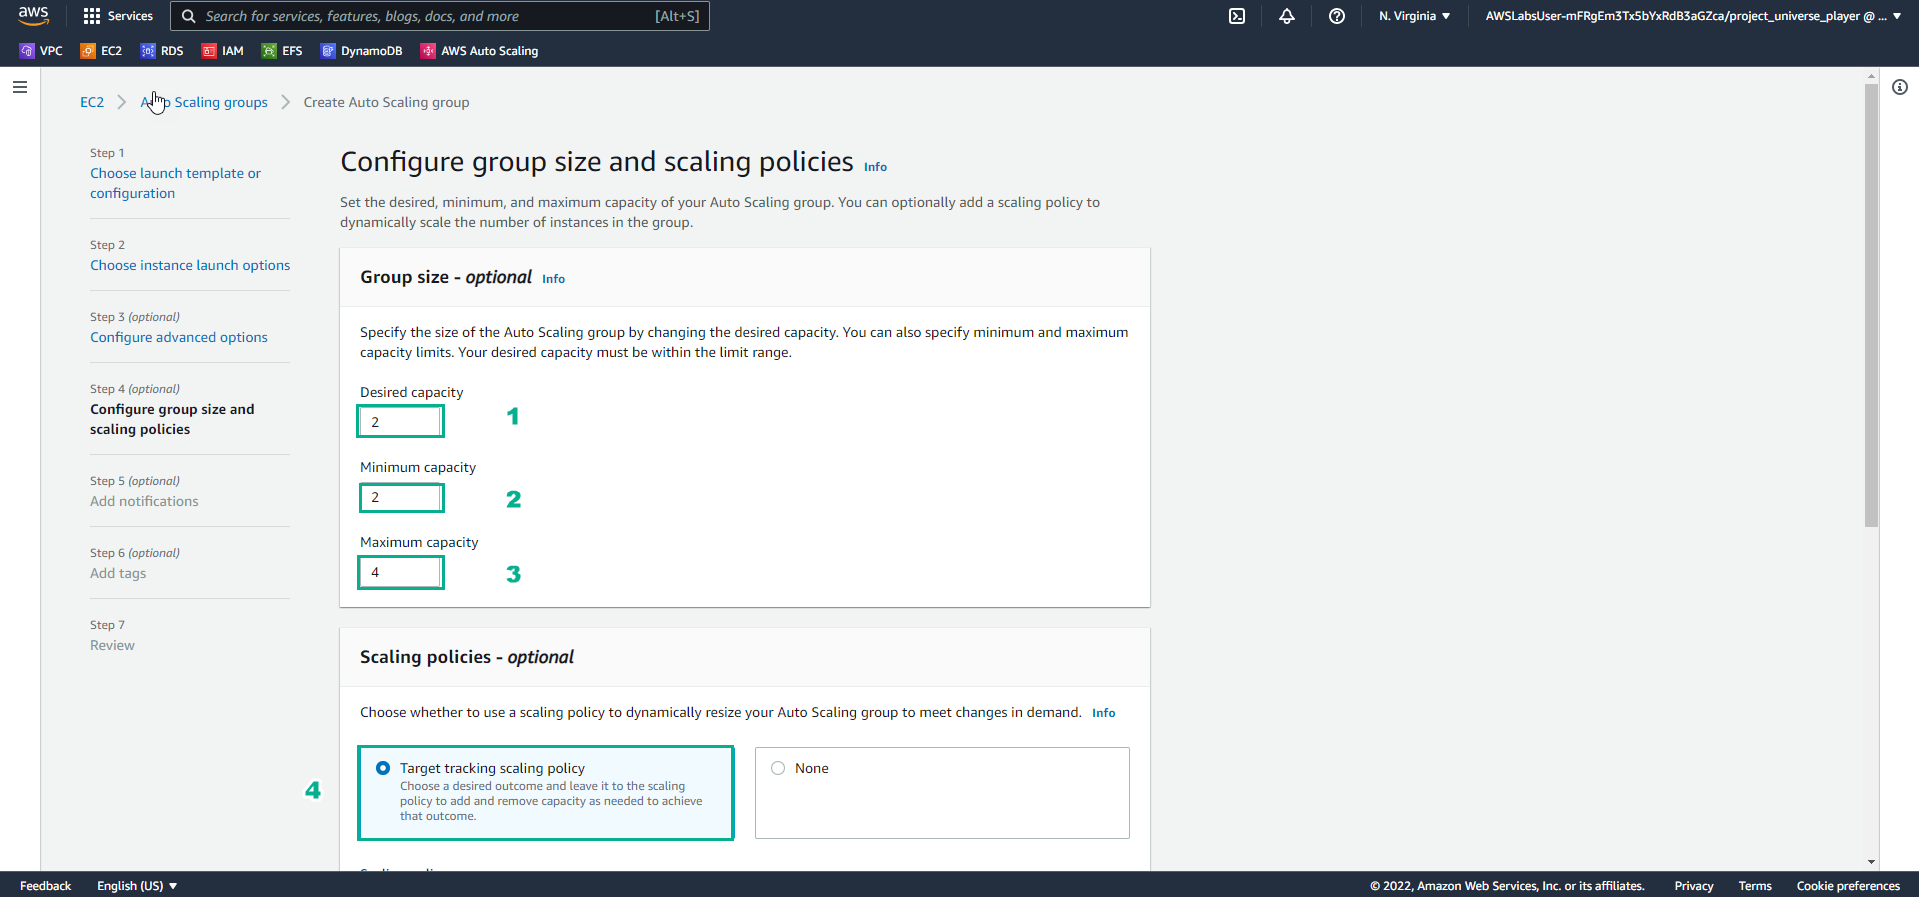
- In the EC2 Auto Scaling Group interface
- In Configure group size and scaling policies
- In Group size
- Desired capacity, enter 2
- Minimum capacity, enter 2
- Maximum capacity, enter 4
- In Scaling policies, select tarfget tracking scaling policy
- In the Practice interface
- Read step 26 of Auto-healing and Scaling Applications
- Read CONCEPT
- Select the arrow to the right to see the next steps
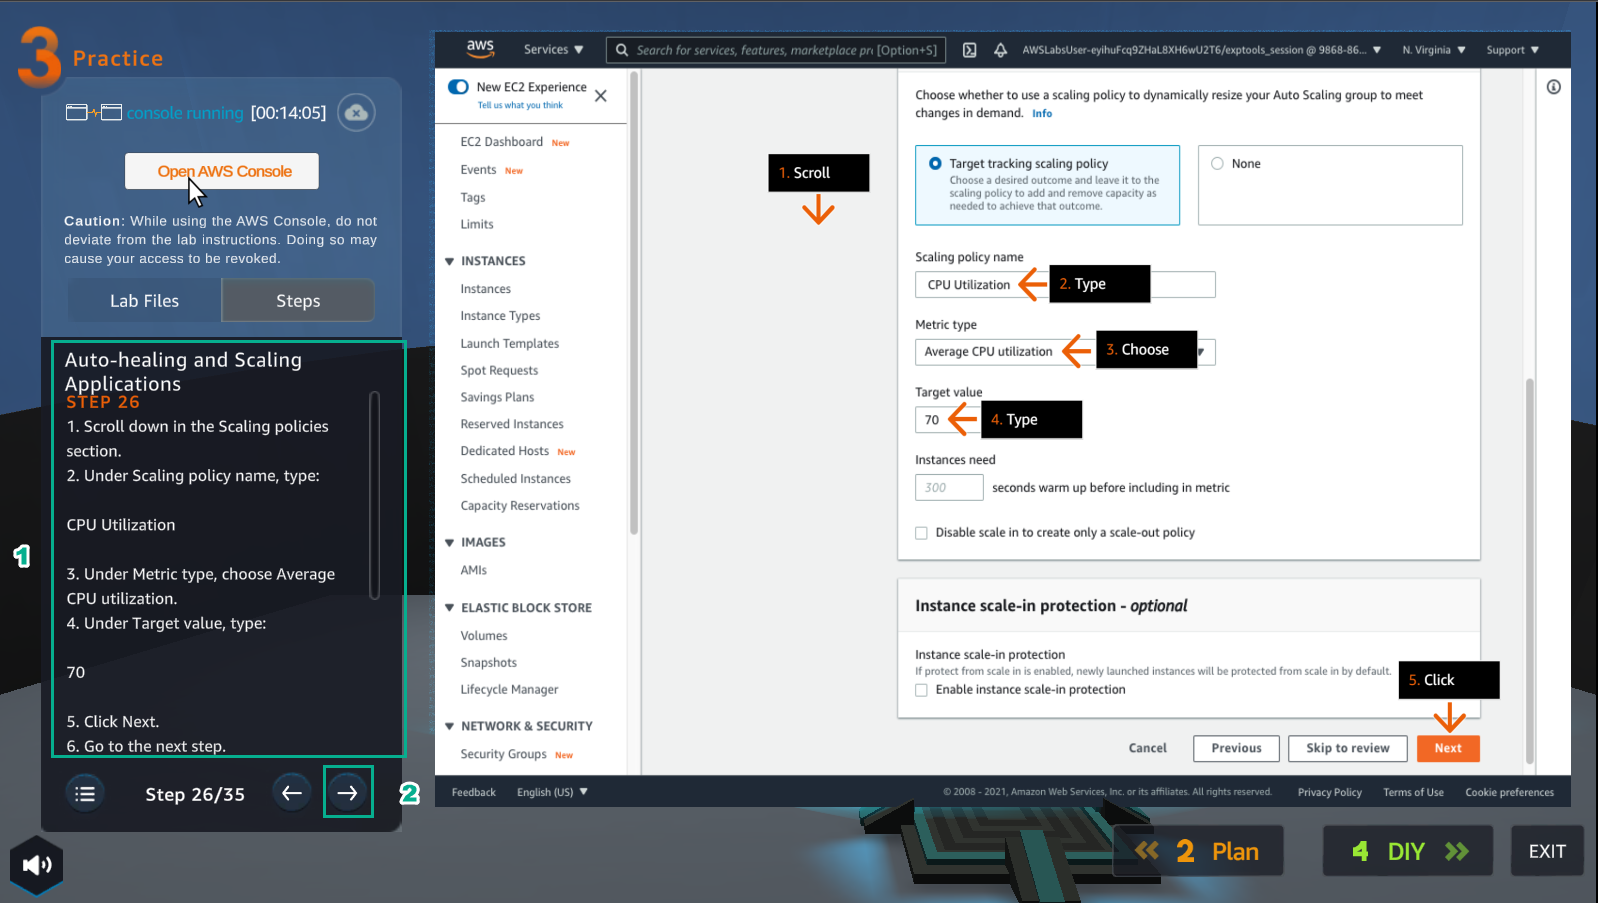
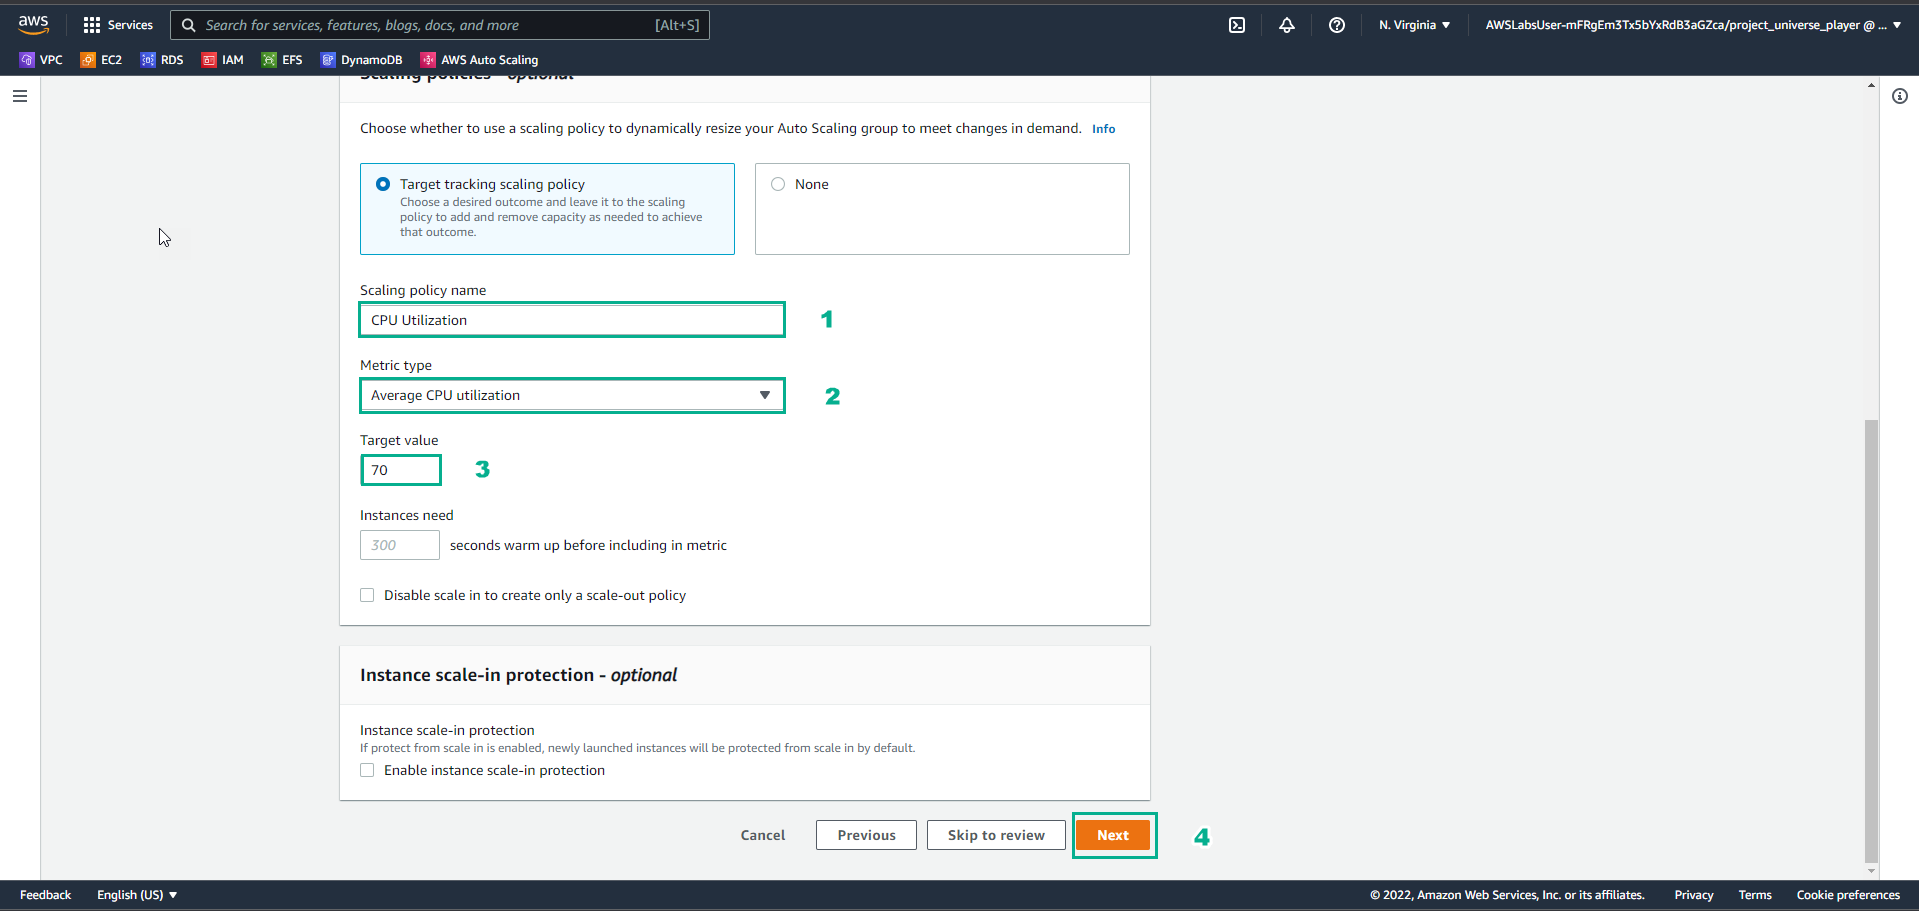
- In the EC2 Auto Scaling interface
- In Scaling policy name, enter
CPU Utilization - Metric type, select Aerage CPU utilization
- Target value, enter
70 - Select Next
- In the Practice interface
- Read step 27 of Auto-healing and Scaling Applications
- Read CONCEPT
- Select the arrow to the right to see the next steps
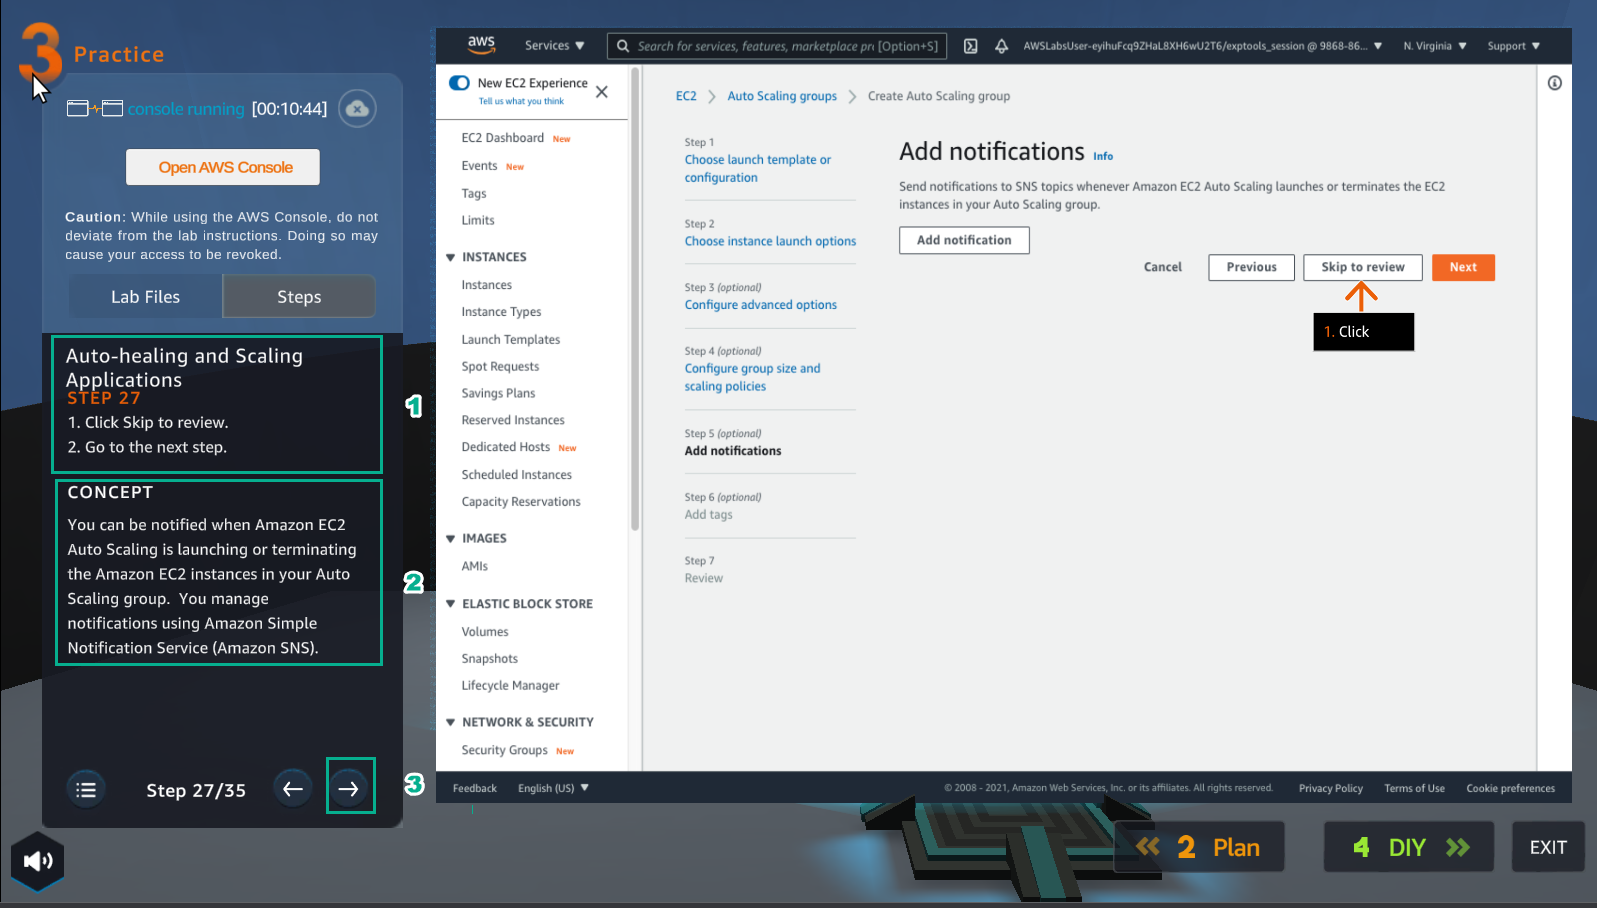
- In the EC2 Auto Scaling Group interface
- Select Skip to review
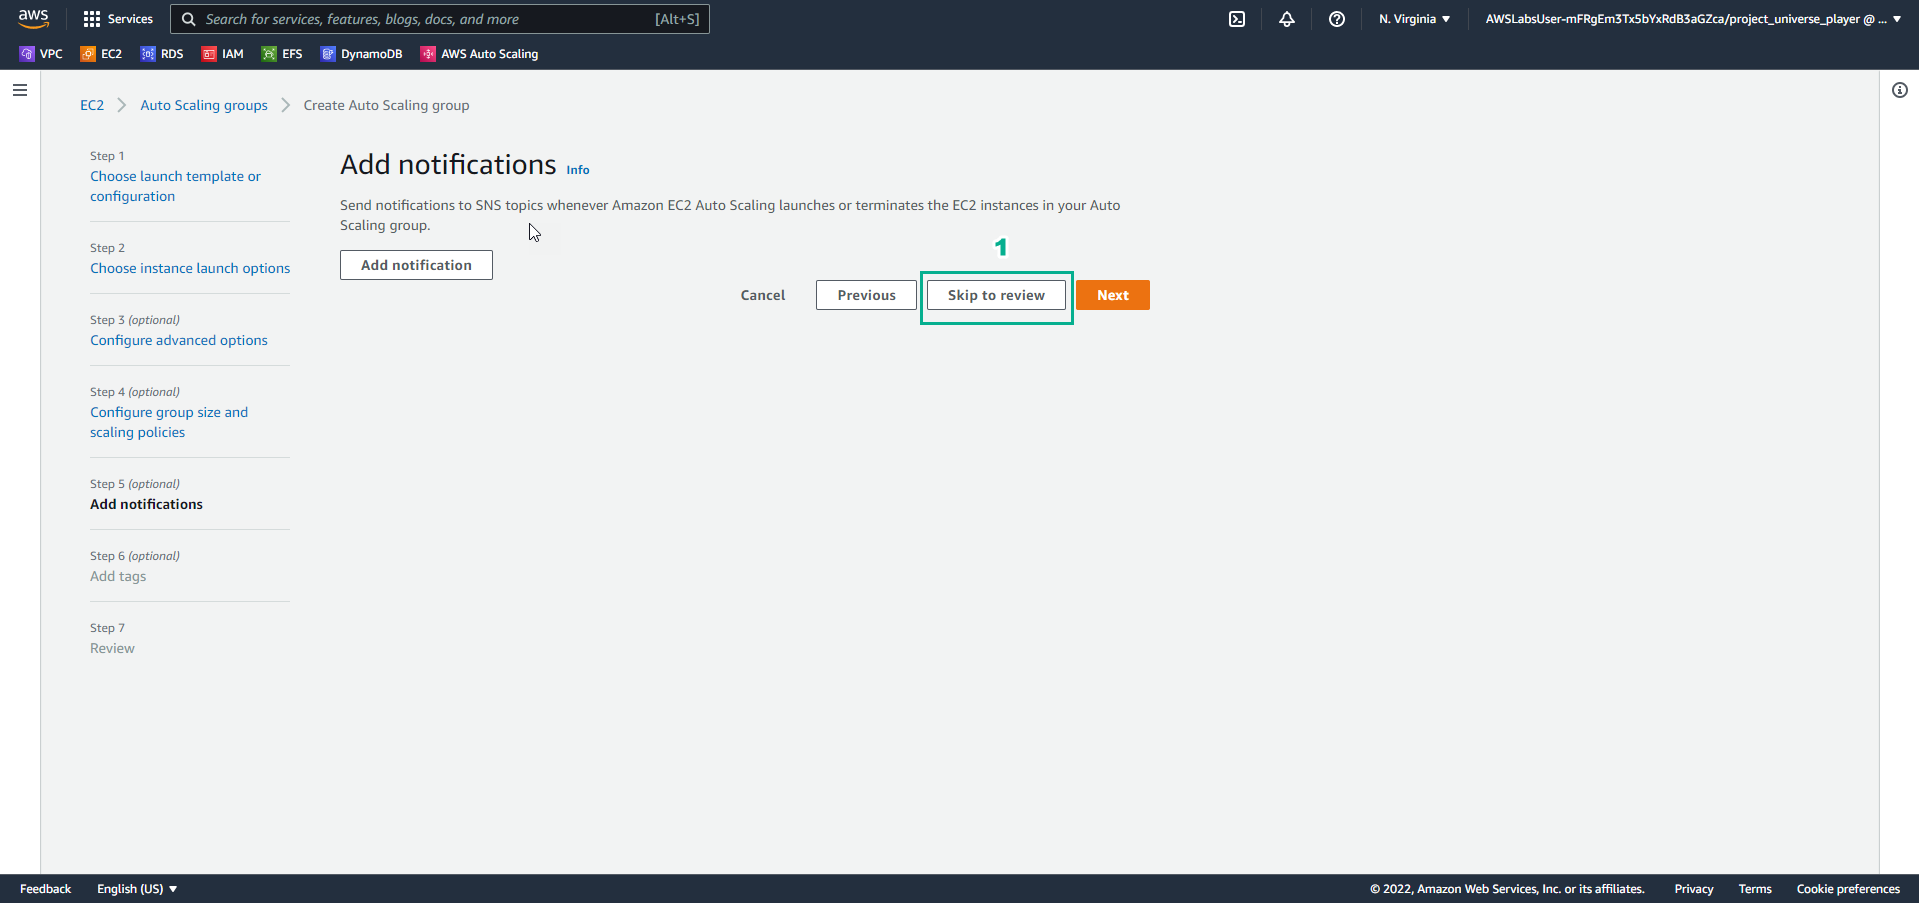
- In the Practice interface
- Read step 28 of Auto-healing and Scaling Applications
- Select the arrow to the right to see the next steps
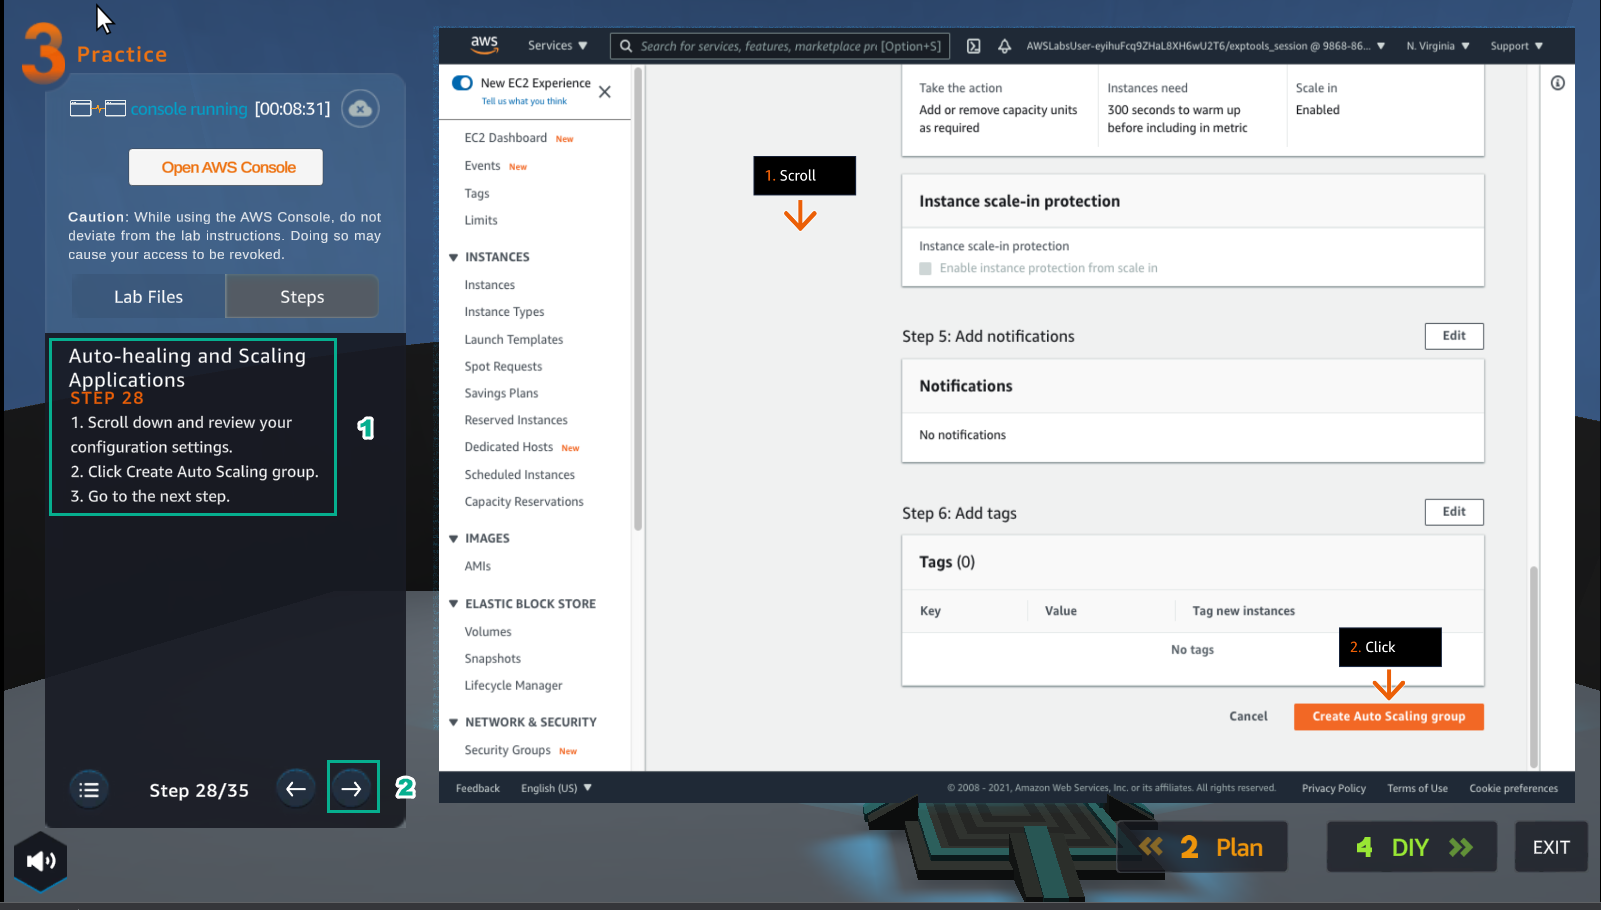
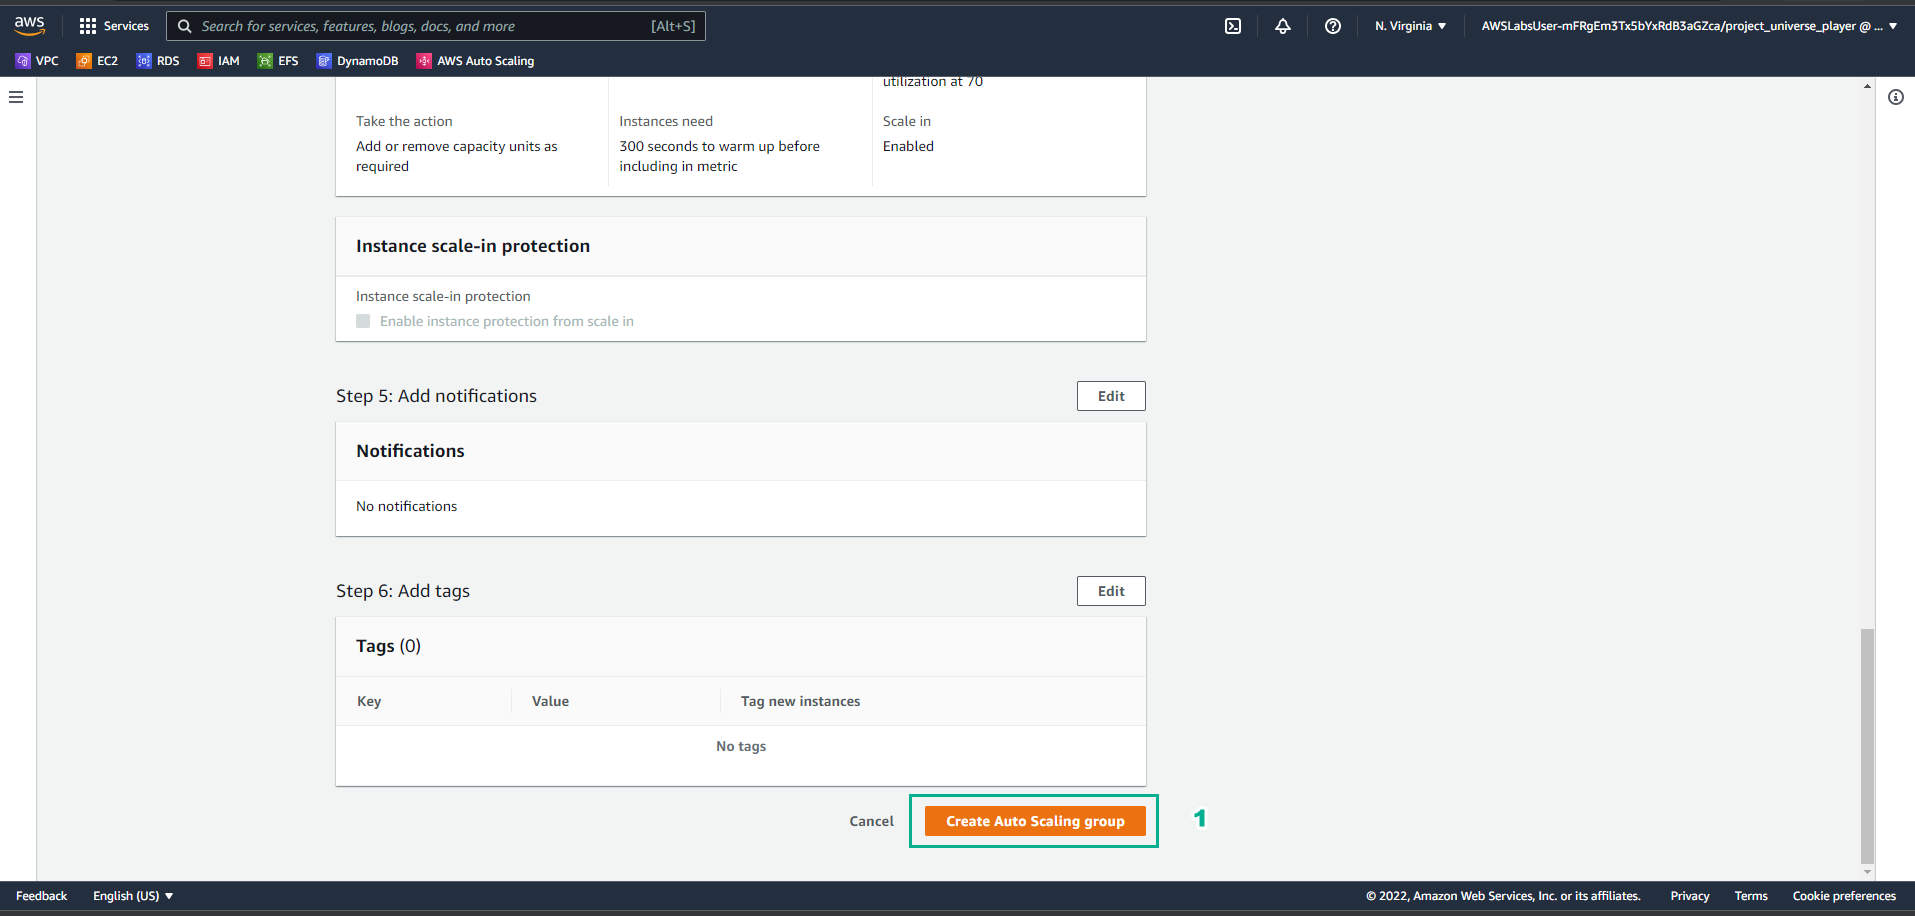
- In the Create Auto Scaling group interface
- Select Create Auto Scaling group
- In the Practice interface
- Read step 29 of Auto-healing and Scaling Applications
- Read CONCEPT
- Select the arrow to the right to see the next steps
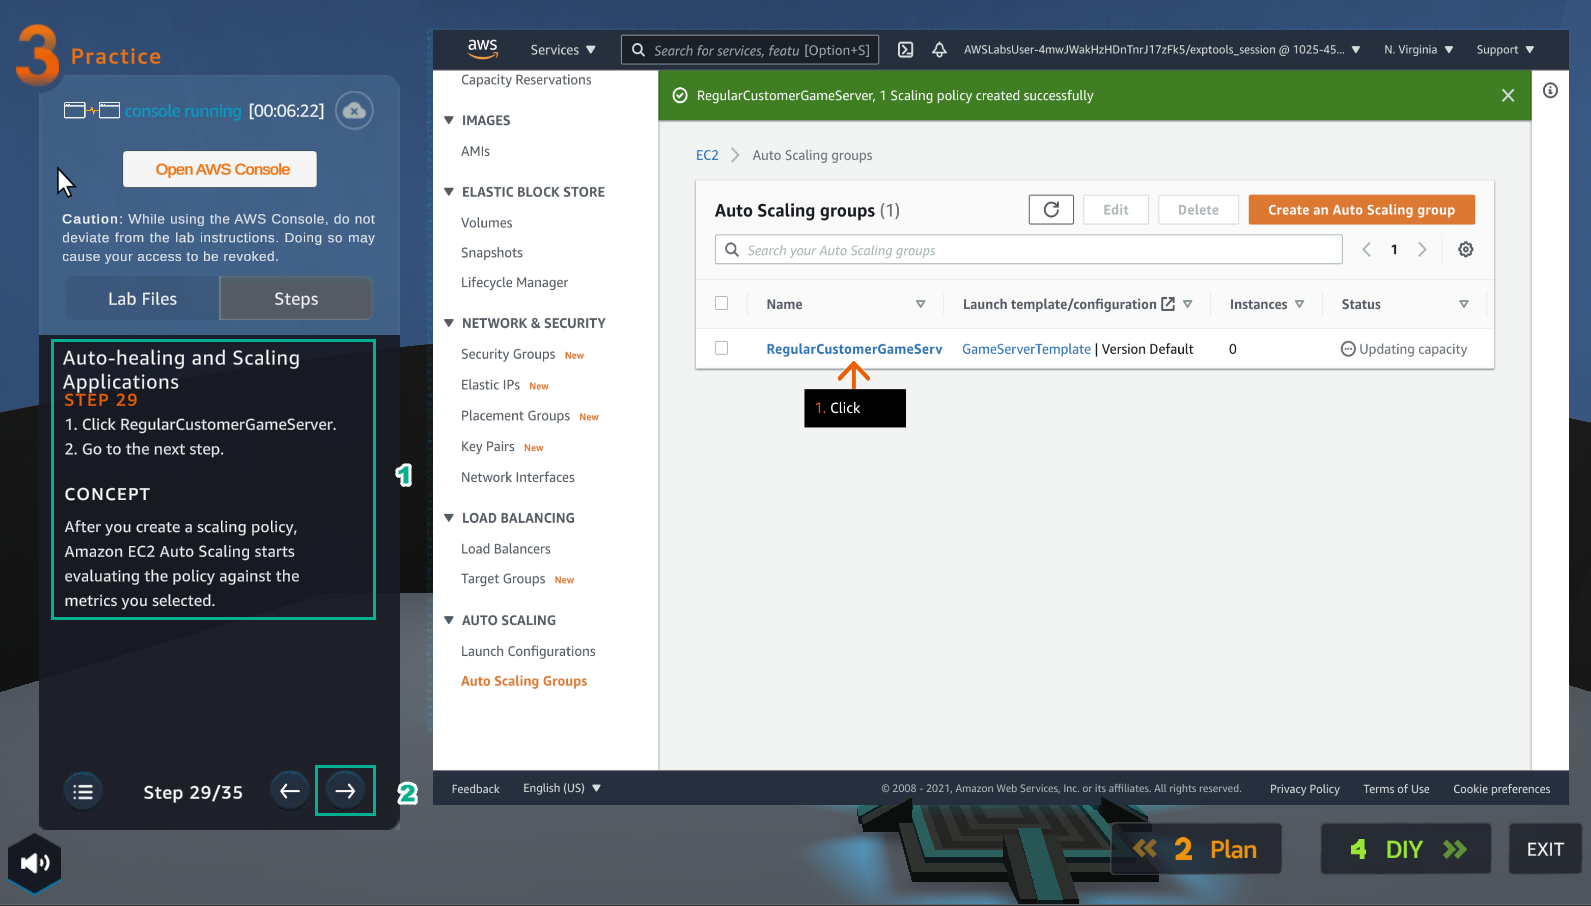
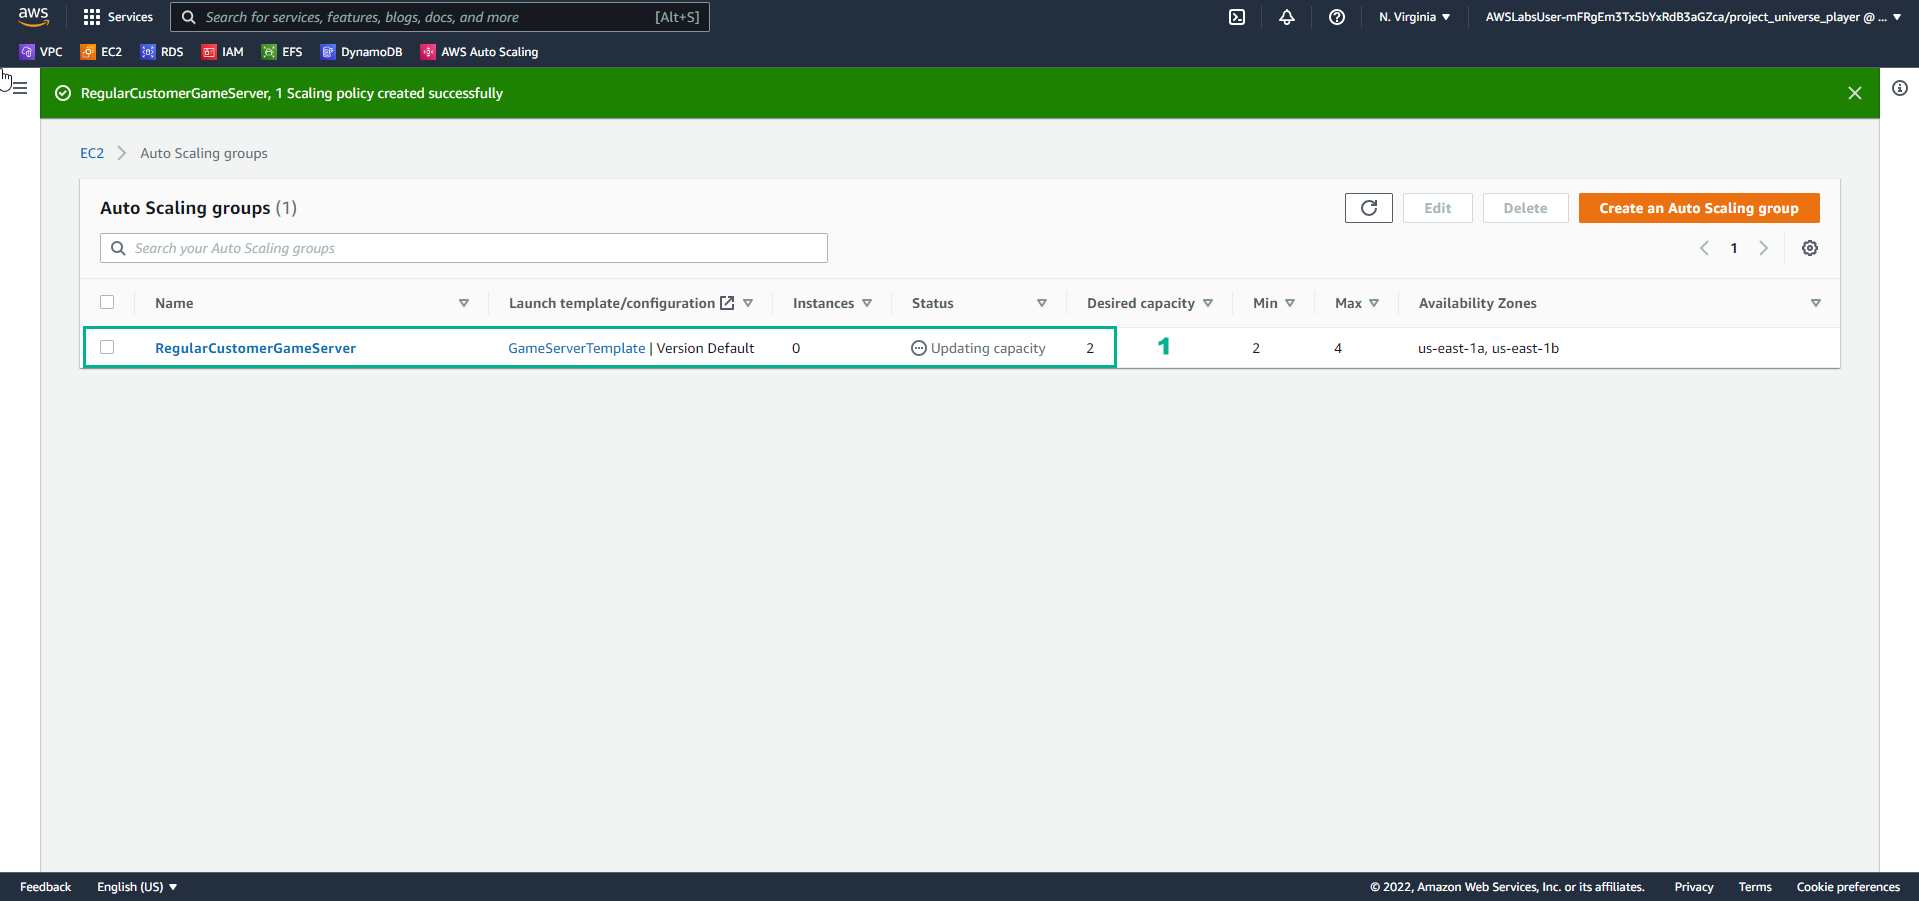
- In the EC2 Auto Scaling group interface
- View initialization results RegularCustomerGameServer
- In the Practice interface
- Read step 30 of Auto-healing and Scaling Applications
- Read CONCEPT
- Select the arrow to the right to see the next steps
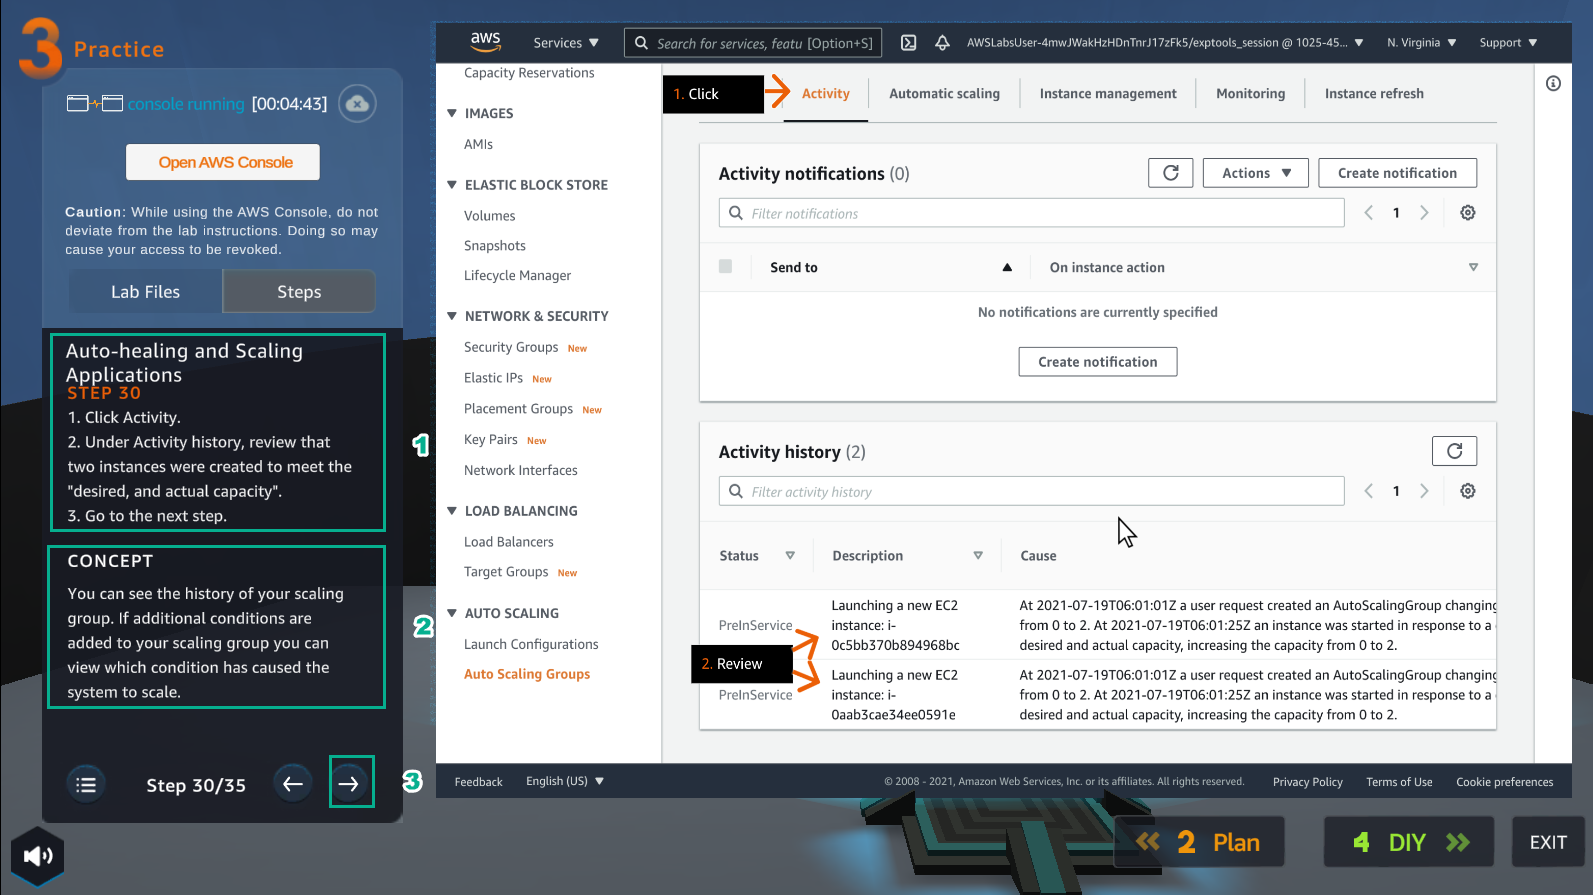
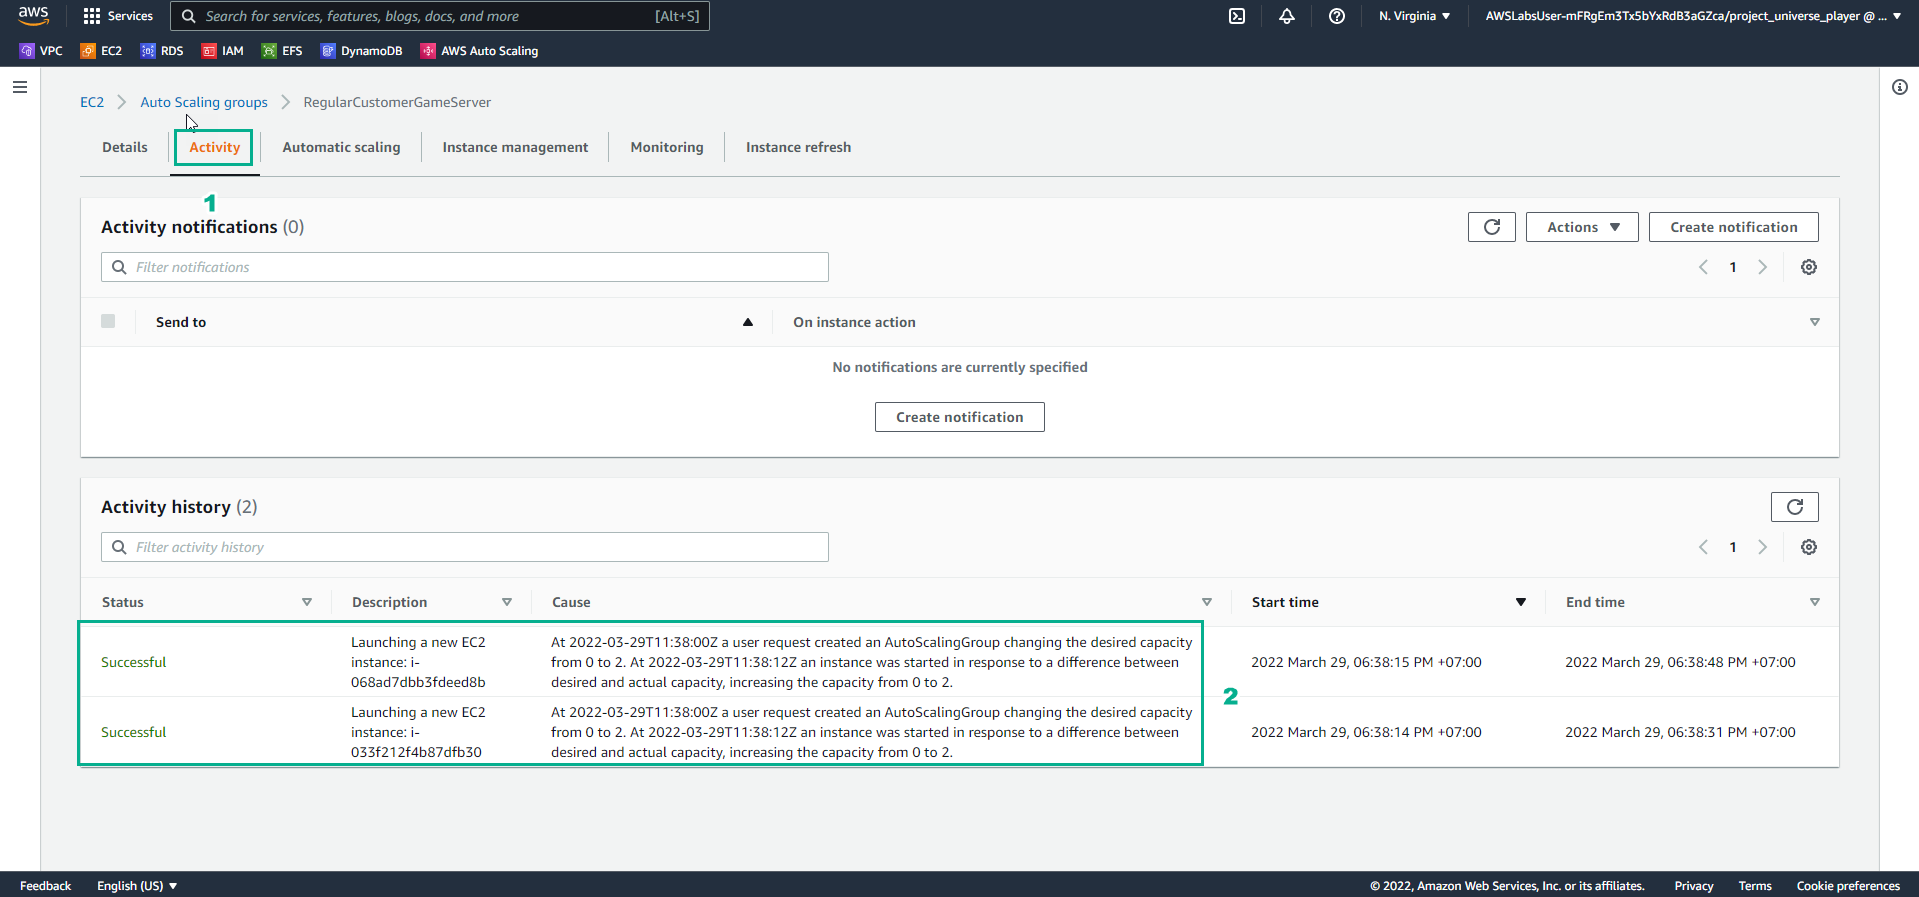
- In the EC2 Auto Scaling Group interface
- Select Activity
- View Activity history
- In the Practice interface
- Read step 3 of Auto-healing and Scaling Applications
- Read CONCEPT
- Select the arrow to the right to see the next steps
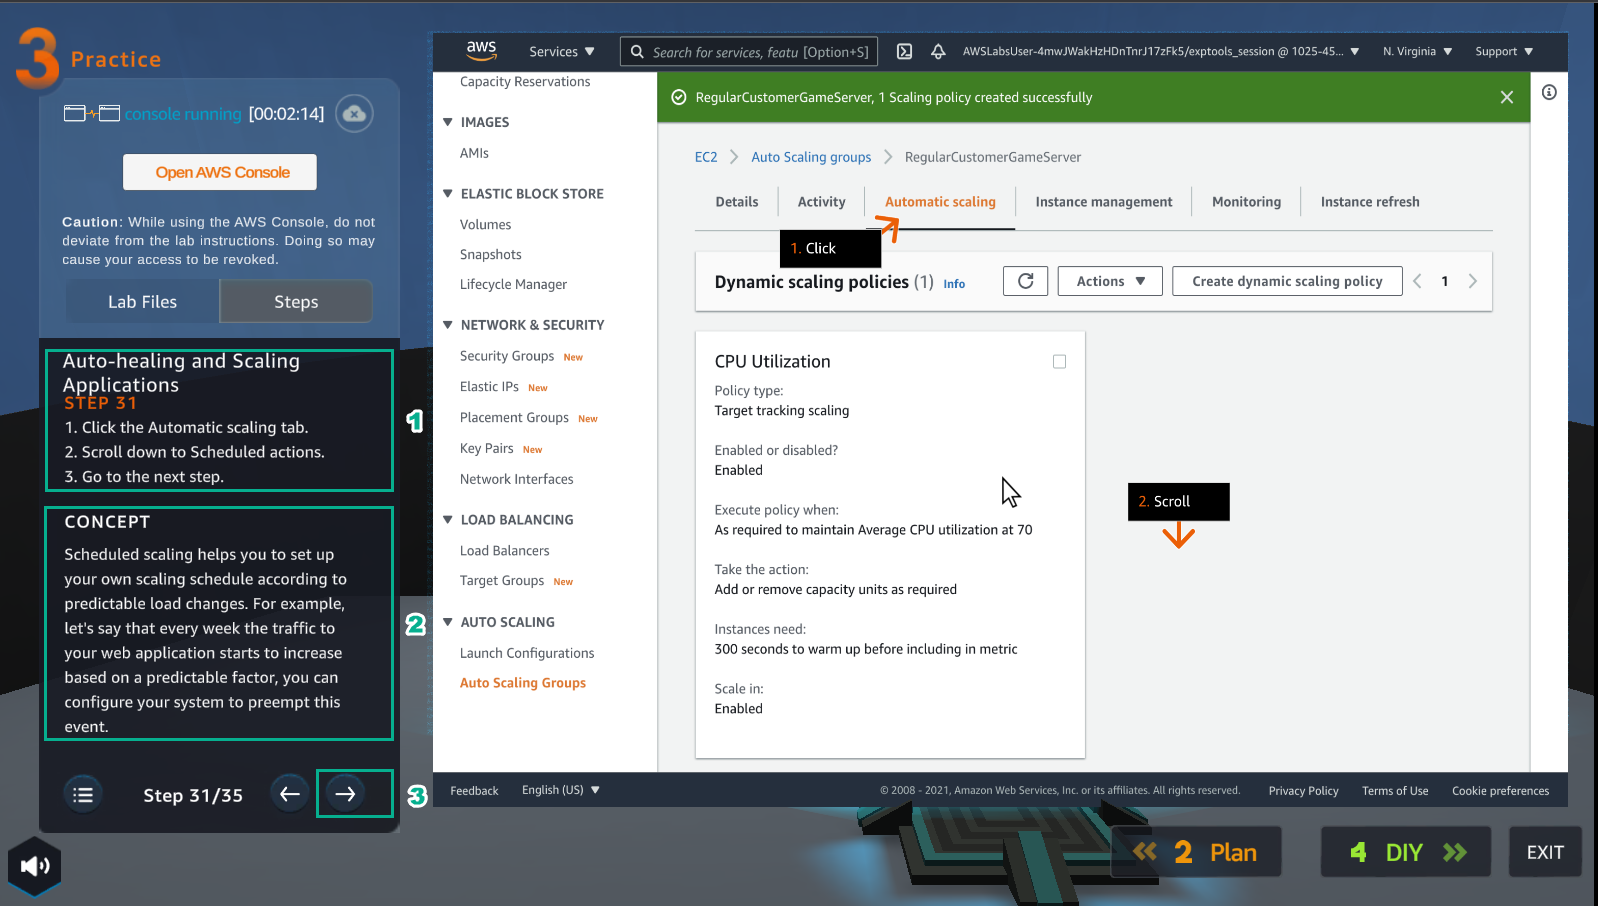
- In the EC2 Auto Scaling Group interface
- Select Automatic scaling
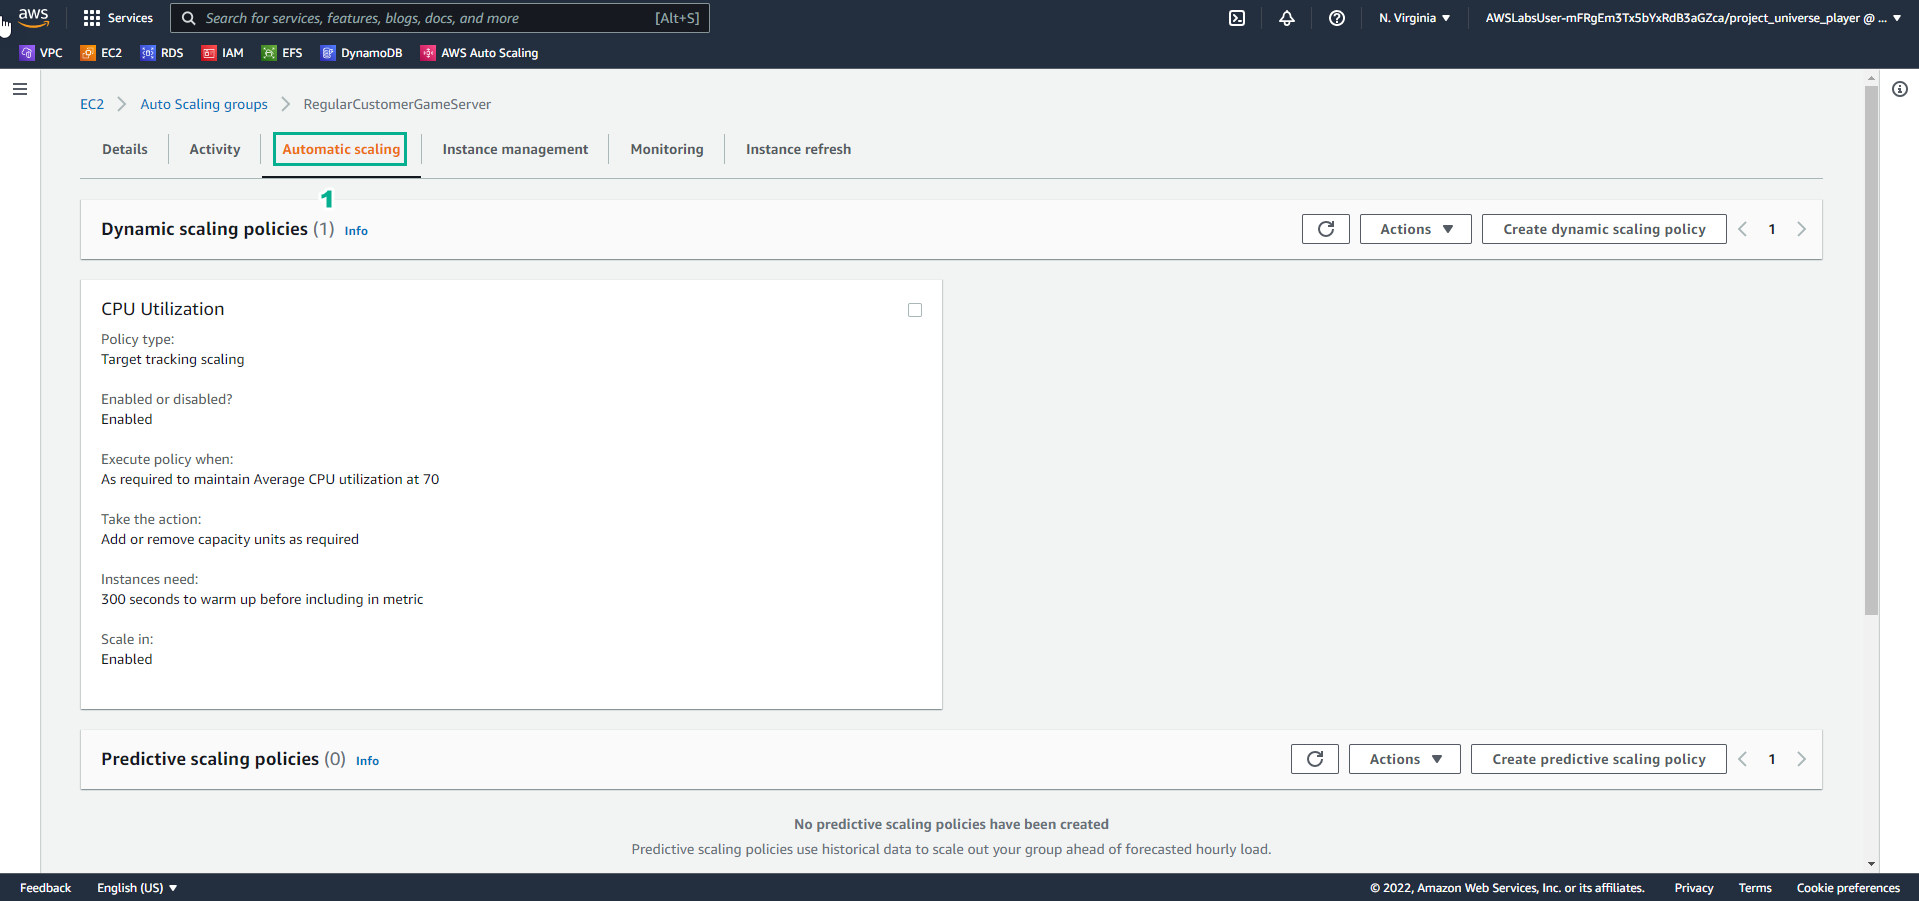
- In the Practice interface
- Read step 32 of Auto-healing and Scaling Applications
- Select the arrow to the right to see the next steps
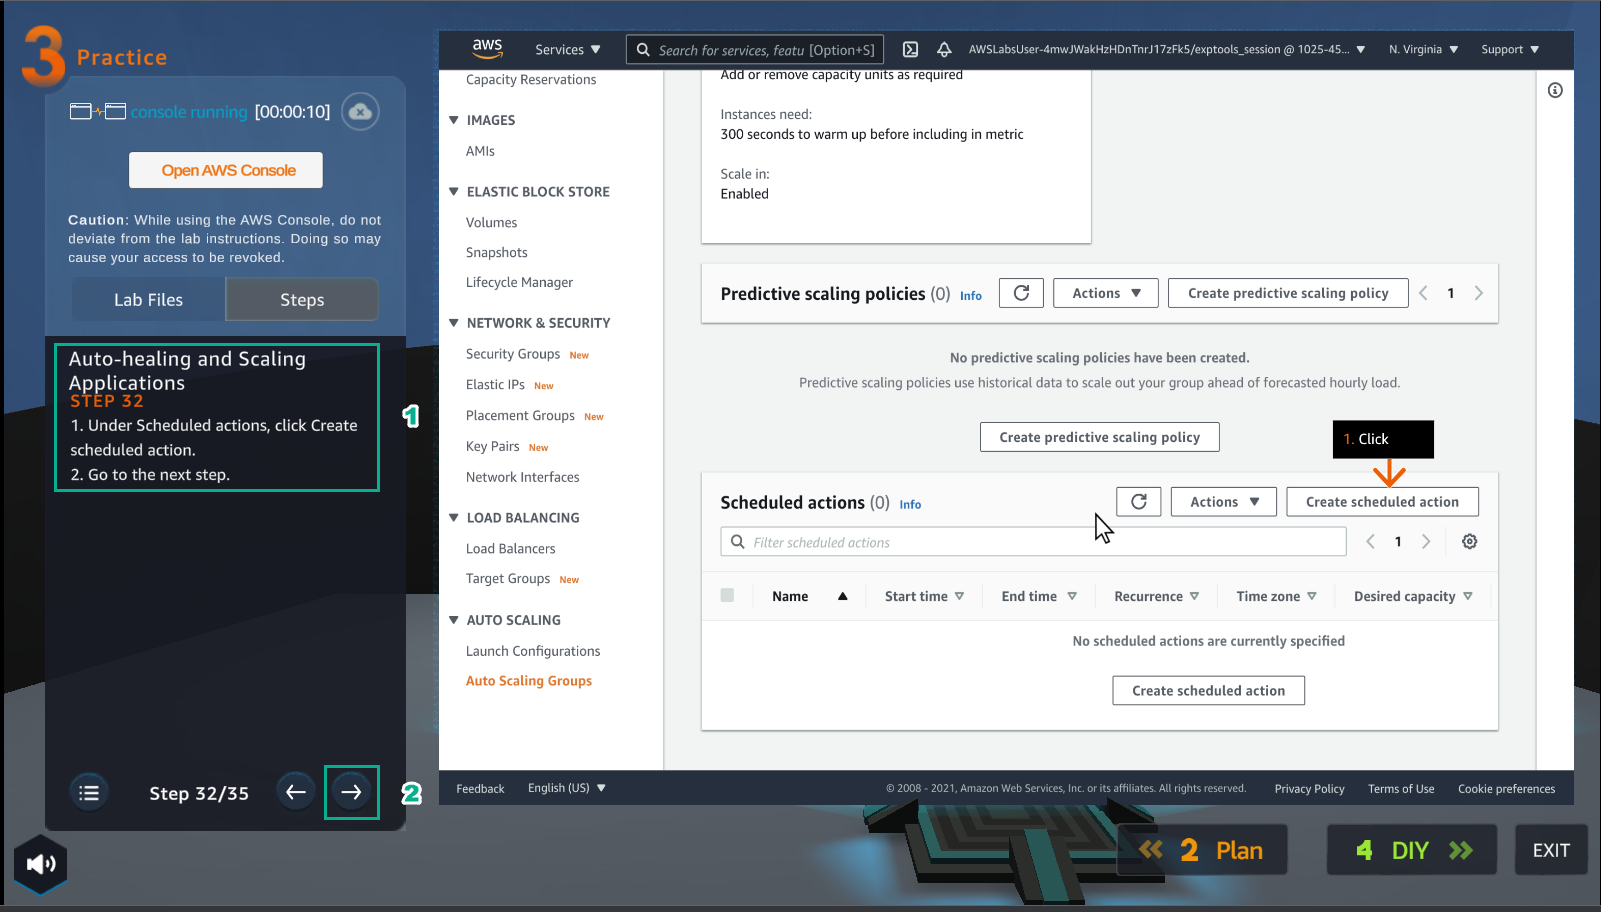
- In the EC2 Auto Scaling Group interface
- Select Create scheduled action
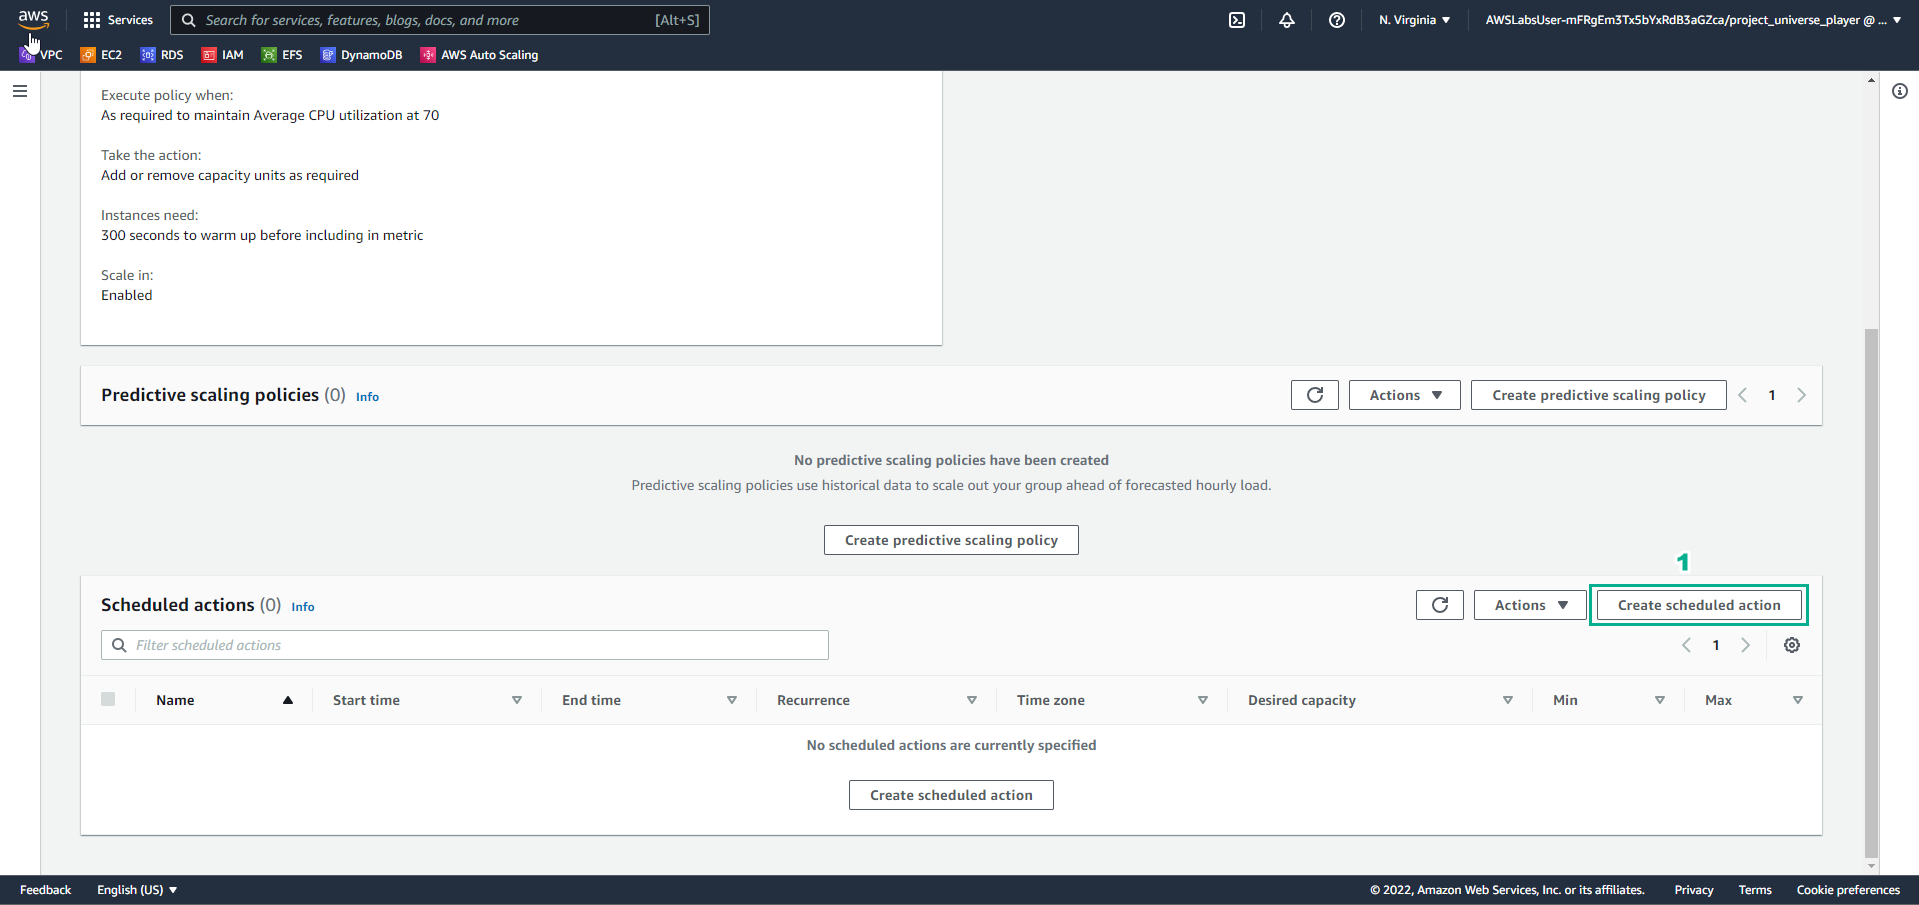
- In the Practice interface
- Read step 33 of Auto-healing and Scaling Applications
- Select the right arrow to see the next steps
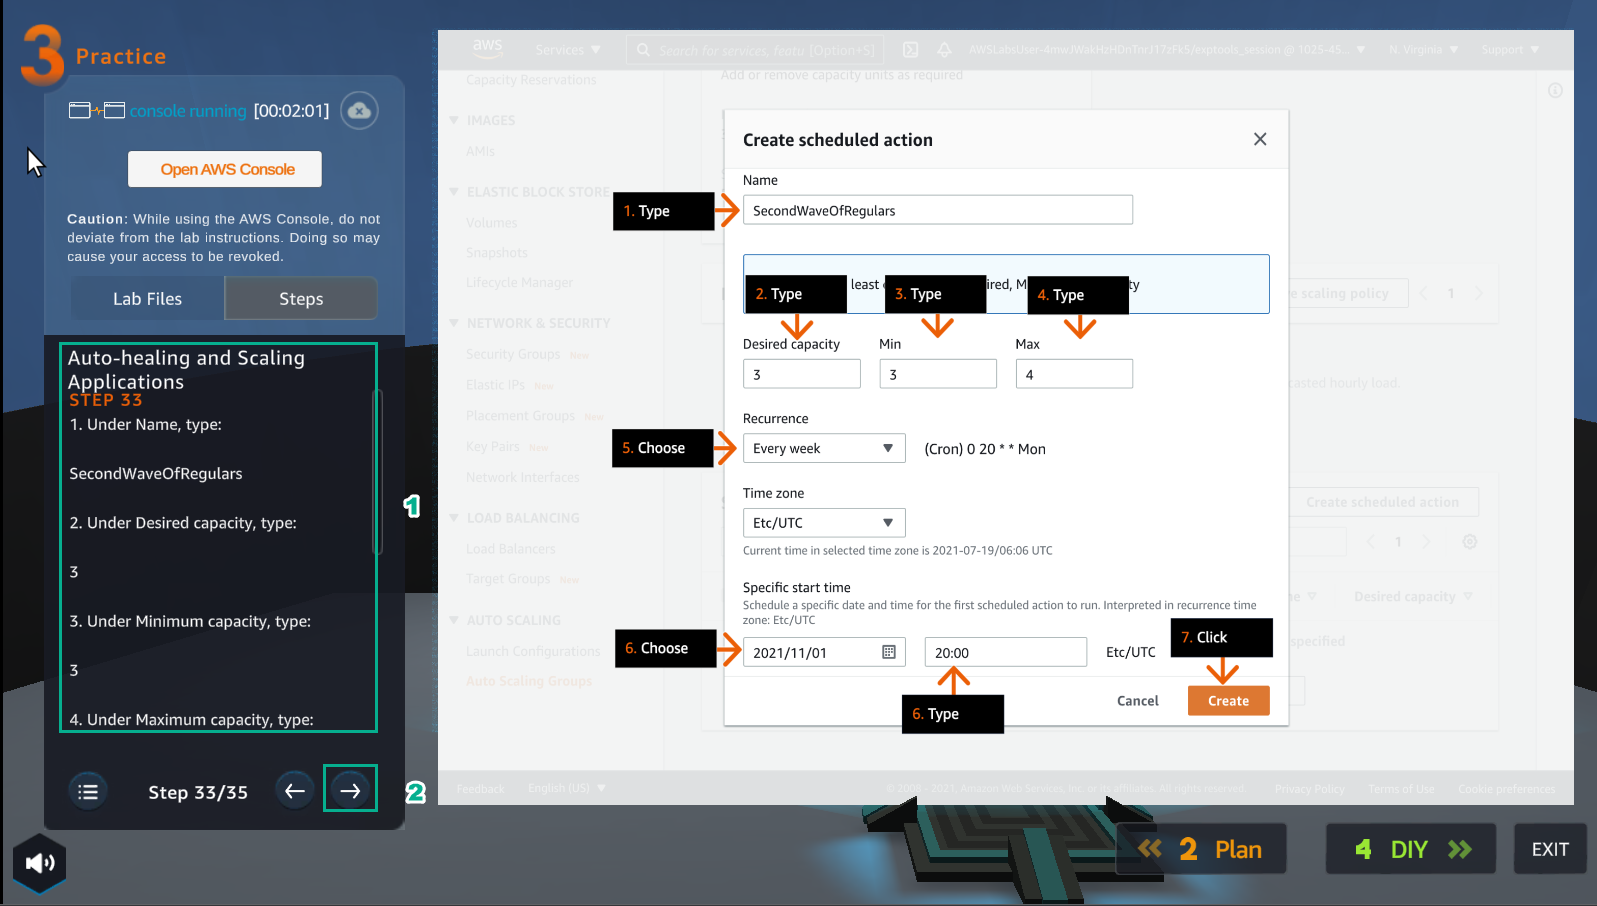
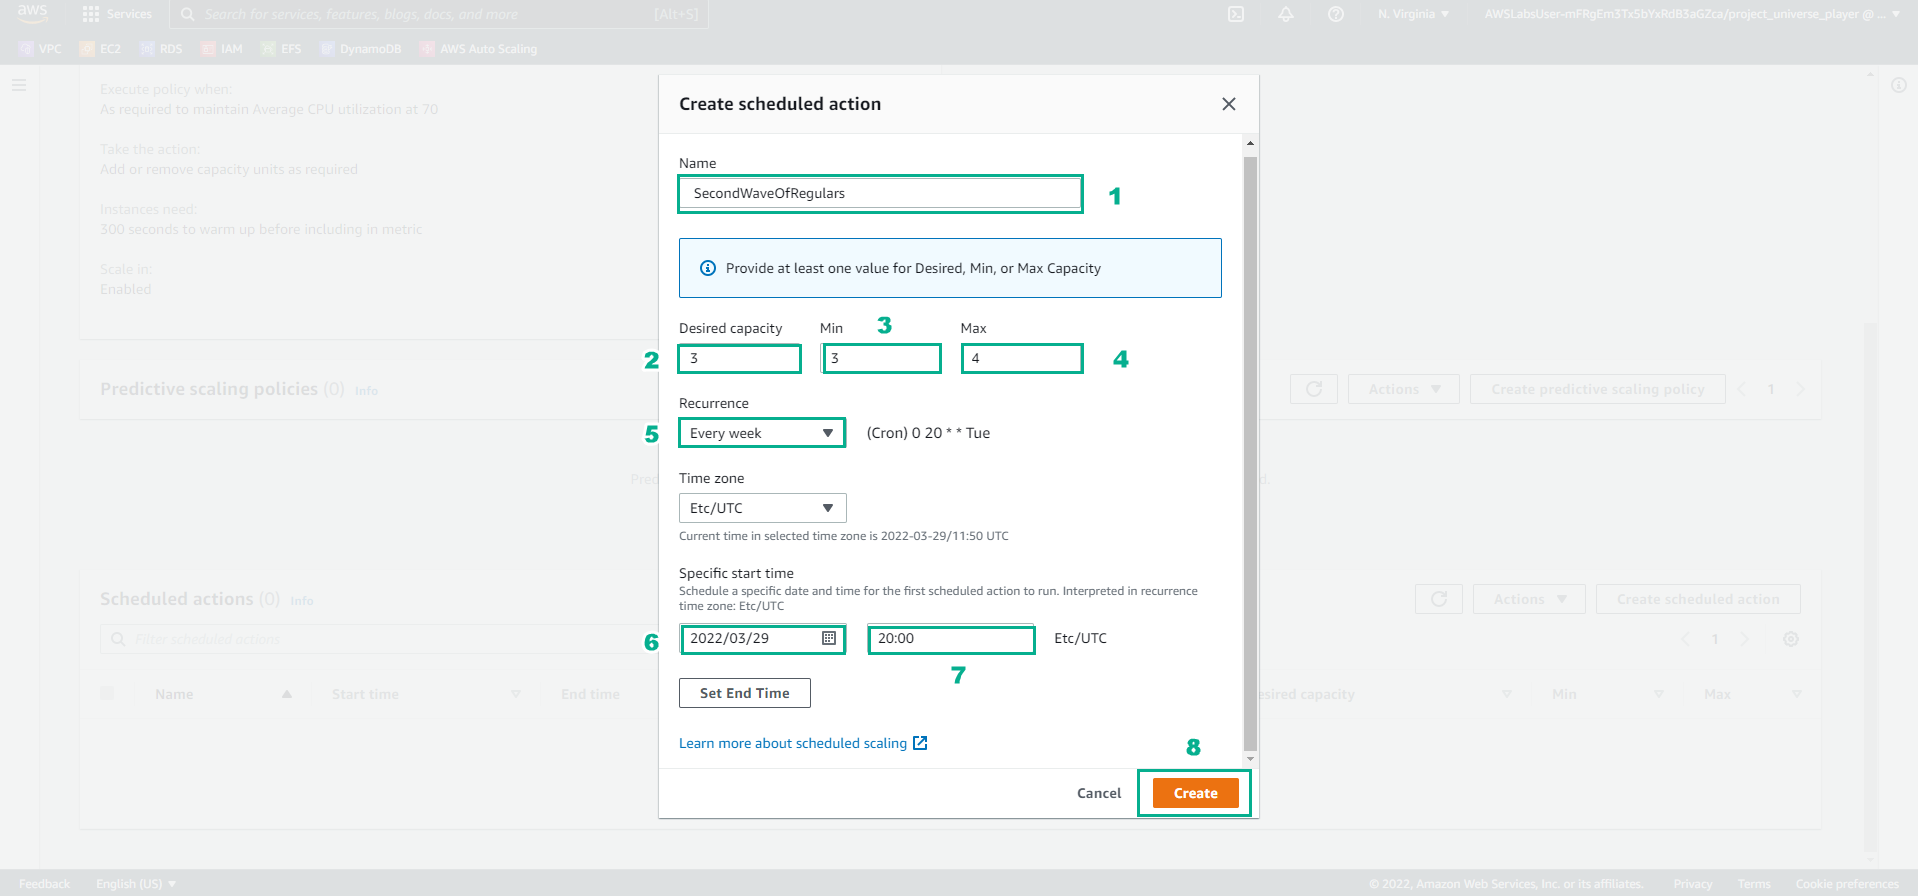
- In the Create scheduled action interface
- Name, enter
SecondWaveOfRegulars - Desired capacity, enter
3 - Min, enter
3 - Max, enter
4 - Recurrence, select Every week
- Specific start time, choose a time in the future
- Select Create
- In the Practice interface
- Read step 34 of Auto-healing and Scaling Applications
- Select the right arrow to see the next steps
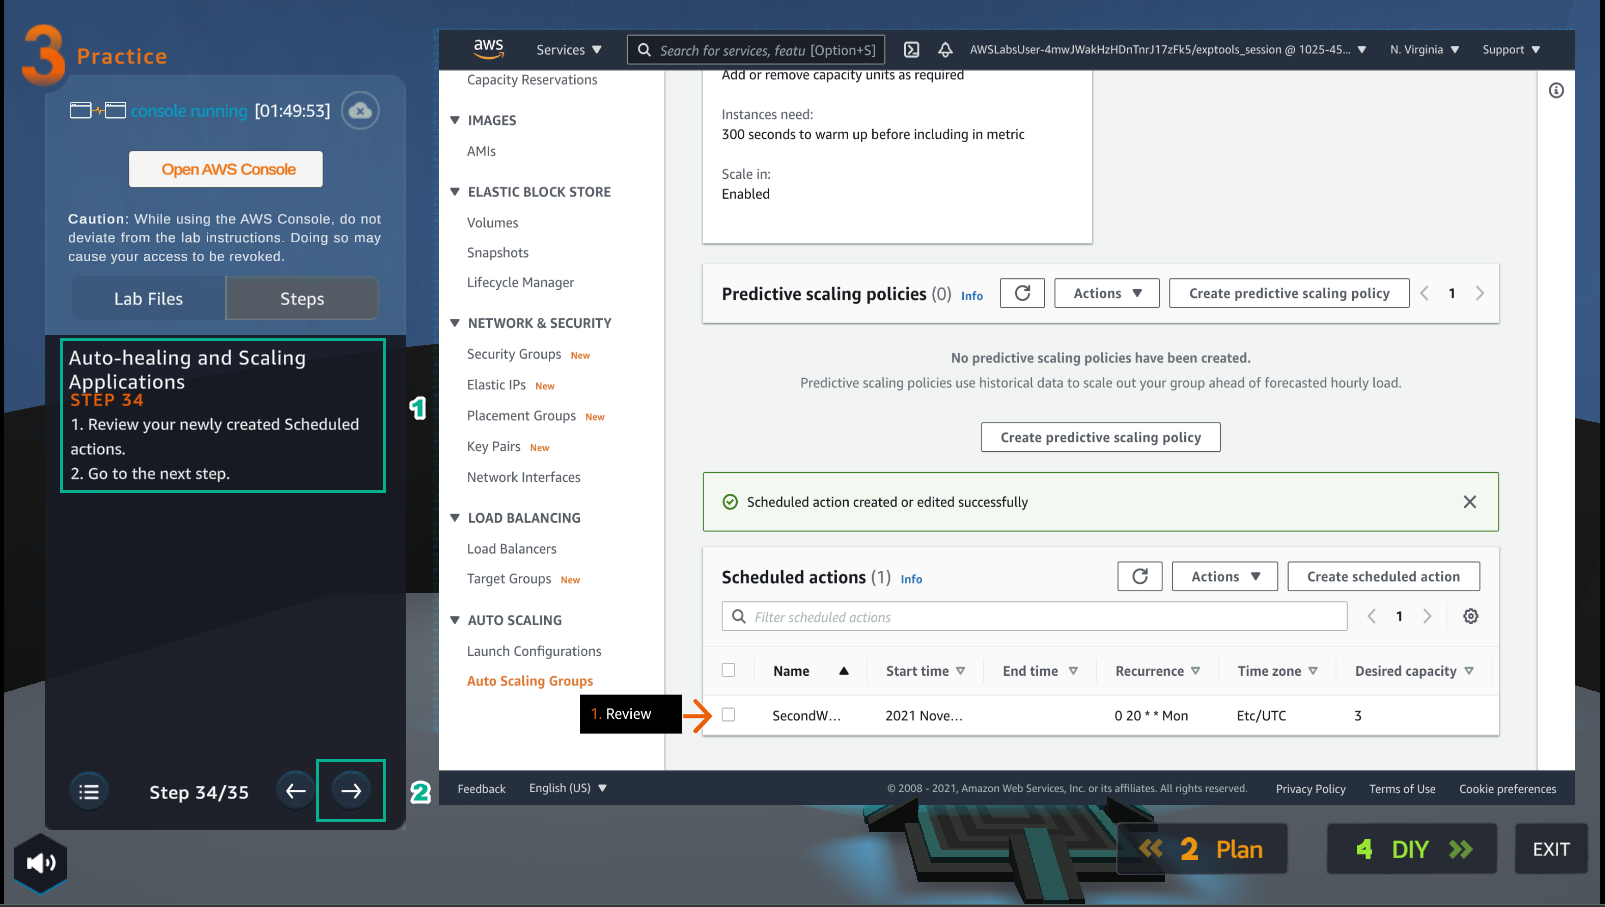
- Congratulations to the player on completing the lab