Practice
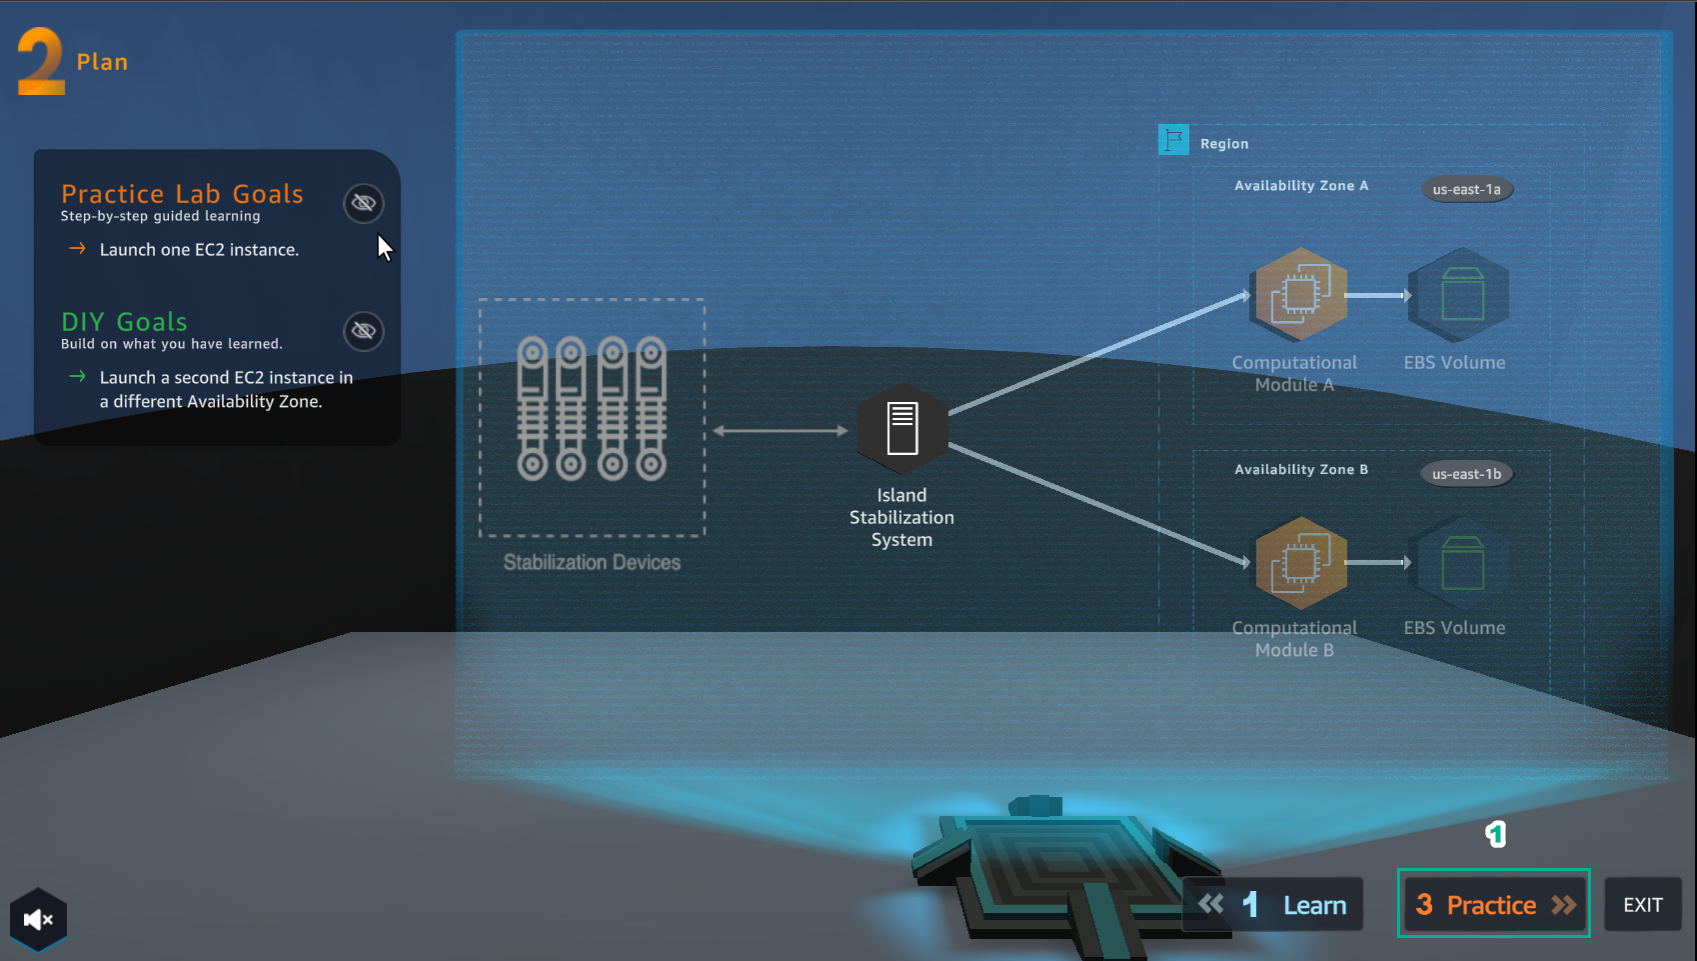
After watching Plan, the player prepares for Practice
- Select Practice to perform the lab
- Read the first step of Cloud First Steps and CONCEPT
- Select START LAB
- Select the arrow to the right to perform the next steps

- Select Open AWS Console
- Read step 2 of Cloud First Steps
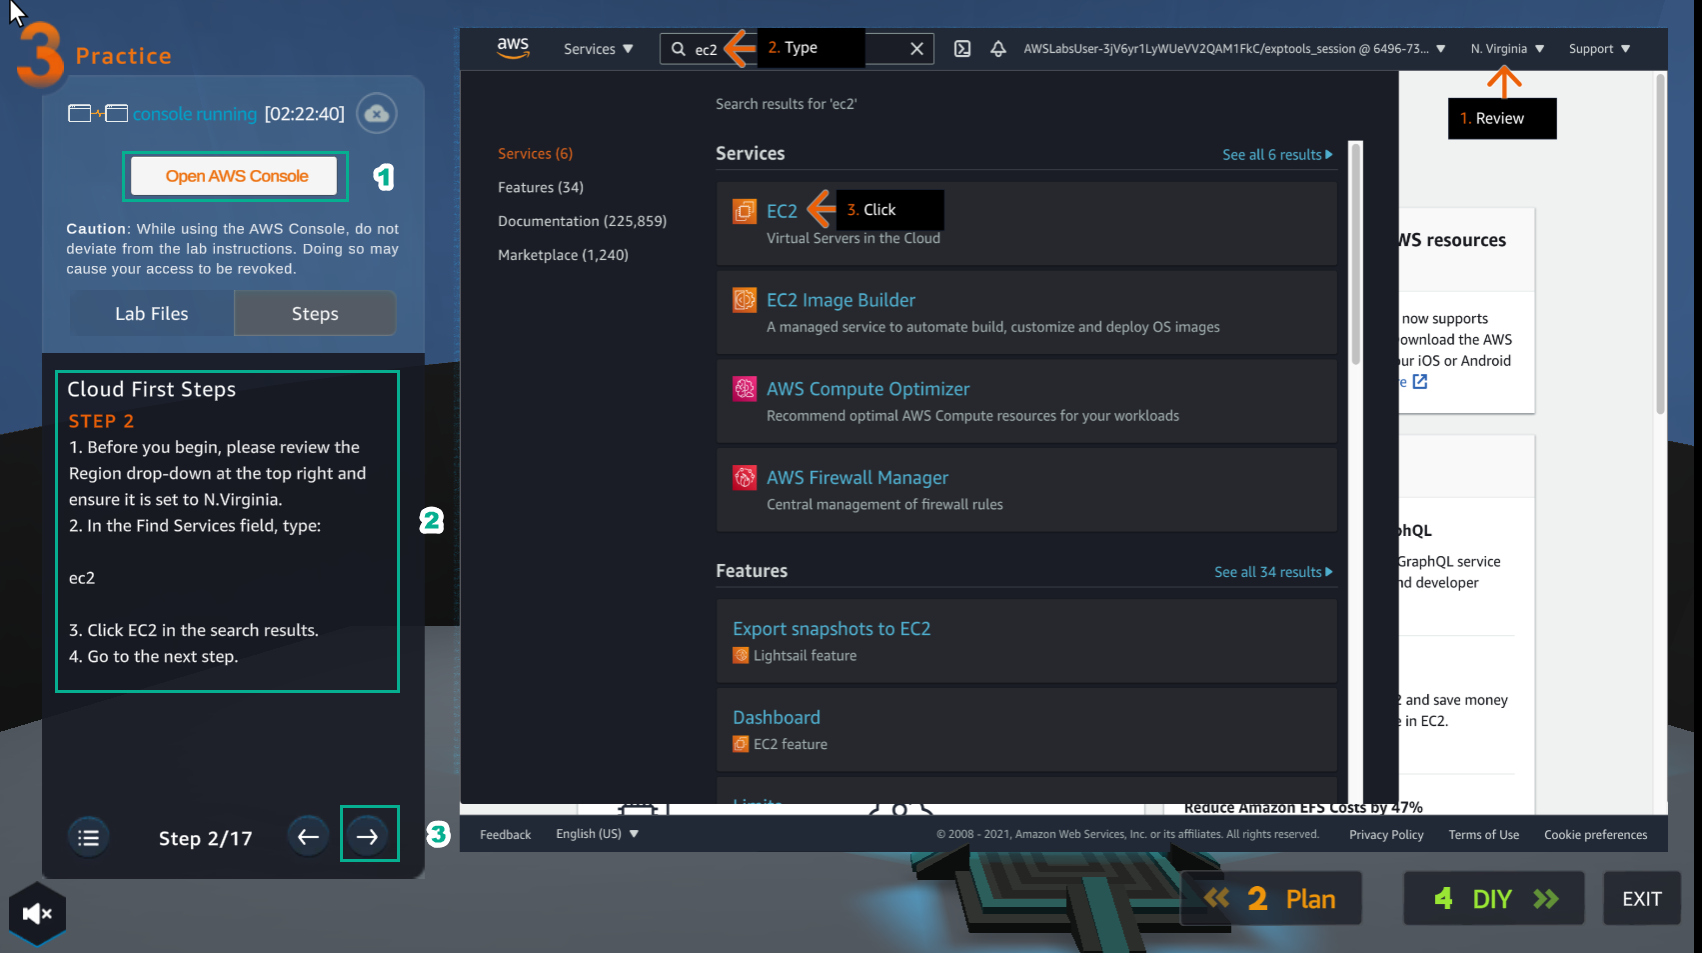
- Go to AWS Console page
- Find EC2 service and select
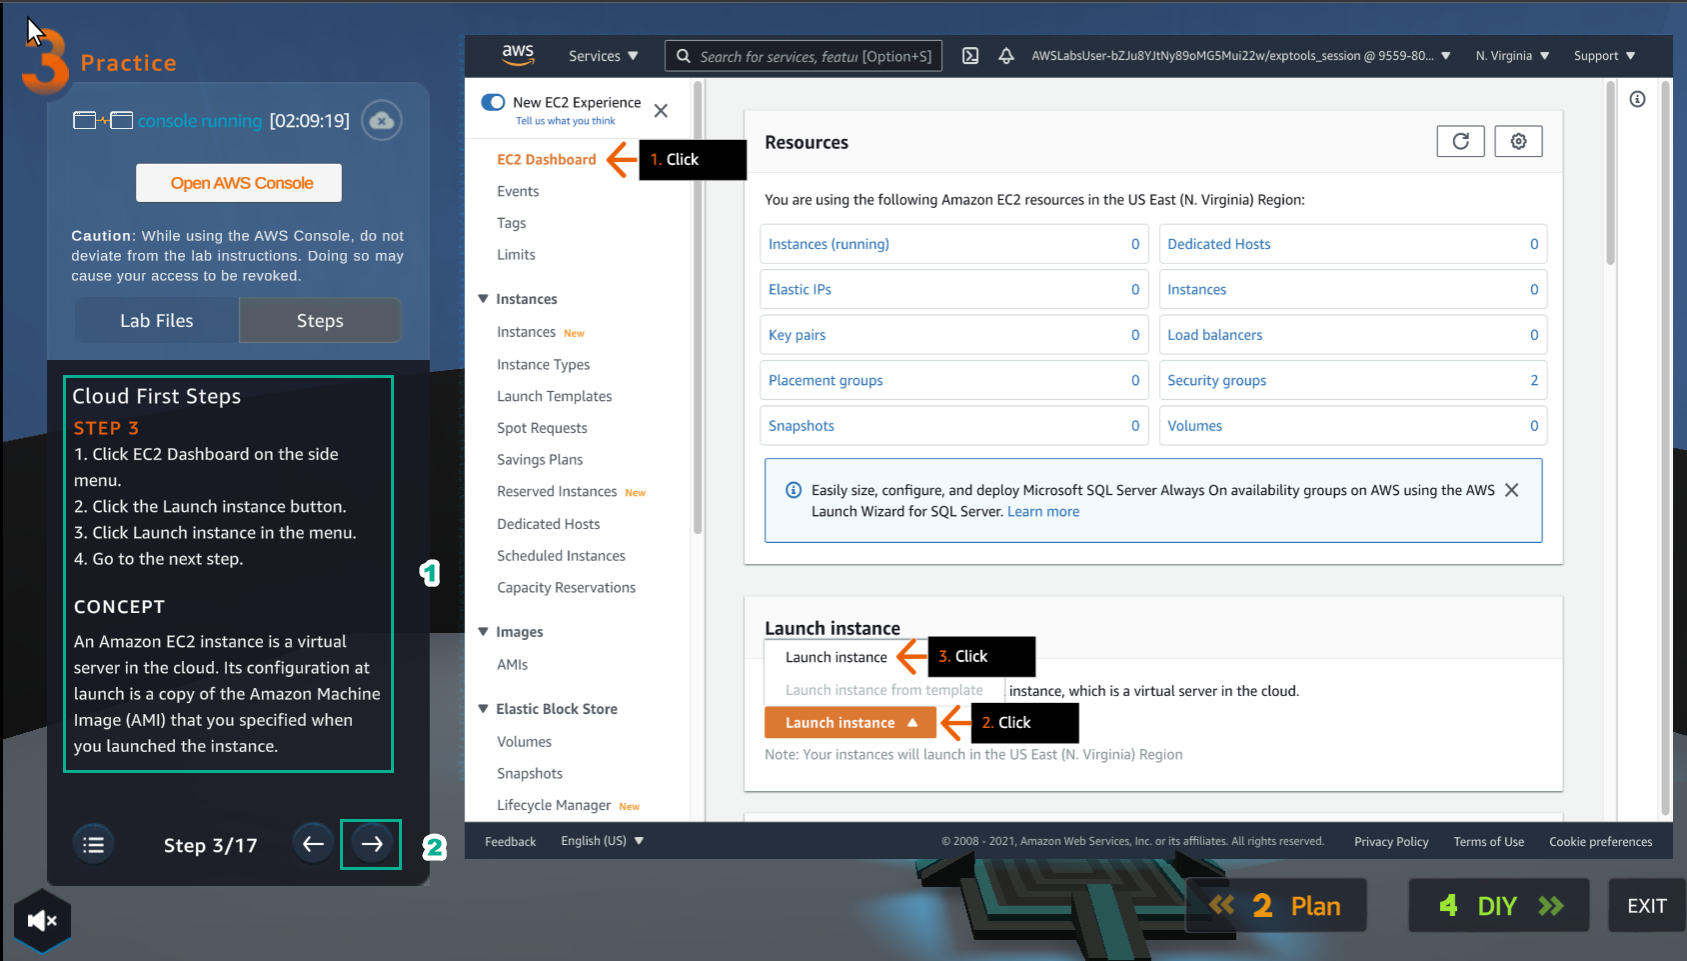
- Read step 3 of Cloud First Steps
- Select the arrow to the right to view and take the next step
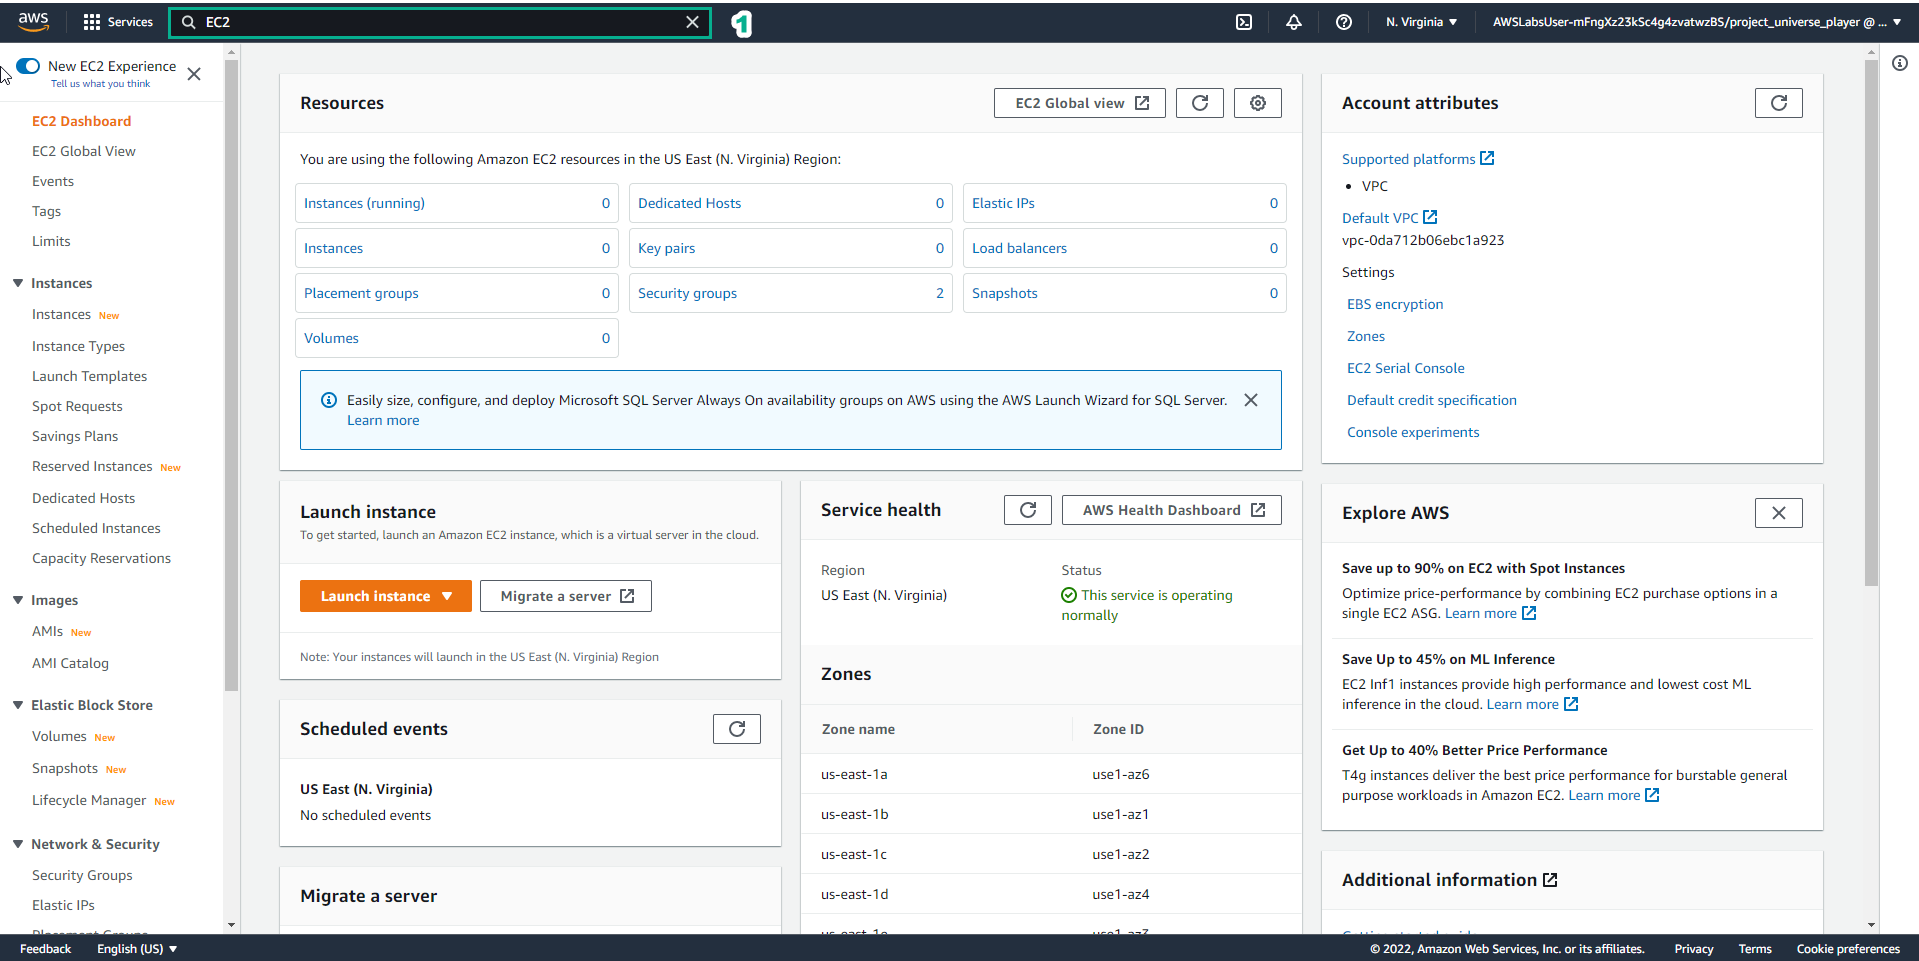
- Go to AWS Console page
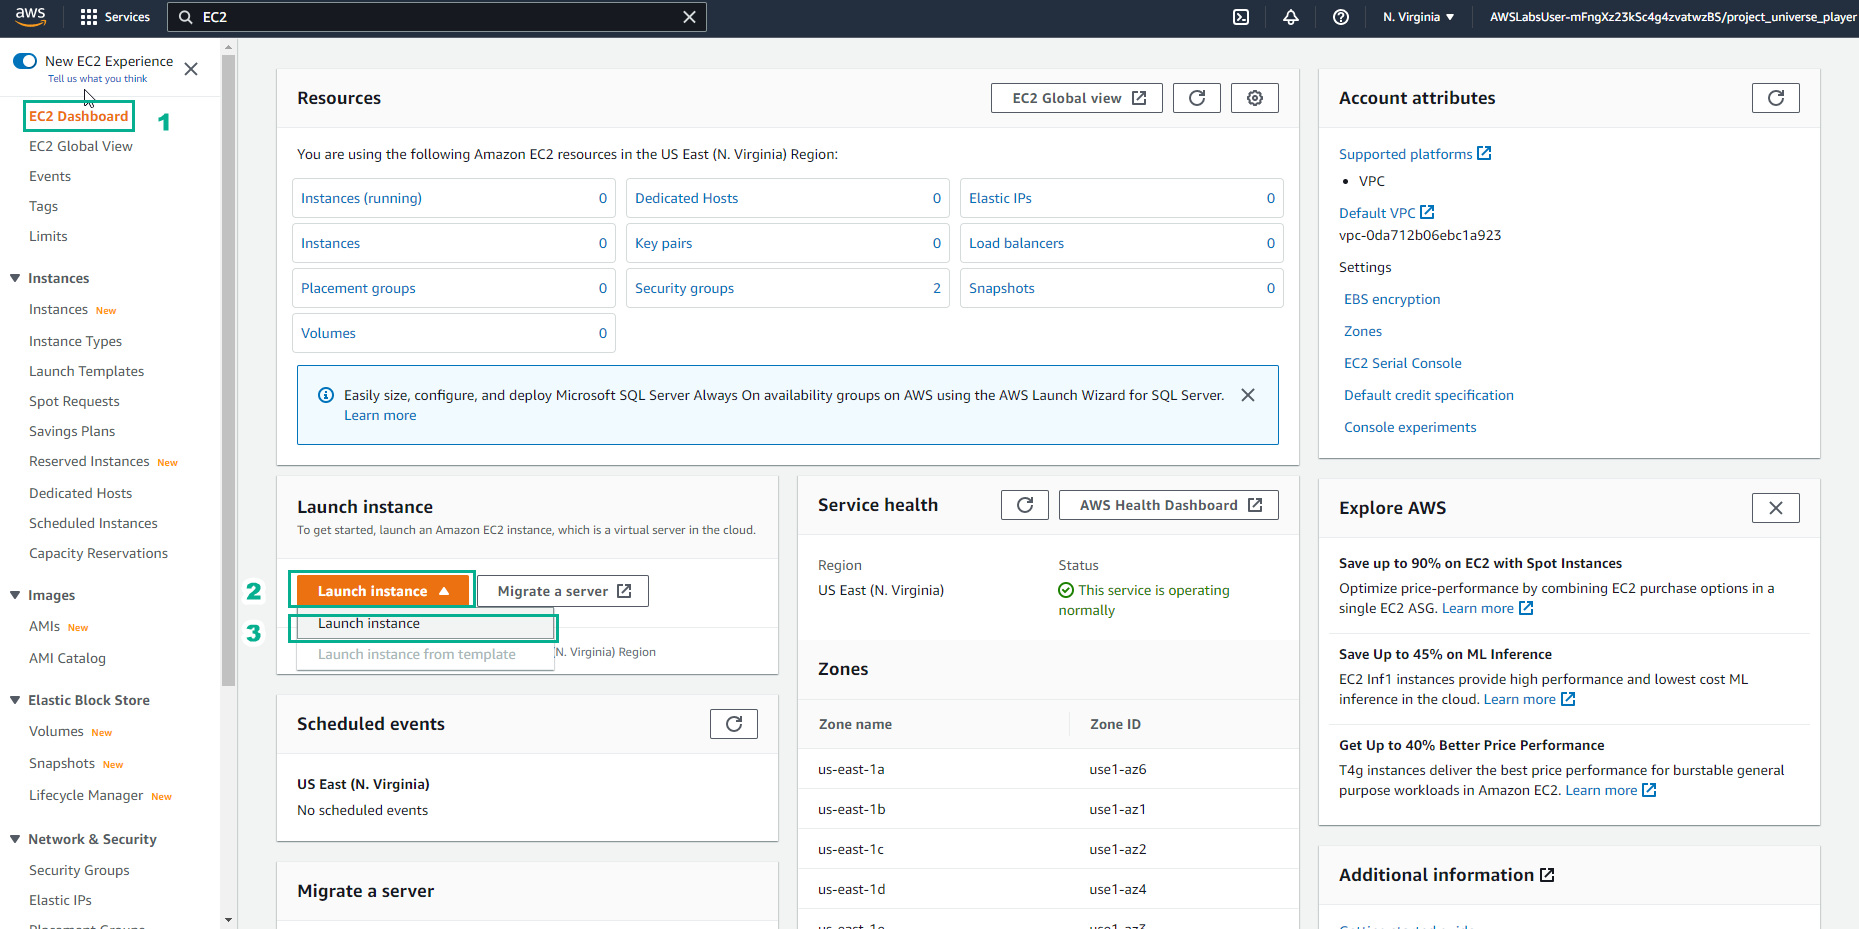
- Select EC2 Dashboard
- Select Launch instance
- Continue to select Launch instance
- Read step 4 of Cloud First Steps
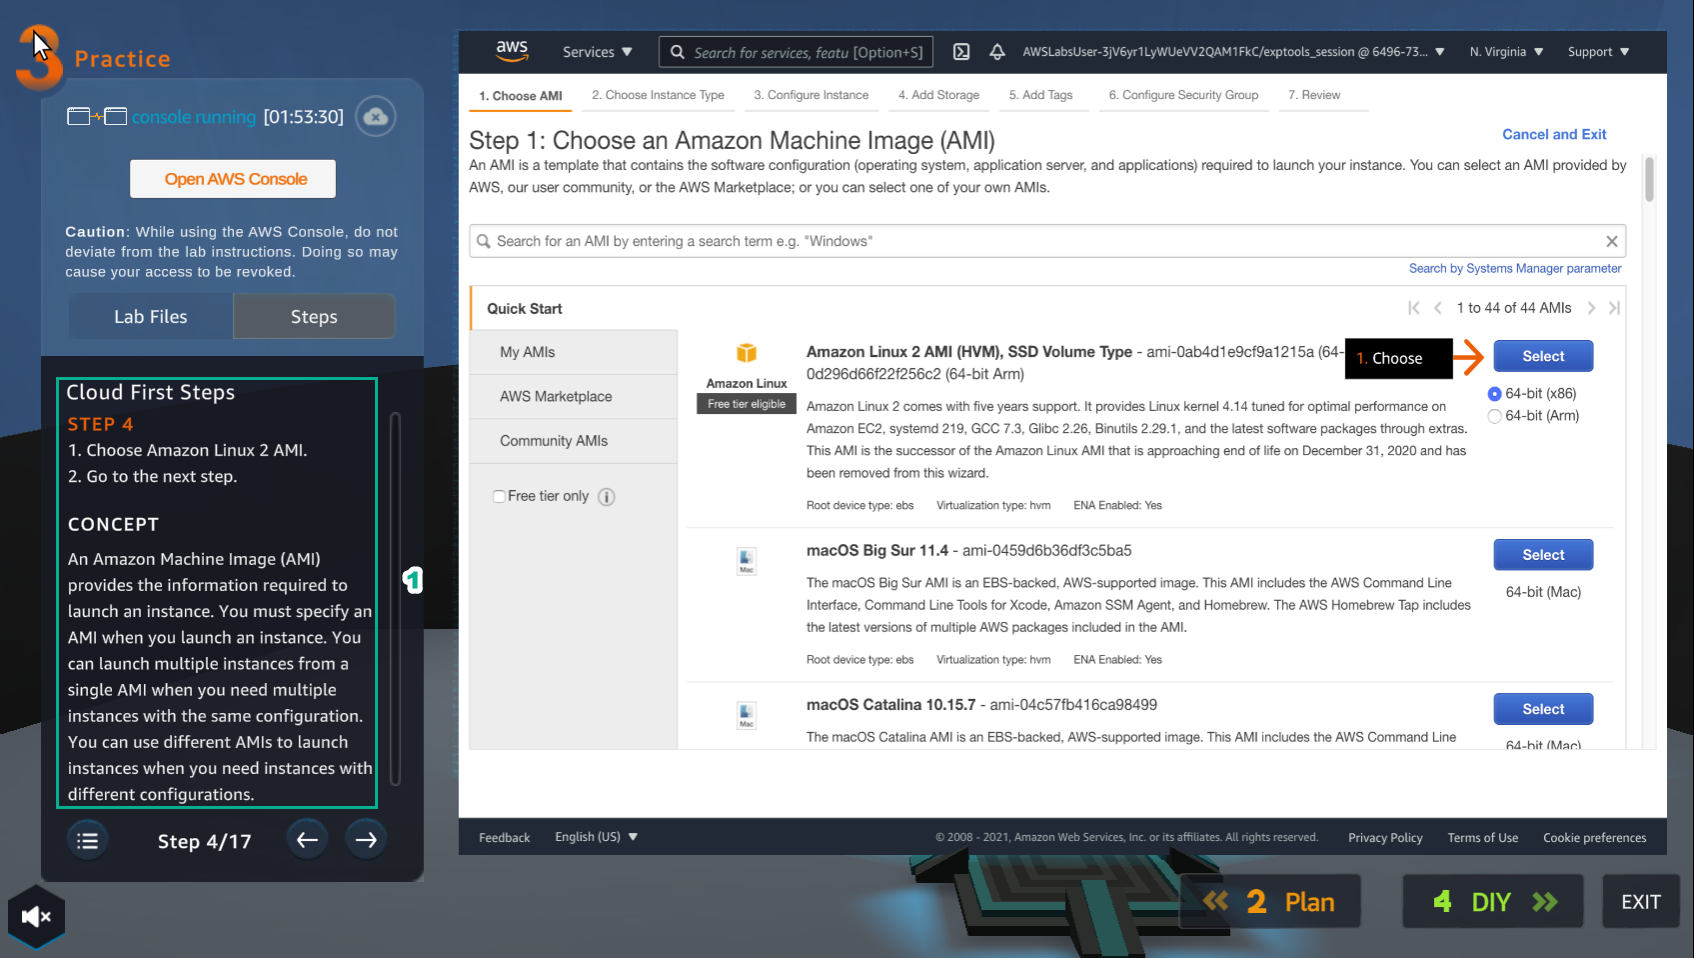
- Go to AWS Console page
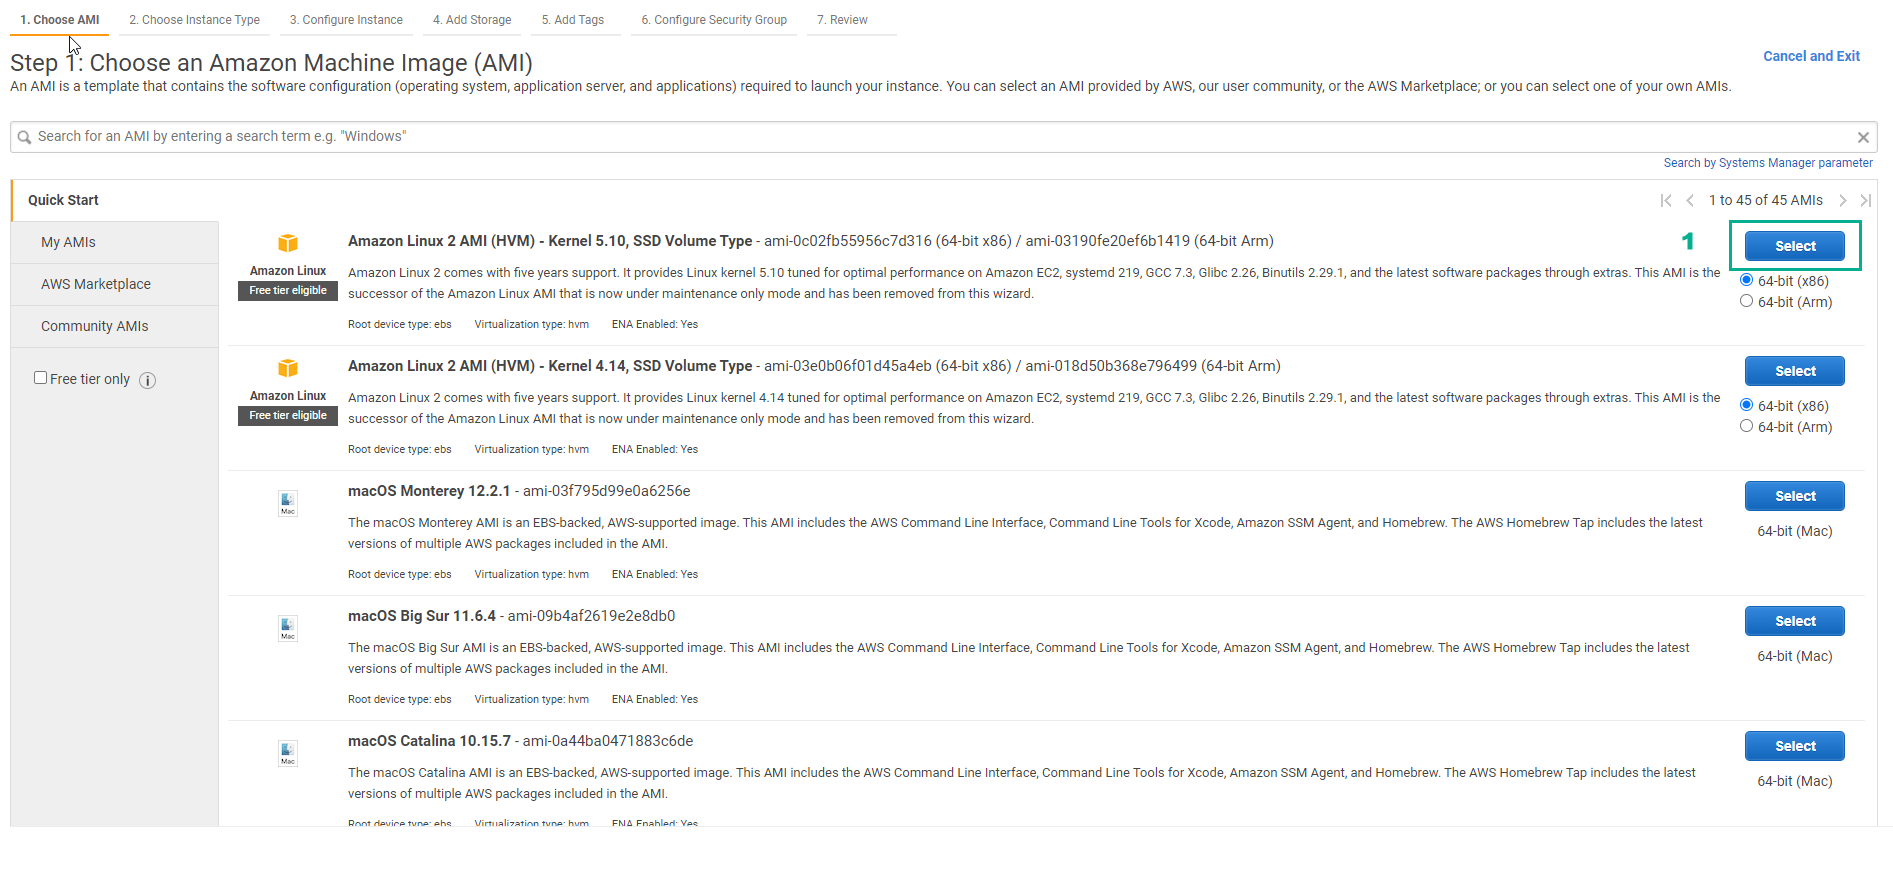
- Select Amazon Linux 2 AMI
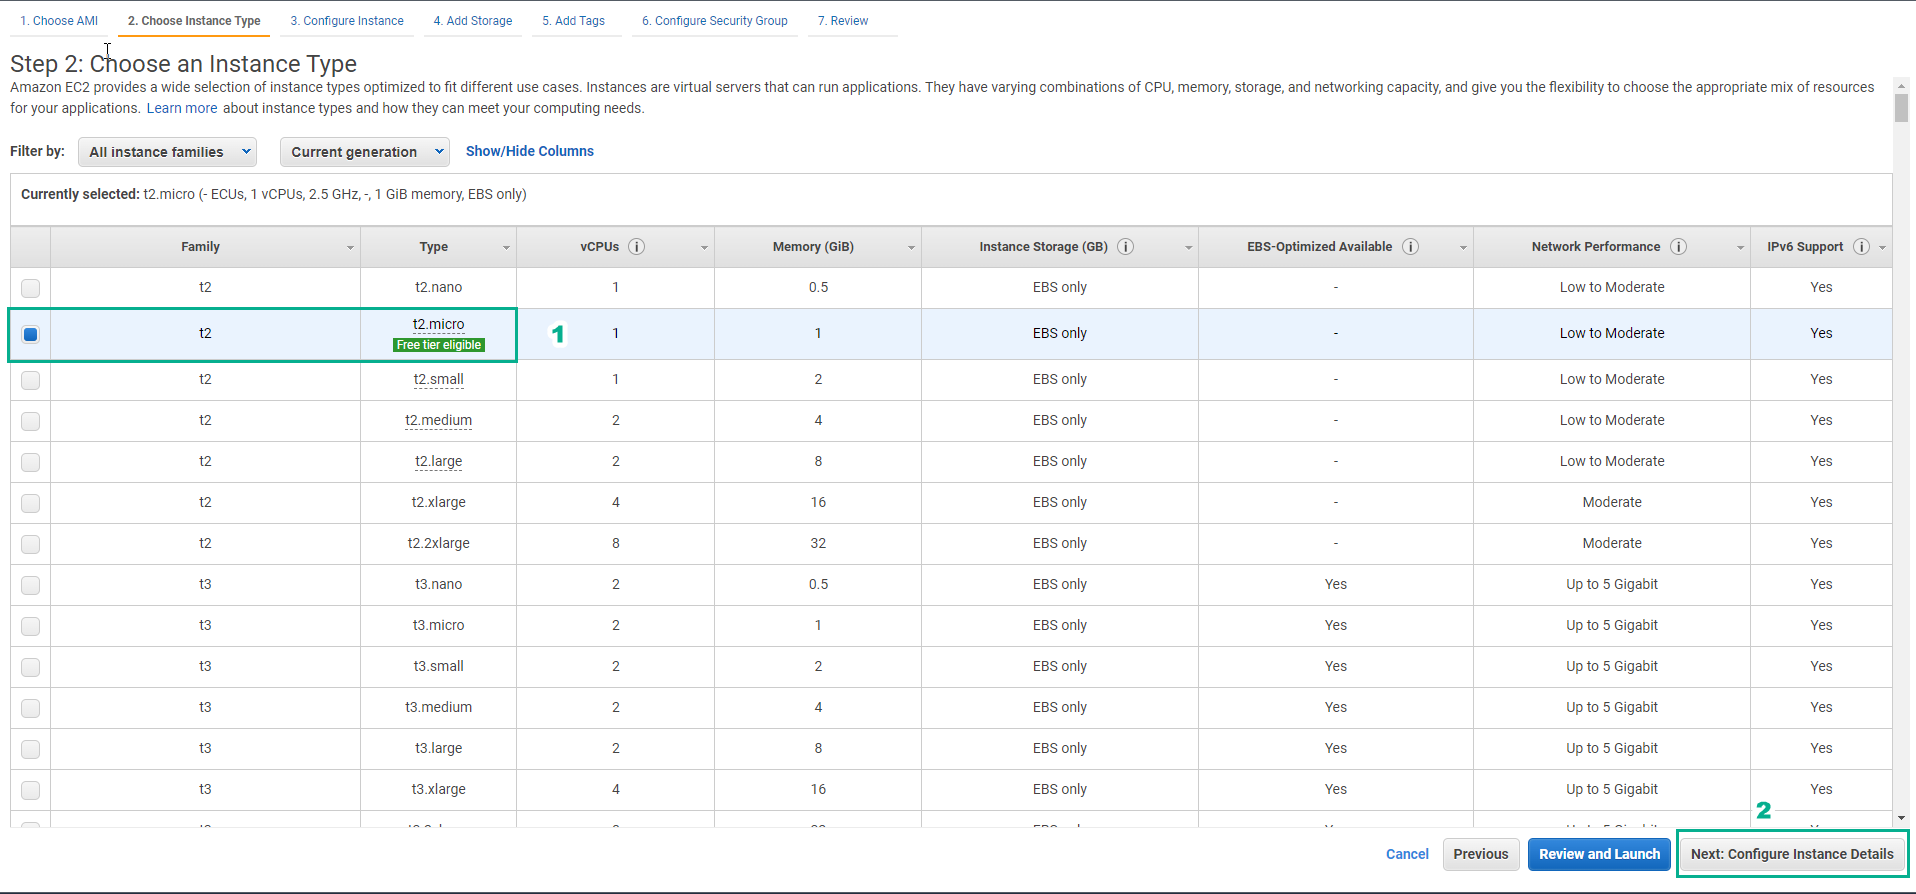
- Read step 5 of Cloud First Steps
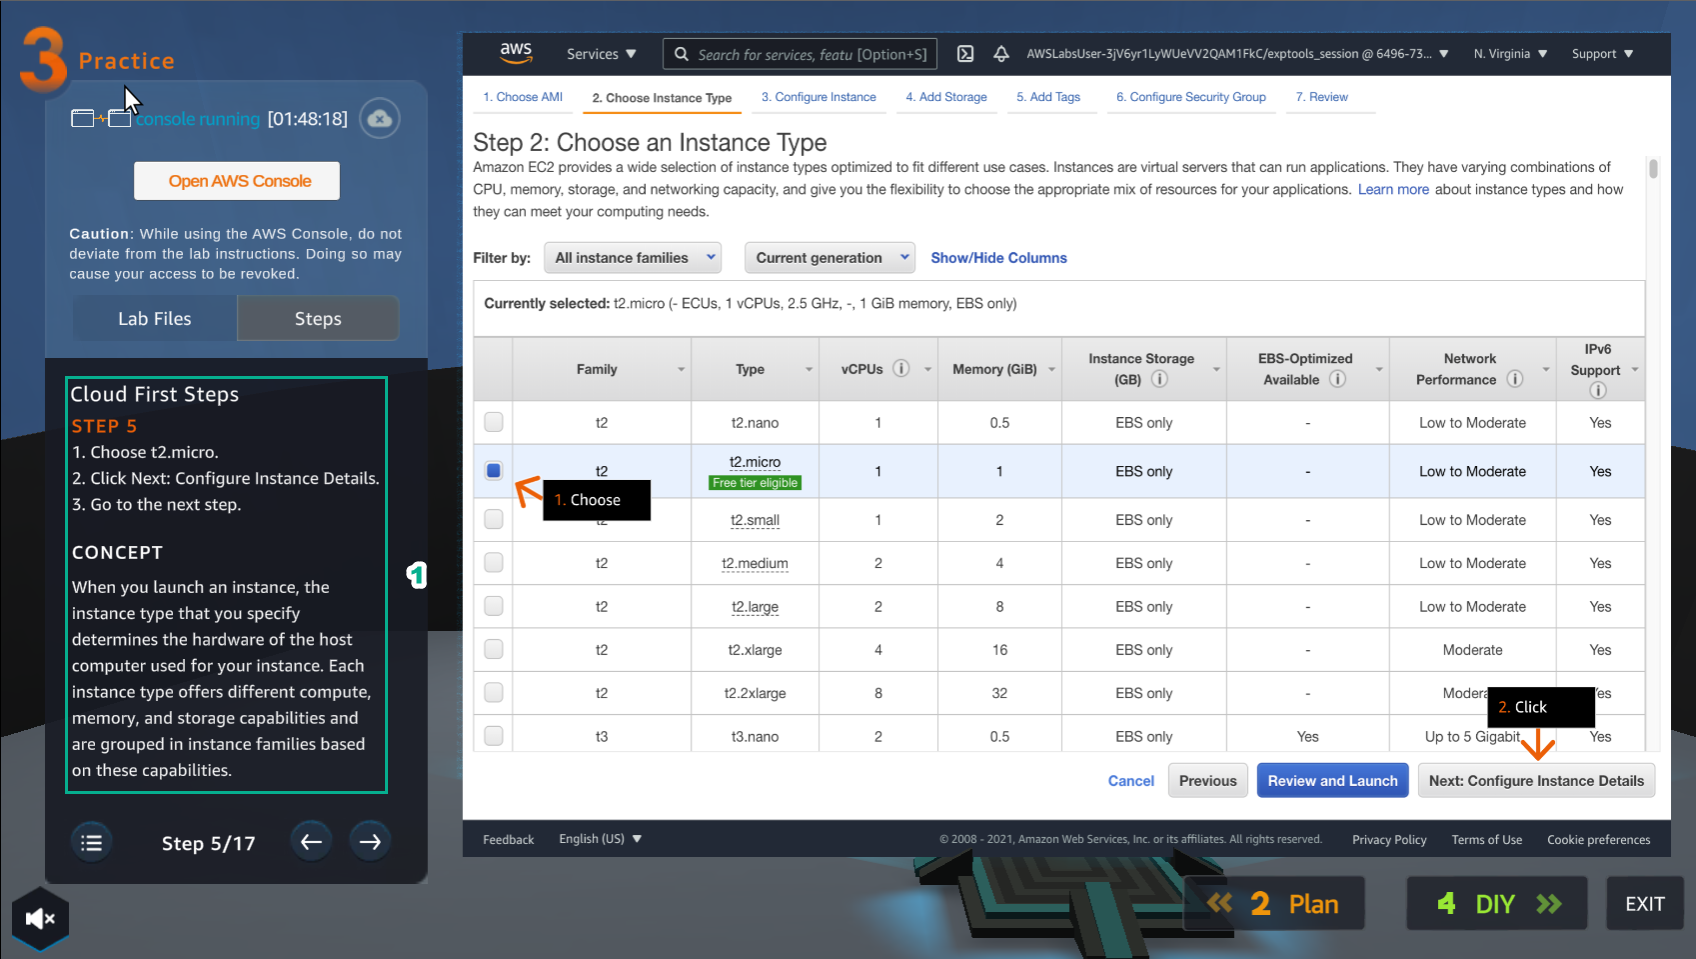
- Go to AWS Console page
- Choose an Instance Type, select t2.micro
- Select Next: Configure Instance Details
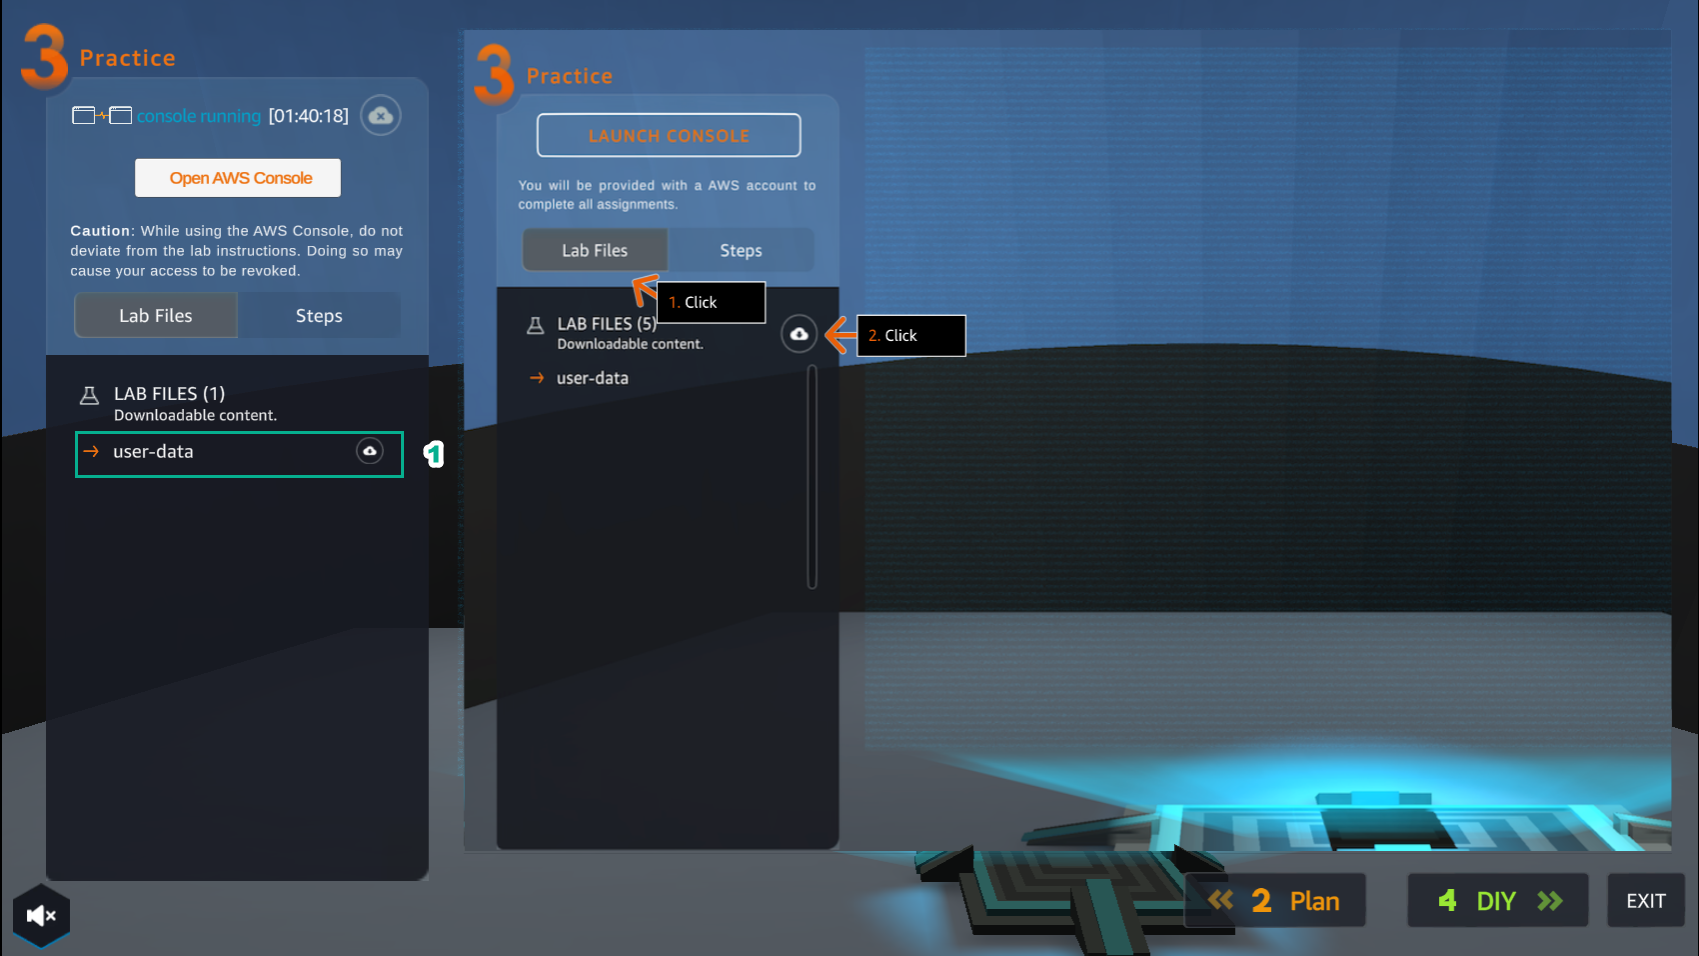
- Read step 6 of Cloud First Steps
- Select Lab Files
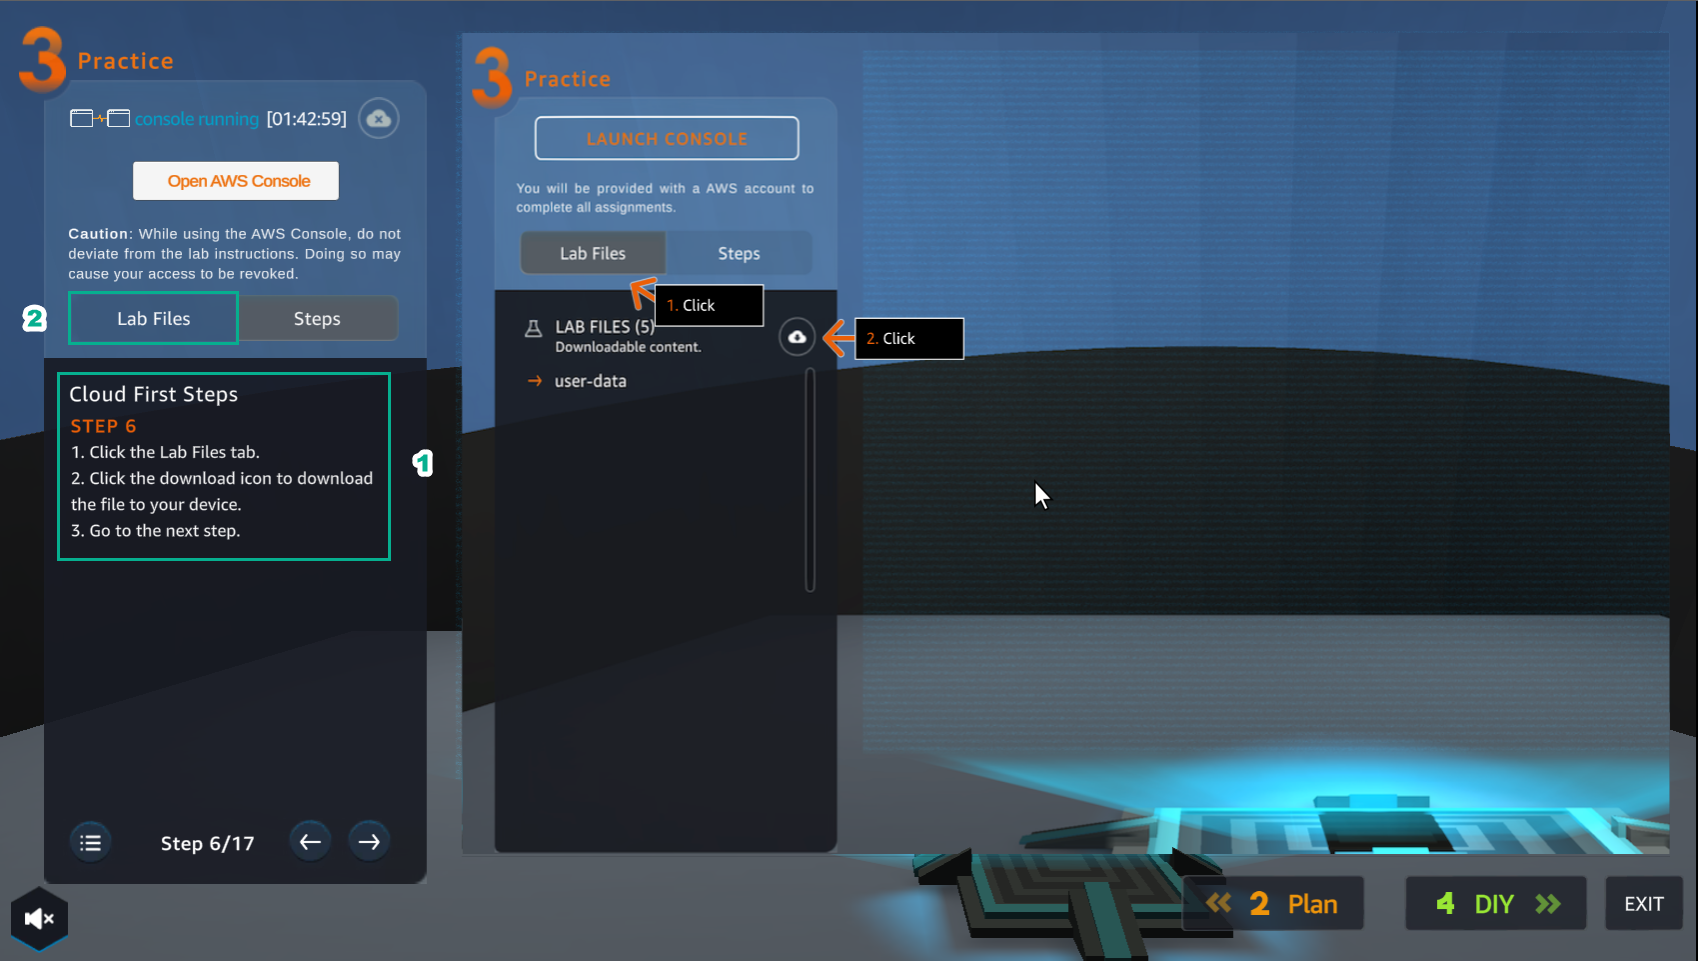
- After selecting Lab Files, select user-data and download it
- Read step 7 of Cloud First Steps

- Go to AWS Console
- Select VPC
- Select Subnet
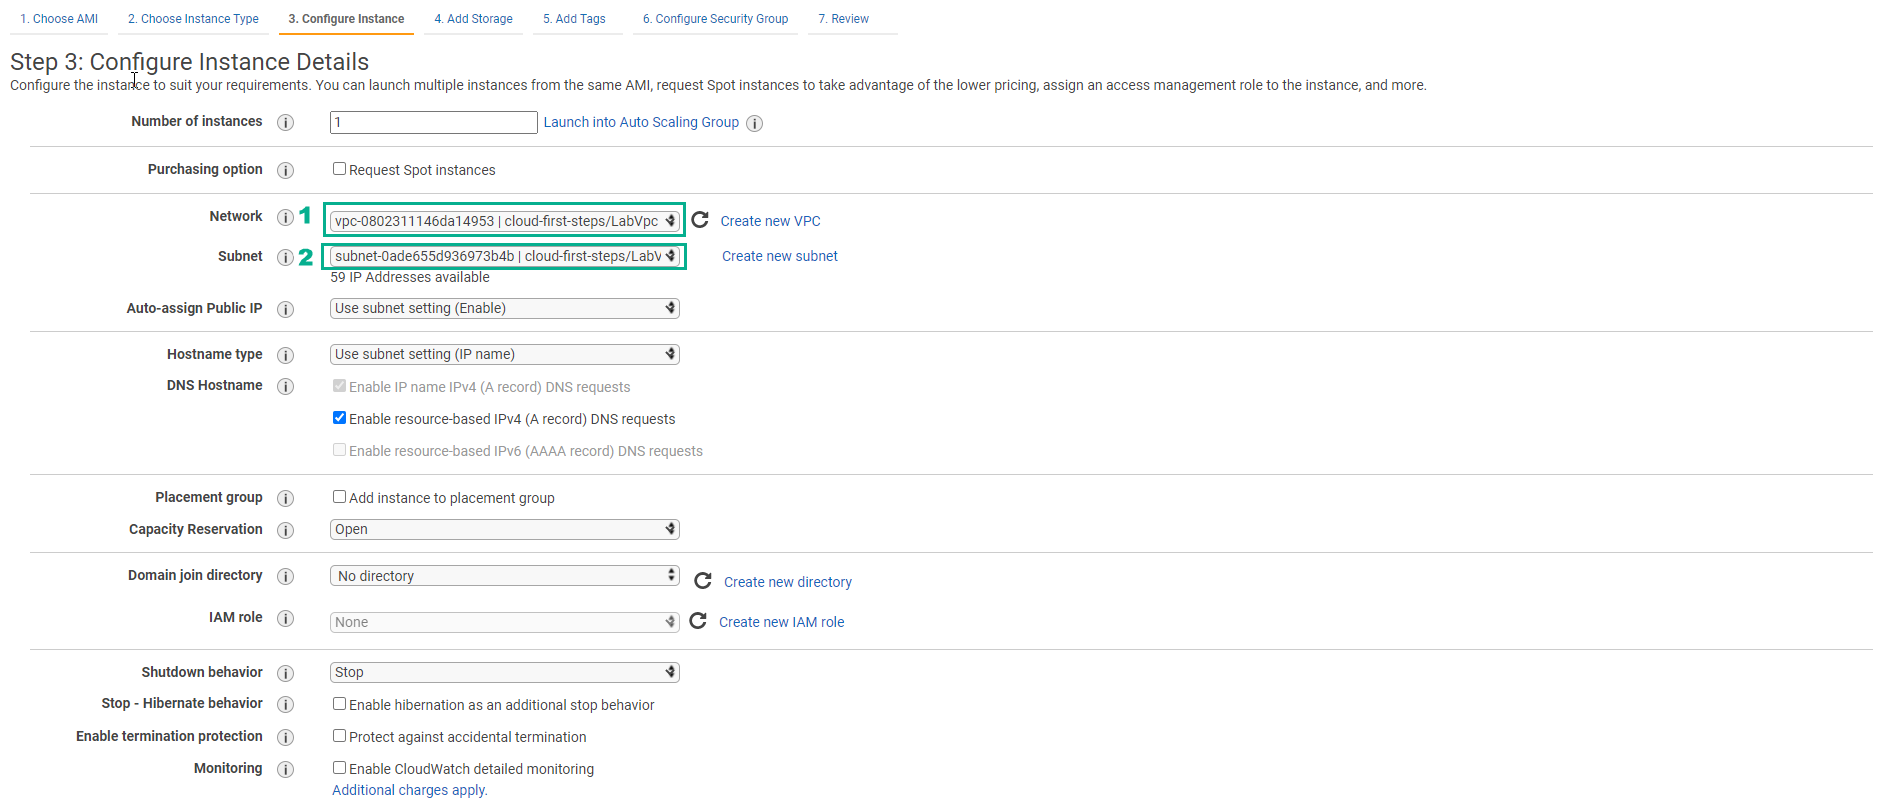
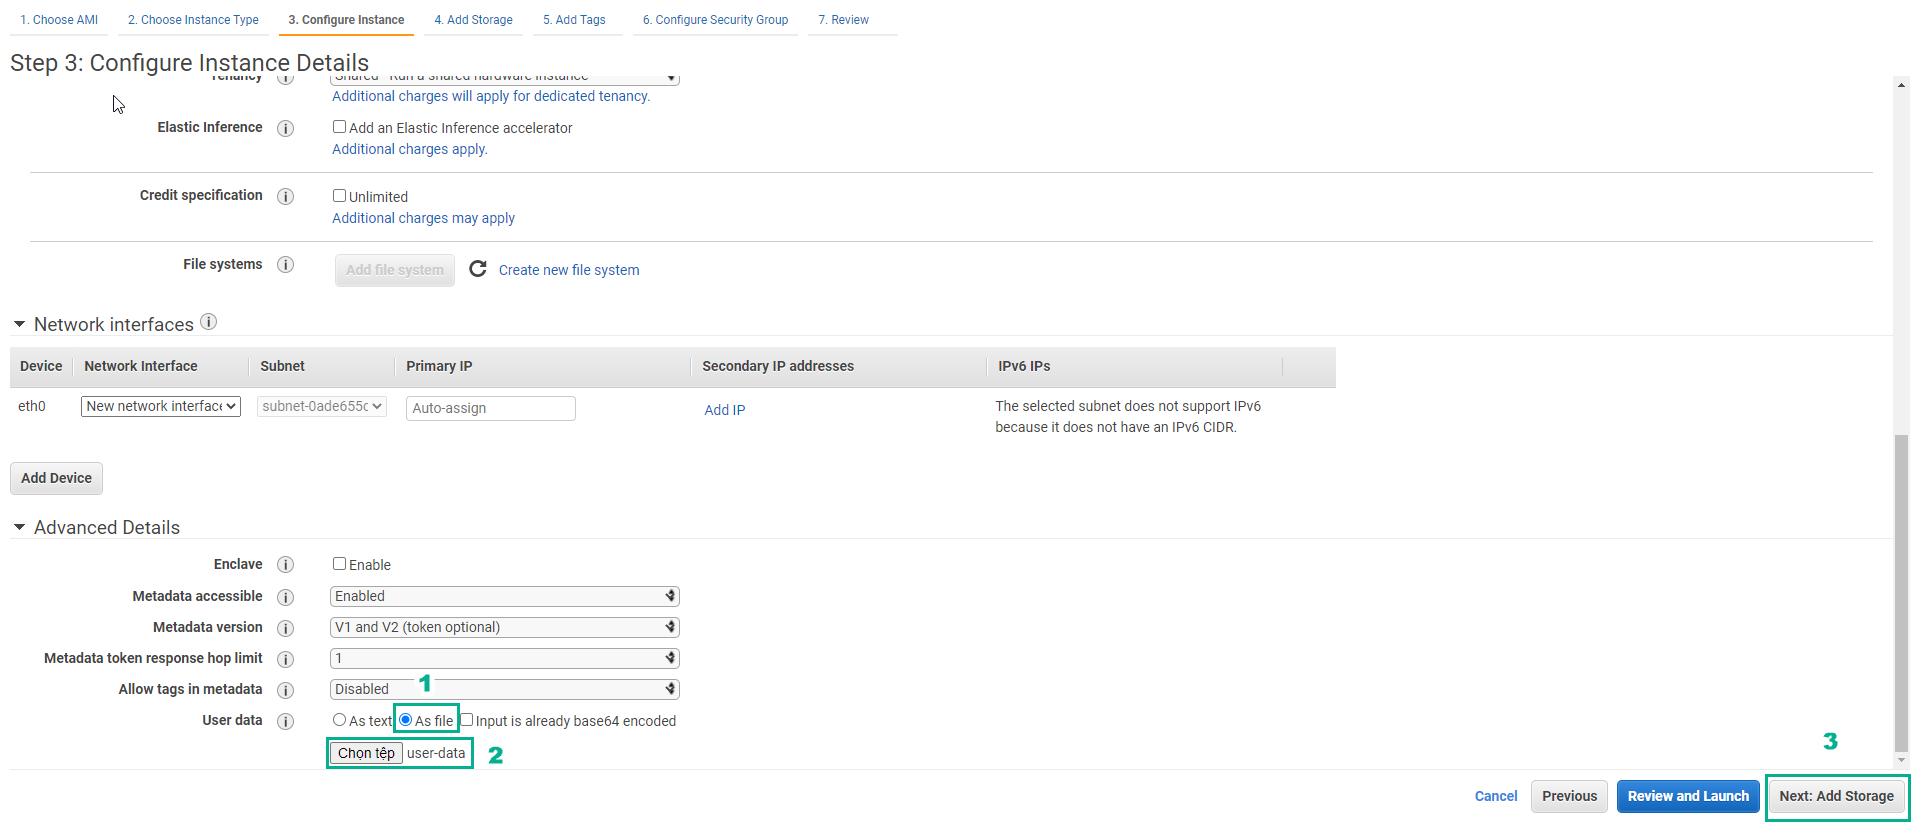
- Read step 8 of Cloud First Steps
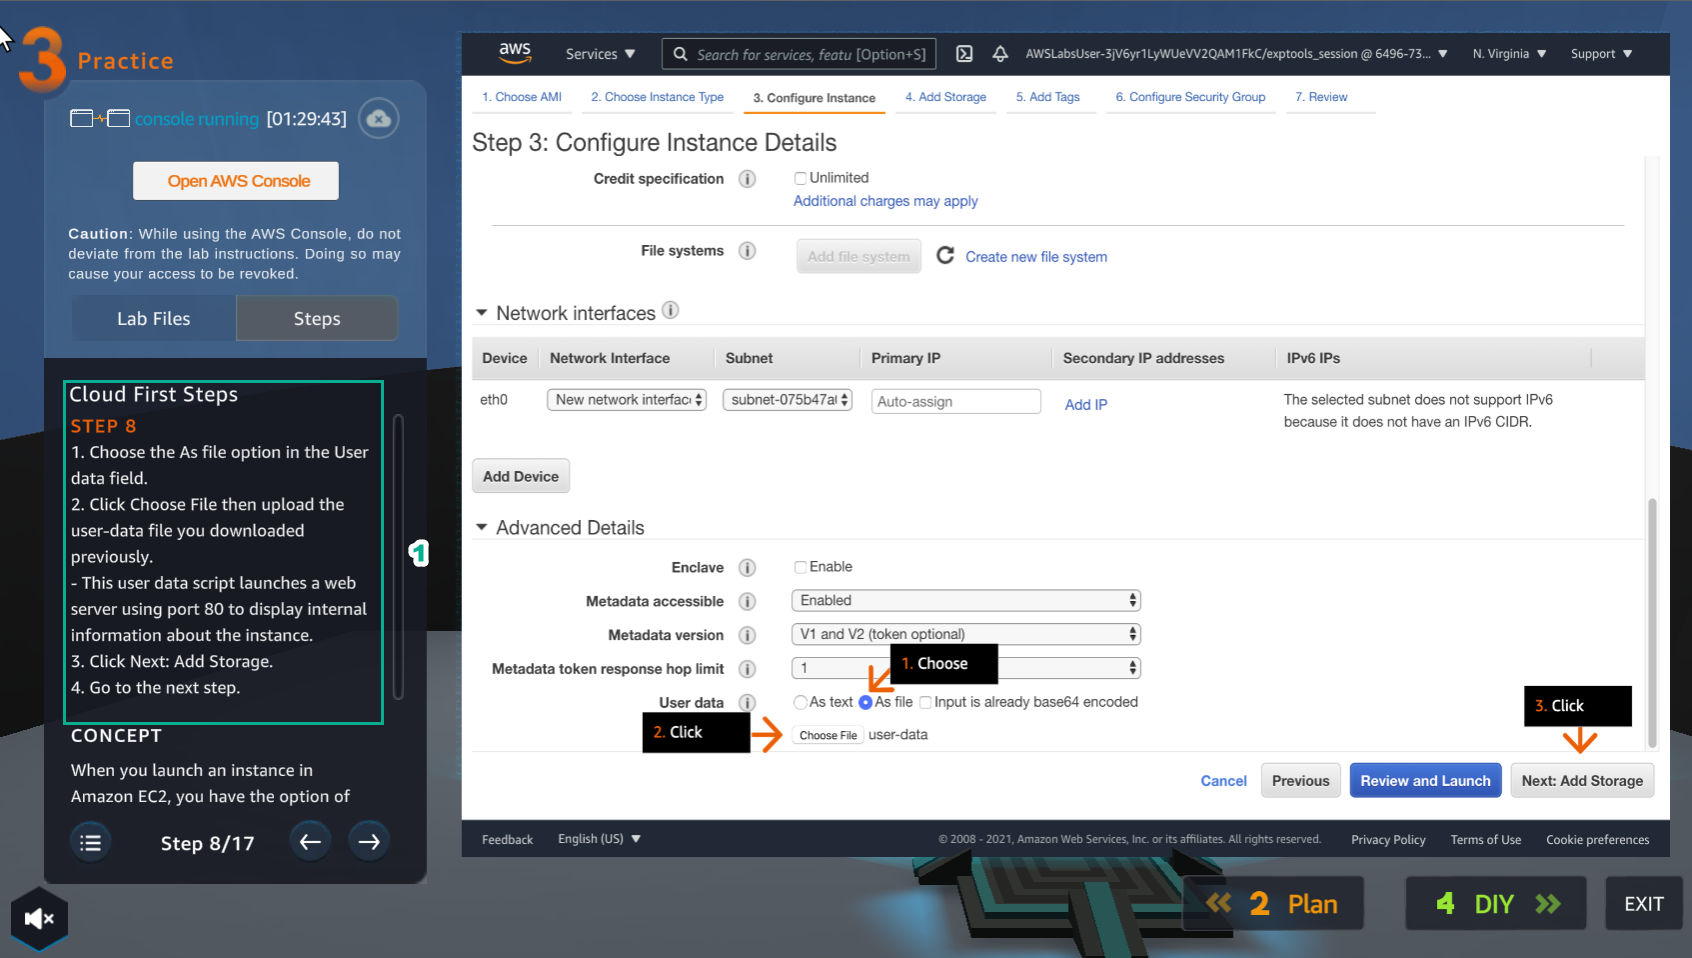
- In the Configure Instance Details section
- In Advanced Details, select As file
- Select Select file, and load the file user-data
- Then, select Next: Add Storage
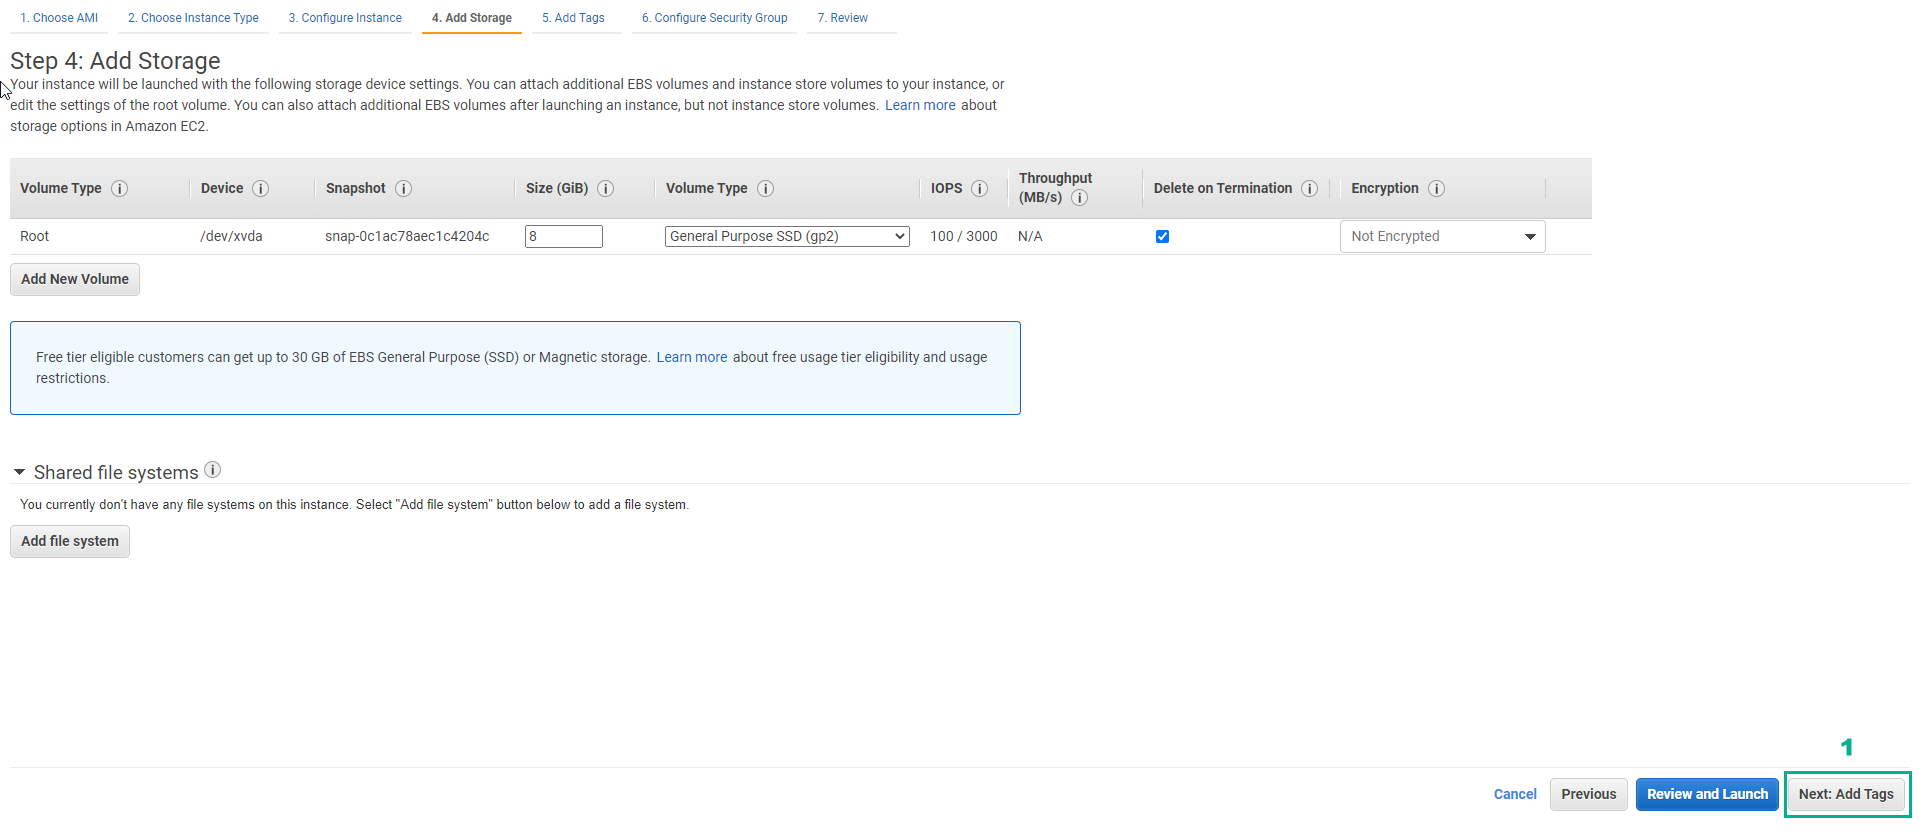
- Read step 9 of Cloud First Steps
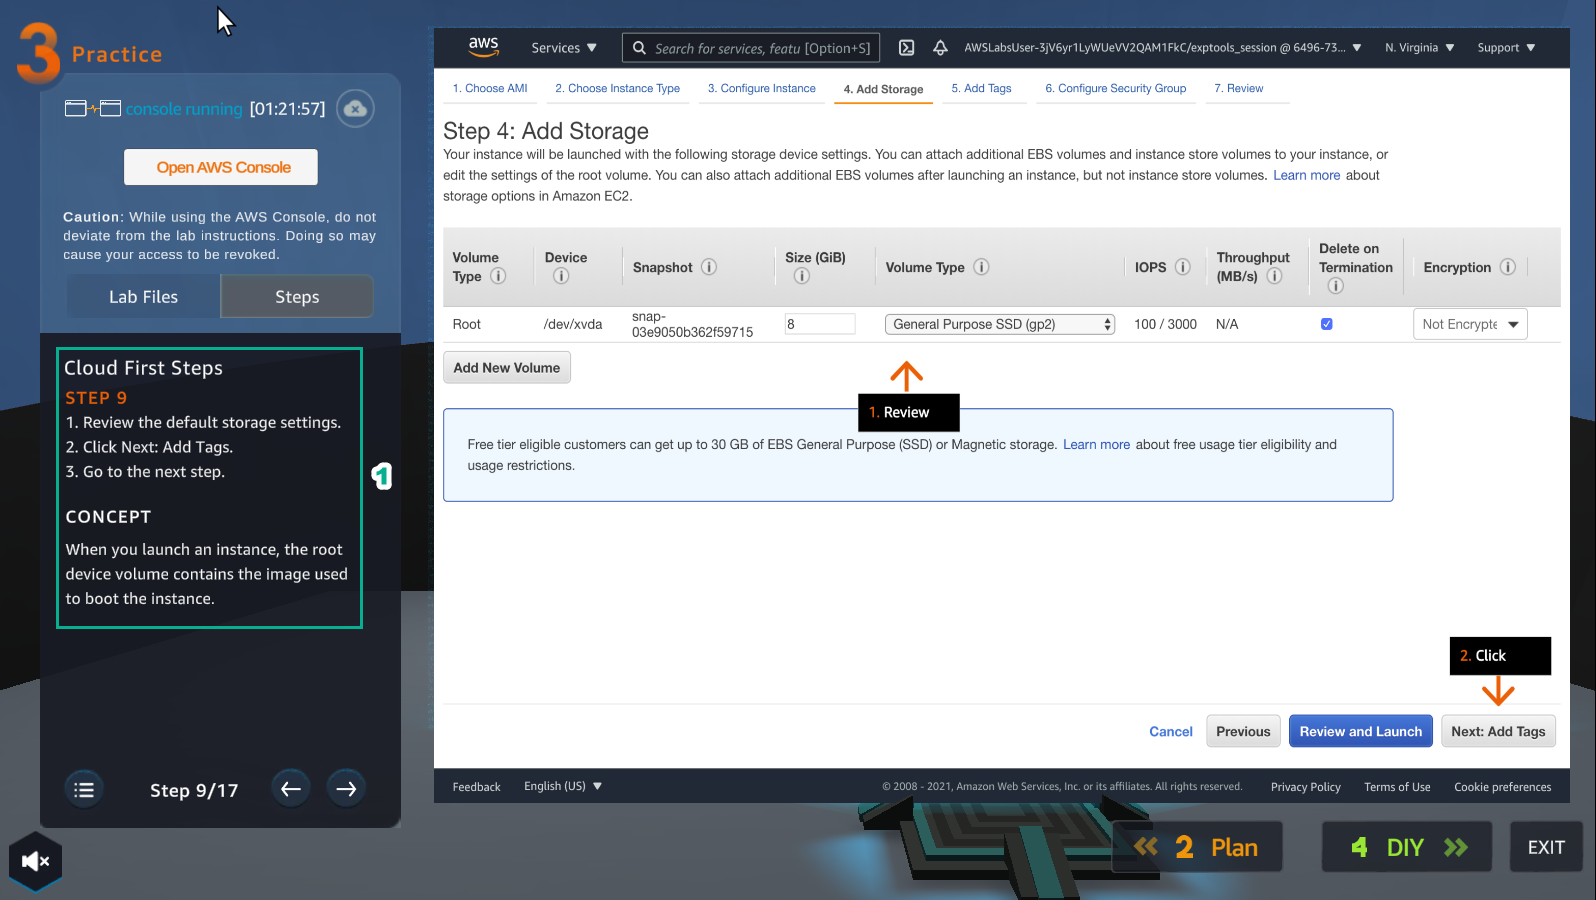
- Select Next: Add Tags
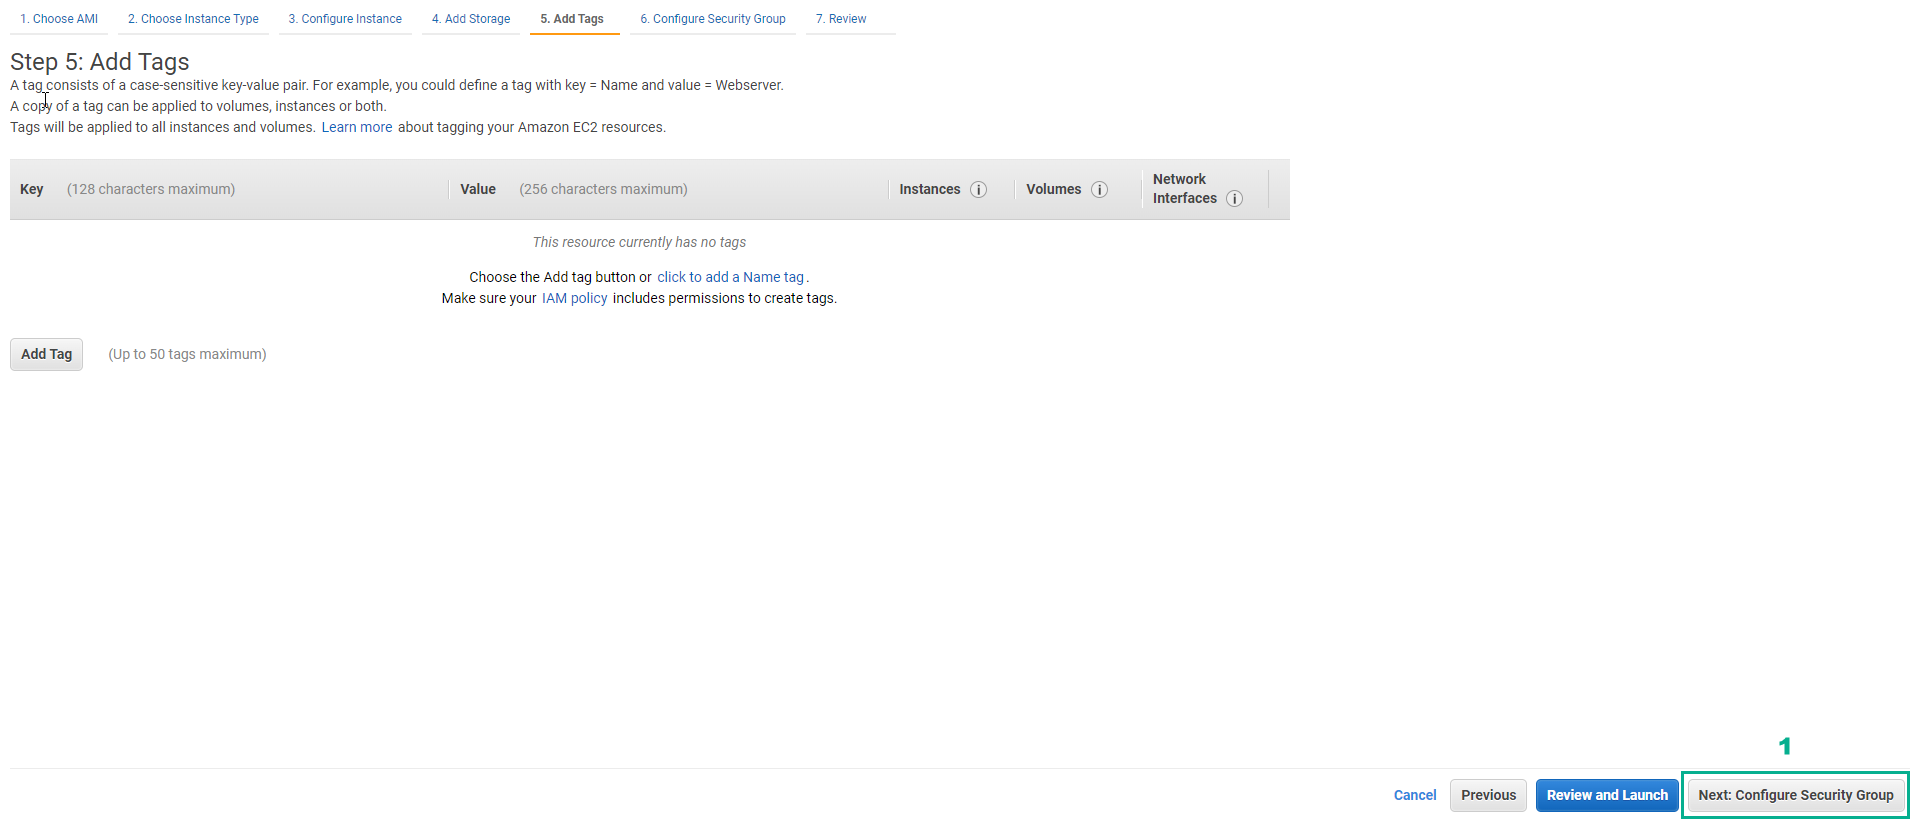
- Read step 10 of Cloud First Steps
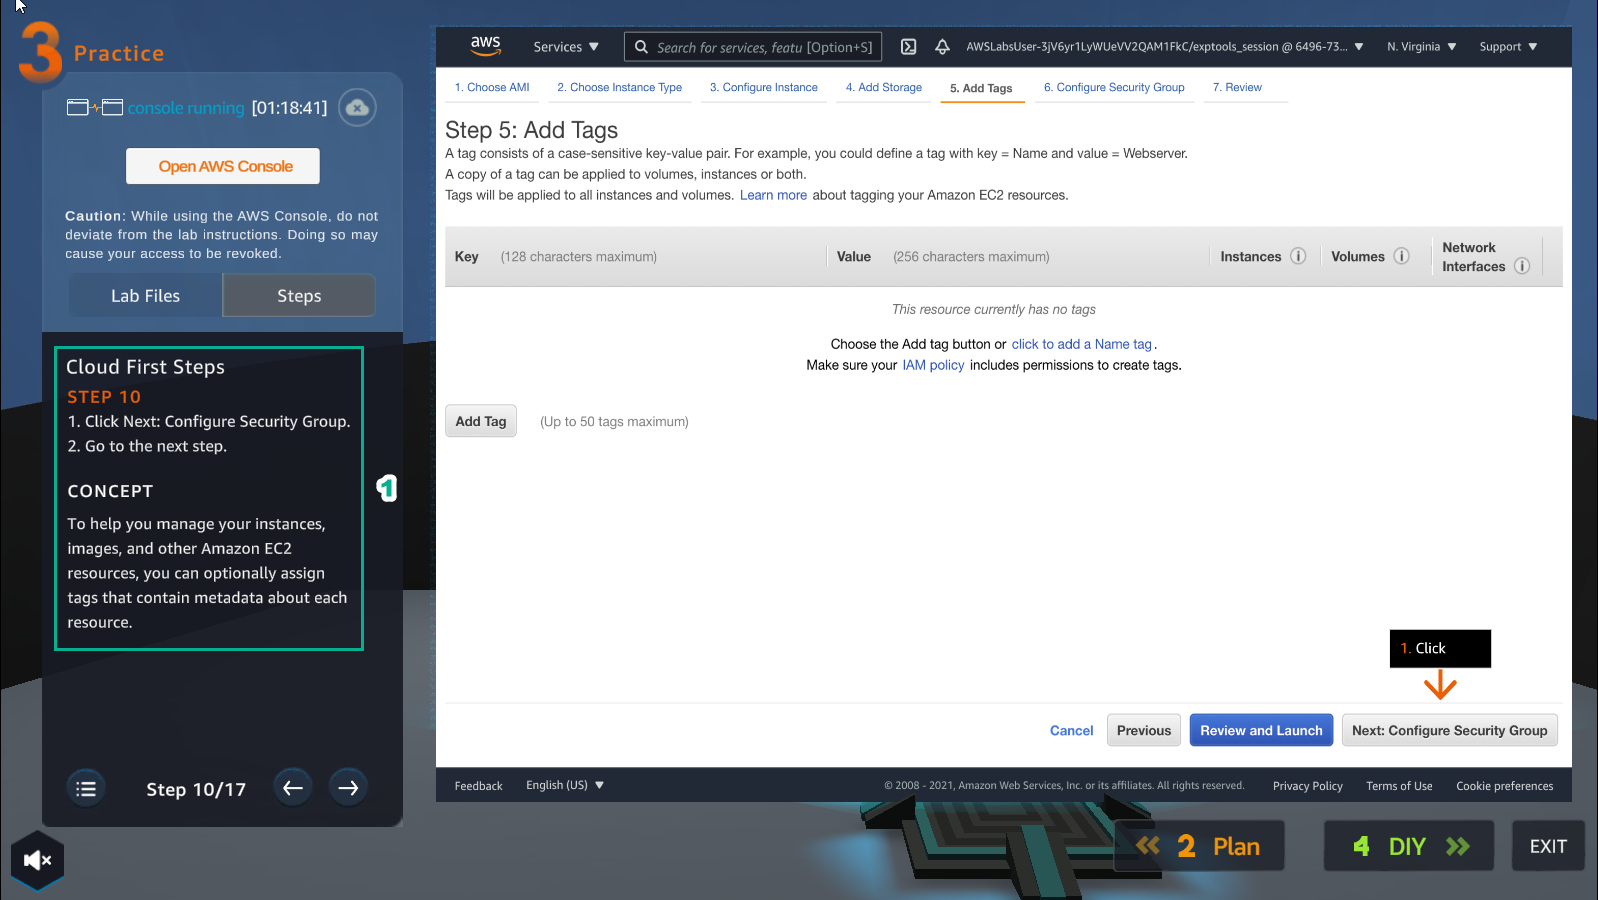
- Select Next: Configure Security Group
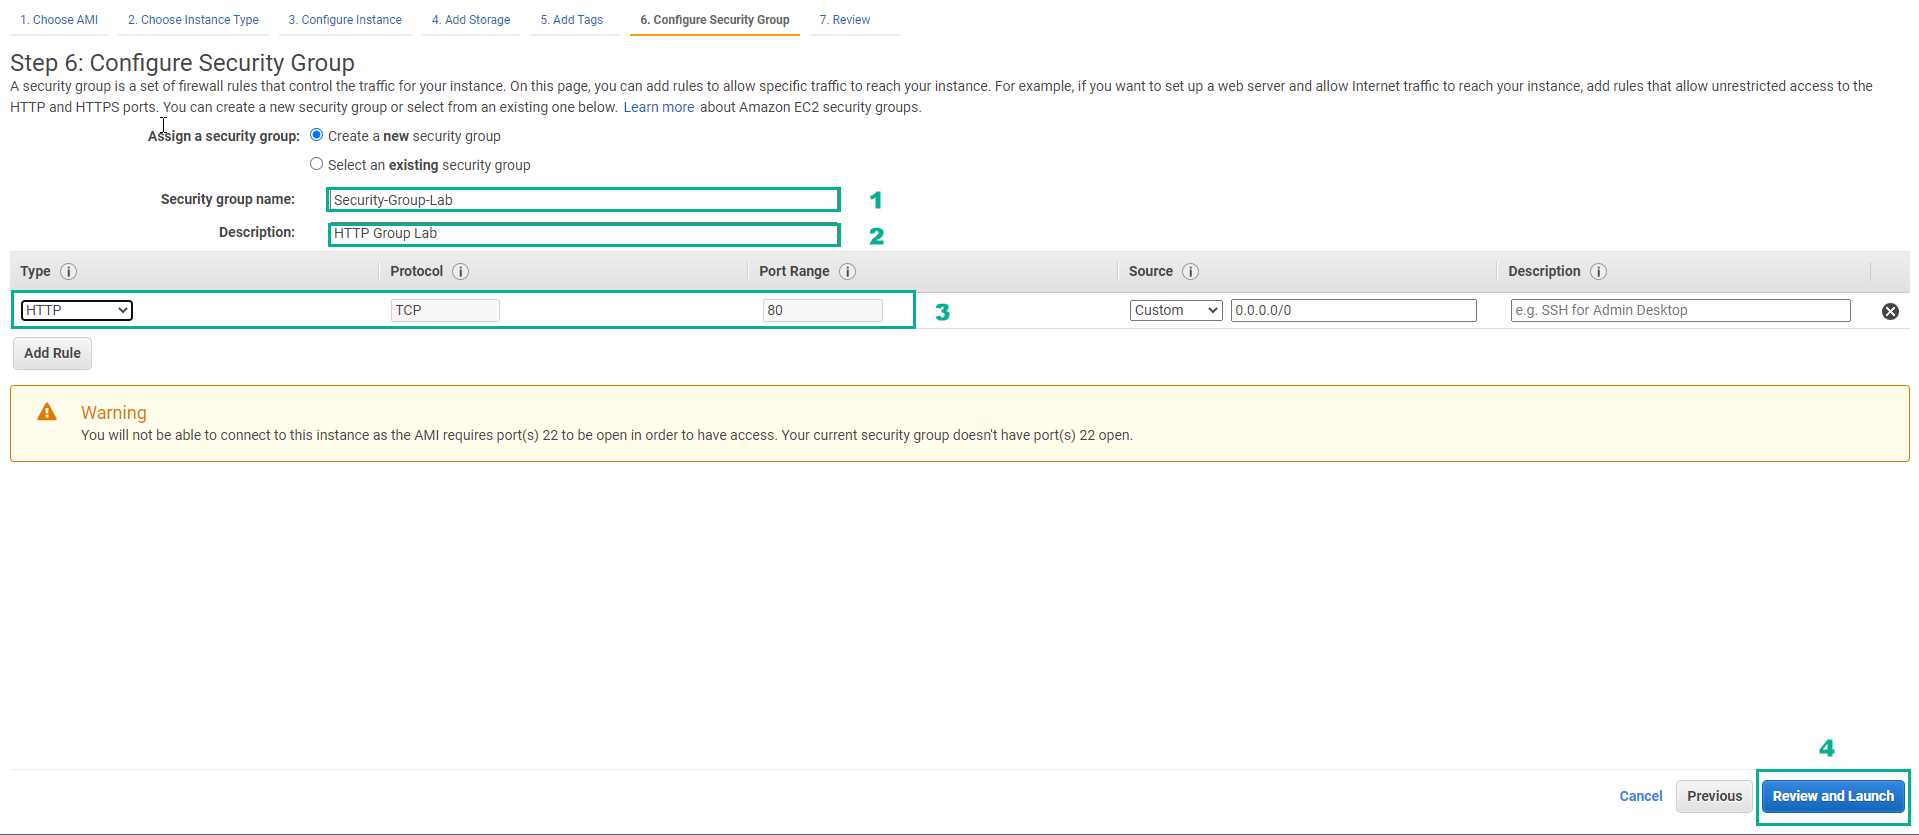
- Read step 11 of Cloud First Steps
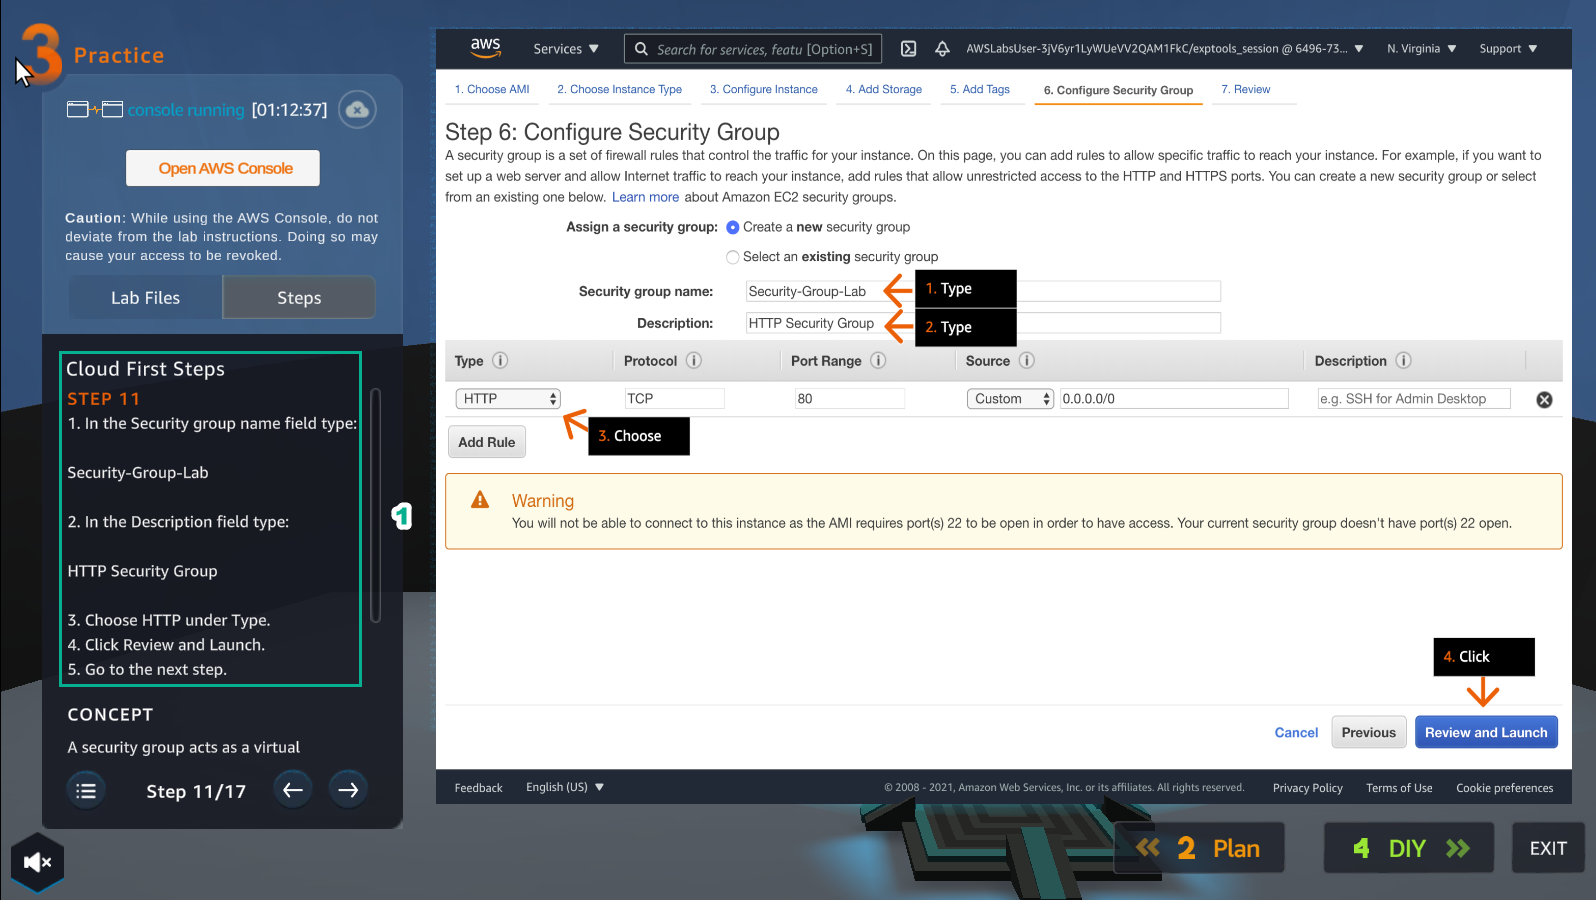
- Create a security group
- Security group name, enter
Security-Group-Lab - Description, enter
HTTP Group Lab - Rule, select HTTP
- Select Review and Launch
- Read step 12 of Cloud First Steps
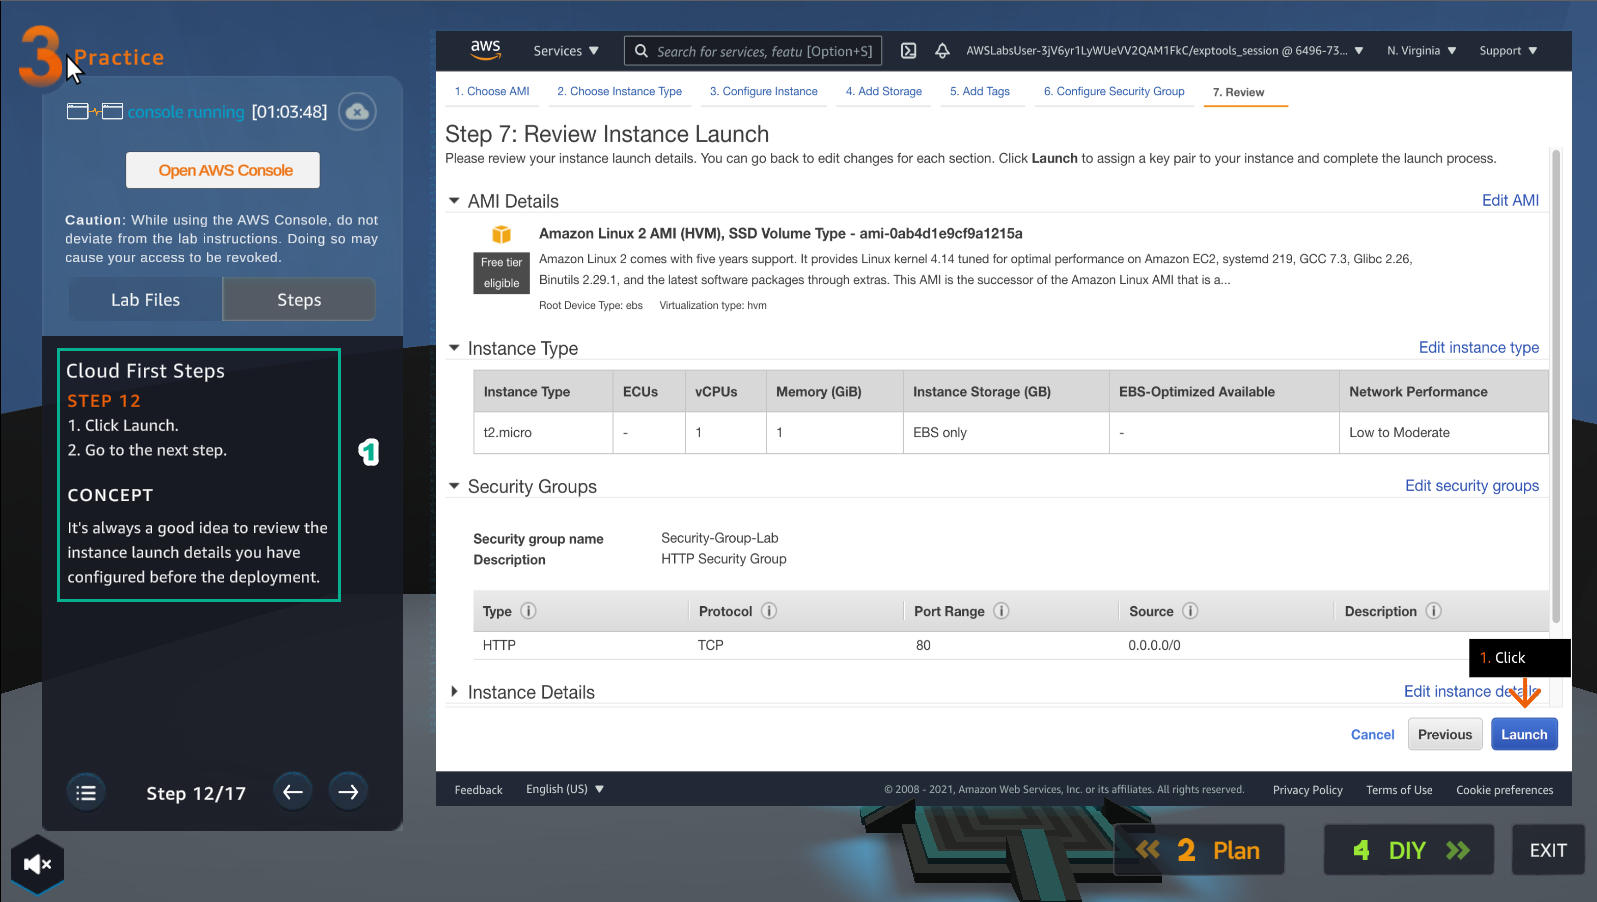
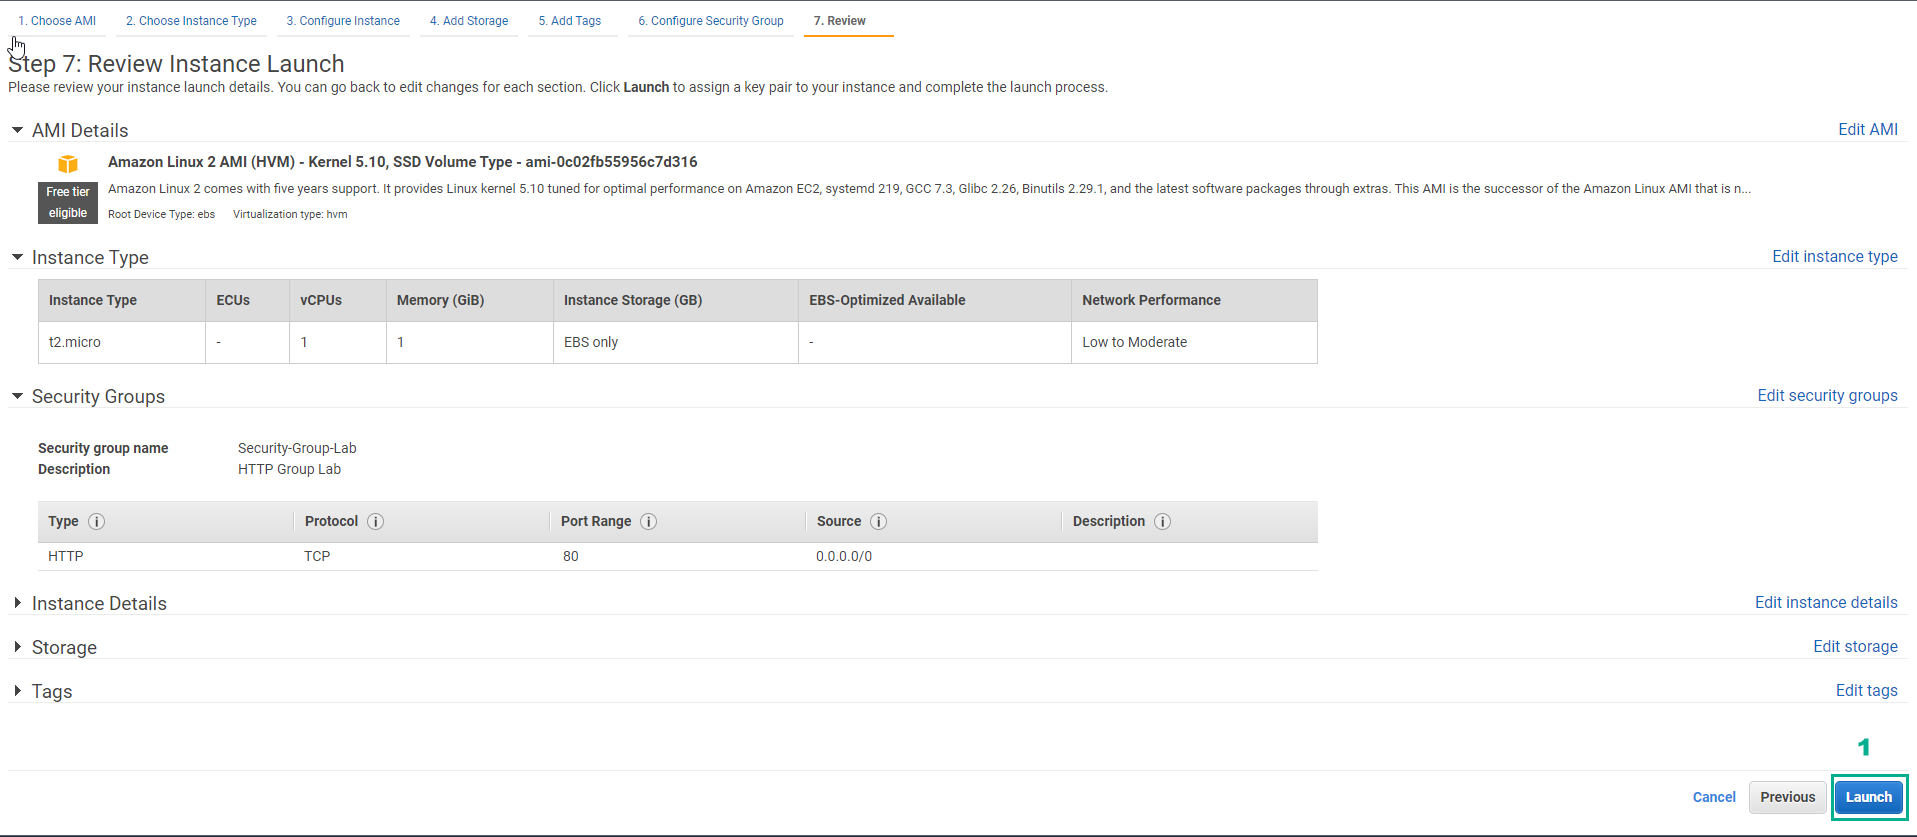
- Double check and select Launch
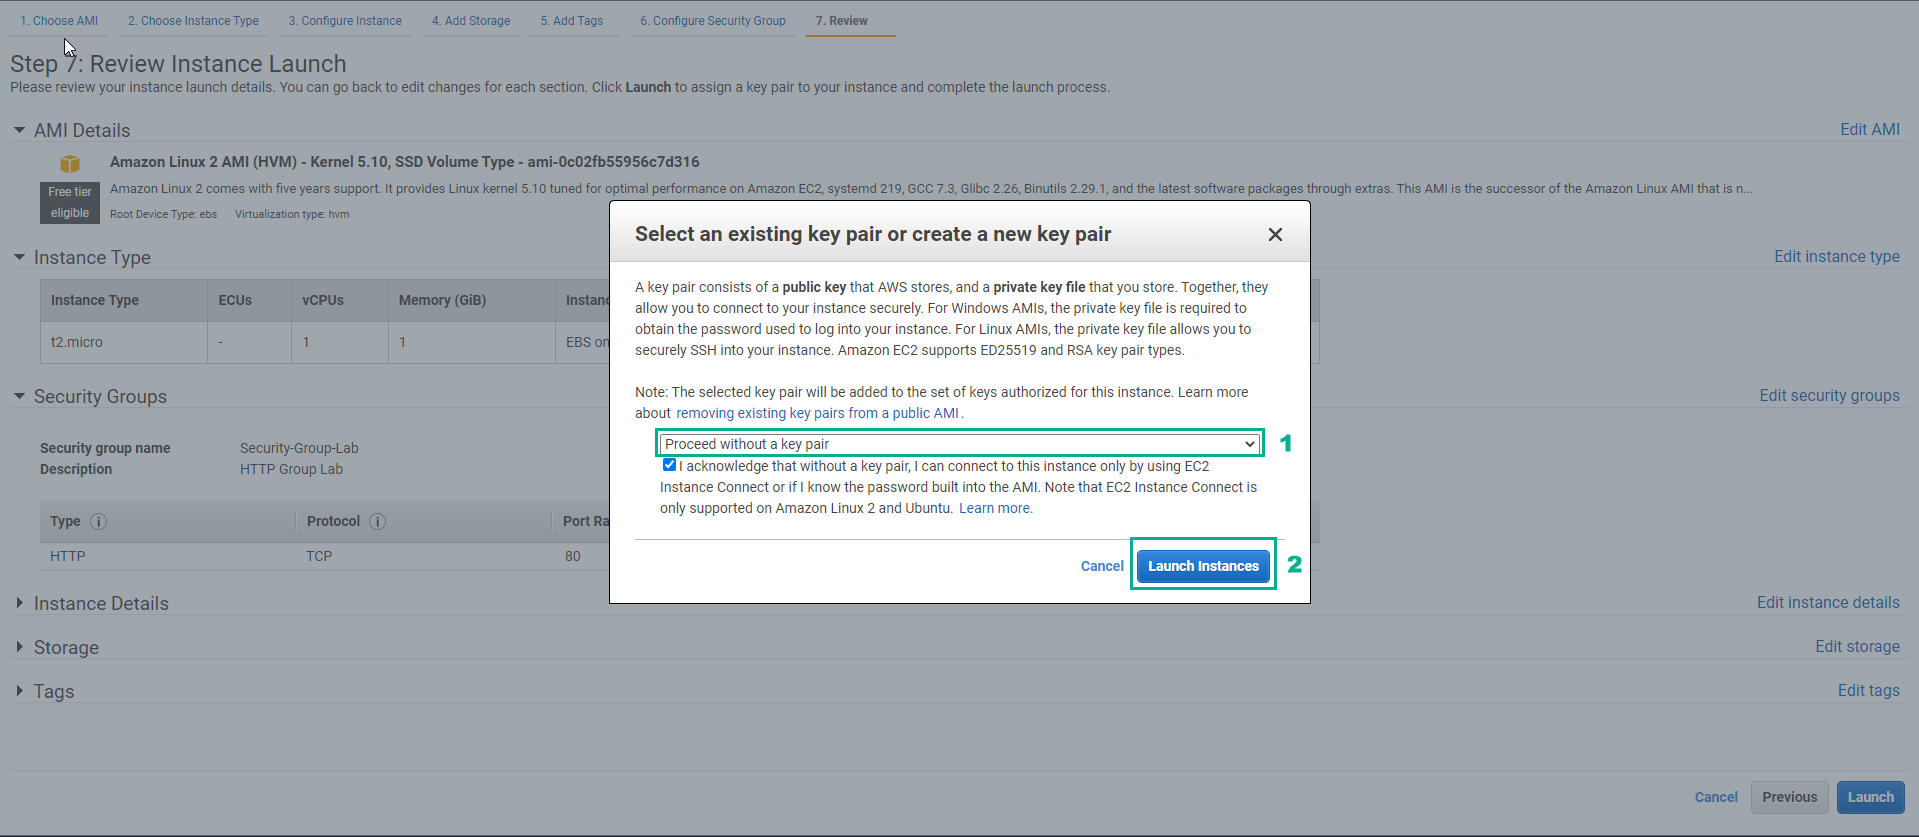
- Read step 13 of Cloud First Steps
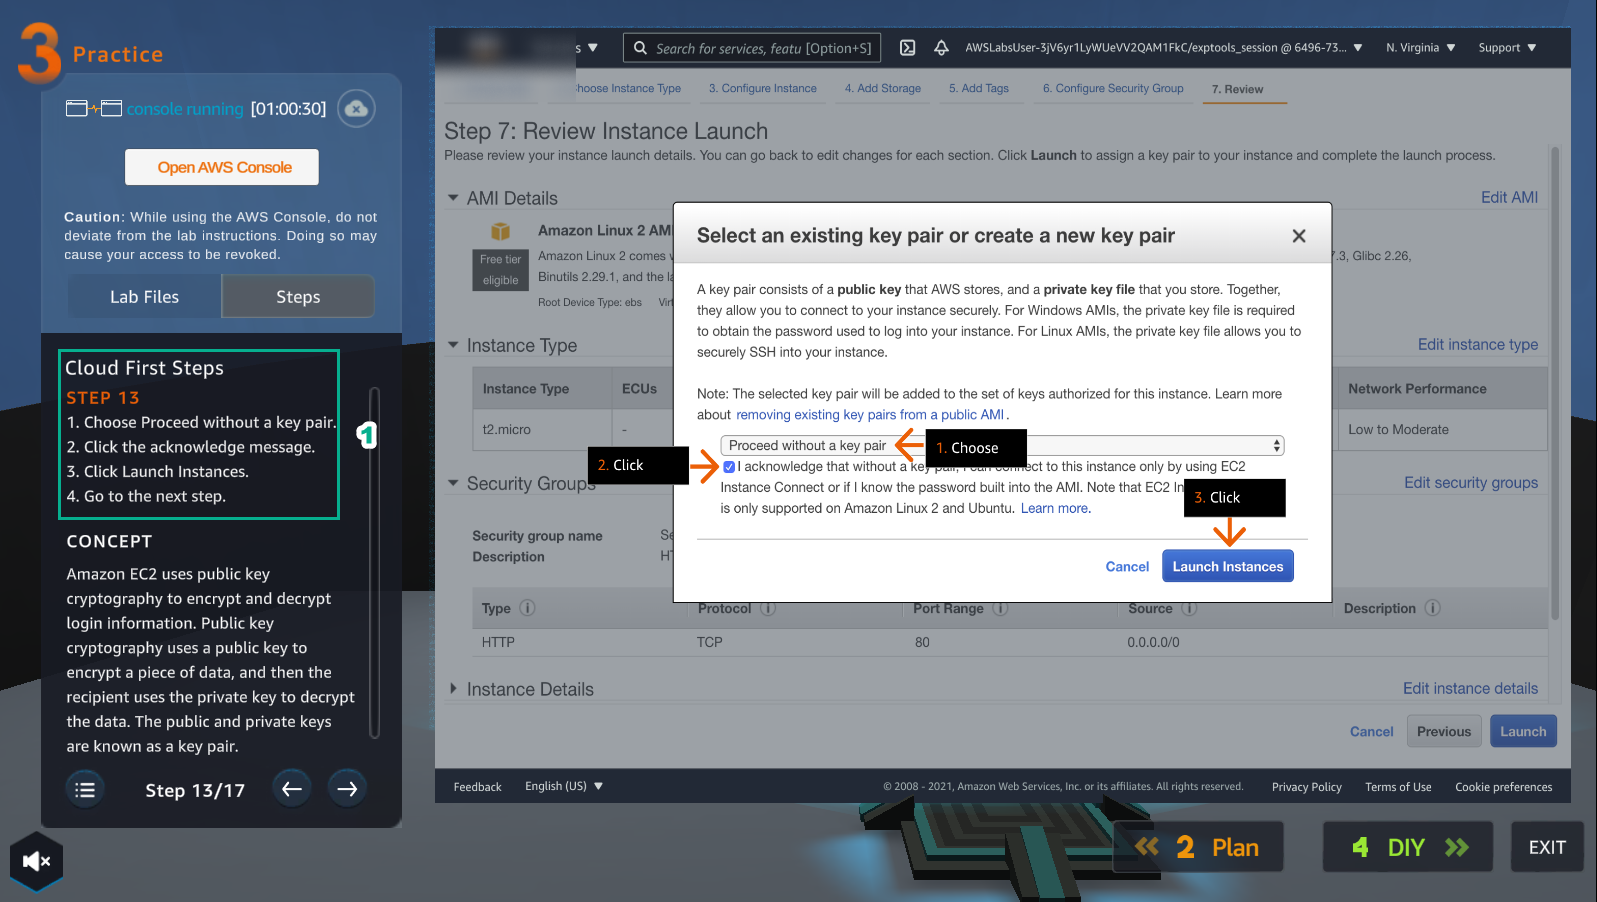
- Select Proceed without a key pair
- Select I acknowledge…
- Select Launch Instances
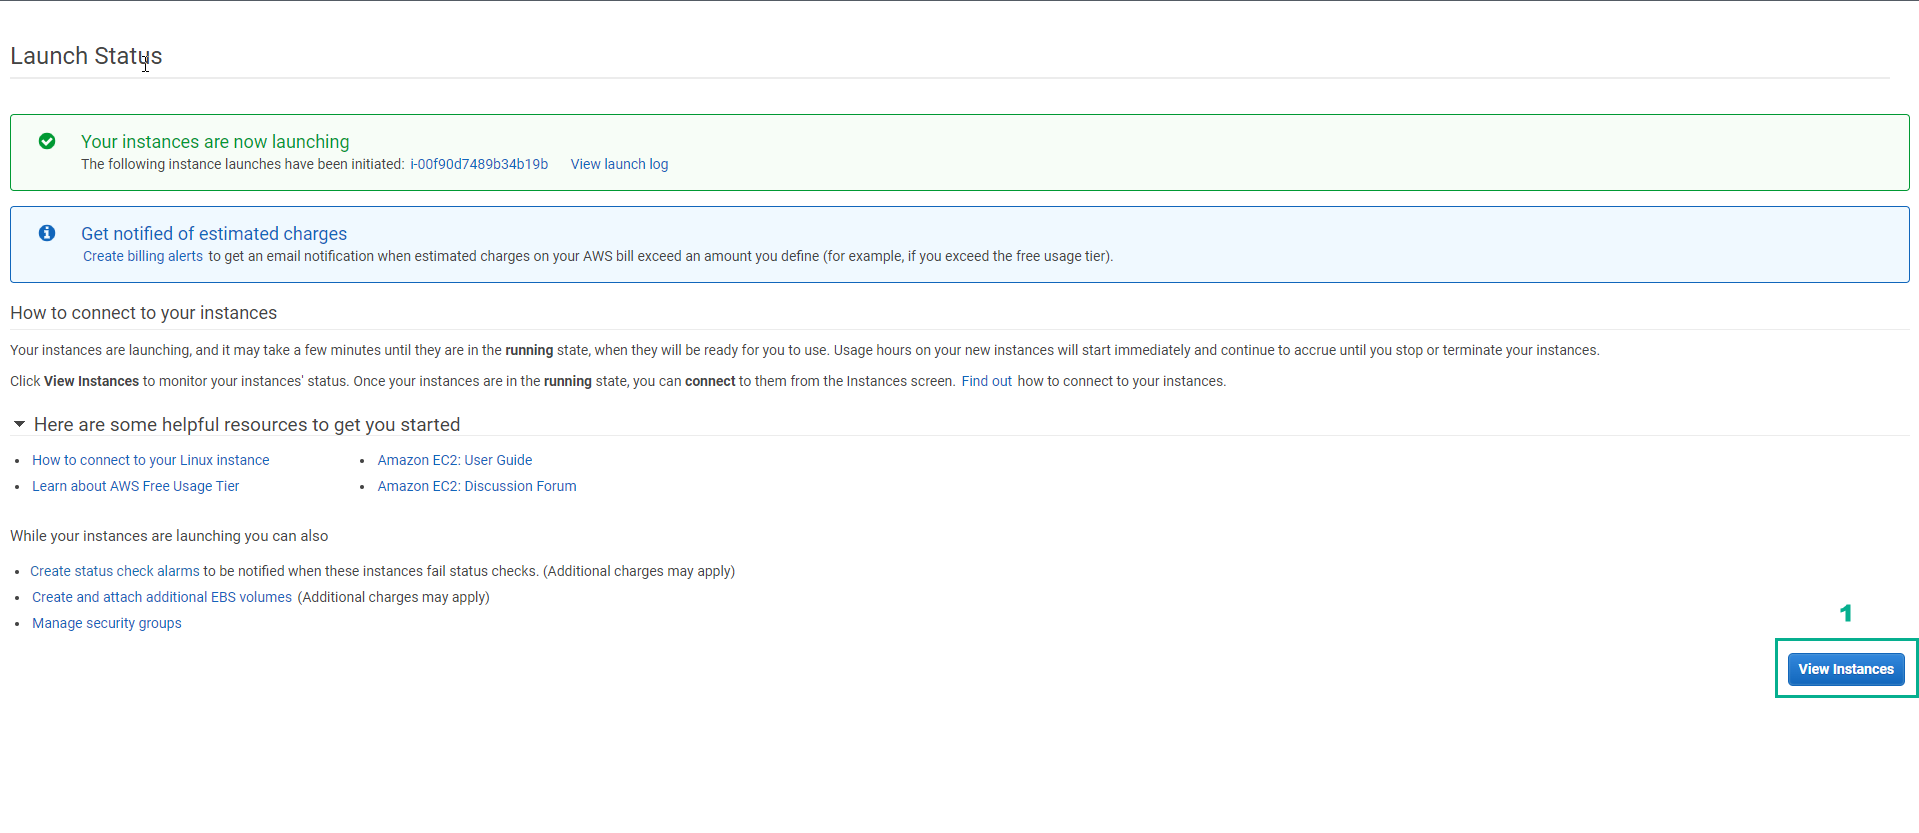
- Read step 14 of Cloud First Steps
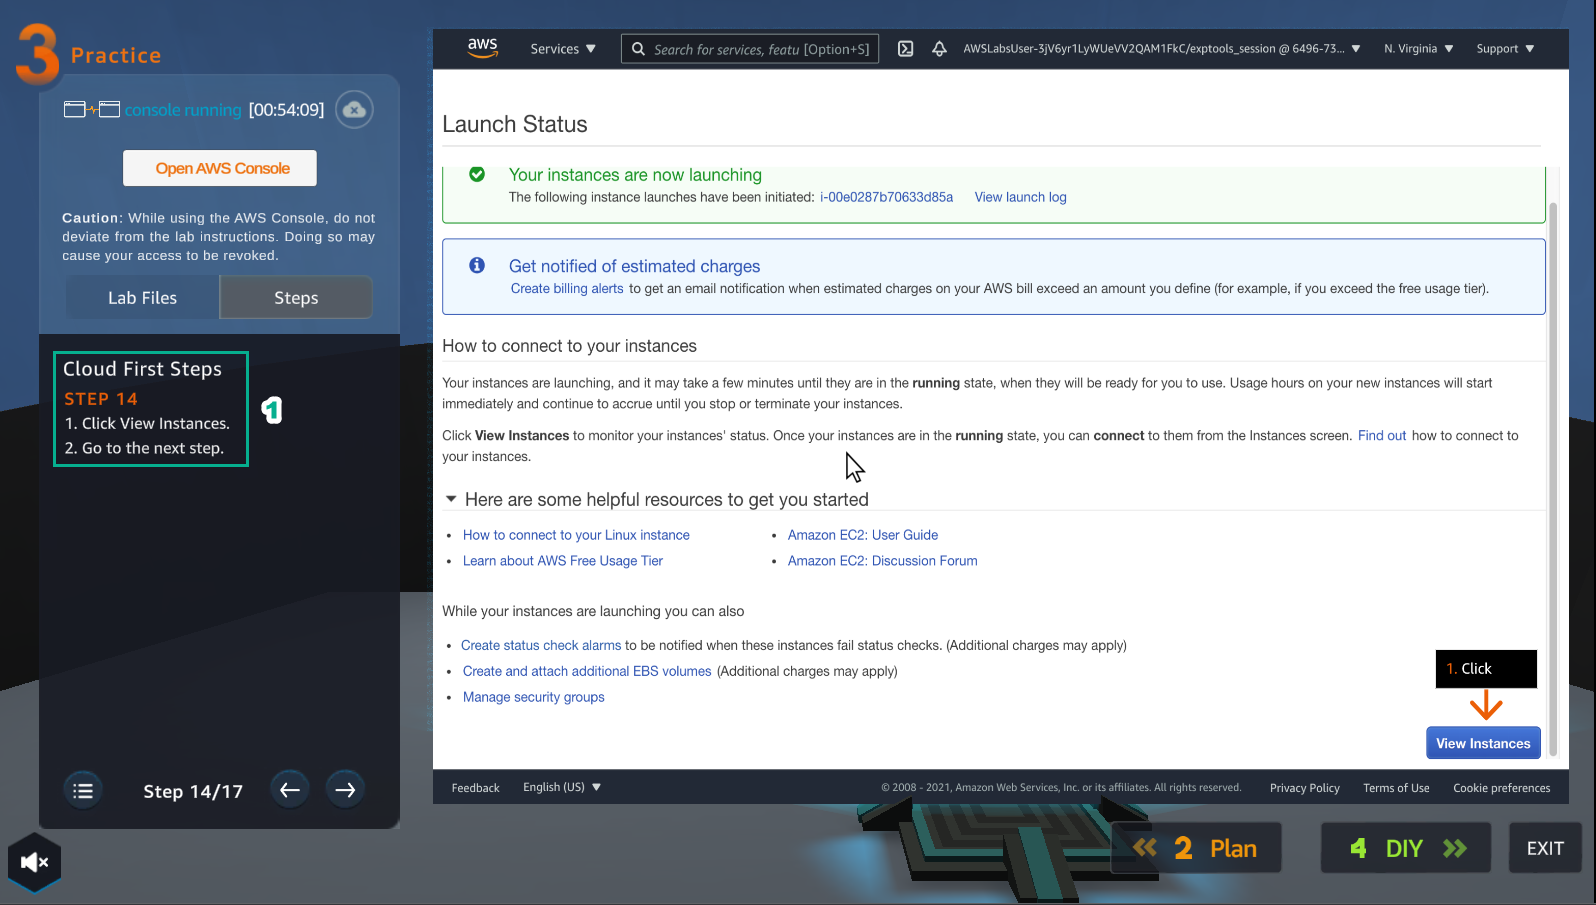
- Select View Instance
- Read step 15 of Cloud First Steps
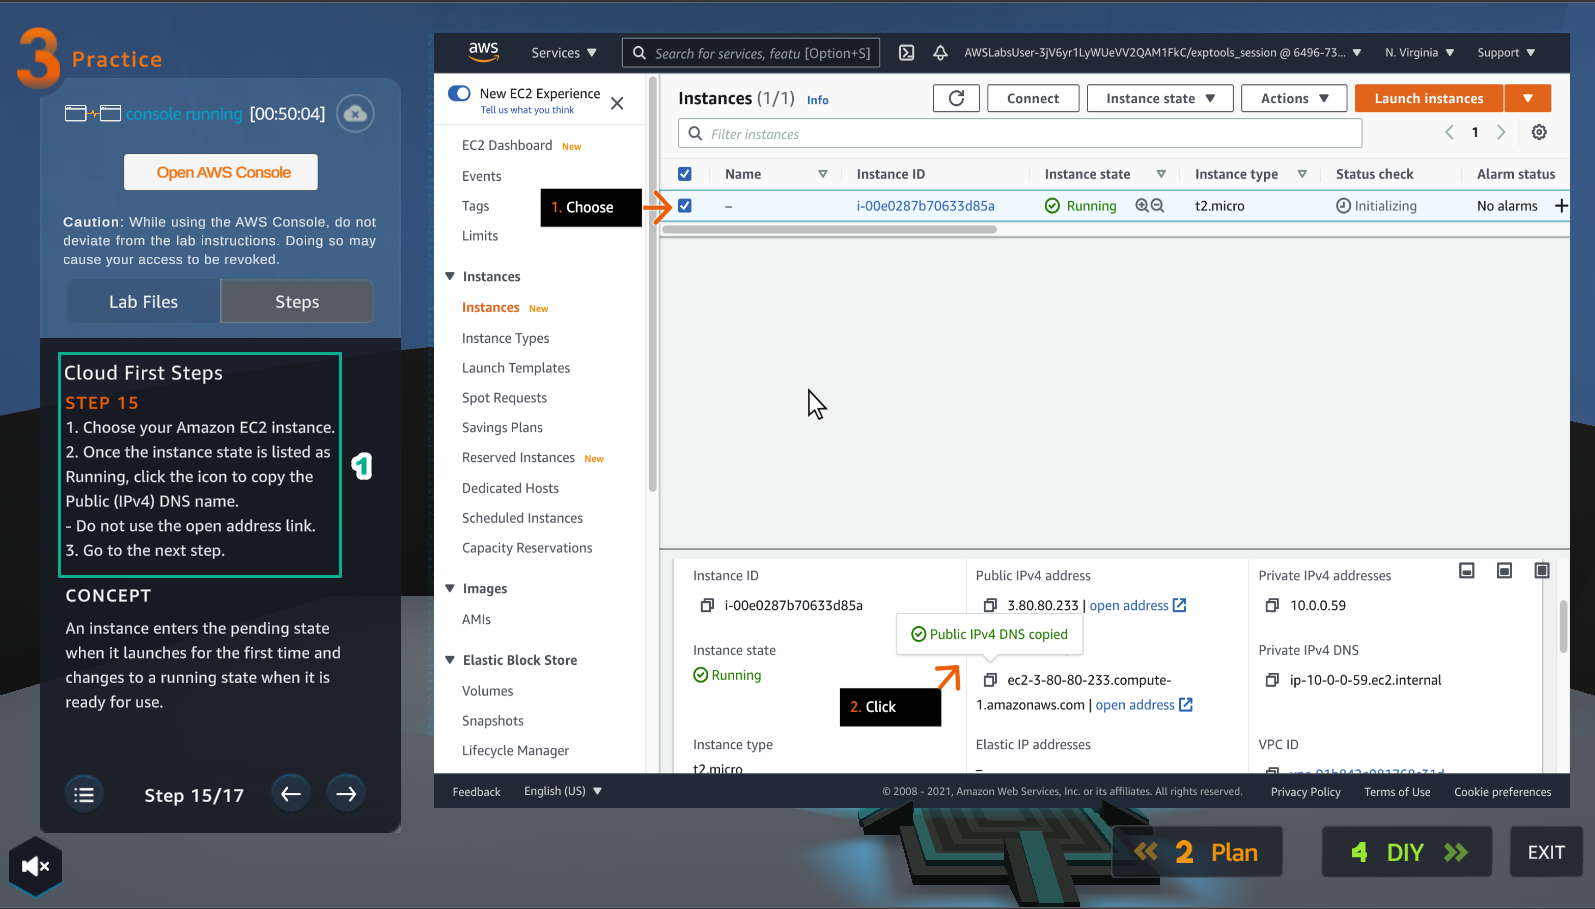
- Select the Amazon EC2 instance just created
- Find and copy Public(IPv4) DNS name
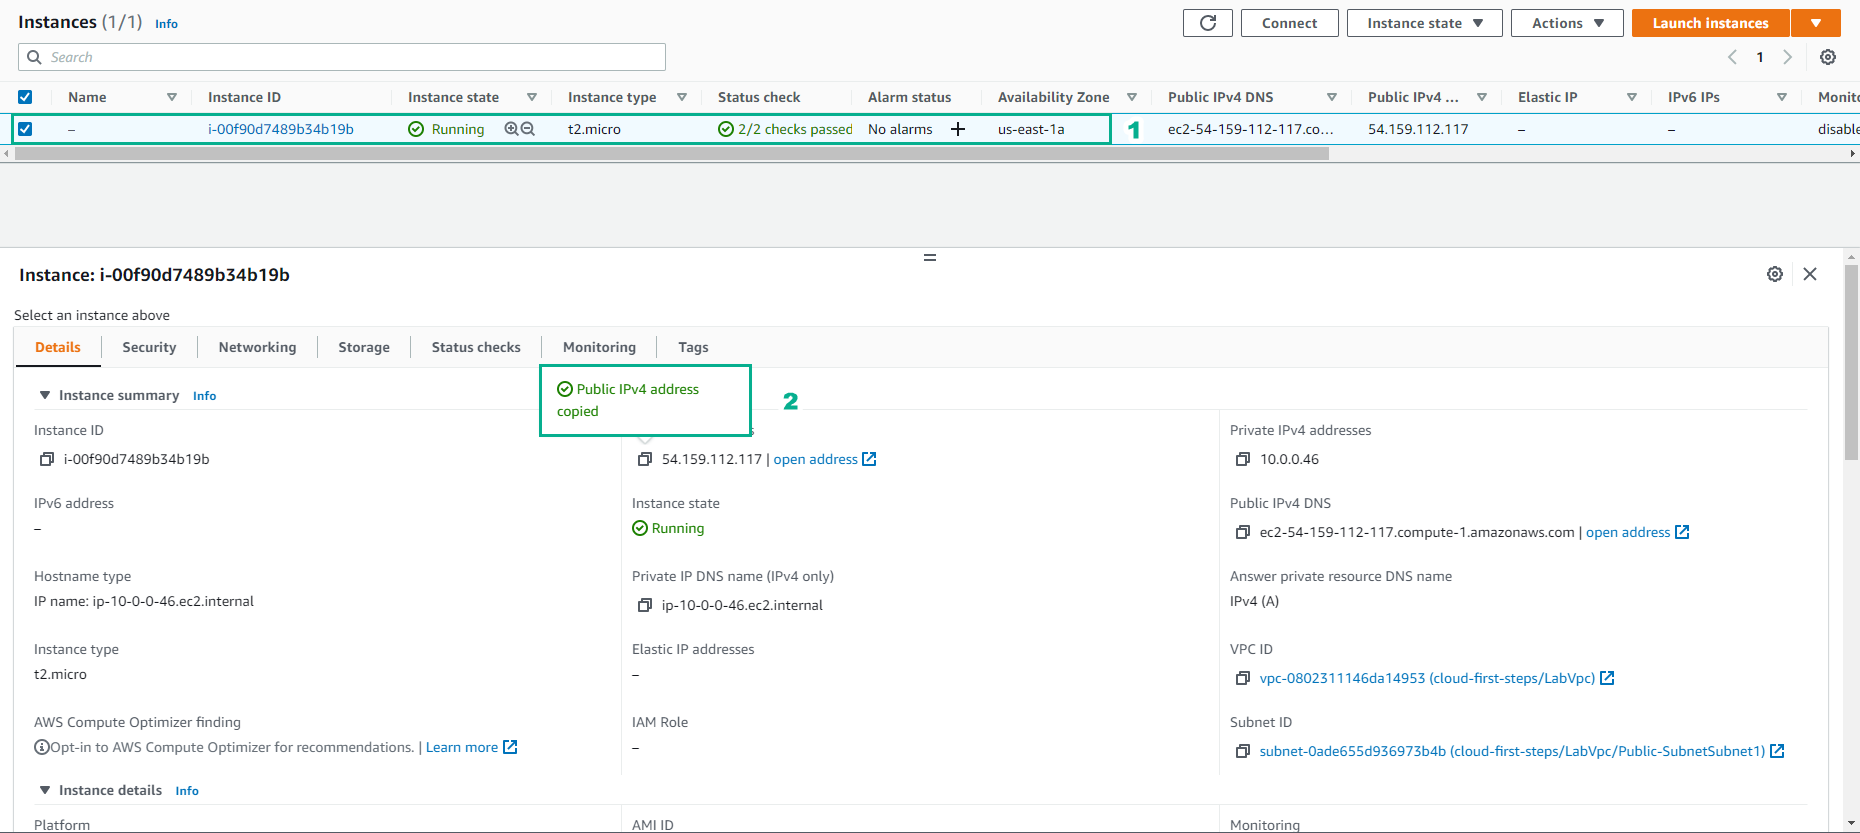
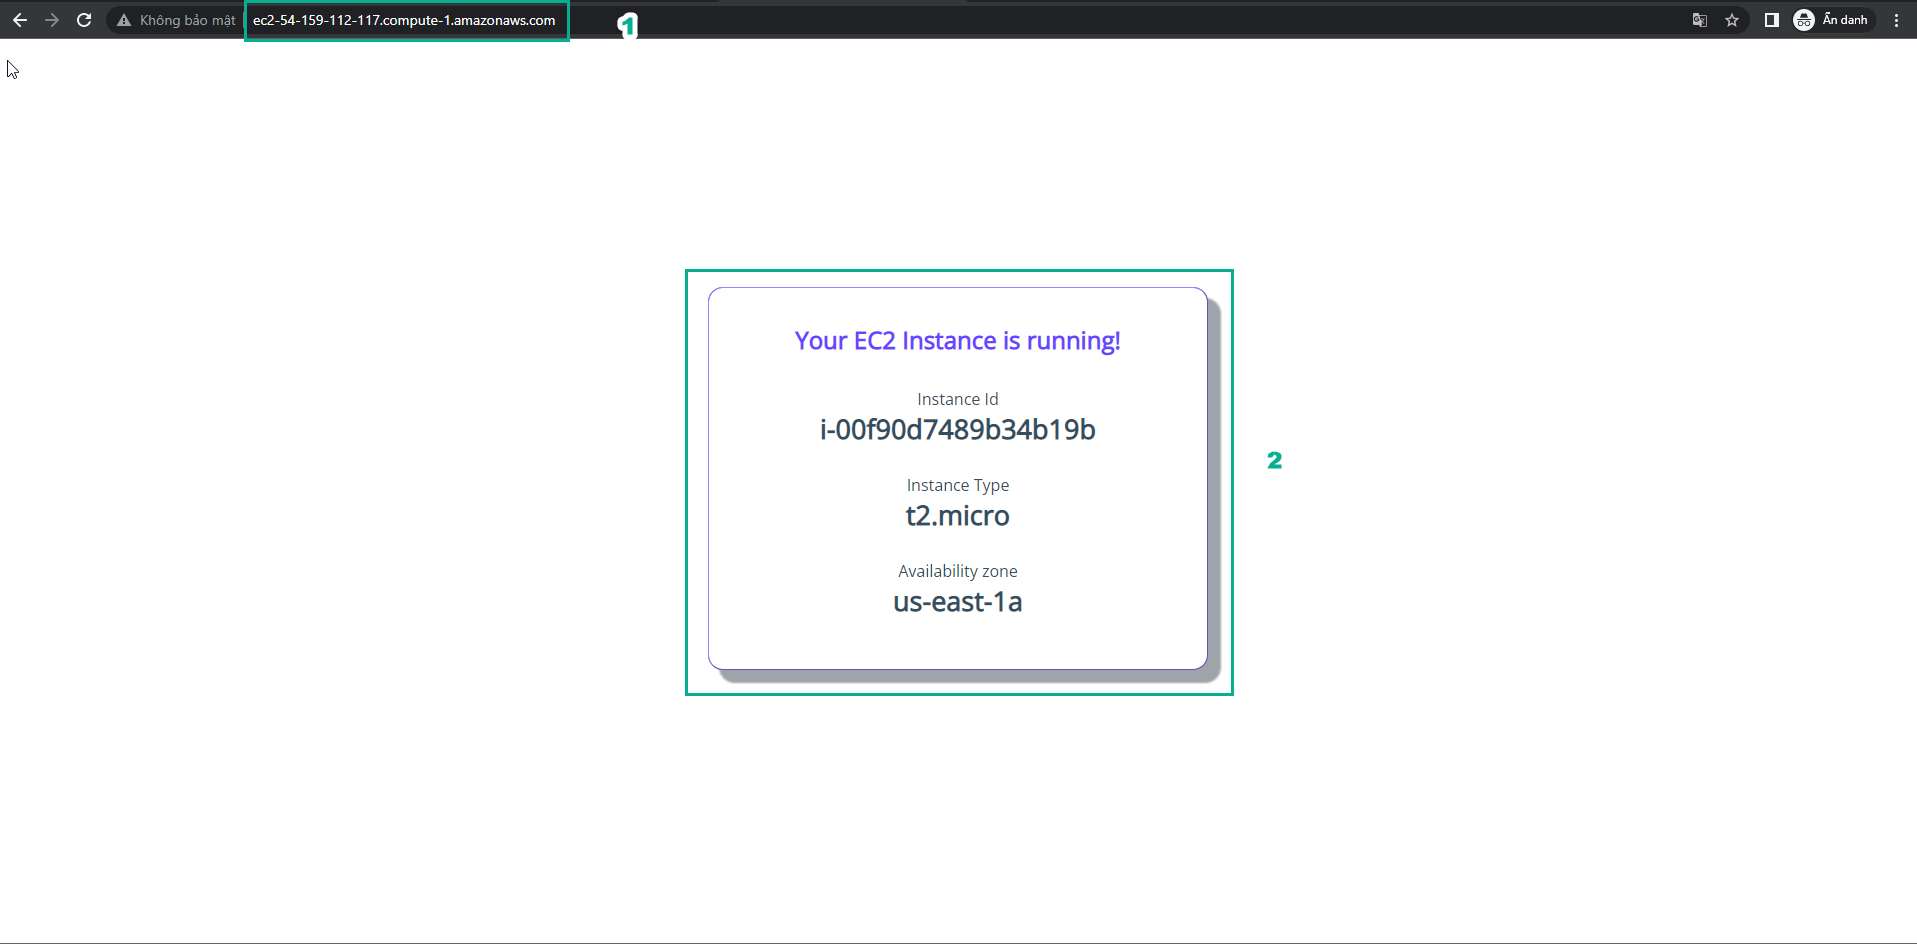
- Read step 16 of Cloud First Steps
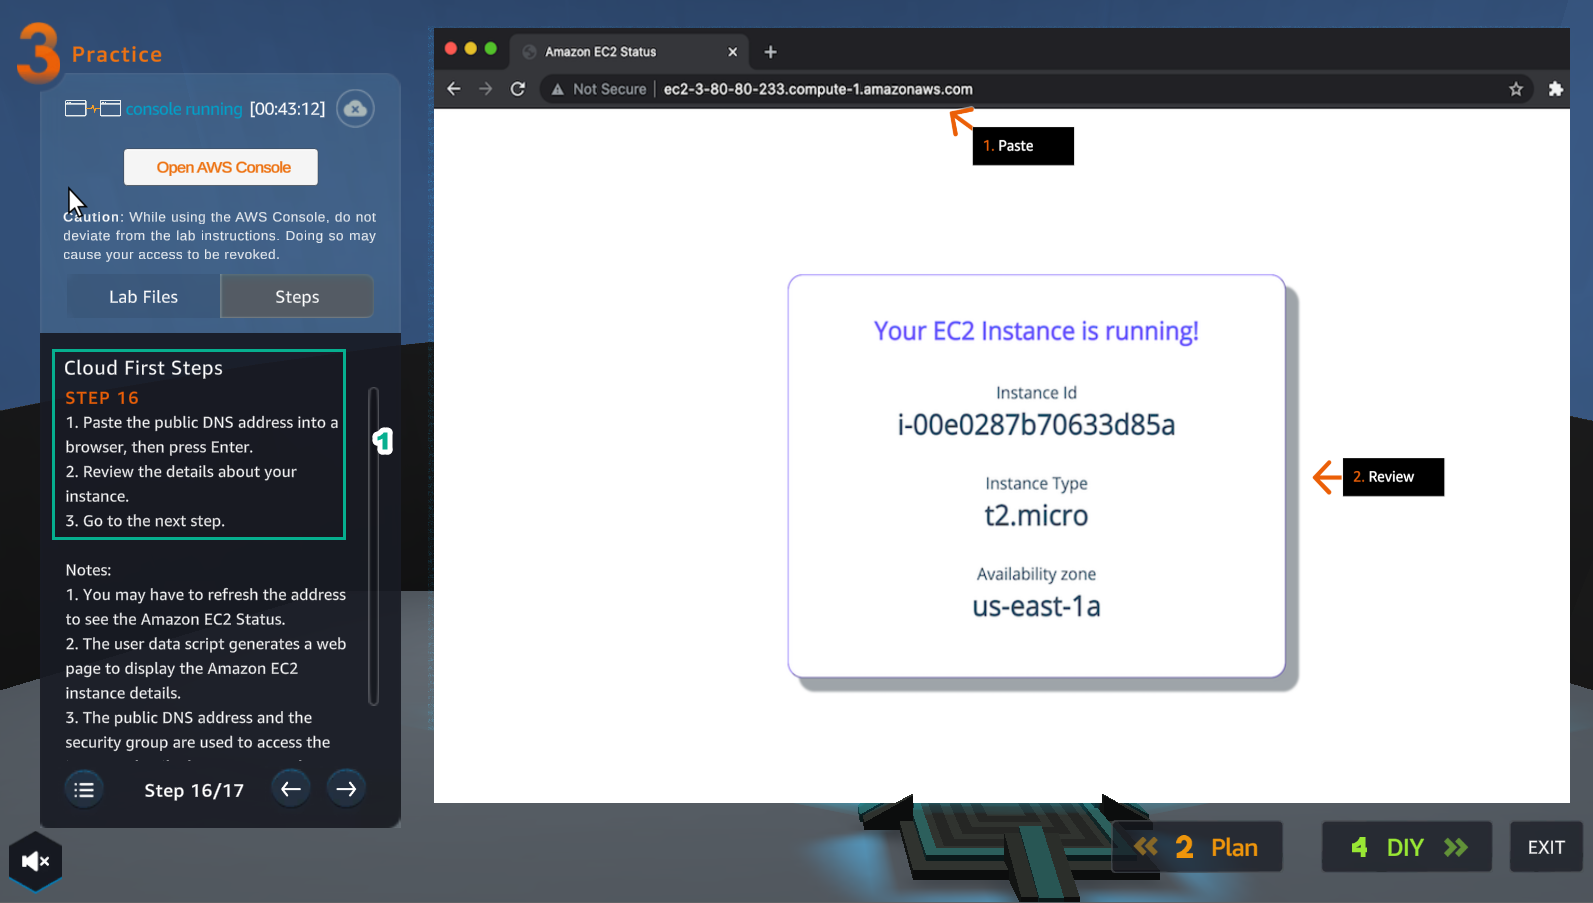
- Paste Public(IPv4) DNS name into the browser and Enter
- View results
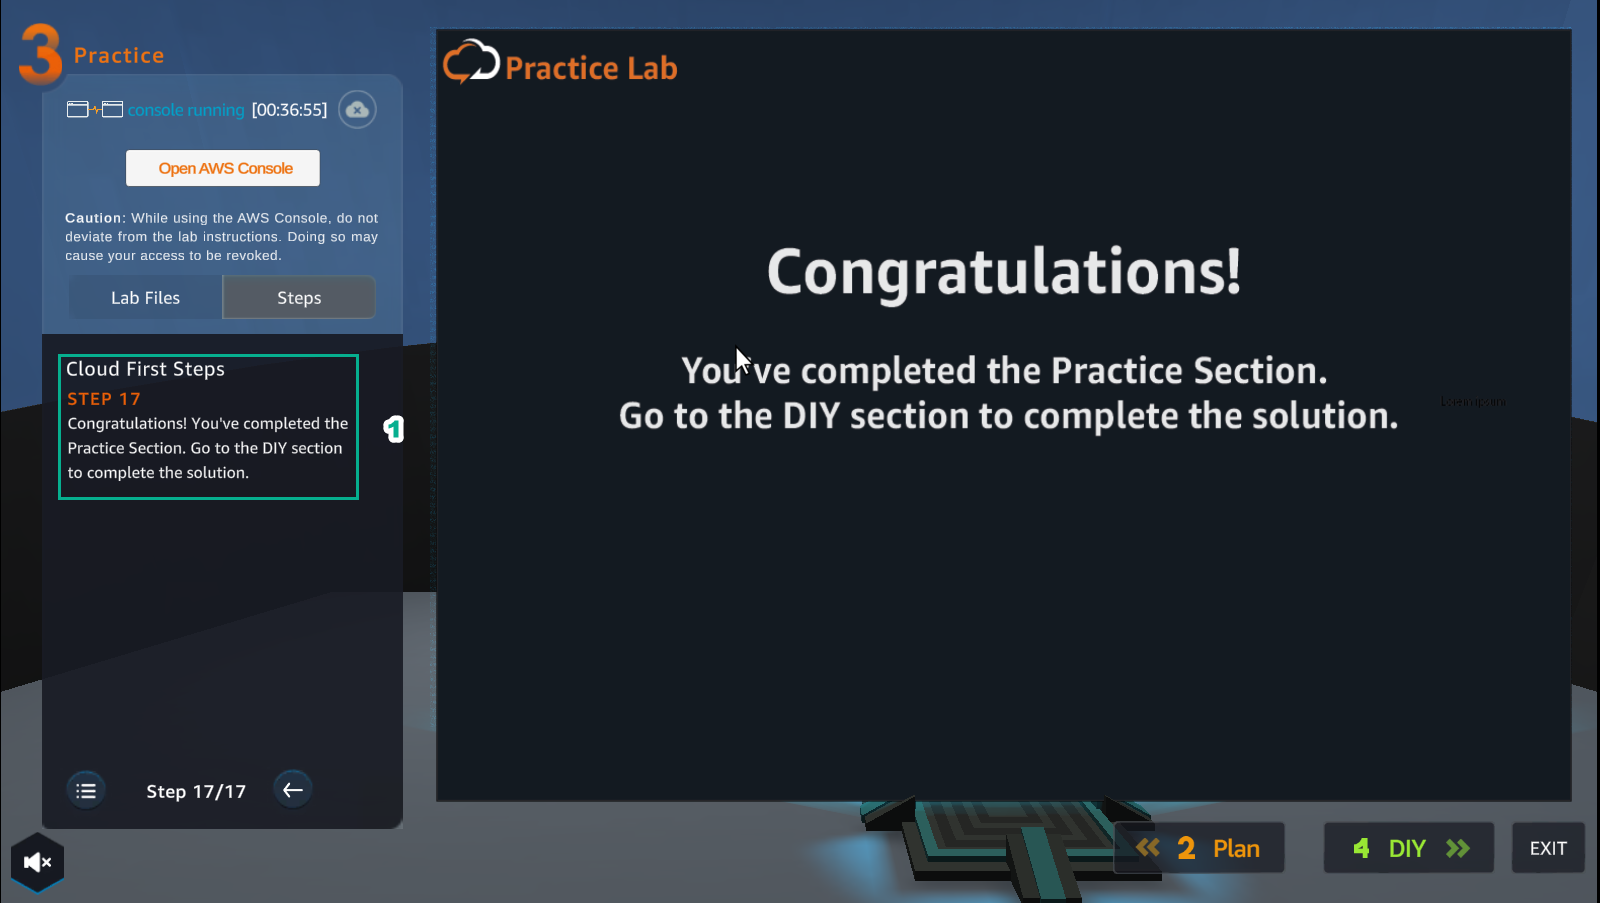
- Congratulations to the player on completing the lab